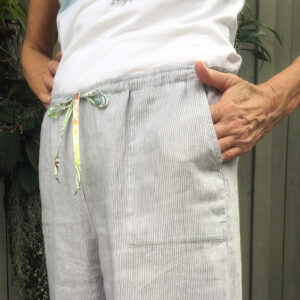
Many garments in ready-to-wear are sporting drawstrings, you can add them to blouses, dresses, tunics, and jackets fairly easily. The question is, where is the best placement so the garment looks good?
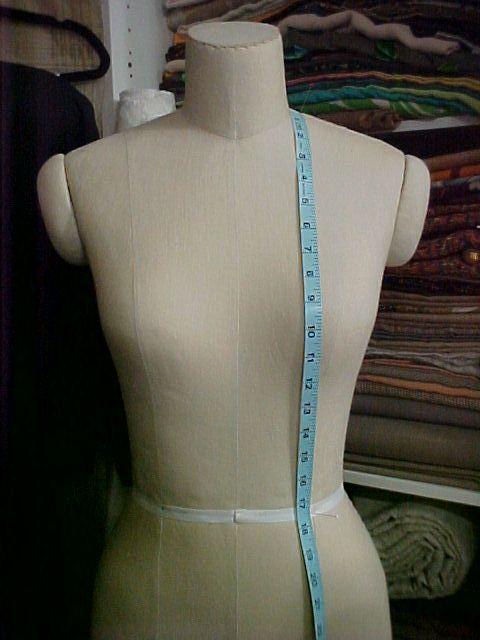
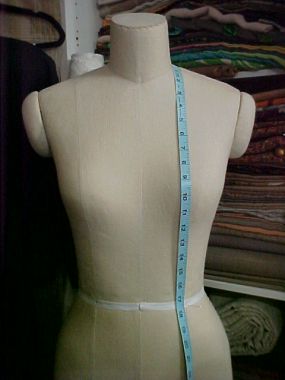
1. To determine the best length for your drawstring position, measure from your shoulder seam to your waist over your bust point. Note where the measuring tape ends along the shoulder line. A garment with a high neckline will have a different vertical measurement than a garment sitting further out along the shoulder seam as the shoulder lowers.
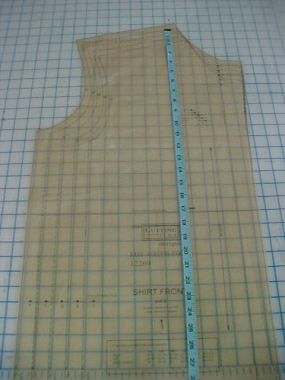
2. On the pattern, measure from the STITCHING LINE (not the cutting line) at the neck edge just as you did on the body, until you reach the distance you measured your body. Mark this distance to indicate your waistline on the pattern.
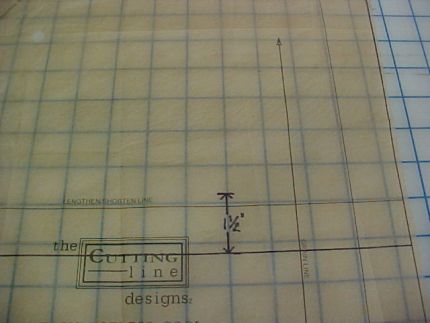
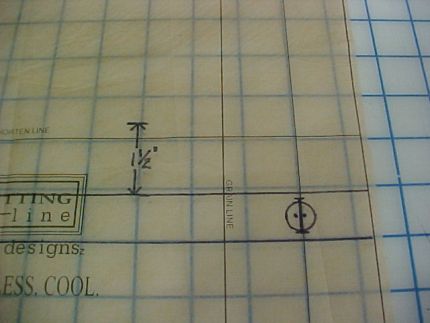
3. Make a mark 1 1/2″ below that mark. This is the top line for the drawstring casing. The 1½” gives the blouson above the drawstring. Most patterns have much more added for the blouson and it can create a bulky look in the finished garment. This amount is just enough to hide a midriff budge and when the drawstring is pulled slightly it gives the illusion of a waist.
4. Draw a second line indicating the width for the drawstring, a 3/4″ to 1″ width is what you’ll see in ready-to-wear. This is where you place the casing for the drawstring. At the center front a buttonhole and button must be placed to anchor the drawstring. Equally place additional buttons and buttonholes above and below the ‘anchor’ button placement to close the front.
Start your 14-day FREE trial to access this story.
Start your FREE trial today and get instant access to this article plus access to all Threads Insider content.
Start Your Free TrialAlready an Insider? Log in





Wow, Louise, thanks again for a lovely simple expanation, especially of how to correctly measure yourself for the most attractive placement. I will try this out on my next garment, and see if maybe I can get away with a 'waist'!!
your number one fan,
Jean
I certainly wish you would have included a pic of the finished garment....call me lame, (I've been sewing for >40 yrs) but I am confused by the concept. Maybe it's the linguistics, and usage of the word "drawstring"...I dunno. How can a gathering contribute to the illusion of a waistline? I don't get it....
This is a very helpful explanation. For "Puterdame", a drawstring or cord is put through the casing which is sewn at the waistline. When the cord is tied at the waist, the garment becomes gathered above and below the waist and thus the waist is defined. Hope this sounds logical to you.
Puterdame is right on. So many of these teasers on Threads are poorly written and illustrated. I rarely look at them for that reason. Doesn't threads have editors who sew. I started sewing when I was 3 so that means I have been sewing for 70+ years.
Thank you Louise. Once again you have provided clear, concise directions for making changes to a pattern. Your explanation of why to lower the upper line of the casing by 1 1/2" was right on. I appreciate your willingness to share your expertise.
Cathie
While I appreciate the sharing of this information, I found myself confused and wondering where the rest of the article was when I finished reading the steps outlined. I felt like there should have been more. More information, more pictures, etc. I happen to be a beginning garment sewer and I soak up all information like a sponge. Please give more details and photos.
All you are doing is tracing down the actual length to the waist and adding one and a half inches. Seems pretty straight forward to me. Thanks for the illustration.
I would like to knows who manufactures the mannequin shown in the photos. Thanks.
Remember that if the garment that you are making is not originally designed for a drawstring, you may have to lengthen the pattern and thus the cut of the garment so that your garment does not end up too short.
I think you should measure your back length as well.
Is this only for a garment that opens in the front and buttons down the front?
Is the casing placed on the wrong side or the right side of the shirt front? That is, on the outside or inside of the shirt?
Where does the drawstring emerge from the casing to be tied?
What do you mean by, "a buttonhole and button must be placed to anchor the drawstring." What does anchoring mean here?
Please, I need at more steps after those above, including a sample of the end result.
Susan
I agree with previous writers: these instructions are so incomplete as to be essentially useless. They explain only how to place the drawstring at one point on the garment, the center front. But how do I position the casing around the side and back? I hope Ms. Cutting can remedy this omission. I'll check back in a few days.
The title of the article says "drawstring placement" and really only addresses that one issue. It doesn't go into how to actually add a drawstring to a pattern that didn't have one to start with. I have added drawstrings to a few patterns and also readymade garments and each one is a bit different. For placement, you can also put on the garment, tie something around your waist, blouse it up as much as you want and mark where the tie hits the garment with chalk or pins. This is actully more work than measuring and marking the pattern but the only way to go if you are adding a drawstring to an existing garment. And, yes, this will shorten the final length of the garment. The actual casing is usually just top stitched into place.
If you put the casing on the inside, you will have to either cinch and tie it on the inside (hidden when you button the garment) or make openings for the cord ends to emerge. You could also sew the casing on the outside, making it a design feature, and have the cord ends come out on the outside of the garment. You can also run elastic through the casing. Adjust the tightness before you stitch the ends of the elastic at the ends of the casing.
The button to "anchor" the drawstring is there to keep the garment front from gaping under the drawstring when it is cinched to one's waist.
If your garment has no opening (pull over the head) you can still add a drawstring with the cord ends emerging from buttonholes or grommets on the outside. They can emerge at center front, off to the side, center back, etc. - whereever you like. It would help to reinforce the area under the buttonholes or grommets to keep them from raveling out.
It's not so hard, I promise!
Please have someone proof the written article before publishing. Typing errors, as well as confusing sentences, make it more difficult to follow the directions.
Thanks, Louise. The 1 1/2 inch down tip is so helpful. I would have learned that the hard way when adapting patterns which I do, but I'm only an advanced beginner sewer. (Also, thanks, LydiaSondhi, for the tip on lengthening the garment. I'd have thought about that too late.)
Louise, I did not understand what you meant by "Equally place additional buttons and buttonholes above and below the ‘anchor’ button placement to close the front." Can anyone help me on that? Why would you need additional buttons?
Lastly, to TheDesigningSeamstress. How about contributing to Threads? Sounds like you have lots of experience and are into well described instructions. It would be so cool if you'd share! I notice some people say instructions are great when I don't get them, and other times when I think they are clear, other people don't get them. That's how I came to like Kenneth King. I read several online instructions from him which I liked so well that I printed them out and only later found that they were all the same person.
I wish I had received this a few days ago when I made the mistake of making the top of my dress too blousy. Had to take out the casing and resew it. I used elastic in mine, and it was very simple.
Being tall, I have trouble with placement when I make things for myself so I appreciate the information in this article. I pretty much understood it, especially after reading the comments from the more experienced, but I wish you had said where to draw the second line for the casing--above or below the natural waistline. Or should the waistline be centered in the middle of the casing? Please respond as I intend to use this tip since I no longer have the figure I once had. This treatment adds style, comfort, and subtle camoflage if used correctly.
I also agree with Puterdame and TStegmiller. Where is the rest of the article??
It definitely needs further pictures of explaination with garment in construction photos. Great idea just needs a little more illustration.
Louise, I think you instructions are perfectly clear, especially on second reading. I would like to see an illustration of your finished garment just 'cause visuals add so much to the imagination. I love the sewing ideas posted here and I love your patterns. Thanks for sharing.
Elizabeth
Does the drawstring tie on the outside or the inside using this technique?
It looks as if the casing opening must end before the buttonhole or placket whether it is in front or in back. If the casing is in the back but ties in front, there would need to be a separate buttonhole for the tie to come out.
Thank you very much, C F Fields. With Louise's plus your information together, I think I can do it. You answered all my questions!
Susan
I had no trouble with the directions, it's just that as I age, the things that i miss most are my mind and my waistline!