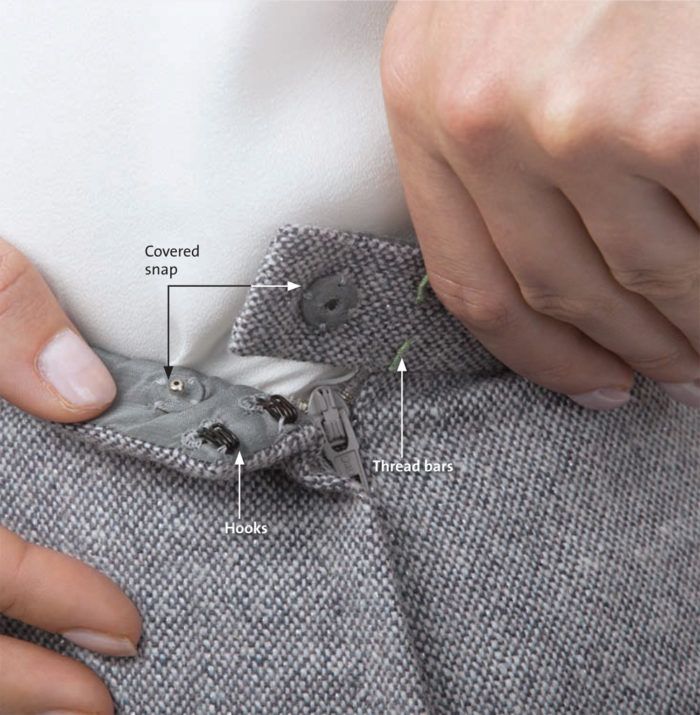
In this excerpt from “Build a Better Waistband” in Threads #165 (Feb./March 2013), Susan Khalje shares her techniques and tips for adding hooks, eyes, snaps, and other small finishing details to achieve a better fitting waistband.
Don’t miss other fabulous techniques by subscribing to Threads or by purchasing the tablet edition today.
Orient and secure secondary closures
Hooks and eyes, as well as snaps—often referred to as findings—are typically employed as secondary closures on a waistband to augment the primary closure (usually a zipper) and give extra security. Findings should be oriented for the wearer’s ease of use and for a quality, no-show finish.
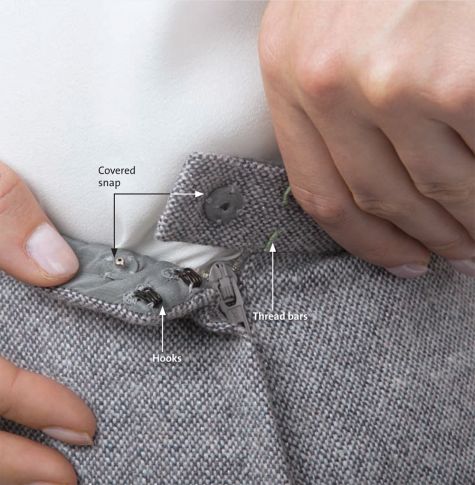
Hook-and-eye placement
Your dominant hand makes the motion required to close a garment opening. So place hooks on your dominant hand’s side, and place underlaps, metal eyes, or thread bars on same side as your nondominant hand.
Snap placement
Snaps help secure a waistband’s underlap, keeping it from slipping above the waistband or folding back against the wearer’s body. To secure the snap, pushing the ball into the socket is easier to do with the dominant hand. So place the snap’s ball section on the waistband’s underside, with the socket section on the waistband underlap.
Video: Learn how to attach hooks, eyes, and snaps securely to your garments in this video tutorial from Susan Khalje.
Sewing hooks, eyes, and snaps
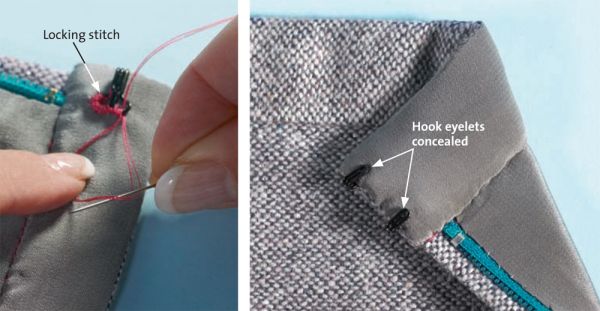
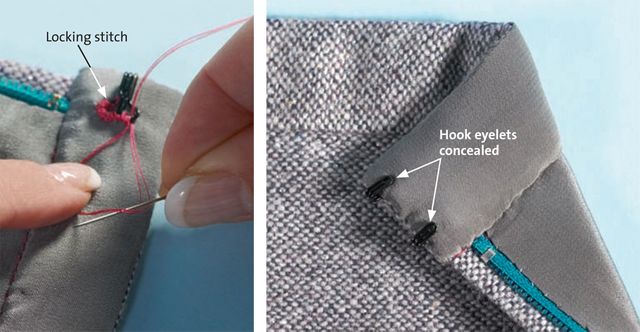
Findings often work their way loose because the stitches used to attach them allow them to move; in effect, they saw themselves off. Use a locking stitch to sew findings securely.
Knot the end of a doubled, waxed, and pressed thread. Anchor the thread in the waistband and take one stitch through the finding’s eyelet from underneath. Take another stitch, but before tightening the loop, slip the needle through it. Tighten the thread to create a tiny bead that rests at the finding’s base. Follow the finding’s contours as you stitch. If you’re sewing a snap, use two or three stitches on each quadrant.
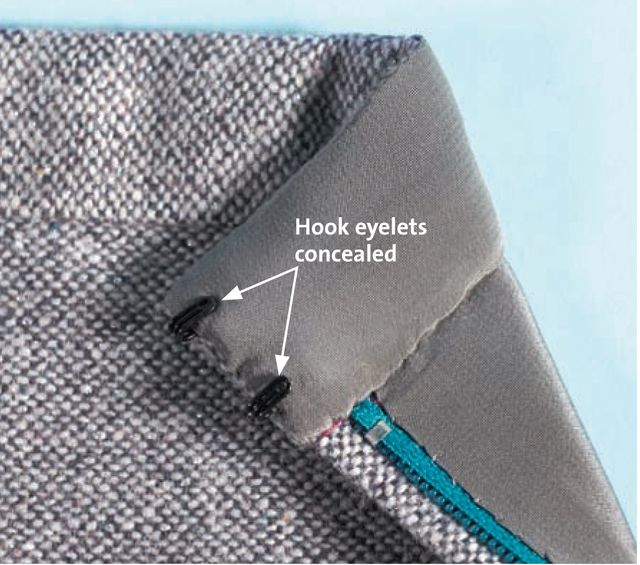
Hooks also can be sewn to the waistband’s end before it is finished, to conceal the hook’s eyelets. Place each hook so its eyelets rest just inside the waistband end’s foldline. Anchor stitches to the petersham to secure the hooks.
Complementary details
There are a variety of small finishing details that further enhance a waistband. Below are three that complement the couture construction techniques explained on the previous pages.
Thread bars
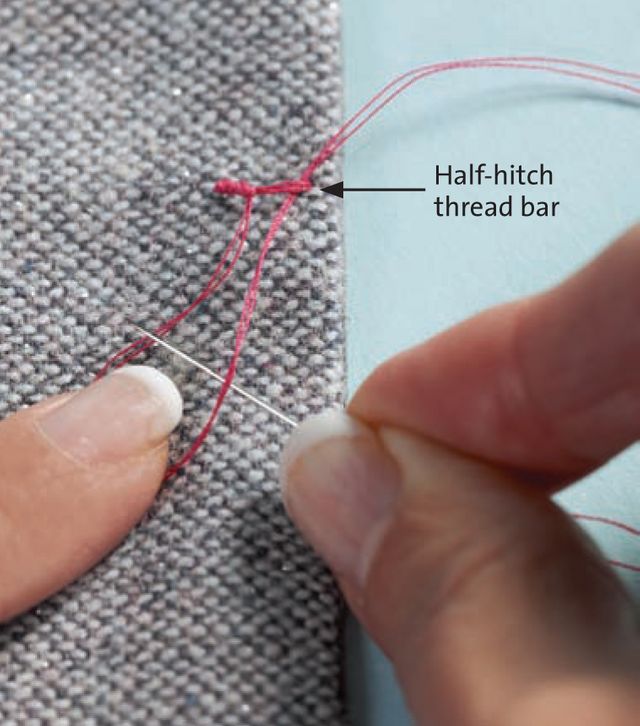
Thread bars are often used in place of metal eyes in couture garments. To sew them, begin with a length of doubled thread that is waxed and pressed. Anchor the thread on one side of the bar’s placement, hiding the knot. Draw the thread over the waistband’s surface, and anchor it on the opposite side, then return to the first side, anchoring it again. These four thread strands form the bar’s base. Use your thumb to hold the thread out of the way, slide the needle under the base threads, and pull it most of the way through. Pass the needle back through the small loop created from underneath, then pull the loop closed. Repeat until the entire bar is covered, sliding the knots down along the base threads so they’re closely packed. Secure the thread at the end with a few small, tight stitches.
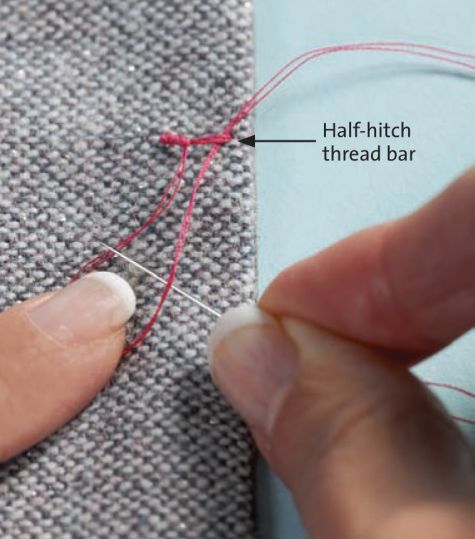
Video: Learn how to sew a thread bar in this video tutorial from Susan Khalje.
Covered snaps
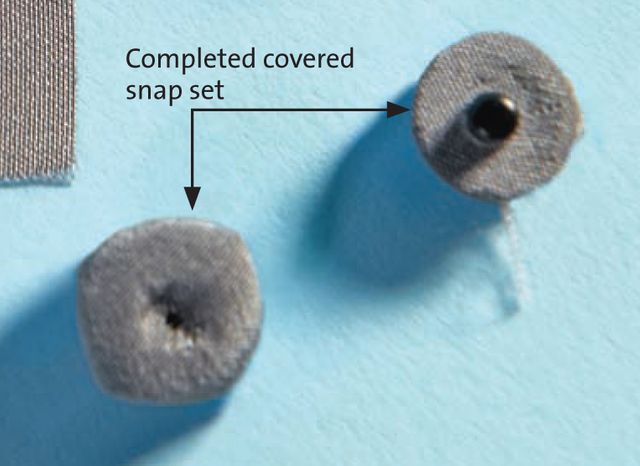
In the couture tradition of covering up as much metal as possible, snaps are usually covered with a small piece of lining fabric.
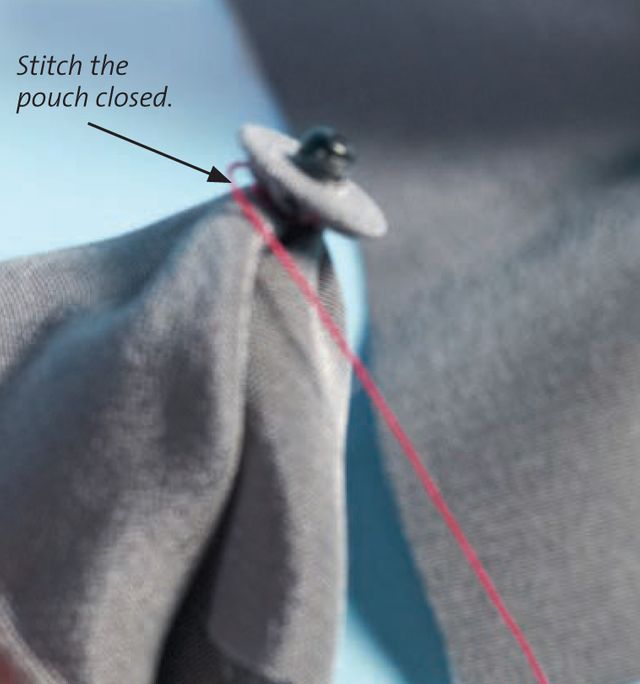
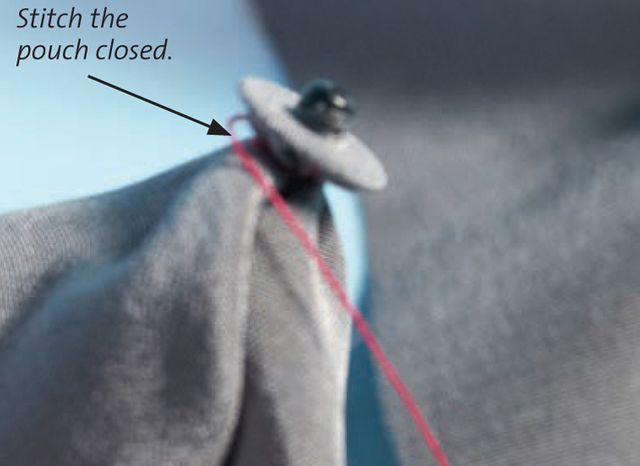
Cut a circle of lining fabric larger than the snap. With an awl, make a small hole in the fabric, and force the snap’s ball through it. For easier handling while covering the snap, stitch around the fabric circle’s outer edges with a long running stitch and gather it lightly, making a pouch. Then, stitch around the snap’s back side-through the fabric only-using small backstitches to tighten the fabric. Next, sew several stitches across the back, sewing only through the fabric. Trim off the tuft of fabric, and flatten the remaining edges with your fingernail. Cover the socket section the same way, but it’s not necessary to pierce the fabric first. Snapping the two halves together will create an indentation in the socket’s fabric covering. The socket section is a little more slippery than the ball section, and it’s easy for it to flip over as you work, so take care as you’re sewing. One way to prevent this is to snap the covered-ball section into the socket section while you sew the socket’s covering in place. Sew the snap sections to the garment with a doubled thread that is waxed and pressed.
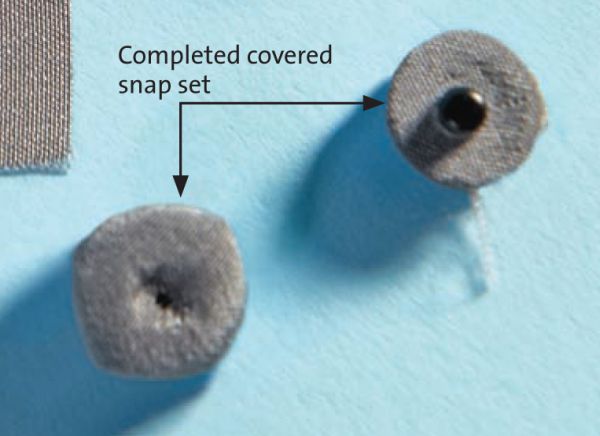
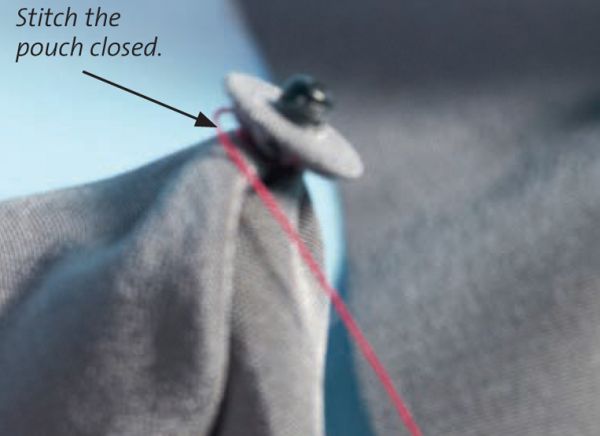
Cover metal snaps with a piece of lining fabric. Sew a pouch of lining fabric around a snap section, tightening it with stitches.
Hanging loops
Another clever feature for a waistband is a pair of hanging loops. They distribute the garment’s weight on a hanger from four points.
Sew two tubes from lining fabric, cut on the straight grain. Press flat. Each should be about 3⁄8-inch wide and 8 inches long when finished. Place the ends of each loop perpendicular to the waistline, about 3-inches to either side of the side seams. Stitch in place by hand or machine. Install hanging loops before finishing the waistband, so their ends are concealed.


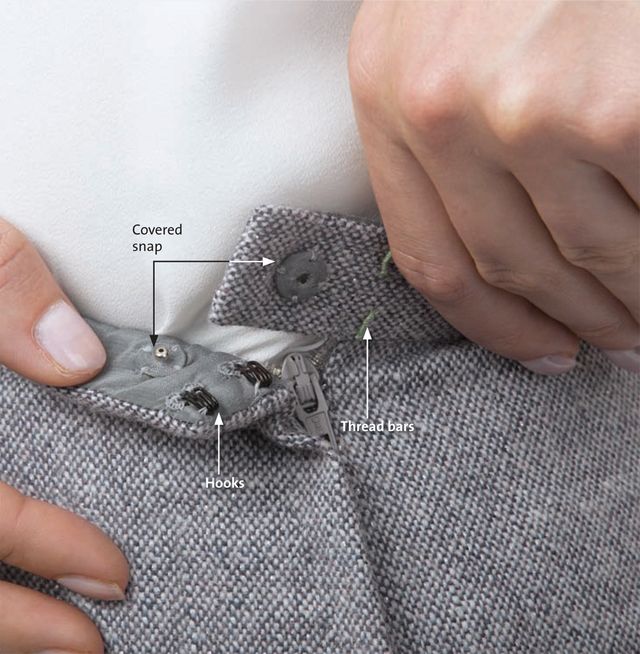
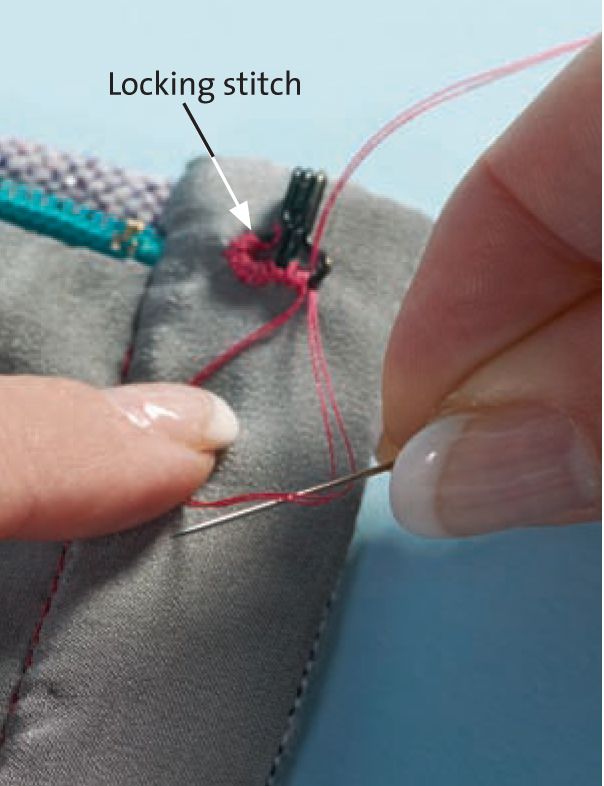





All the details revealed!!!
Thank you Susan, for this, and all of your contributions to Threads Magazine.
Wishing everyone at Threads, and my fellow readers, an exponentially happy 2013!
I really like the reference to the 'dominant hand' to correctly place hooks and eyes - now I won't forget which goes on which side!
I appreciate all of the amazing tips from Susan. She is an awesome and talented lady and always so willing to teach.
THANK YOU and Happy New Year to all of Threads staff and contributors.
Thanks so much for including covering a snap with a bit of lining! Sew Simple!!!!! Linda S
That dominant hand info is brilliant. It is so good to have the couture effect on such small details as findings, something not usually addressed in sewing manuals. Thanks, Susan, and a Happy and Productive New Year to you and all of the Threads staff.
Thanks for the detailed instructions and photos. You wouldn't think there was so much involved, but there obviously is.
Thanks for the detailed instructions and photos. You wouldn't think there was so much involved, but there obviously is.
Lovely article, which includes some tips and information new to me.
I've been sewing for about 50 years or so, though, and I've never heard of a "locking stitch". Is that something like a buttonhole stitch? Or a blanket stitch? Is this something I've been doing automatically without knowing it had a name? And what in the wide world is a "petersham"?
"petersham |ˈpētərˌ sh am; - sh əm|
noun
1 historical a kind of heavy overcoat with a short shoulder cape.
• the thick woolen fabric used to make such coats.
2 a corded tape used for stiffening, esp. in the making of belts and hatbands.
ORIGIN early 19th cent.: named after Lord Petersham (1790–1851), English army officer."
- from Apple's Dictionary application
Thanks.
Petersham is a type of grosgrain with a flexible edge, so it works well for waistbands or wherever you need to apply it in a curve. Delightful stuff! Often store clerks don't know the difference, so look carefully at the edge: regular grosgrain has a perfectly straight edge, whereas Petersham has a more wavy or scalloped-looking edge. If you google "Petersham", you'll get some images you can look at.