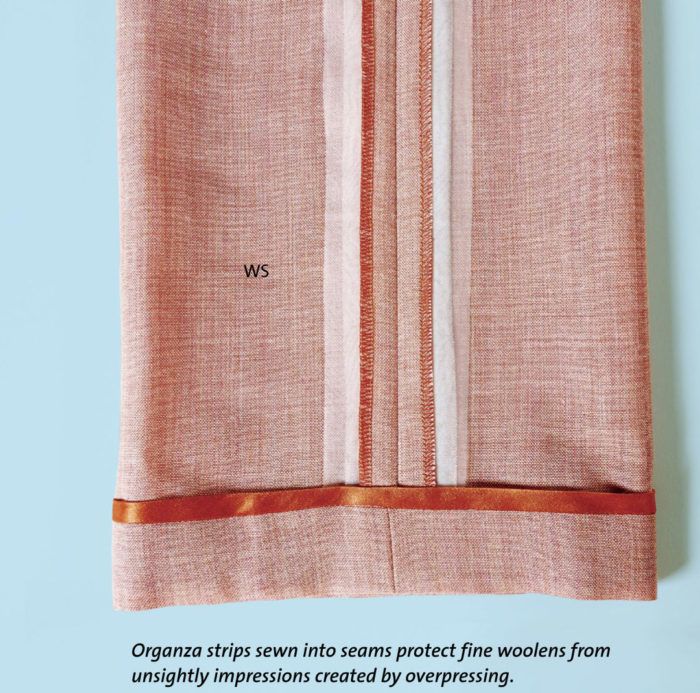
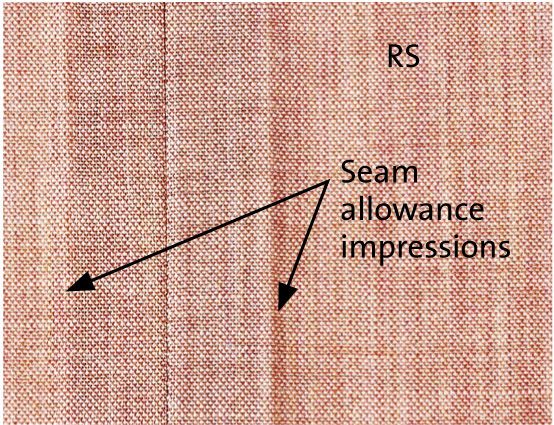
In “Padded Seams” from Threads issue #166 (April/May 2013), Katrina Walker explains her techniques on how to make lightweight padded seams to prevent seam allowance impressions on your wool garments.
Preventing these seam allowance impressions is one of the biggest challenges of sewing fine wool garments, and  their occurrence on a beautiful garment you’ve just spent hours creating can be heartbreaking. Seam imprinting is a particular problem with trousers and skirts that don’t include a protective underlining.
I became so frustrated by having my work damaged by seam allowance impressions that I was inspired to find a way to ensure that my fine garments would remain beautiful through years of cleaning and pressing. I found that a padded seam does the trick nicely. You can also think of it as an underlined seam.
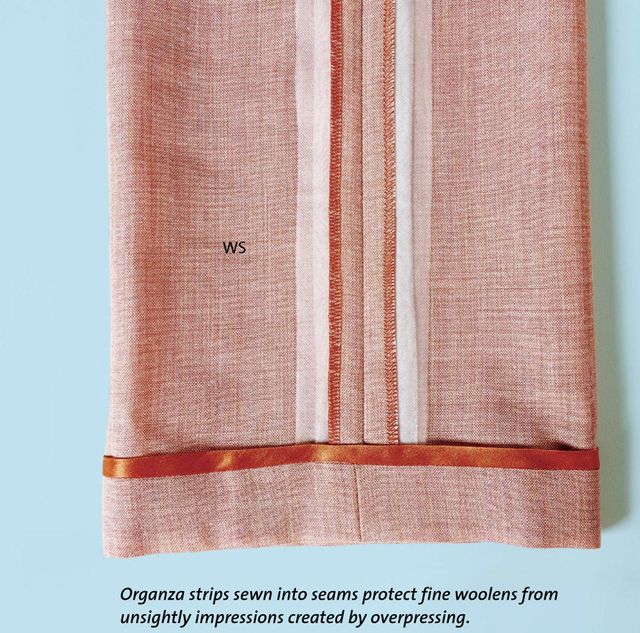
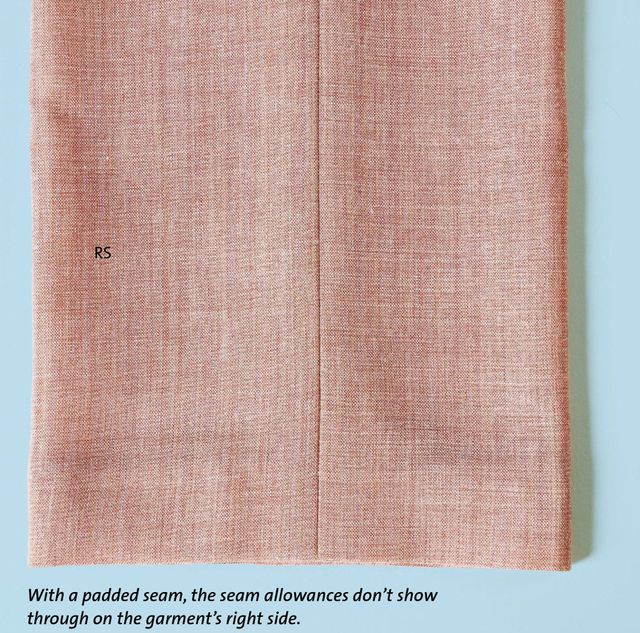
The concept is simple: Two strips of fabric sewn on both sides of the garment’s seam allowances buffer the seam allowance edges and prevent imprinting when the garment is pressed. Padded seams are traditionally used with a bulkier fabric to exaggerate the appearance of a seam, to provide an additional foundation for seam embellishments, or to prop up delicate fabrics. I use silk organza strips as a lightweight seam padding to provide invisible, lasting support without bulk.
How to Sew Padded Seams:
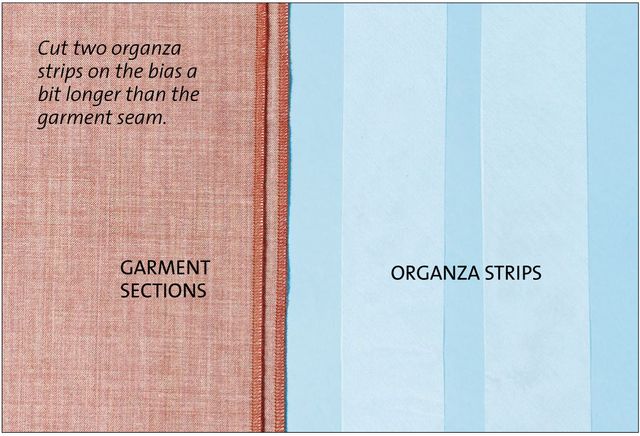
Silk organza is an ideal choice whenever lightweight reinforcement is needed. It is superior to synthetic-fiber organza because it presses beautifully without being damaged by heat. For a padded seam application, cut silk organza strips on the bias to prevent fraying and to enable the strip to curve easily along seamlines.
1. Measure the seams to be padded to determine the organza strip lengths necessary. Cut two strips on the bias, each slightly longer than the seam and double the seam allowance width plus 3⁄4-inch. For example, a 5⁄8-inch seam allowance doubled is 1-1⁄4-inches, plus 3⁄4-inch yields 2-inches.


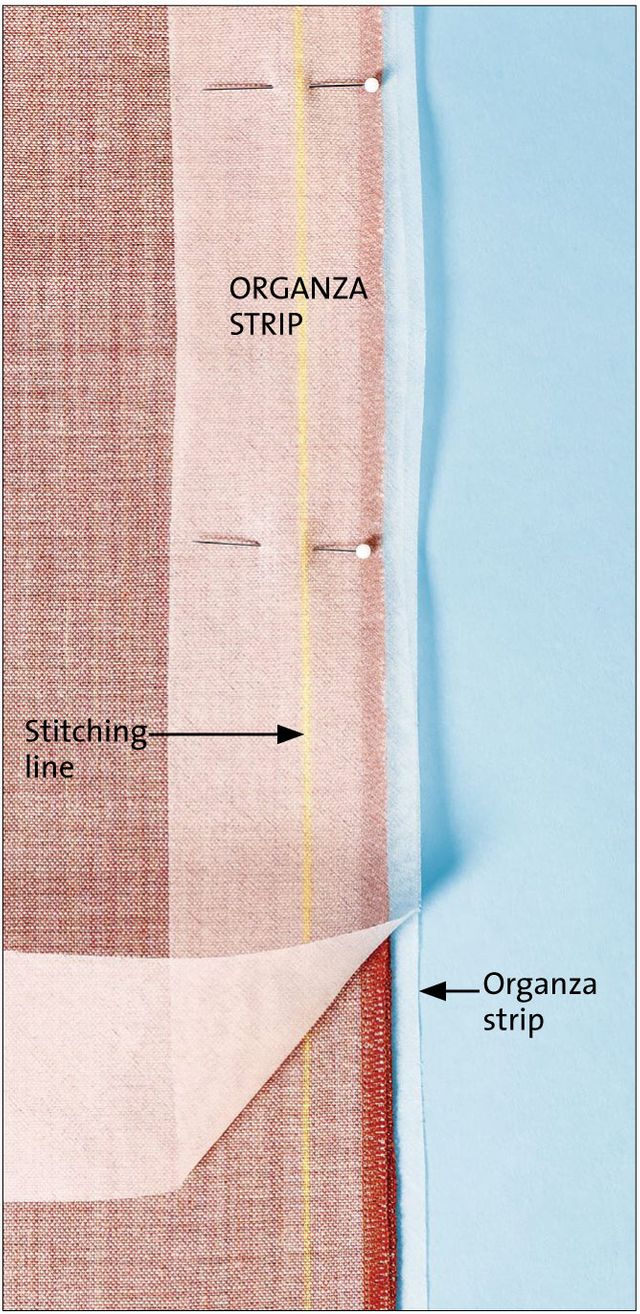
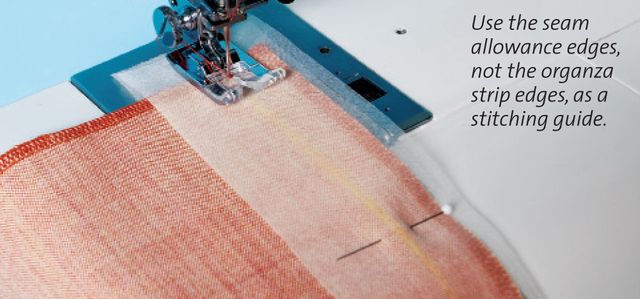
2. Pin the garment’s seam, right sides together, as usual. Mark the stitching line, if desired. Sandwich the seam allowance between two organza bias strips. The strips overlap the stitching line, and their edges extend past the seam allowance edges by approximately 1⁄4-inch.
3. Sew the seam, stitching through all four layers.Use a straight stitch set to your preferred stitch length. Make sure to sew precisely on the stitching line, referring to the garment’s seam allowance edge and not to the organza strip edges.

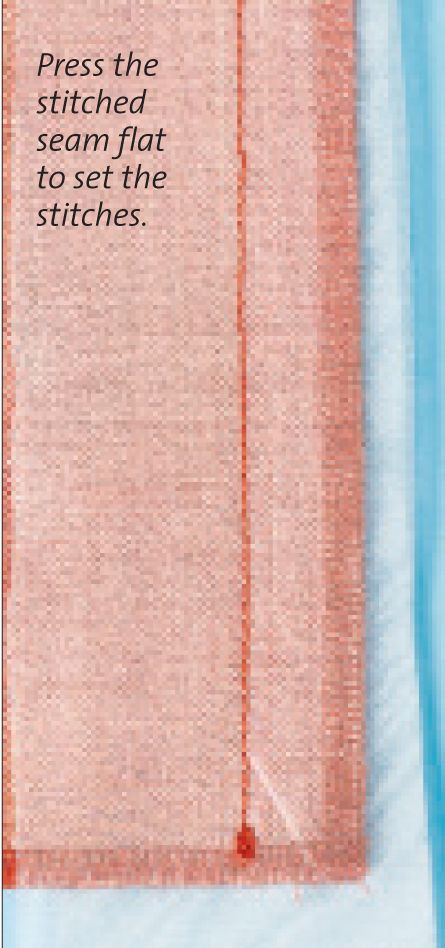
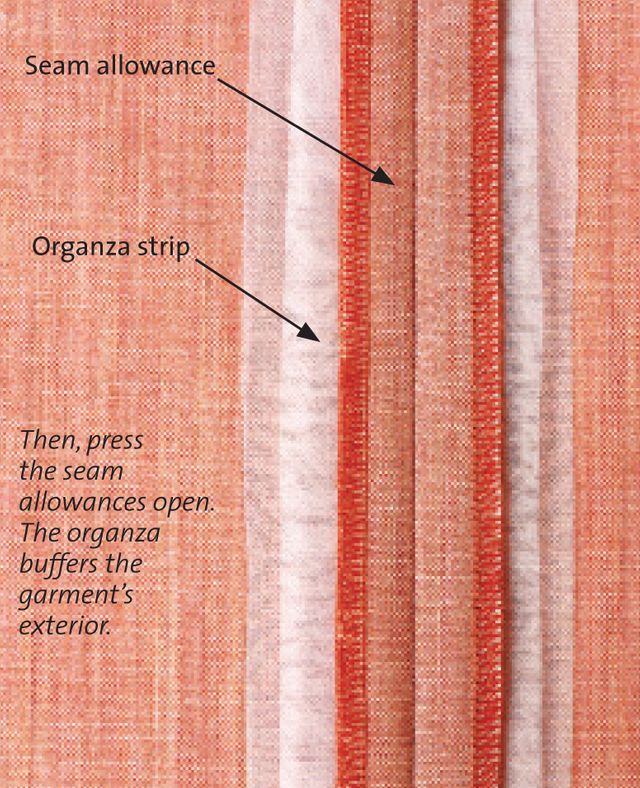
4. To set the seam, press it as stitched, with all layers aligned. Then, press the seam allowance open; use a press cloth to prevent shine, if necessary. The raw organza edges that extend past the seam allowance edges provide a barrier between the seam allowances and the garment’s body. If you wish to finish the garment’s seam allowances, do so now-but take care to avoid catching the organza bias strips in the stitches.


5. Continue applying the organza strips to seams as you construct the garment, until all the seams are sewn and the garment is ready to finish. Take care at seam intersections to ensure that the organza layers do not become bunched and that their edges remain free from stitching lines.
Do you have any tips or tricks on preventing seam allowance show-through? If so, please share them in them in the comments section below.




When ironing these garments that may show seam impressions, usually iron the seams wrong side out, then turn right side out for the creases. I have heard, perhaps I have done it too, place paper or non fusible Pelion. between the seam allowance and the garment when pressing, but your method looks like it makes things easier in the long run.
Thank you for your tip! I'm sure it works with other fabrics too!
This is a great solution to imprint issues. I am always careful when I'm constructing the garment to press seams open on my sleeve roll, which allows the right side of the garment to slightly roll down and away from the edges of the seam allowance, thus avoiding imprint. But, the dry cleaners are not going to do that when they press so your effort is wasted. Thank you for sharing this technique!
Wonderful technique -- especially when working with satin! Thanks for this tip!
Really want to try this, but may use another very light weight fabric than expensive silk organza.
I use nude organza on light colored sheer fabrics to prevent the seam allowance from showing through to the outside.
Silk organza need not be all that expensive. We deal with the Dharma Trading Company for all our silk, and dye it ourselves as needed. My daughter used silk gauze from this company for a wedding veil, rather than nylon tulle as she wanted a veil with a great deal of drape ability. It came in 45" width and was just over $4.00 USD a yard. Silk organza is just a little more in cost and comes in both 45" and 54" widths. Check them out at http://www.dharmatrading.com/
Why would you not underline if the fabric is so impressionable? I think it would be easier than making all those strips, and keeping everything aligned--I know from "reinforcing" cb seams with tape. It's more of a pain than it ought to be.
Helpful tip. Thank you for taking the time to present this instruction. But, I underline woolens.
I think this would be quite useful for garments that are sent out for dry-cleaning. It seems to me that consideration should be given to doing something at the hems as well as they can imprint too.
Thank you so much! This is wonderful. Sincerely
I've never had an occasion to do this but looks simple enough and worthwhile. Thanks
Proper seam pressing is so important but personally, I think if you are going to line something and if it is wool you probably will, you shouldn't serge the seams. They are notorious for leaving impressions. I would do a flat, wide triple zigzag along the SAs to prevent any raveling. That and a strip of brown paper bag or a paper envelope to slide under the SAs while you press and you are good to go.
Also, using a wooden seam roll which lets the seams fall away without impression, is a great way to deal with this issue.
Finding natural silk organza is hard. If you have sources please post.