How to Add Mock Cuffs on Short Sleeves
Try this cuff for a great sporty detail on a short sleeve. It doesn’t shorten the sleeve as if you rolled it, nor does it show the sleeve’s wrong side.
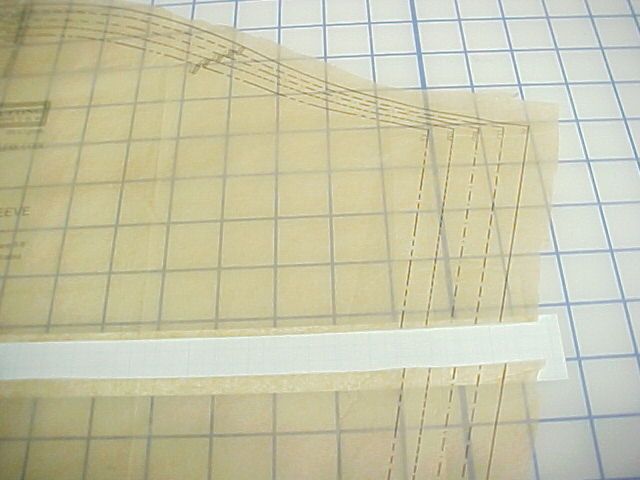
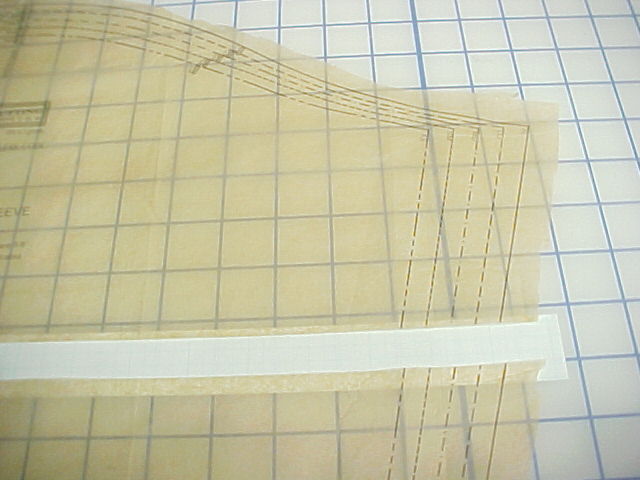
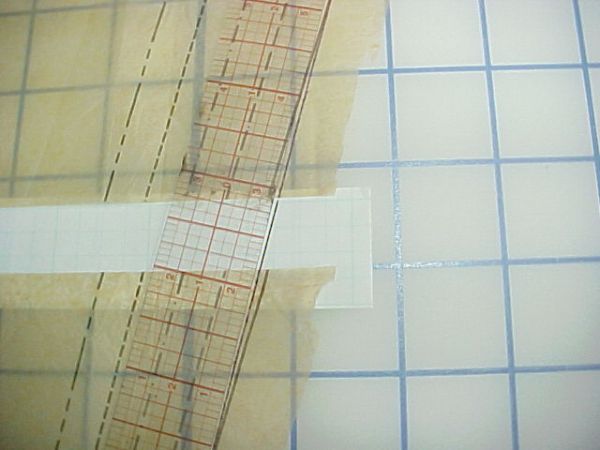
The tissue pattern for the short sleeve needs an extra 3/4-in. added to the lengthen/shorten line. True the vertical sleeve seams.
Make sure you have at least a 1-1/2-in. hem in the sleeve.
To add length to the short sleeve, using 1/4-in. graph paper to achieve an accurate measurement across the lengthen/shorten line.
Next, true the vertical sleeve seams.
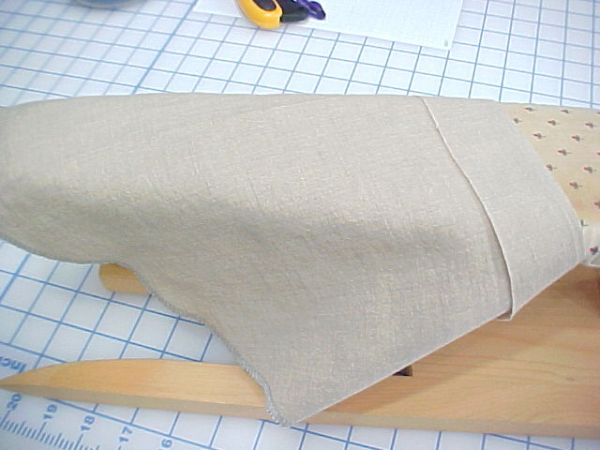
Complete the garment up to hemming the sleeve. Fold the sleeve hem to the wrong side and press over a sleeve board at 1-1/2-in.
Fold the sleeve again at 1-3/8-in. You will find the sleeve itself overlapping and gathering above the second fold. This is normal. You are folding a smaller hem onto the larger section of the sleeve.
You will be stitching at the lower section (the fold you just created). Stitch 3/8-in. away from this fold.
Press the fold and stitching on a sleeve board.
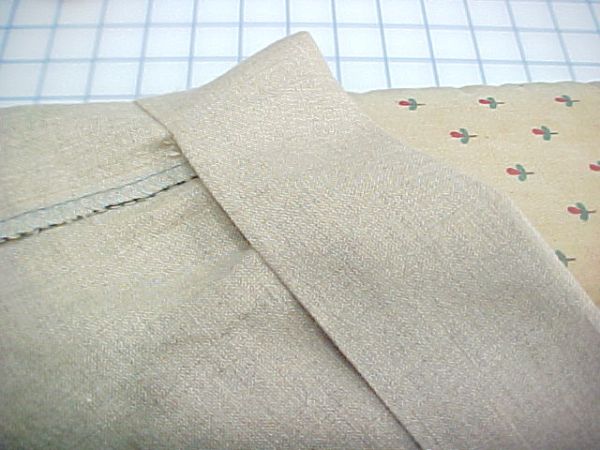
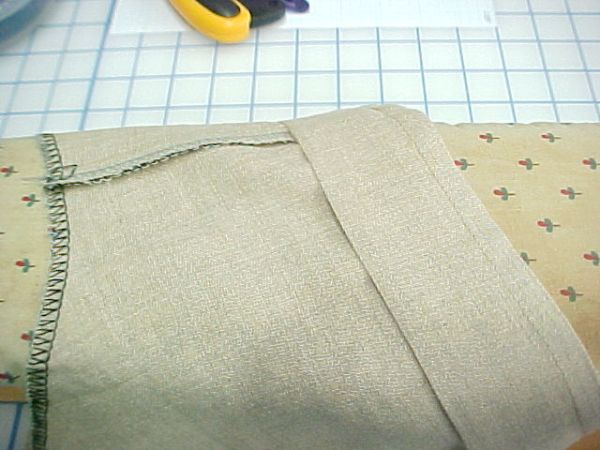
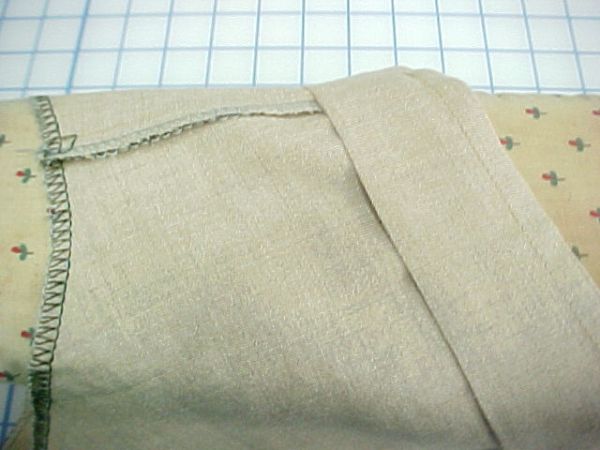
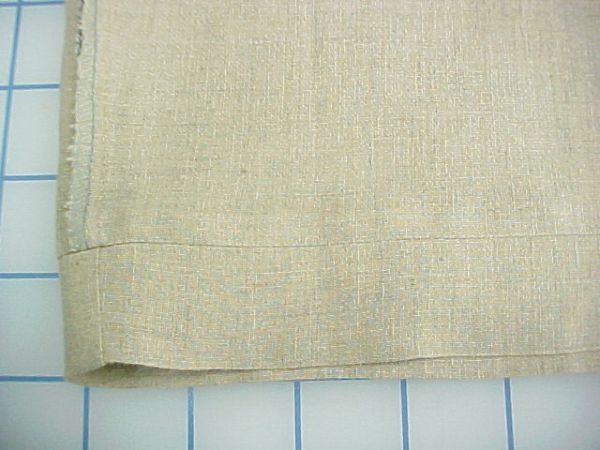
Turn the cuff down and look at the sleeve from the right side. A little pleat has formed at the top of the cuff, it is stitched into place.
From the wrong side, the raw edge of the hem has been captured into the stitching line leaving the inside of the sleeve clean finished.
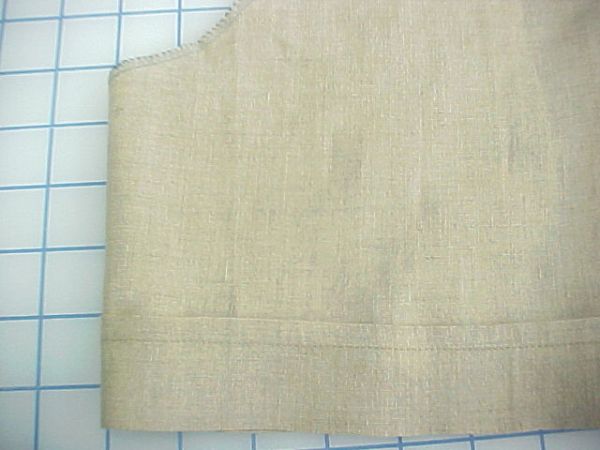
Lastly, press over a sleeve board with the little pleat going up and the original hem fold at the bottom of the sleeve. The additional 3/4-in. you added to the lengthen/shorten line has been sewn into the pleat of the cuff.
Will you use this method to add mock cuffs? Do you have any other tips and tricks to add?
Start your 14-day FREE trial to access this story.
Start your FREE trial today and get instant access to this article plus access to all Threads Insider content.
Start Your Free TrialAlready an Insider? Log in






Yes, I'll certainly use this method. In the hot, Texas summers, I make a lot of short-sleeved shirts and tops. This method is a keeper!
This is a classic way to shorten a pair of long pants into anything from capris to walking shorts as well, and you already have plenty of material there to work with, at any length. Gives a very nice easy, finish to the hemline.
THX for reminding us!
This is a classic way to shorten a pair of long pants into anything from capris to walking shorts as well, and you already have plenty of material there to work with, at any length. Gives a very nice easy, finish to the hemline.
THX for reminding us!
Back in the dark ages, one of the maternity tops that I made had this type of sleeve. I loved it as it was comfortable and much more polished because the seaming/hemming was enclosed (my sewing abilities weren't the best then, not that they are now LOL!). I never saw that kind of cuff again in a sewing pattern even though I looked for it, until I started selling sewing patterns myself and a copy of that old maternity pattern came my way. The top or dress has raglan sleeves and a cuffed short sleeve. The only difference between the two is my top had topstitching on the bottom of the cuff as well the same depth as the top. You can see the pattern at http://moonwishesstore.ecrater.com/p/11968499/simplicity-sewing-pattern-8381-misses-size-14?keywords=8381
Thanks for these instruction and now with the power of Pinterest, I can pin them to share with others while at the same time knowing where to find them again!
Honest, I only posted ONCE!!!!
This is a Bishop Method of Clothing Construction Council technique. It was introduced by Edna Bryte Bishop years ago and then, like so many of her techniques, copied in the industry. I have used this since I first learned it in the 1970s and use it on trouser style slacks as well as sleeves. It makes a great cuff and you don't ever have to worry about the hem coming out and then tripping on it when you walk. It is fast! And it's all done on the machine. I also use this on sporty styled unlined summer jackets. You will use it over and over again.
Year ago I made all may clothes and did a very good job. The I gain weight about the time the pattern company changed their sizes. I have not been able to make my clothes fit correctly since and I now have the time to sew and I have not lost any so I really need help get the correct fit.
Thanks, Linda
After trying this w/ scrap paper, I believe the directions are backwards. It seems the first fold should be 1 3/8" and the second should be 1 1/2". Great idea, thanks! I have seen it on RTW and didn't bother to take it apart to see how to do it.
I've done the button bands on the front of shirts this way, too, including a strip of interfacing. I copied this from a ready to wear shirt that I took apart many years ago.
I enjoy the idea but will work through it within a week cause I have a client that requested this very alteration. Thanks
Modestly Me
I discovered this method on commercial shirts over 30 years ago and used it many times on shirts for my husband. I'm still using it on shirts for myself. I do add a stay stitch in the ditch on the underseam to help keep it in place.
I have been using this method on both short sleeves, long sleeves and some jackets for years. Love it.
Brilliant. I am tired of folding up long sleeves and this will be my new way to make my forthcoming winter wardrobe. Half or 3/4 sleeves with this advice will be awesome. Thank you, thank you, thank you.