A Beautiful Hem for a Four-Ply Silk Crepe
My friend Lynda Maynard has been kind enough to allow me to share her technique, which she taught me last summer. Her book, The Dressmaker’s Handbook of Couture Sewing Techniques, can be purchased on Amazon.
Last summer, I had a customer who needed a gown for her daughter’s wedding. This gown, which was strapless, had a bodice and flowing skirt of 4-ply silk crepe. Since 4-ply silk crepe is a fabric I don’t work with often, and since I was dreading the hemming, I called Lynda. She’s the queen of silky, flowing fabrics, and I knew she’d have a finish that was beautiful as well as efficient.
This is the technique. You’ll really be making a version of a bias facing with this finish.
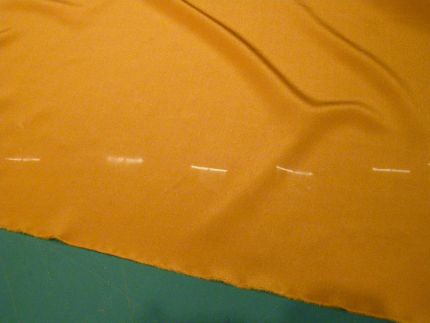
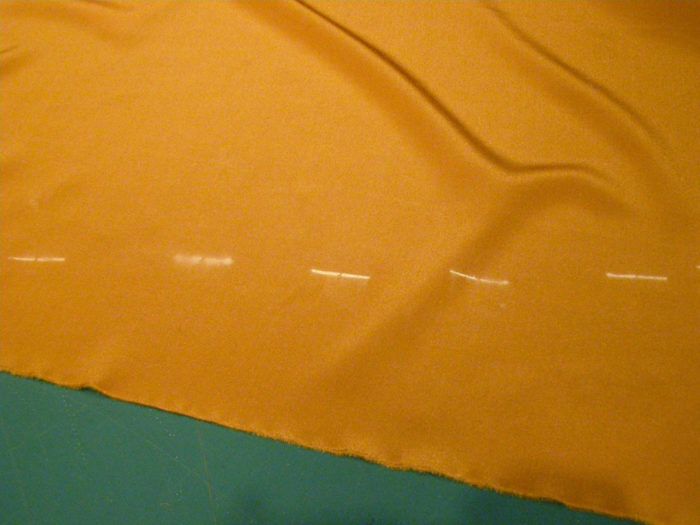
Begin with the marked hem–I used the skirt hem marker that blows powder–a really useful device if you’ve not used one!
Get yourself some nylon or silk tulle (also called Illusion veiling in some places). Ideally, it should match the fabric. I’ve chosen different colored tulle for demonstration purposes.
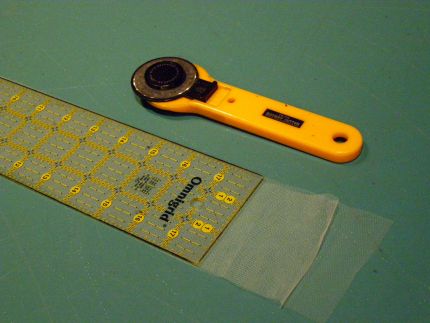
Cut a 3″ wide strip across the grain.
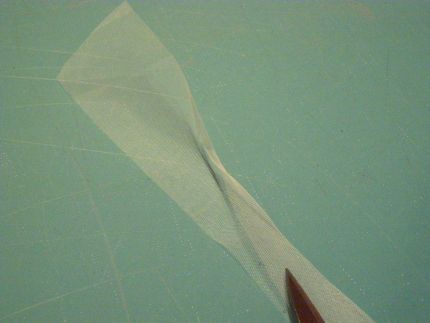
Press this strip in half, matching the raw edges.
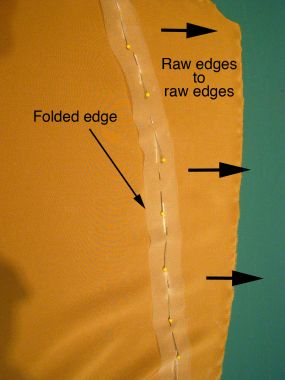
Pin the strip, to the front side of the fabric, so the folded strip straddles the hem markings. Keep all raw edges to the same side, and the folded edge opposite.
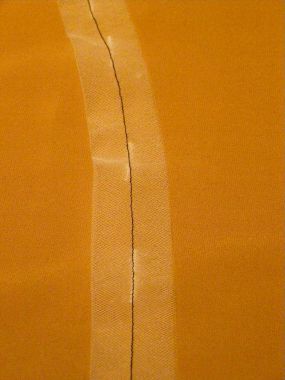
Machine sew along the markings, centered on the strip.
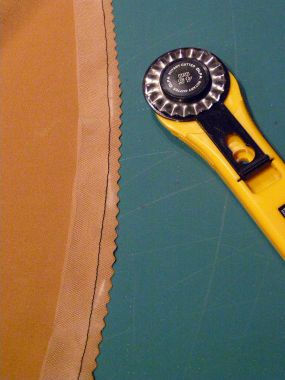
Trim the raw edges away to 1/4″-3/8″. Use the pinking blade in the rotary cutter–it gives a nicer finish.
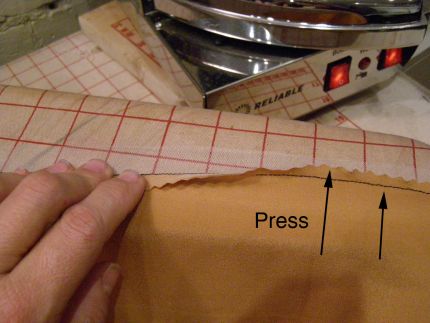
Press the strip towards the seam allowances.
Pressing the strip towards the seam allowances makes it easier to get the hem to favor to the inside in the next step.
Start your 14-day FREE trial to access this story.
Start your FREE trial today and get instant access to this article plus access to all Threads Insider content.
Start Your Free TrialAlready an Insider? Log in





Oh my gosh! I love this! Thank you so much to Lynda and you Kenneth for sharing. You are my absolute favorite designer. I have been watching you since Sandra Betzina’s television show. I read anything I see connected with you. You have taught me more than you will ever know! You never disappoint!!! Thanks again! Cindy
You mentioned this technique during a class I took with you. I could not for the life of me visualize how this worked. Now it's crystal clear. Thank you for sharing this wonderful technique.
Another great technique from a great teacher.
When i do a hem with fine, pin point stitches as in this hem, I give a gentile tough after several inches to keep the stitch from pulling too much.
Kenneth - Do you recommend doing this here?
To Simplypat: Actually I use a gentle tension to begin with, so the stitches are somewhat loose, but giving it a gentle tug is another way of doing just that. The pint, we're both making here--loose stitches won't show from the front as readily.
And again, thanks to my friend Lynda Maynard--a brilliant sew-ist, and teacher, and a lovely person!
The stitches look somewhat larger than needed, which makes it look sloppy and noticeable. The beading needle is not correct - use a number 12 sharp or 'tween. You will get more control. Maybe that will help.
I have her book, and I think it is a great one for teaching, as the pictures are large and clear, and th instructions easy to understand. I also like that it is spiral bound, so it will lay flat. It makes it easy to follow along and refer to as you sew. It's one of my favorite sewing books!
I do not understand the red square material in the step about pressing. Is this simply a pressing cloth? Seems like a beautiful treatment for hems. What other fabrics could this idea with the tulle be useful?
To Cloff: I've found that the beading needle and stitch length look neat and tidy--the photos may make them look larger but they are 1/4" apart. Needle choice is a personal matter, and with such a fine thread, I find the #10 beading needle is exactly correct for the result I want. It seems you found a different choice that works for you. Different ways to do the same thing. That's the beauty of sewing.
To User 2592692: The red squares are the pressing surface of the pressing table--not anything else. Sorry for the confusion! This treatment is good for any fine, drapey opaque fabrics that need a light touch for the hem.
This is a great technique -- so elegant!
Just one question for Professor King (I have never worked with silk 4-ply crepe -- I don't think I've ever HANDLED it before)
Q: Would you consider underlining this fabric? If not, why?
I'm learning every day -- thanks so much for sharing your knowledge with us.
Beautiful technique, Mr. King! I wish I had known about this when I was making bridesmaid dresses for our daughter's wedding a few years ago. Question, please: Does the tulle stiffen the hem, or is it still soft and flowing? Thank you for all of your great articles.
I assume you use tulle instead of "Hug Snug" (rayon seam binding), or just turning the fabric on itself, to create more flare/less droop? And you keep the thread on the outside of the hem (rather than between the fabric and hem) to prevent ironing marks appearing on the front side? Is this on the bias or straight-grain, or does it matter? Any "tricks", if bias, to prevent deforming the hemline by stretching (such as using a teflon, or roller foot)?
Since netting does not ravel, why do you use a double thickness?
Once again, awesome. Thank you.
Senor King,
I'm with JennnyEbner - so many tips and gentle guidance in your ever contribution. Big shout out to Lynda!
A fervent fan!
To NinaLBoston: I wouldn't underline this fabric because you want it to be fluid--that's part of its beauty. However, a trick I learned from my boyfriend who designed costumes for Broadway--he learned this from one of the A-list costume shops--line the garment with another layer of the same fabric. I tried this on a gown I did last summer, and WOW! it gave so much more weight and drape, and when she sat down, no lining was apparent.
To Idasew: The beauty of this technique is that it's soft, and flexible, not stiff. It moves beautifully.
To JDTailor: I used this technique, to make a thin, flexible hem. The hug snug doesn't look as finished to my eye--one can dye the tulle to match the fabric. Turning the hem up makes it bulkier, and the hand stitches REALLY visible. That to my eye was too obvious and rough-looking for what I wanted to achieve.
To Bsquared: I use a double thickness, so I have a fold at the top edge of the strip. Though the netting doesn't ravel, the cut edges catch every piece of lint to catch on your stockings, making the skirt unpleasant to wear. Having a fold there eliminates this issue. It also gives slightly more body when turning the hem.
And to the rest, thanks for the kind words! All hail Lynda Maynard!
I just want to thank you for another wonderful technique to add to my tool box. You'd be amazed at how many of your tutes have become standard ways of business for me. I thank you so much for that. Thanks to Ms. Menard too! Great technique I can't wait to use.
This is a wonderful technique that had not occurred to me. And I also learned from the Q&A... answered some of my own queries. Really enjoy reading about these techniques!
Beautiful! I love these tips!