Cut Longer Facings for Better-Looking Garments
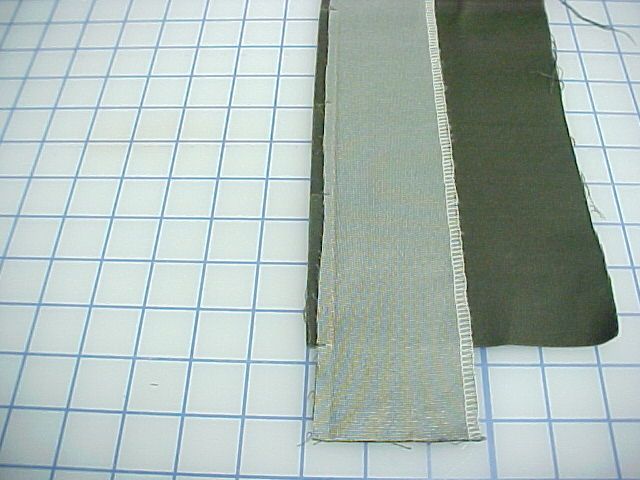
When a garment has a separate front facing, such as a blouse, jacket, or skirt, cut the facing about 2-in. longer at the hem. This helps assure a smooth ripple-free application.
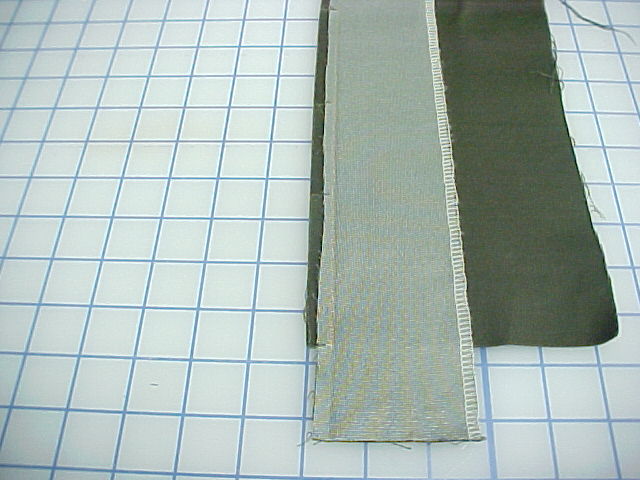
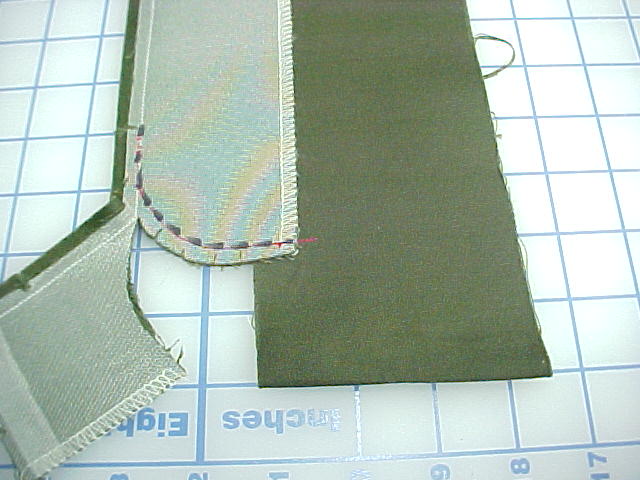
Here, the garment front and facing were cut from the fashion fabric.
I recommend using a knitted or woven preshrunk interfacing. It doesn’t hurt to preshrink and usually helps the look of the finished garment. But beware, even if you did preshrink the interfacing, it could shrink more during pressing.
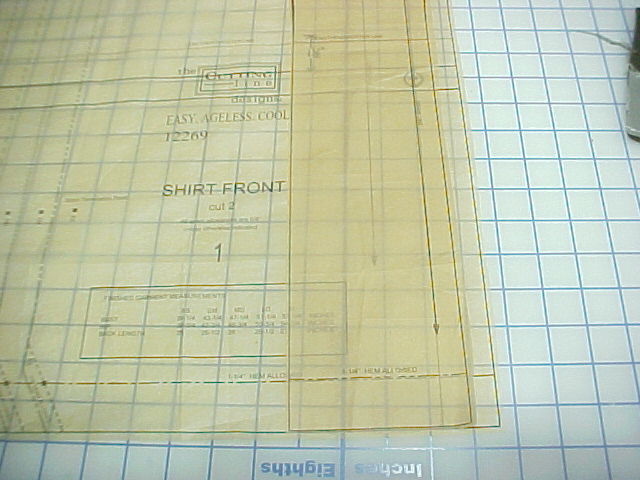
The garment front and facing pattern pieces start out the same length, and will either fit together 1 to 1 or the facing could be up to 3/4-in. shorter after the interfacing is applied.
Without first laying the facing pattern tissue over the garment front pattern tissue to check their fit, the front is either eased onto the facing, or the facing is stretched to match the front length. In either of these cases, the front edge ends up with an unattractive eased/wrinkled vertical seam.
By making the front facing about 2-in. longer, the facing and the garment front can be pinned together evenly.
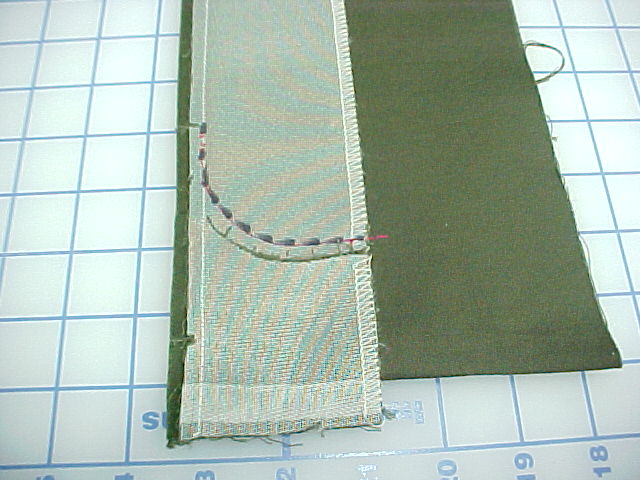
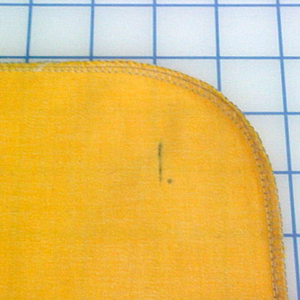
The front garment can have a straight or curved hem. Once the facing is sewn to the vertical edge, redraw the hem curve. Start stitching by slightly overlapping the stitches on the vertical seam you just stitched. Continue stitching along the line or curve you just drew. Cut off any facing and garment fabric that is not needed. Use the same seam allowance width as the vertical seam.
Have you every tried this technique or one similar? Were you satisfied with the results?
Start your 14-day FREE trial to access this story.
Start your FREE trial today and get instant access to this article plus access to all Threads Insider content.
Start Your Free TrialAlready an Insider? Log in





I have done this for years. In fact, every time I have to add something that has either a turn or a vee, I make it longer so I have something to work with. Then I just cut off the excess.
In fact, I make doll clothes and this works very well on miniature items.
Thanks for showing this technique!
No, I have never tried this; but I will be all over it next time around.
Perhaps I'm just more of a novice sewer but I would've liked to have had more details shown and explained. I'm not quite sure how this went from "cut longer facings for better looking garments" to changing a straight cut facing to a curved one.
Thank you, Louise. As always, you are a master of common sense approaches. Using larger or longer fabric pieces in this way makes it so much easier to handle stitching challenges.
Thank you, Moonbeams. I've been working on doll clothes, too, and you've helped me with your tip.
I will definitely try this next time. Thank you so much!!
I'm a very experienced sewist. I have no clue why it would be necessary to cut the facing piece longer than the garment. The goal is not clearly stated. Is it because the interfacing is expected to shrink? Or is there something else that can possibly happen? I seem to be clueless. I'm also not sure how the rounded corner relates. Does that help the garment lay flat--?
I think user-2000844 has a good point. I had to read through this 3 times carefully to believe I understood this. Is the basic problem caused by interlining the facing decreasing the length of the facing piece? At first I thought this had something to do with those weird L bends in some complicated pattern edges.
"Doh!" (she says as she slaps her forehead)
Why did I never think of this??? So simple. Great tip, thank you!
There seems to be something missing from this tip. Just couldn't follow it.
Some are understanding this right off, but I'm among those who just aren't "getting it"...could someone explain it for the rest of us? My interfaced seams are sometimes ripply, so I'd like to understand this trick. Thanks.
I am not sure if it is the interfacing that makes this necessary but it always works.
I sew from the bottom up for a few inches, (curved or straight edge makes no difference) and then start at the top easing the extra two cms as you sew. If you put the facing (longer) on the bottom it will ease in automatically.
Please, could someone explain this for me. I'm just not getting this at all. Thank you for your help.
Clear as mud!
You specify woven or knit interfacing. What are the advantages over weft insertion?
Thanks.
It basically says to cut the lining piece about 2in longer than the piece that is being lined so that instead of having to stretch and ease it in you have plenty of lining. You can lay both pattern pieces on top of each other before you cut anything out to see if the lining piece will be the same length or a little shorter so you can decide if you need to add 2in or even more. The curved hem photo is just showing how you can straight stich the extra long lining to hold it in place then go back and stitch the curve and cut away the excess instead of trying to match up the curve first.
This is crystal clear, its about making the facing longer so when the interfacing is applied and shrinkage happens, you have enough facing length. I don't think the curved hem has anything to do with the subject only showing you that it works with both curved or straight facing. I have been doing similar for years as interfacing shrinks when applied to fabrics and some fabrics misbehave also. I don't find any hidden message other than to make facing longer to provide for any shrinkage in the facing once the interfacing is applied. The fact a curved hem was demonstrated is not an issue.
Thanks for the post.
Sue
In response to a couple of concerns others have: Kylasm's summary is great, but there may be a couple of points that could be added. Firstly, I read Louise as saying that this process applies whether you're doing a straight or curved front. If there's a curve, don't cut the curve until after you've seamed the 2inch/5cm longer facing piece right to the bottom edge of the garment front. Then mark and stitch the curve as Louise has shown, then cut off the excess fabric. The value in cutting a longer facing is that sometimes we may not be 100% accurate when the front and facing pieces, or perhaps we're using a different fabric for the facing. Cutting it longer reduces the risk of the two pieces not matching perfectly and so results in a better finish, whether the bottom edge is straight or curved. Hope that makes sense and helps.
Janice b. I found this tip very useful as the facing does sometimes shrink when you fuse the interfacing. Thank you
This isn't clear to me at all. Why is only a portion of the bottom cut as shown in the photo? If you're cutting the facing 2 inches longer than the final length of the garment, won't you be cutting off the curve in the fabric when you finish off the garment to its actual length?
What's confusing is that the facing on the left appears to be ending up a good two inches shorter than the main body on the right, and not the same length. Better photos?
Here's what I understood:
The facing and garment edge should be the same length and you should not have to ease or stretch the facing when applying it to the garment edge.
There can be shrinkage of the facing when you iron on the interfacing. To account for this possibility easily, simply cut the facing and interfacing a bit longer. Iron the interfacing to the facing. When you apply the facing to the garment you will have enough length on the facing to match the full length of garment without having to ease or stretch the facing to make it fit the garment. This way you will end up with flat and smooth edge.
Hope this helps.
Half are getting the concept and the other half, I will go a bit more in depth with the explination.
Interfacing has a tendency to shrink when pressed to the fashion fabric, even if it has been pre-shrunk (which I always do my self)...but, it can still shrink more. The pattern tissue for the facing and the front of the garment are usually the same length. Most sewers (me included) after unpinning the tissue from the fashion fabric, fold the pattern pieces up and place them back in the envelope, never realizing that the two pattern pieces fit together.
When the interfacing is pressed to the facing, it might (not always) shrink. But, because the tissues have been place back in the envelope, many sewers think, because they are seeing the front of the garment and the facing are two different lengths, the pattern front piece need to be 'eased' onto the facing or that the facing has to be stretched to fit the total length of the front. The final result of the garment will have a rippled effect along the front seam. Cutting the facing longer can avoid this effect.
If you cut the facing piece about 2" longer then the front of the garment, the facing can then be pinned evenly from the top neck edge to the bottom along the front seamline.
After stitching the long front edge and if the bottom of the garment is square, then excess facing hanging below the garment can be cut off and the hem finished as usual.
If it is a curved bottom as pictured in the last photo, the patten piece can be placed over the facing and the hem curve of the pattern can be traced onto the facing and be sewn according to the pattern directions. Any additional facing after the curve is stitched would be trimmed away.
In reading through the comments, why knitted or woven interfacing, this would also include weft interfacing, what I am not fond of is any non woven interfacing. But, you have to let the fabric dictate the weight of interfacing to be used in the garment. Tissue weight, sheer, stretch, all bias, fabric in one hand and interfacing in the other, fashion fabric should always feel heavier.
The reason the last photo has the curve cut off, and the extension of fabric towards the right, once the curve is turned to the wrong side, the extension becomes a 2" hem in the garment.
The issue is shrinkage. Louise reminds us to pre-shrink our interfacings. Even with this step, pressing the interfacing to the facing fabric may cause even more shrinkage. To compensate, cut the facing longer then apply the fusible. Apply the facing to the fashion fabric, With the facing/fashion fabric applied in a 1:1 ratio the chance of rippling or easing puckers is eliminated. Last step, trim your facing matching curves or angles as shown on your original pattern piece.
Louise has explained this idea very well, and I will use it next time - great idea!
Why expect it to be complicated when it really isn't.
I thought the initial instructions were very clear.
I think the confusion comes from the fact that though most people were taught to read, it does not follow that they were taught to comprehend what they read.
Viva private school education!
Thanks for this technique. I can't wait to use it. I think it is very clear.
Another way to avoid side effects from applying interfacing is to press the interfacing to the fabric before cutting it out with the pattern of the facing. Shrinking can impact more than the length so to be on the safe side, apply before cutting with pattern.
This looks like a great tip to me, to avoid puckered seams in very visible places. I don't like iron-on interfacings but they are dominating the market so I may have to start using them. If interfacings just keep on shrinking why can't we stabilize them with a second prewash???
This looks like a great tip to me, to avoid puckered seams in very visible places. I don't like iron-on interfacings but they are dominating the market so I may have to start using them. If interfacings just keep on shrinking why can't we stabilize them with a second prewash???
What a great tip and solution to a common problem! I've been using this technique for waistbands to prevent rippling, but never thought to use it for facings! Thank you!
I actually figured that one out all by myself years ago after constantly having too-short facings. I never cut it that much longer though.