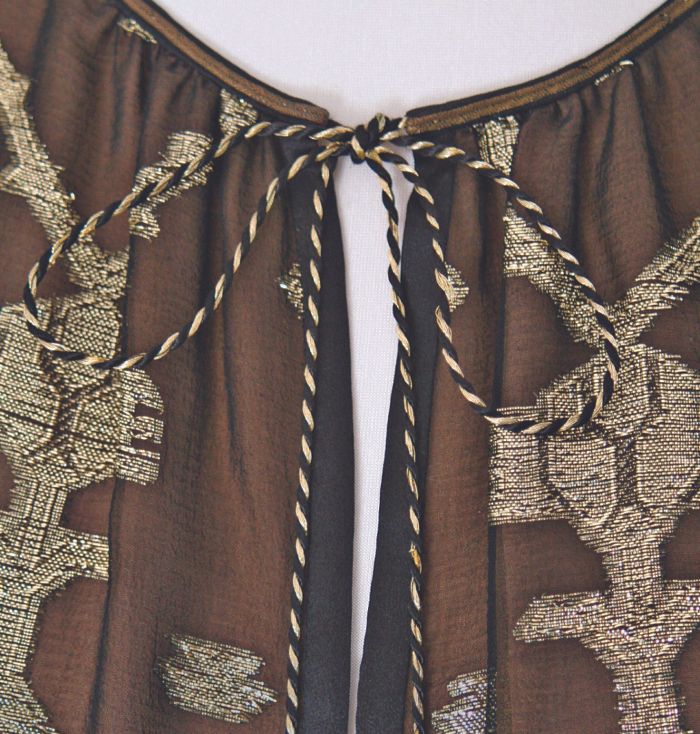
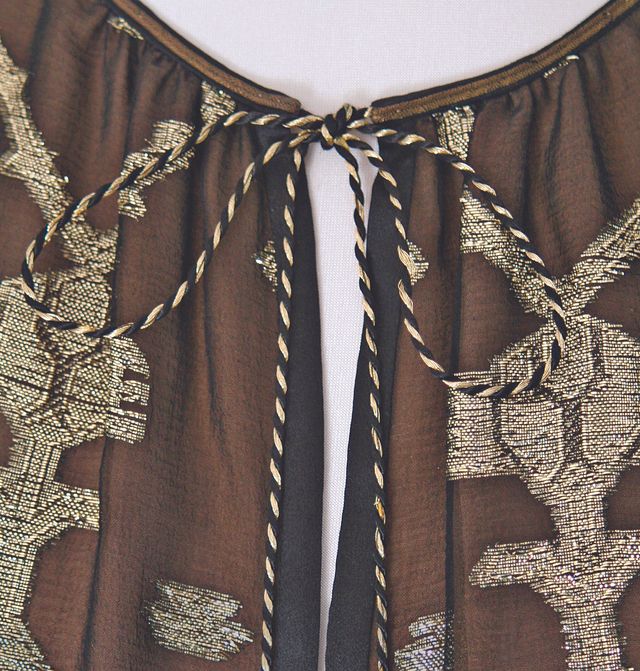
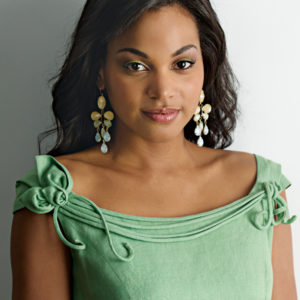
This detail on a chiffon blouse borrows from YSL's Russian collection. The neck edge is finished with a very narrow (3⁄16-inch) silk charmeuse bias binding, a narrow metallic braid is sewn to the binding, and a tie is added.
Couture expert Claire Shaeffer shows how to trim a neckline using a technique from Yves Saint Laurent in this excerpt from “Homage to Yves Saint Laurent” Designer Techniques Vol. 1.
The detail on a chiffon blouse, shown above, is from YSL’s Russian collection. The neck edge is finished with a narrow (3/16-inch) silk charmeuse bias binding, a narrow metallic braid is sewn to the binding, and a tie is added.
Prepare the bias strip
To begin, cut a bias strip about 1-1/4 inches wide and as long as the neckline circumference. Press the strip, stretching the bias slightly. Trim the seam allowance from the neck edge on the seamline. To avoid stretching the neck edge, baste it to a duplicate paper pattern.
Attach it to the neckline
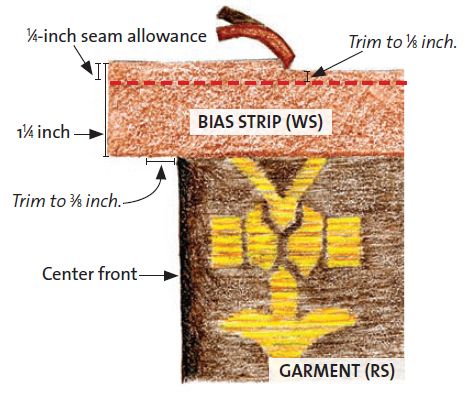
1. With right sides together and raw edges aligned, stitch the bias strip to the neckline with a 1/4-inch seam allowance. Trim the seam allowance evenly to 1/8 inch and the bias strip ends to 3/8 inch past the center-front opening edge, as shown.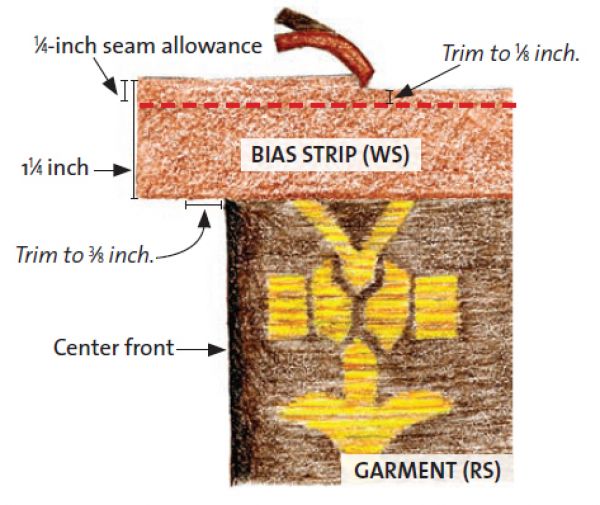
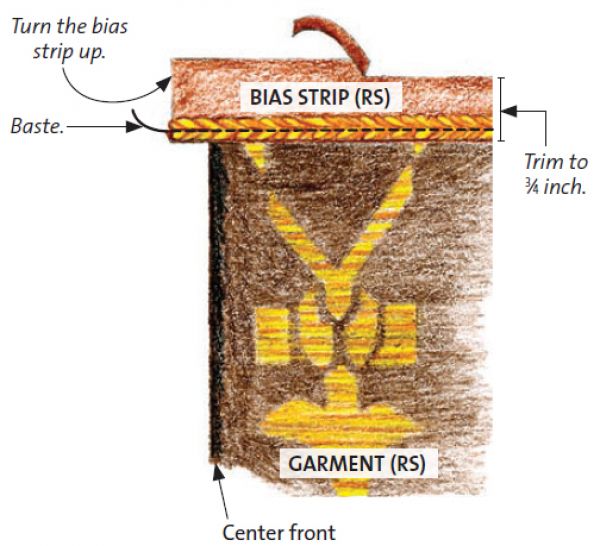
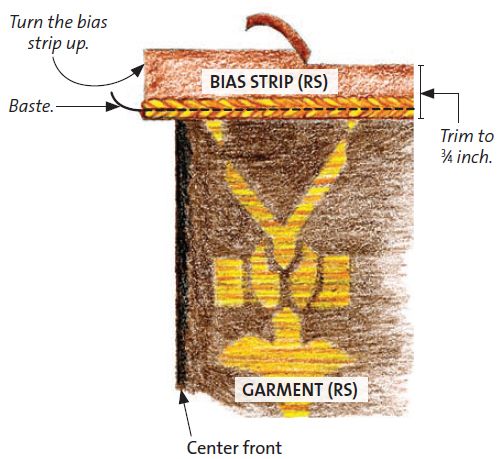
2. Add a braid to the neckline. Turn the bias strip up. Place the braid over the bias strip a scant 1/16 inch, only a few threads from the seam; baste it in place. Measure and mark the bias strip 3/4 inch from the seamline; trim.
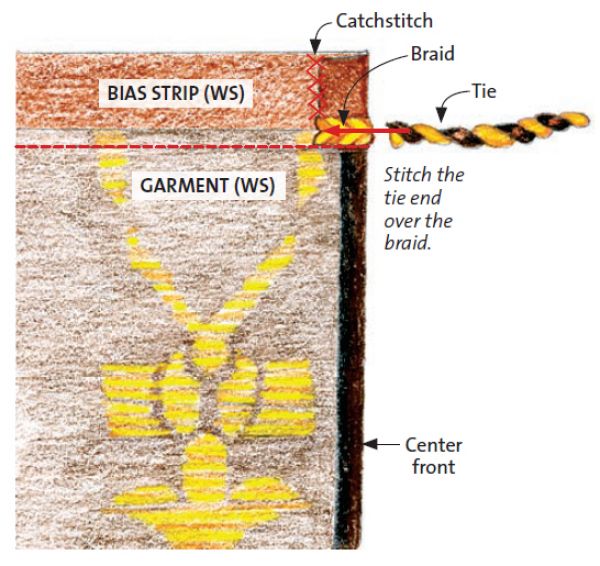
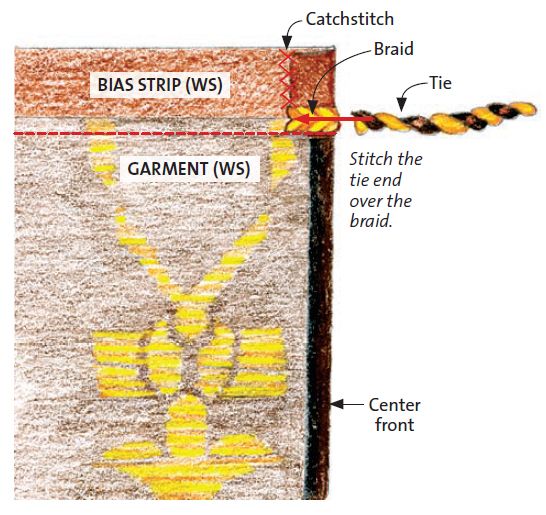
3. Wrap the strip ends, including the braid, to the wrong side at the center front. Sew the end edges to the wrong side permanently with catchstitches, as shown at right. Permanently sew one tie end over the braid to the wrong side. Repeat on the other side.
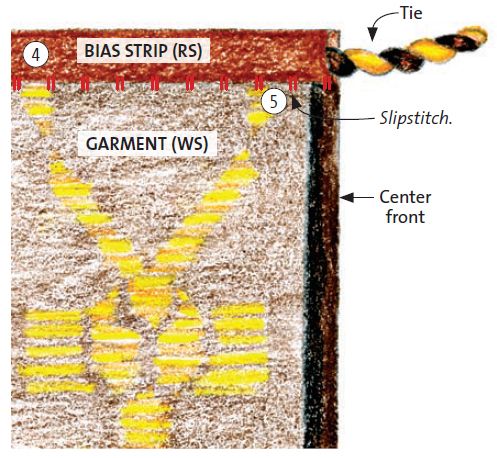
4. Wrap the bias strip over the neck edge to the wrong side. Only a few threads of the strip will show above the braid. Fold under the bias edge so the folded edge barely covers the seamline on the wrong side. Pin and baste it in place. Note: If the bias strip is too wide, trim as needed
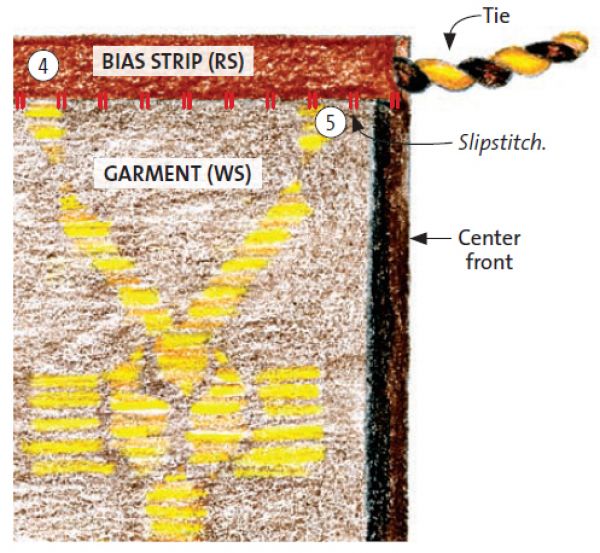
5. Sew the bias strip permanently inside the neckline with short slipstitches. Then attach the braid permanently with short running stitches in the center if it is very narrow or at the top and bottom if it’s wide enough.
Designer Techniques Volume 2 is is available for iPads, iPhones, and Windows based devices. It features even more couture construction techniques from other designers to help take your sewing skills to the next level.





This is a very interesting technique. However, I'm pretty sure that step 1 should have a 1/4" seam allowance, not a "1-1⁄4-inch seam allowance".
Actually, @Tammy19, I think that would be correct, because you fold it in two,lengthwise, stitch, and the fold over & either stitch in the ditch or by hand. I'm pretty sure that's how it goes.
If you follow the steps, the whole width of the bias is used to start with, no pre-folding in half. She is stitching the flat bias piece to the seam area, and trimming it down to the 1/4" above the seam line and you still have the rest of the bias that will eventually be wrapped up and over the cording and the seam. At one point she says to trim it if needed so you are using the least amount of fabric as possible so that it is a very delicate binding.
Pardon me, I meant it would be trimmed to 1/8" after stitching it to the seam and then the seam allowance of the blouse and the binding are trimmed to 1/8".
This technique does not have the binding folded in half as would be usual.
very gorgeous blouse you have there. The info on how to trim a neckline will come in handy for me I'm sure.
very gorgeous blouse you have there. The info on how to trim a neckline will come in handy for me I'm sure.
It seems this blouse would still be a very popular style. Do you have a photo of the whole blouse?
I like it.