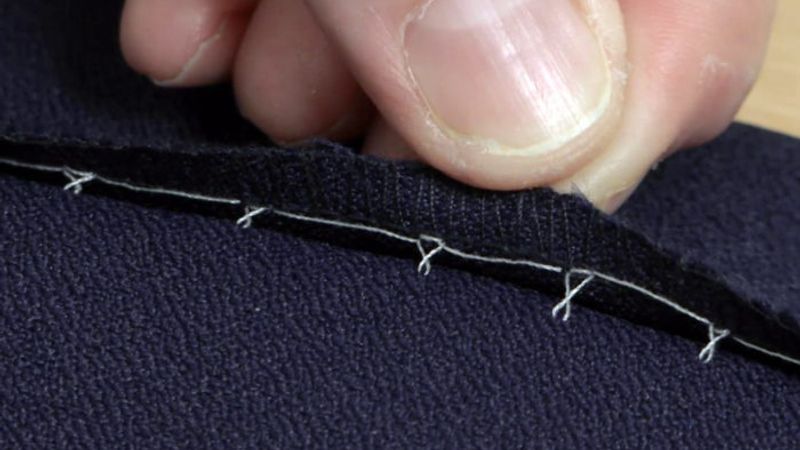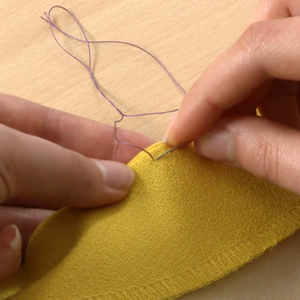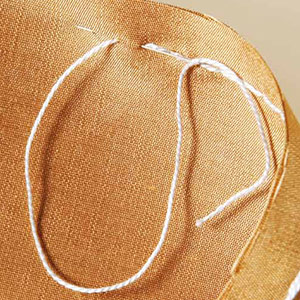
Couture expert Claire Shaeffer shares her method for securing hems on challenging fabrics with the figure-eight stitch in “The Figure-eight Stitch,” Threads #173 (June/July 2014). This hemming stitch is easy to make and holds hems nicely. The figure-eight stitch is practically invisible; therefore, it’s a great alternative when hemming knits, crepes, stretch-wovens, pleated fabrics, and other tricky-to-hem fabrics. Watch this Threads Essential Techniques video, and learn how to sew with this wonderful stitch.
Have you ever used the figure-eight stitch?


This is very nice & the magazine shows great pictures of this.
This is a lovely hand stitch and I'll probably use it. It would be nice to see a left handed demonstration now and then for us lefties. It makes it easier than always trying a mirror image!
left handed will have to sew left to right.
I had already skimmed the magazine article, but appreciated seeing is shown here online! i was impressed with the changing of the hands from right to left hand and back again. Must be nice to be so ambidextrious!!! I will definately use this stitch, where needed! Thanks for sharing........
Most Sincerely,
SewingSadie
Loved this figure 8 video but my suggestion would be to demonstrate on say pink fabric with black thread to produce better visible contrast, I felt this navy linen useless in demonstrating the material fold or even the raw edge finish. I too am a 'leftie' surely some of these videos could be run in parallel showing both left and right applications. I have a wonderful Australian publication for left handed sewing and embroidery stitches constantly in use.
I too would like to see instructions and videos for sewers who are left-handed. It's hard enough to learn a new skill without having to reverse all the instructions.
I totally agree with all of the above. I too am left-handed. as I watched the video I was thinking, "how would I approach this?" I am a little ambidextrous bit this would be a challenge. With that said I think this video was well presented.
Experience & Left-Handers:
Question: Have you ever used this stitch?
My mother owned a dress shop in the 70s-80s. She carried a lot of knit fabric clothing, including sportswear. She enlisted several people to do alterations; including myself and a “lefty” friend. I used this stitch constantly as I worked on all those hems! (I learned it as a child and used it up to that point, mostly, with linings.) So, I'm rather well practiced with it and all kinds of varieties of it.
It makes an incredibly strong hem and can take quite a beating since if the thread breaks anywhere along the hem it works like backstitching and won’t pull out and is easily repaired. It’s also for the most part invisible since you only need to pic up a thread or two from the outer side. It's actually rather elastic so on knits, it’s really the only way to go because it won’t gather up anywhere, slide around or pull.
The only thing I would add to this tutorial: The 3/4-1" strand between actually depends on the drape of the fabric. The more drape the fabric has the closer you work your “little 8s” - anywhere from 0-1 inch.
The trick is to hold the garment with the fold of the hem under the garment on your lap or a table - so that only the hem edge is visible at the top. Then you just work back and forth between the hem and the garment.
Otherwise, as a general rule to start I’d advise you to anchor your knot and the1st stitch in one of the seam allowances on the edge where you are going to begin hemming from. I find that this strengthens the hem so that if it’s stepped on, etc., it’s pulling against a strong holding anchor.
Left-Handed?
The "lefty" worked her hems this way but left to right.
So, Lefties:
Begin with your knot on the left edge by inserting needle left to right on the seam allowance on the garment side. Go back over that stitch to anchor it.
Take your first stitch on the hem across from the garment stitch, by inserting your needle left to right on the hem edge. Go over this stitch again. This is still part of the anchoring.
Now depending on how much drape* the fabric has, you insert your needle (left to right) on the hem any where from 1/4-1” down along the hem edge from your the last stitch you made on the hem.
Work back and forth, from garment to hem, hem to garment … The only other thing I would add is to anchor your stitches whenever you hit a seam allowance, just for added security.
By-the-by: This method works great for circular hems. Just gather the basting line that’s closest to the hem, pin it to the garment evenly around and go to work.
I hope this helps and isn’t more confusion!! ;-)
I love videos like this. Thank you! I agree with the comment about pink fabric and black thread for greater contrast and with the comments about left handed hints. I'd like to add that it would be helpful to make just one more stitch that isn't the start of the chain. It doesn't look like each stitch has the original two back tacks. Do we just make one back tack in the edge or do we make two, like the very first stitch?
I am also curious about the basting line at the edge of the hem. Why? What purpose does it serve? Is it a handling issue? Does it make the hem lay flatter and better in your lap while you stitch? I feel the second hem edge basting stitch is an unnecessary stitch. But obviously I'm wrong because you did it and your very experienced.
For Left handed sewers, watch the video in a mirror. It will be the reverse of the right handed sewing.