


This web extra from Kenneth D. King‘s article on hemstitching, “Drawn Threads”, in Threads #178 is a guide for how and where to apply hemstitching most successfully.
Applying a hemstitched design to a garment takes a little forethought and planning, but it’s not difficult. The easiest way to work is to create the embellishment on yardage basted to paper, and to cut the garment section afterward. Creating the embellishment first, then positioning the pattern pieces on the fabric ensures that the embellishment will be placed correctly on the finished garment.
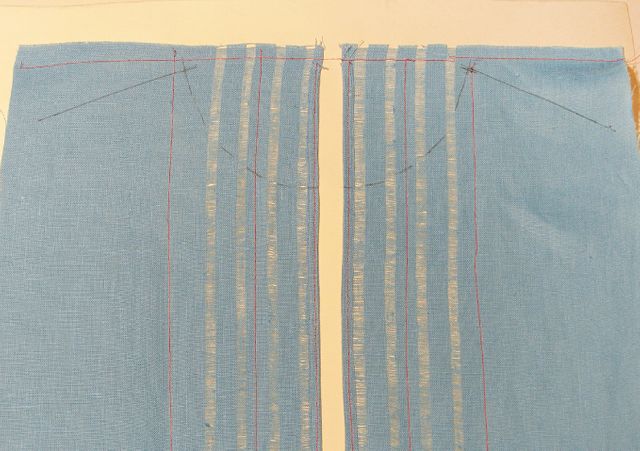
1. First, decide how many threads to remove from the fabric for the design. Then, draw the threads. To stabilize the fabric for stitching, mount it to heavy paper, such as brown kraft paper, oaktag, or manila paper. Pin the fabric to the paper, then machine baste it in place (red stitches). Always test the fabric first to ensure that the basting stitches won’t leave permanent holes in the fabric. 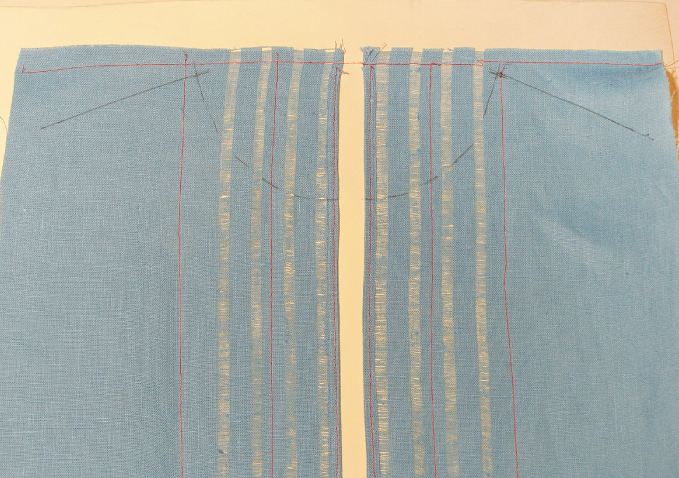 2. Mark the garment pattern’s cutting lines on the fabric for reference. This way, you’ll avoid more hand stitching than is necessary for the garment.
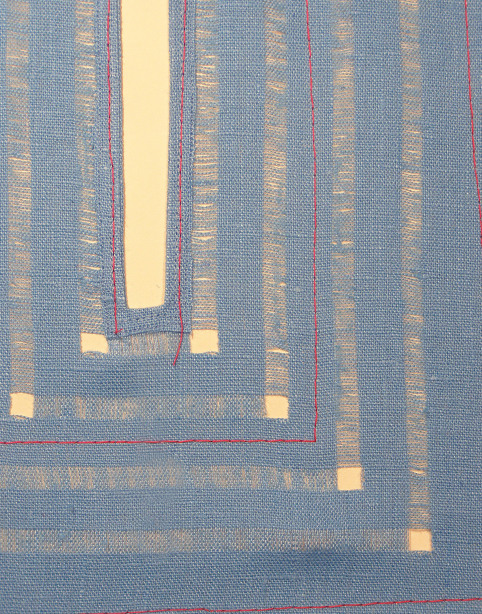
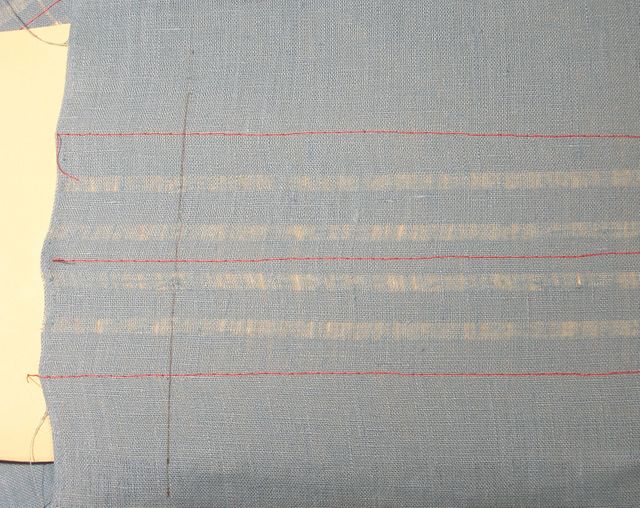
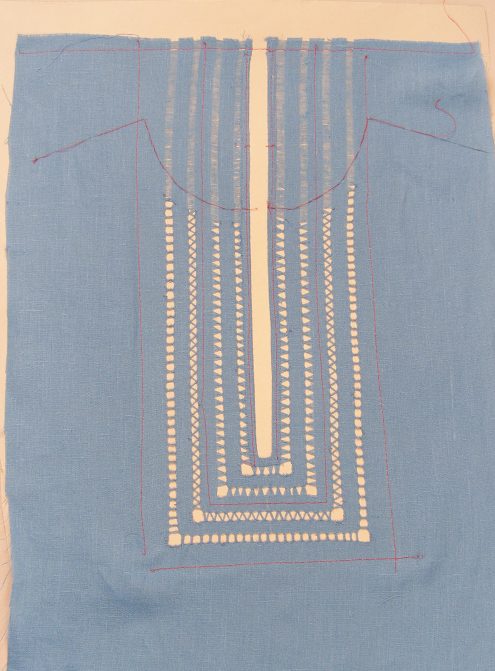 3. If the hemstitched design turns a corner, carefully cut the threads from inside the drawn thread area within the corner. The design does not need to be worked through the corner; this leaves a completely open area. Finish the raw edges of the open corner with a tiny whipstitch.
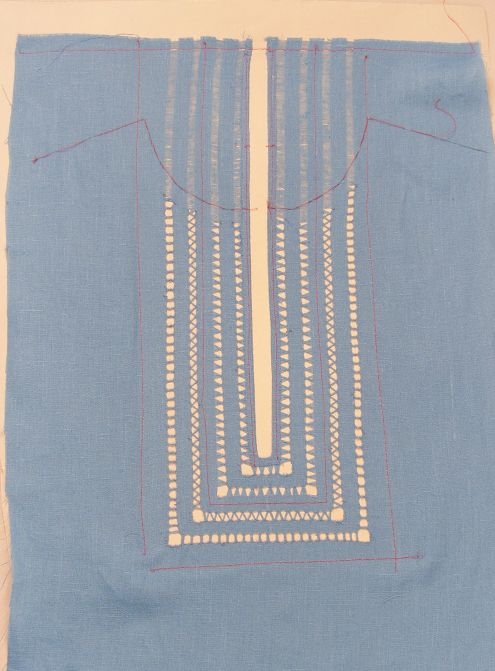
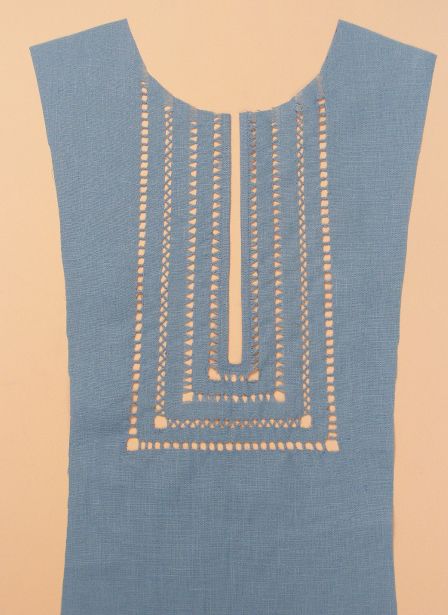
4. Work the hemstitching on all areas of the garment desired. Mounting the fabric to paper makes the process and handling the fabric much easier. Complete the hemstitching before removing the fabric from the paper.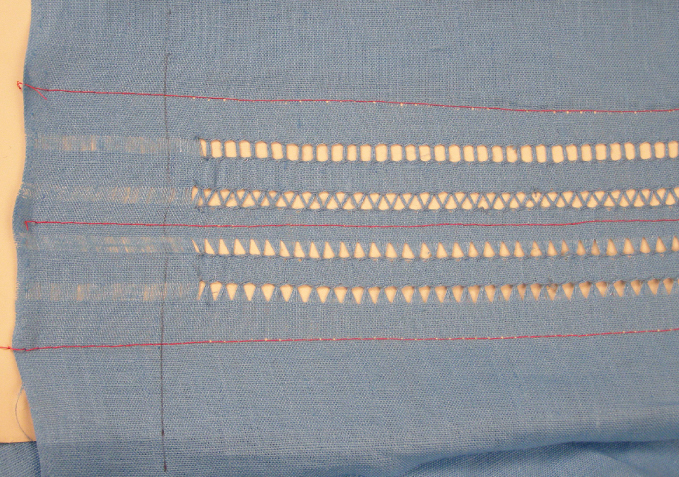 5 Remove the fabric from the paper and press it. Position the garment pattern pieces onto the hemstitched work, align it to the marked cutting lines on the work, and cut. Now you can proceed to assemble your garment as usual.
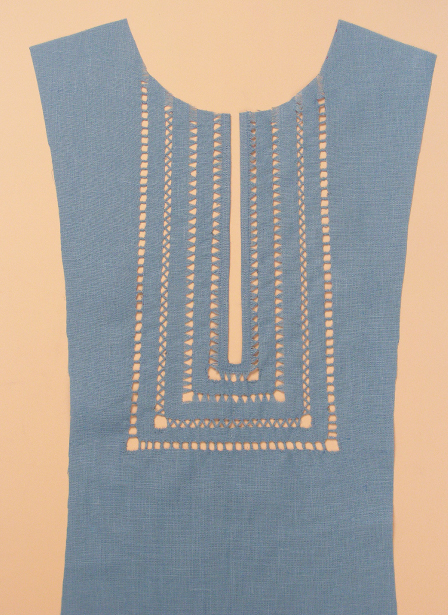
Will you try this embellishment technique?


Hey, I love hemstitching in garments! I dit a post in the summer blogging about a pair of shorts and a simple tee, with a line of hemstitching, it really made a simple outfit special.
That looks so good, I will have to give this a try
Love the embellishment and will try it for sure.
When I first glanced at it, I thought that it was copper thread embellishment. So, I am torn.... Do I draw threads or sew designs? My first guess is that with the fabric sitting close to the machine at present, it will be the thread embelishment. With the cotton batiste in the closet, it would be a great addition for heirloom designs.
I didn't know the name of the stitching. I learned to do it as a child creating a boarder on napkins. I will now try it to embellish garments. Thank you for the idea.
My mom had learned this technique when she was a child and still has the apron that she made. It is a neat technique that I will definitely think about when creating a special garment.
I'm going to receive some linen I recently ordered and look forward to trying the technique on a summer top. Tea towels would look great with that, too.
There is a mention in a 1927 sewing handbook that picot edging is simply hemstitching cut in half. How is this possible? Can Threads please post a tutorial on how to do picot edging from the 1920s? Thanks!
I've wanted to try this and the soutache for a while. Time is not my friend. As always, fascinating!