

It wasn’t until I purchased my first embroidery machine that I realized the importance of taking the time to care for my machine every time I started a new project. I worked at a sewing machine store for at least five years before I bought my first machine. I had the lucky advantage of being given store machines to take home and use as my own. This store featured a full-service repair department, and I was a regular customer. I remember bringing in “my” machine and hearing the repair guy say something like “*$@($*@#%*%!!” I developed the reputation for causing all sorts of mayhem to any machine that I came in contact with for any length of time. I would sew over pins, never change my needle, and slam the presser foot down. If I heard a noise coming from my machine, I would try to “sew through lt,” hoping it would stop all by itself. And I NEVER looked under the needle plate or in the bobbin area to see what was going on.
When I purchased my first machine, I loved it and somehow it was different because it was mine. Just from working in a sewing environment, I must have learned subconsciously how to care for embroidery machines, because all of the sudden, I knew what to do, and I did it. About that time, I was asked to write an article for Threads on how to maintain your sewing machine. I showed a draft of the article to one of the service techs, and he was shocked that I could be so thorough on the topic. Let me share some of the important points about taking care of your machine so you can have happy embroidery every time you turn it on.
Embroidery machines and sewing machines are really one and the same in most cases. There are machines that just embroider, but the majority of them have both capabilities. Because you use your machine differently when you embroider, there are some specific things you need to pay attention to.
Let’s get started by taking a general inventory of the condition of our embroidery machines. Externally, is it dirty? Are there obvious clumps of lint clinging to the needle bar? Lint can build up around the needle bar-twice as fast if you use a lot of cotton thread for embroidery. Embroidery designs can have a lot of color changes. It’s recommended that you snip the thread next to the spool and pull it out from the needle to change colors. Honestly, I don’t do that; I just whip the thread out of the machine as I pull the spool off the pin in one fell swoop. For as many times as I’ve done that (and I’ve probably changed the color of my thread during embroidery thousands of times) I can’t say that it causes a problem-UNLESS IT’S DIRTY. Lint flecks off the thread I’m using and it can build up along the thread path and down around the needle bar. I can’t see what’s going on along the thread path because it’s closed up by the outside covers of my machine, but I can see it clumping around the needle bar. As you pull thread out of the top of the machine to change color after color, all that lint can be dragged up into the machine and settle on the tension discs. If lots of lint starts to coat the tension discs, they will not be able to effectively clamp down on the thread, and your embroidery will not stitch out right.
Check out the lint all over my needle bar.

Use the small brush that comes with your machine to gently wipe the lint away.

If you have a front-loading bobbin, remove the accessory tray and take a look. More than likely, it’s a mess down there as well, especially if you haven’t cleaned it out lately. Keeping this area clean will keep your bobbin thread sensor working properly (if you have one). If you run out of bobbin thread when you’re embroidering and your bobbin sensor is not working, your machine will keep going until it jams, breaks a needle, or finishes that color. This can ruin your project, kick your machine out of timing, or just waste a lot of time.Use the small brush that comes with your machine to gently wipe the lint away.
To clean the bobbin area, take out the bobbin case and remove the needle plate.
Some machines come with a tool to remove the needle plate if it doesn’t just slide off. I lost my tool, so I use a small screwdriver to pop up the needle plate.

With the needle plate removed, you can really see what’s going on. There may be clumps of lint around and in between the feed teeth. If you have a can of compressed air and you want to blow out the dust, position the nozzle at the back edge of the opening, behind the needle bar. Shoot the air down and out toward the front of the bobbin area. I tend to stay away from using canned air because you can end up blowing stuff deeper into your machine where it will accumulate and cause problems down the road.

I like to use the small brush to clean the feed teeth and area around them.

Use the brush to clean the bobbin case area as well.

If you use a lot of spray adhesives to keep your fabric in the hoop, some of the stickiness is carried into the bobbin case area by the needle. Lint fibers that are stitched through the stabilizer can also be sticky. To remove any residue that may have collected, moisten a cotton swab and use that to rub it away.
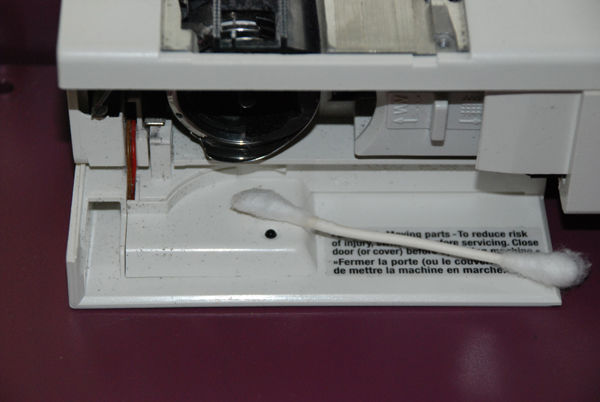
Use the cotton swab to polish any other tight area on your machine that may be dirty. I tend to collect a lot of gunk around the thread tension unit on the top of my machine.

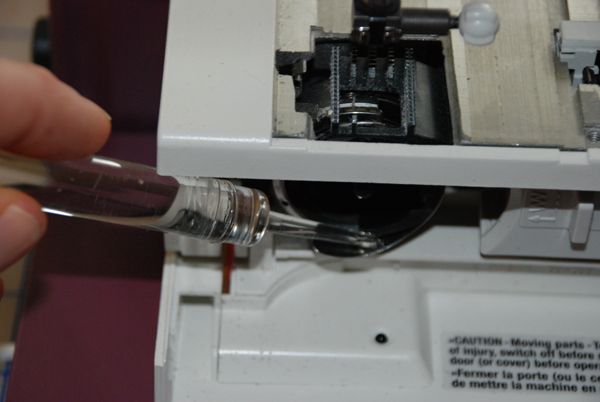
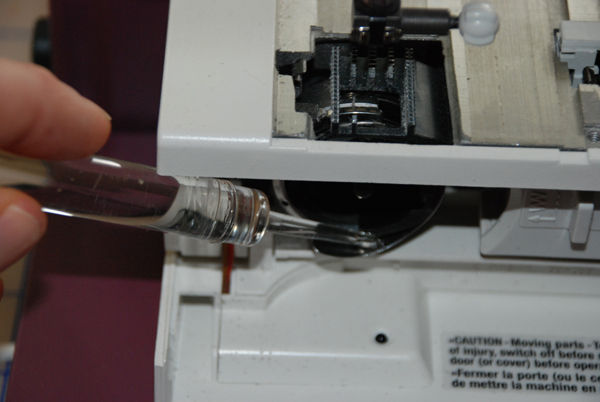
If you’ve been following along with a front-loading bobbin, the last step is to put a drop of oil on the outer edge of the metal ring that holds the bobbin case. Turn the handwheel toward you a few turns to distribute the oil evenly.
If you have a top-drop-in bobbin, this is what it looks like after you take the needle plate off.

Lift out the plastic bobbin case to reveal the space underneath. Lint and dust can accumulate here, too. If you want to use a cotton swab to clean out this area, use a tiny dot of machine oil to moisten it.

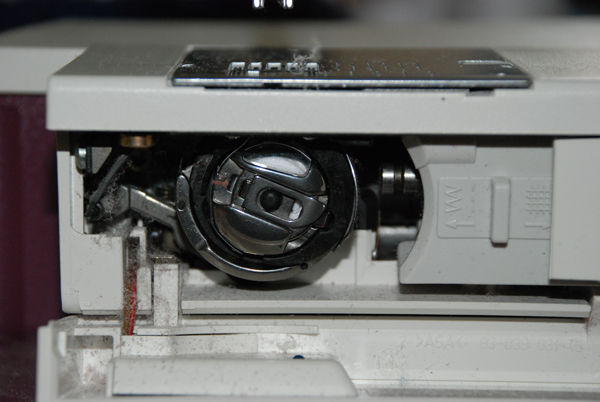
Before you put the bobbin case back, check it out carefully for burrs or holes. When your machine jams or if you break a needle, it’s a good idea to check the bobbin case. There is little space for the needle to go up and down in. If it becomes bent, it can strike the plastic and create a burr or hole.
This is the leading cause of thread breakage or fraying that occurs while embroidering. As the needle goes up and down, the thread rubs against these burrs and weakens or breaks the thread. The best way to avoid these problems is to use the appropriate needle for your project and to change your needle frequently.

The same thing can happen to your needle plate. Inspect it for dings and burrs as well. Most can be buffed out with fine-grit sandpaper. In either case, if the damage is too much to buff, visit your local sewing machine dealer and purchase a new bobbin case or needle plate.


Can’t see any tips.
where are tips
My embroidery blog https://looksfishy.com/best-embroidery-machines/