

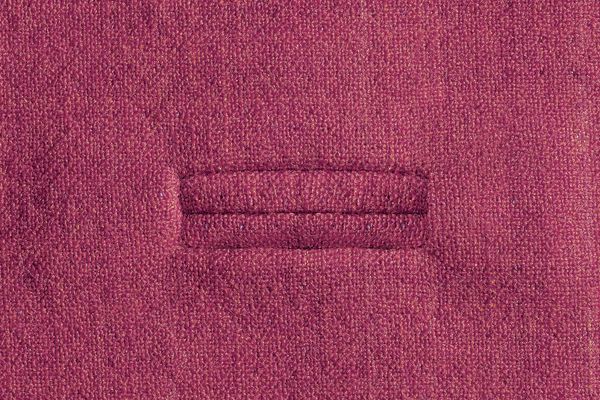
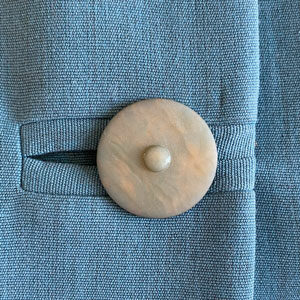
Claire Shaeffer shares her favorite bound buttonhole method for stable fabrics once taught to her by a tailor. It’s perfect for wool materials, fabrics that are firmly woven, and fabrics that don’t ravel much. Made by stitching two strips or welts to the long sides of the buttonhole, it’s really a piped buttonhole. The strips can be cut on the lengthwise grain, cross-grain, or the bias.
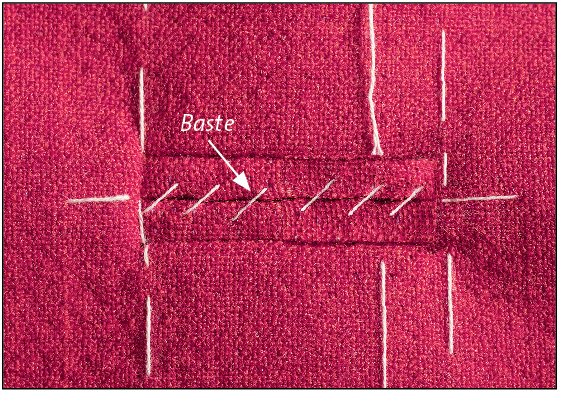
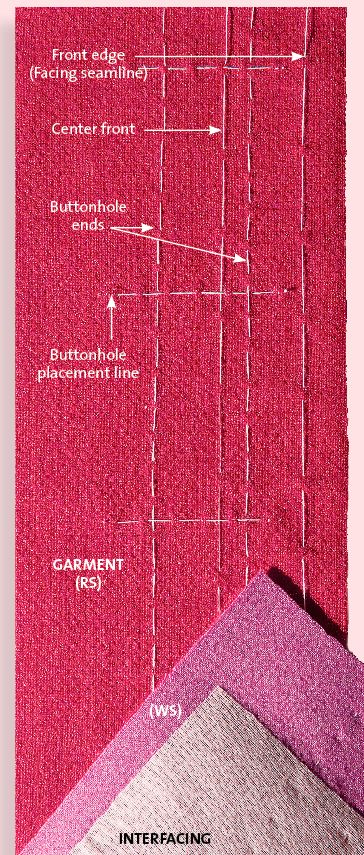
Mark the garment with basting, as shown below, in preparation for buttonhole application.

1. Make the welts for the buttonhole. Begin with a fabric scrap long enough to make multiple welts, and folded on the desired grain. Don’t try to work with a narrow strip. You’ll burn your fingers, and the folded edge of your strip will have undulations. Press the fold. Machine-stitch through both layers 1⁄8 inch from the fold. Then trim 1⁄8 inch away from the stitching on the unfolded edges so the stitched line is centered on the strip. Cut each welt 1 inch longer than the finished buttonhole.

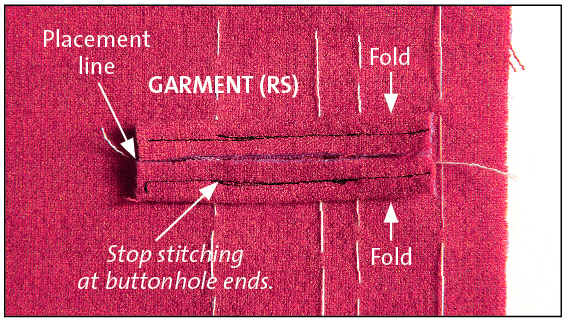
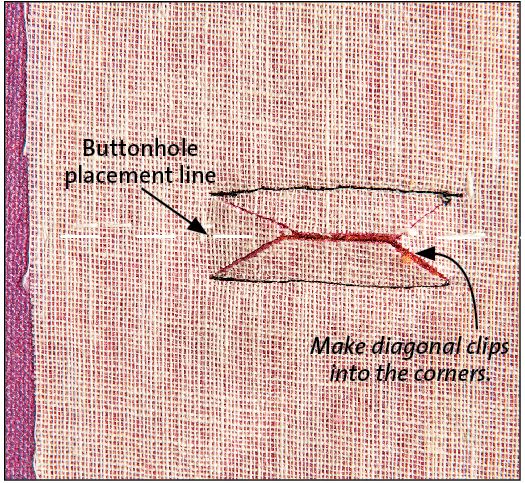
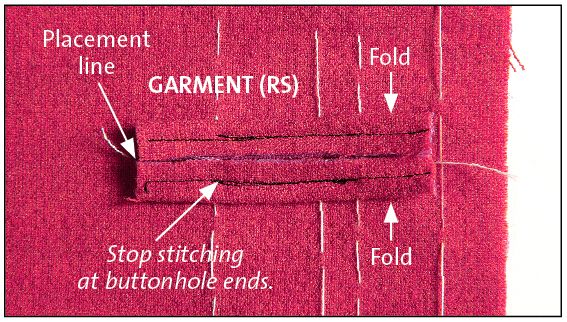
2. Align the raw edges of one welt with the buttonhole placement line; baste. Repeat with the other welt, abutting the cut edges. With a 1.5-mm-long machine stitch, sew over the previously basted line, starting and stopping at the buttonhole ends. Fasten the stitches securely at the beginning and end with hand-tied knots on the interfaced side.
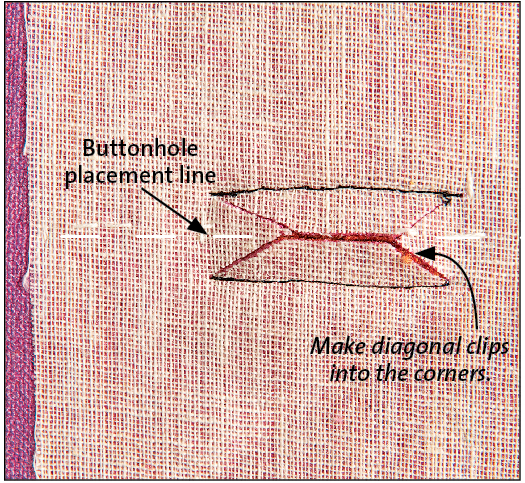
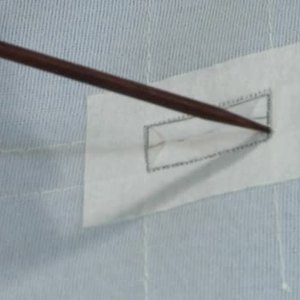
3. Open the buttonhole. On the wrong side, cut between the welt stitching lines and into the corners.
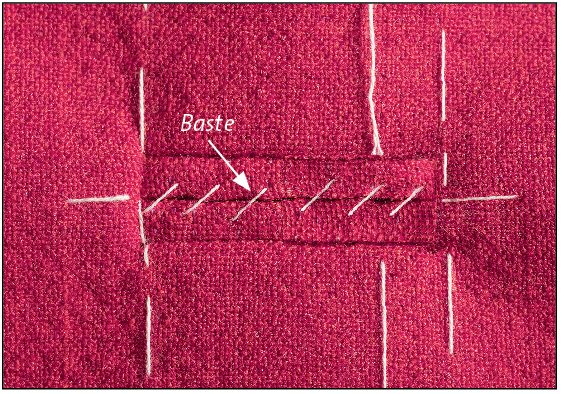
4. Turn the welts’ cut edges to the wrong side through the cut opening. With the right side up, adjust the welts so they meet at the center along the buttonhole placement line; pin. Using small diagonal stitches, baste the welts together.
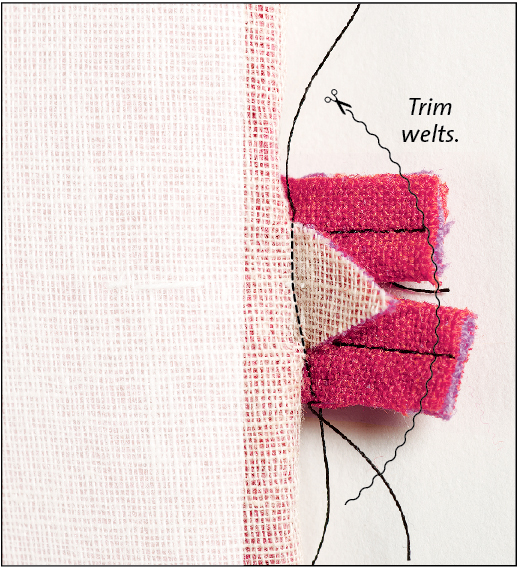
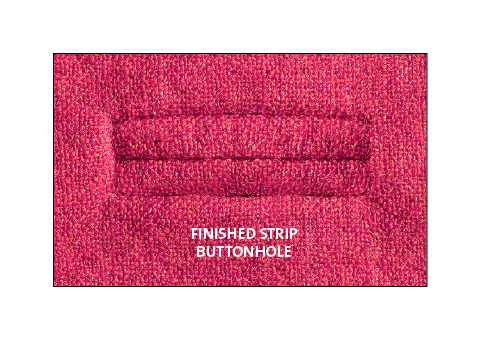
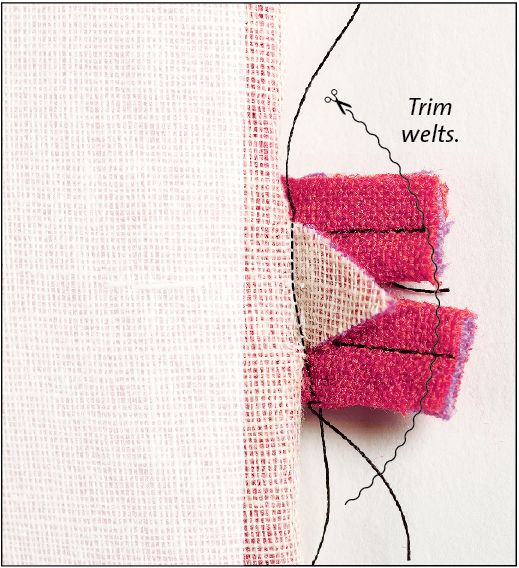
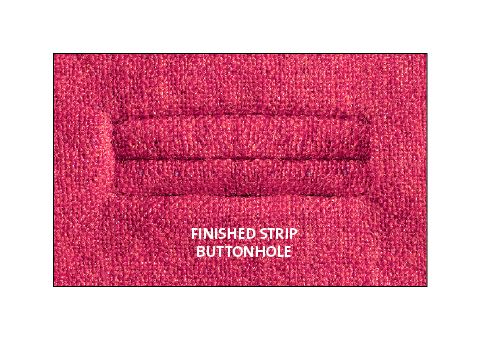
5. Fold the garment edge back. Stitch across the triangle. Trim the ends of the welts, and round the corners to reduce bulk. Then press the buttonhole face down on a soft surface. Finish the buttonhole. For a finishing technique, see the article “Bound for Beauty” in Threads #160.


LOVE bound buttonholes!
MANY years ago (about 50?)I had the instructions for making bound buttonholes in the shape of a little sailboat! Too much fun! Edith in Dallas TEXAS
I love Claire's instructions; they are always so clear!
It is lovely. Great instructions. What about the wrong side of the garment? Elena
Related to elenaevent's question, do you do the bound buttonhole before or after you attach the facing? And yes, how do you get it so that the buttonhole looks all right when the jacket is open and the facing is showing? An eighth of an inch seems awfully tiny to try to maneuver and turn under on the facing side so it won't fray.
Elena and Aliensnextdoor,
One way to finish the inside is to create a window in the jacket facing. Locate the placement of the "window" by pushing pins through the coat fabric through to the facing at each corner of the finished buttonhole. Cut a piece of lining fabric about three times as long as the buttonhole and about four times the height of the buttonhole. You will sew this little rectangle of fabric to the jacket facing (right sides facing). The stitching will be a rectangle exactly the same size as the bound buttonhole. Cut a center slit and angles to the corners as above in #3 and turn this little facing all the way through so that there is a window in the fabric that lines up with the back of the bound buttonhole.
Then you blind hem the window to the edge of the wrong side of the bound buttonhole and all is hidden and perfectly beautiful. The inside will look just like the outside since you will only see the buttonhole welts from either way you look at it.
Diane
As eatsallinsects commented, I too was taught that the shape that the 'lips' of the bounding can take any shape at all, from these straight strips through sail boats, crescents, cat faces and anything you can imagine.
The principle remains the same.
As to finishing the inside, elenaevent, I was taught to line the garments, with a hand-stitched cut-away very neatly fitting closely around the buttonhole.
They're very elegant and people never fail to comment on these OOAK buttonholes!
Thank you, Yarngoddess! Your instructions are perfect.
Edith in Texas...eatsallinsects...can you share or direct me to directions for a bound bottonhole in the shape of sailboat. That does sound like too much fun....gfa in Rancho Cordova.
Oh, my goodness, this makes me even more excited about the copy of Couture Sewing I just ordered! Thank you for your well-written instructions!
In response to aliensnextdoor's question about the narrow width of the buttonhole and making the inside look neat, there is a way, you use a square of silk organza to make a 'window' on the facing. Baste mark the buttonhole placement on the facing, centre a square of organza over the basting and stitch a copy of the buttonhole opening, turn over to the wrong side of the fabric, and slit the opening as you did for the buttonhole,cutting through the facing and organza, and pull the organza to the back of the facing fabric.
Press the opening to the exact shape of the buttonhole, now just slipstitch the facing and it's 'window' to the back of the buttonhole welts.
This technique was also in a previous issue of Threads, although I misremember which one!!!
To: 956070--
I just now saw your request for instructions on making a sailboat bound buttonhole which I mentioned previously.
Maybe I can find the instructions but as I said, it has been at least 50 years since I made them. Will try to remember to post if and when I do find the info. Edith in Dallas TEXAS
Sailboat bound buttonhole.
http://villagedressmaker.blogspot.com/2012/12/kooky-bound-buttonhole.html
Perfect instructions, it helped me alot trough the all process :D
Thanks Claire
Julia
Thanks you for this post ! Claire is clear ;-)
I absolutely love these little tutorials... in the past I have looked for bound buttonholes without much success and now voila! I've found it.
I would also love to see a little tutorial about hand stitching the interfacing in a lapel for tailoring.
I learned these skills in highschool sewing classes but unfortunately, I have forgotten a lot.
Thanks!!