
Here’s a fun little piece that you can whip up to wear for a special occasion.
It’s inspired by the fascinators I’ve been seeing around, but I used an elastic hair band instead of a hair comb to ensure that the flowers would stay in place.
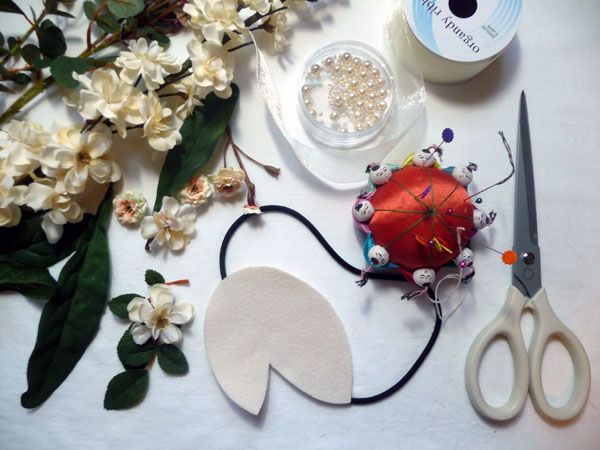
What You’ll Need:
- 2 different types of small silk flowers (Look for those sold in bushels at the craft store instead of the ones in the wedding aisle, which often are overpriced and look kind of cheap. You’ll have much more selection in the stems/bushel section). You want to get something that has nice looking leaves, and sometimes the nice flowers and leaves aren’t on the same stem– so keep in mind that you may have to buy flowers you won’t use in order to pilfer the leaves.
- 1 yard of sheer organdy ribbon- width is up to you (mine was 1 1/2″ wide)
- Elastic hairband in a color thats close to your hair color
- Small piece of wool felt
- scissors
- needle and thread
- glass pearls (optional)
 |
Begin by gathering all of your materials. You can also feel free to add other embellishments, like rhinestones or beads, depending on the style of your dress and ceremony. |
Now it’s time to deconstruct the flowers. Pull each flower off of it’s stem, keeping petals intact. Remove the green cup of leaves on the bottom of the flower.
 |
You might also remove the center of the flower (depending on your look) but wait to perform this step individually as you sew the flowers in place, as the plastic will hold the layers together. |
If you run out of smaller flowers, remember that you can also take off some of the bottom layers of larger flowers in your bushel. Once you’re finished gathering your flowers, pull out several leaves and clip them from their stems to separate them.
Cut a piece of wool felt in the desired shape for your fascinator.
 |
Take a length of ribbon and fold it in a zig zag 3 or 4 times. Hold it to the edge of the felt and sew the inside edges in place. You might want to pin the ribbon down if you’d like it to be just right, but you can also eyeball it. |
Note-you might want to cut 2 same shape pieces from the wool felt at this point, in case you’d like to use one for the backing. (This is something I thought of after I had made the project!)
Begin sewing flowers and leaves to the piece. Since the flower centers on my large flowers weren’t very pretty, I replaced them with glass pearls. With your needle, come up through the center of the petal layers, through the pearl, and back down through the center. Do this twice to really secure the pearl and flower.
 |
If you’re including the plastic flower center, just sew through the center of it the same way you would with the pearl. |
For extra security, you can knot the thread on the back side of the piece between each flower. This way if one of them comes loose for some reason, you won’t lose them all.
Continue sewing ribbons, flowers and leaves onto your piece of felt until you are satisfied with the look.
Next you’ll need to sew the hairband in place. Sandwich the hairband between the wrong side of the floral piece and another piece of wool felt.
 |
For maximum neatness, you could cut the backing piece to the same size as the flower piece, but I just used an oval shape for mine. |
Sew all around the felt piece, being careful not to catch any of the flowers or embellishments with your thread. When you get to the headband, sew through it as well to keep it in place.
 |
Here’s what the head piece looks like on. If you like, you could easily add a pouf of tulle or netting under the felt as a nod to the traditional veil. |


it's a pity you can't see the pictures. We've no idea what this is supposed to look like
Where is a photo of this?