
How to Turn Mending into Embellishment on Lightweight Fabrics
Mending with embroidery is an opportunity to enhance.
Instead of laboring to make mending less visible on garments made of sheer fabrics, make it an opportunity to enhance them with hand or machine embroidery.
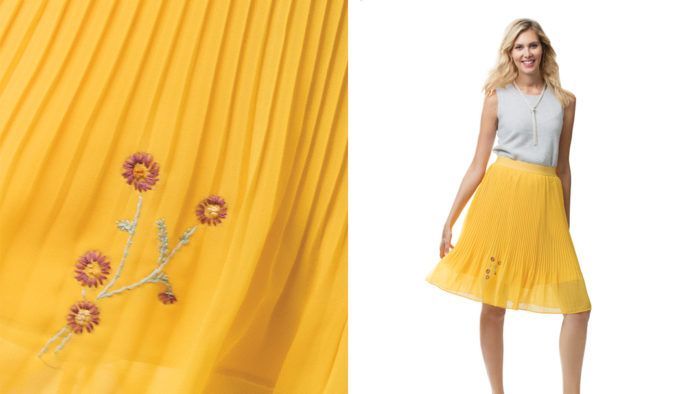
The chiffon skirt shown was torn in three places. A patch would never be satisfactorily imperceptible on the sheer fabric. Now, embroidered stitching flaunts the repair.
Consider this alternative to simple mending on many lightweight, translucent fabrics such as chiffon, georgette, organza, and delicate knits. Follow this method to make embroidery fixes that suit the fabric’s texture and care requirements and the garment’s style. Easily adapt the technique to other fabrics, too. Lightweight fabric demands sparser stitching, while heavy fabric can support a denser design.
Repair the cloth
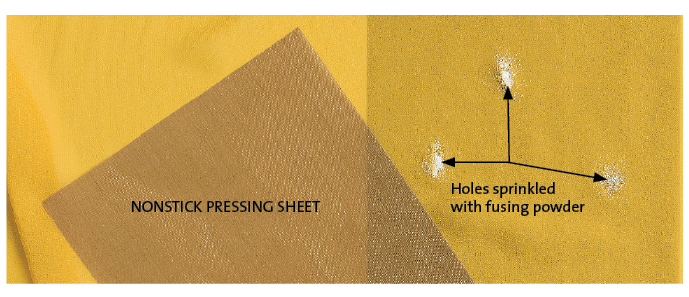
First, seal tears with Bo-Nash Fuse-It Powder (BoNashStore.com). Follow the manufacturer’s instructions, and use the included nonstick pressing sheets to protect your iron and ironing surface. You’ll use a wash-away stabilizer to support the fabric while adding an embroidered motif that works with the look of the garment, as well as your style.
Mend and adorn
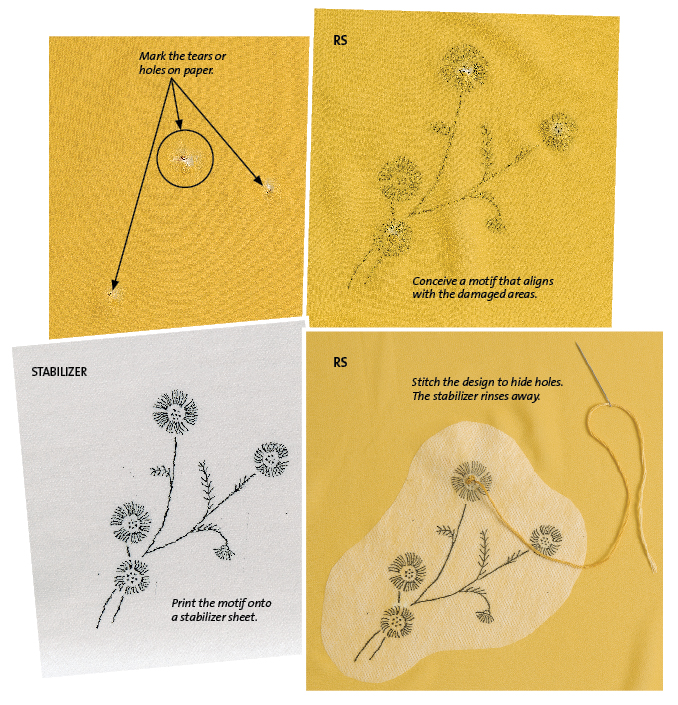
Slide a sheet of paper beneath the fabric, and mark the paper through each tear. Sketch or trace a design, “connecting the dots” into a motif that flows to and over the mending spots.
Next, photocopy and print, or trace, the motif onto a sheet of printable, self-adhesive, water-soluble stabilizer, such as Sulky Stick ’n Stitch (Amazon.com). Be sure to mark the stabilizer, not its removable backing.
Trim the stabilizer, then remove its backing. Apply the stabilizer to the fabric’s right side. Carefully align your embroidery design to the flaws in the fabric. Hand-embroider the motif to finish the repair, then rinse out the stabilizer.
For superior results when embellishing with machine embroidery, Threads Insider members may enjoy reading: Professional Tips for Embellishing Knits With Machine Embroidery.


Great idea. I have used the same technique to camouflage a stain. My black pencil skirt, my go-to staple of my business wardrobe, had a chalk-like stain in the front that was set to stay. I embroidered it with a simple flower motif in black. The embroidery looks like a design element and covers the stain.
wow ! Very nice article!
Been there, done that! I need to wear an apron 24/7...LOL.
Such a great idea! Could've saved many garments this way. Easy to follow tutorial! Would love to see how people have mended their own clothes!