

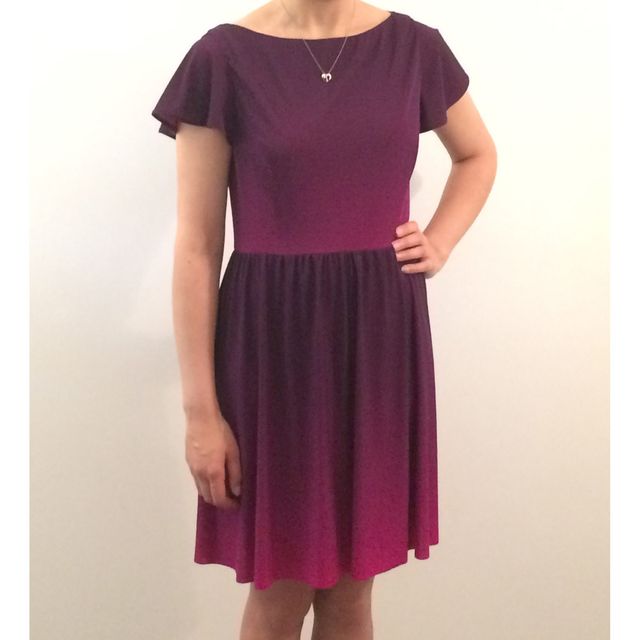
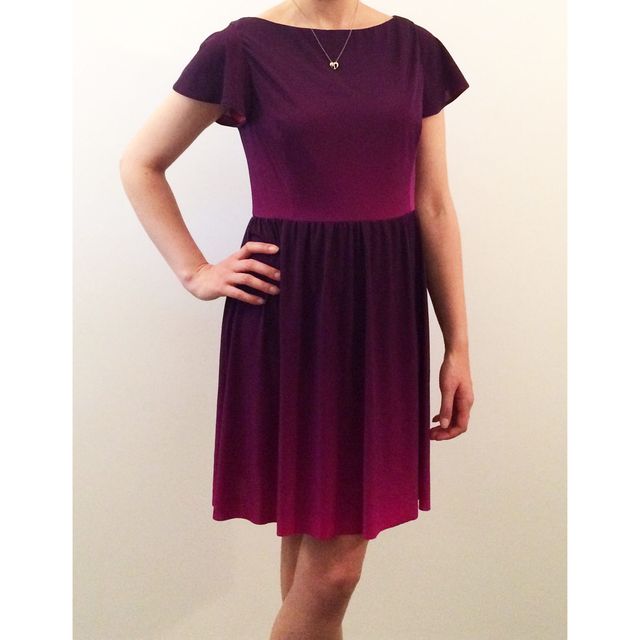
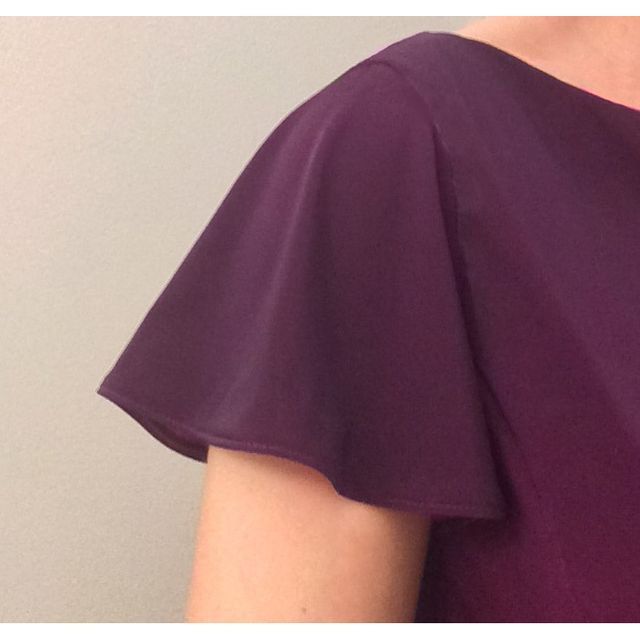
Add Flutter Sleeves for a Refreshing New Look
Give your sleeves body and flare with this simple pattern adaptation

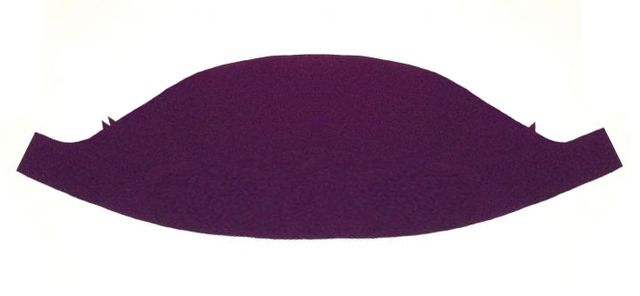
Instead of sewing another garment with run-of-the-mill sleeves, consider customizing the design into something fabulous. A flutter sleeve is a short, loose-fitting sleeve that falls in soft folds over the upper arm.
Flutter sleeves provide extra sleeve ease for people who may have a larger upper-arm circumference or for those who prefer additional arm mobility in their clothing.
Follow along as I explain how to transform a basic sleeve into a flutter sleeve pattern and demonstrate how to sew a baby, or narrow, hem that will give the sleeves a fluid drape.

Adjust the flutter sleeve pattern
Before getting started, be sure to select a pattern that includes a basic short-sleeve design. Find a lightweight, drapey fabric that falls in soft, natural folds.
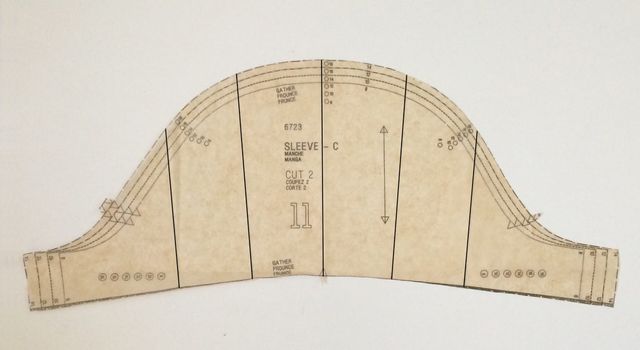
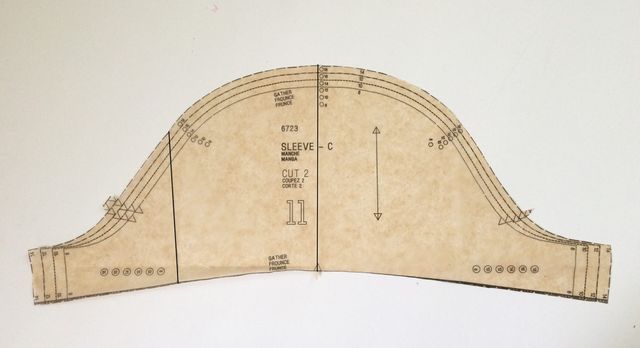
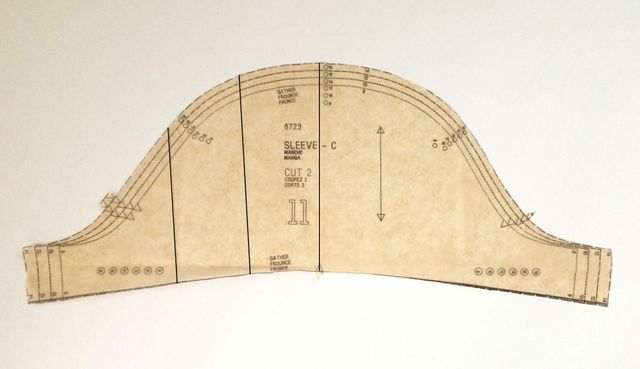
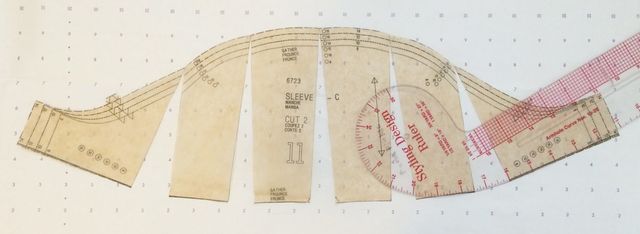
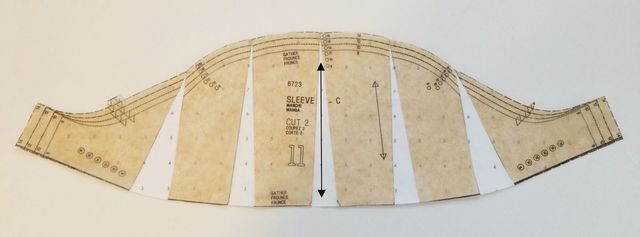
1. Prepare the piece. Cut the sleeve pattern according to your size. Measure the piece to find the center. Draw a center line and another line halfway between the underarm seam and the center line on the sleeve back.

Draw a quarter line and a half line vertically down the sleeve piece.
2. Draw a third slash line. Find the midpoint between the first two lines, and draw a third line in the same manner.

Draw a third line halfway between the first two lines.
3. Repeat on the sleeve front. Draw a quarter line on the sleeve front. Then find the midpoint between this line and the center line and draw a final line at this location.

These five lines indicate where to cut into the pattern.
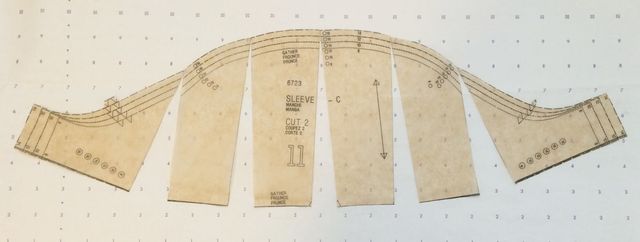
4. Slice the pattern. Cut along each of the slash lines to, but not through, the sleeve-cap edge. Spread the slices to a desired width—anywhere from 1 inch to 1 1/2 inches works well. Note that you haven’t changed the sleeve-cap seam length, so the sleeve will fit into its original armhole.

Slash and spread the pattern piece.
5. Secure the pattern. Place a piece of pattern paper beneath the sleeve pattern. Tape the pattern along the edges and between the slashes, since you will be cutting along the edges in step 7.

In this example, each section was spread between 1 inch and 1 1/2 inches to create the desired volume.
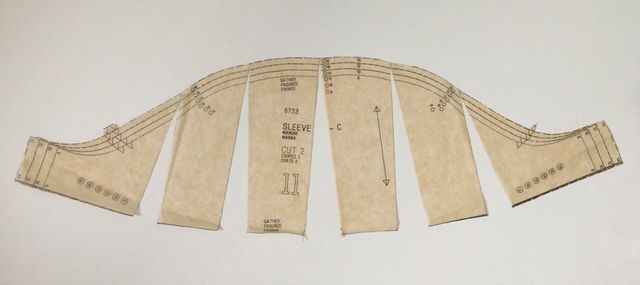
6. Complete the curve. Use a curved ruler as a guide to draw in the pattern’s missing lower edge.

Use a curved ruler to complete the pattern piece.
7. Finish the pattern. Draw a new grainline down the sleeve’s center. Cut the pattern piece.

Draw the grainline perpendicular to the sleeve’s hem at the center.
Sew a baby hem on the flutter sleeve
Now that the flutter sleeve pattern is complete, it’s time to prepare the sleeve. Note that if you want the sleeve to have a light and fluid drape, it’s important to choose an appropriate hemming technique. I suggest sewing a baby hem before attaching the sleeves to the garment.
1. Prepare the fabric. Cut the newly adjusted sleeve piece from fabric. Make any necessary markings, ease-stitch along the top edge between the notches, and sew the underarm seams. (For clarity in the photos, we didn’t sew the underarm seams in these samples.)

Cut the flutter sleeve pattern. Be sure to cut the notches and transfer any markings.
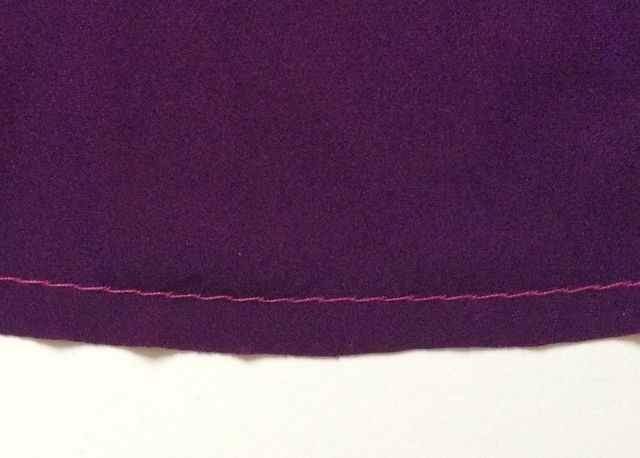
2. Stitch along the edge. Sew a basting stitch 1/4 inch from the lower edge. This makes it easier to turn the fabric under in step 3.

This stitch is used as a hemming guide, so it must maintain an even distance from the edge.
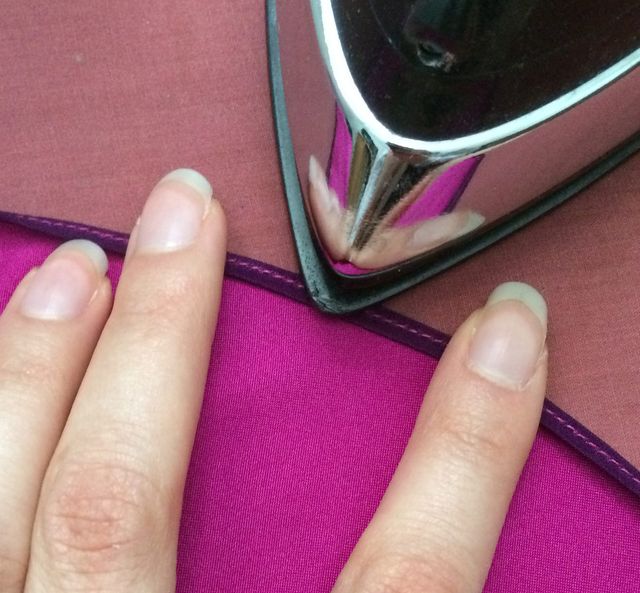
3. Fold and press. Turn the lower edge to the fabric’s wrong side, using the basting stitch as a guide. Press this edge in place.

Fold and press the sleeve along the lower edge.
4. Sew the hem. Stitch the fold in place 1/8 inch from the edge. Then, trim the seam allowance as close to the 1/8 inch stitching line as possible.

Trim close to the stitching line to reduce bulk.
5. Press along the edge. Roll the tiny edge to the fabric’s wrong side. Press in place once more.

Try to turn as little material as possible to the fabric’s wrong side.
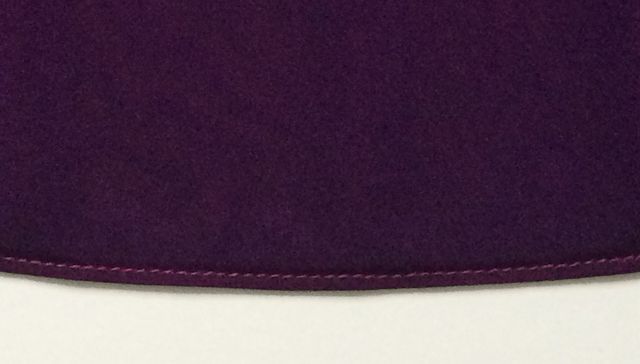
6. Finish the hem. With the fabric right side up, stitch 1/8 inch from the edge to complete the baby hem. Finally, sew the sleeves to the garment’s bodice, as described in the pattern instructions.

Give the hem a final press for a smooth finish.
If you prefer, follow instructions to hem the sleeve with a special narrow-hem presser foot.
Alternatively, you can hem the sleeve quickly with a serged rolled hem. Specific settings produce the best results.


Would this work for a sundress with spaghetti straps.? If so, how would I go about it? Would I have to change the straps to a wider strap first?
That’s a great question. It would certainly be more complicated, but I suppose it is doable. First, the straps would need to be wide enough to at least accommodate the sleeve’s seam allowance, as you mentioned. Begin by making this adjustment. Then you would need to make a sleeve pattern that fits the armhole. In order to do this, either carefully measure the pattern or make a muslin version to determine the measurements needed to draft a sleeve. Once you've made the sleeve pattern, you will need to sew the straps in a way that enables you to stitch the sleeves to them. (Often spaghetti straps are made by sewing down one side of a folded strip and then turning it right-side out. That would not work in this scenario.) Instead, I suggest folding the strap in half, lengthwise, with wrong sides together, and basting along the raw edges, using the pattern's suggested seam allowance. Next, with right sides together, sew the strap ends to the bodice front and back edges, being sure to align the strap's raw edges with the bodice's underarm section. Press the front and back bodice edges and all seam allowances away from the straps to create a fold along the top bodice's seam allowances. Finish the front and back bodice seam allowances as desired. (Note that original bindings, facings, and linings will no longer be able to accommodate the sleeves and modified straps.) Finally, stitch the sleeves in place.