
Glam Wristlet
Make a zippered minibag with interior pockets to carry the essentials.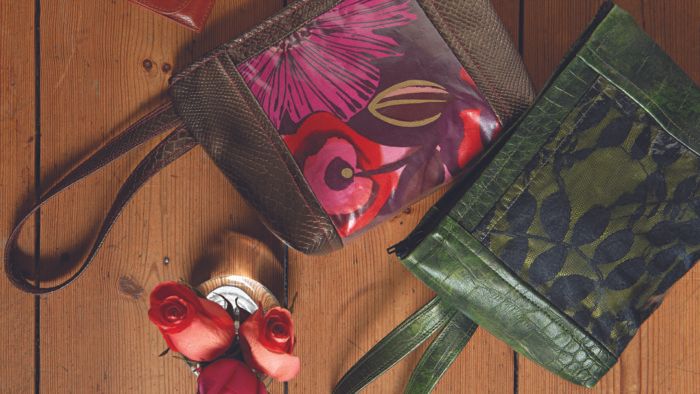
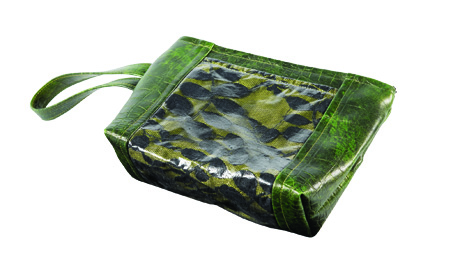
This minibag is not only a fabulous way to carry just what you need. It’s also an exciting project to use up special fabric remnants. At 9 inches long, 6 inches high, and 3 inches deep at the bottom, the wristlet features simple, sturdy construction. It has a wrist strap sewn into a side seam, four interior pockets, and a zipper closure.
The center panel, framed by faux leather, is the place to feature a lovely remnant, such as lace, fancy brocade, a sequined novelty textile, or anything you choose. If your fancy fabric can withstand the iron, we’ll show you how to protect its surface with iron-on clear vinyl. This is your chance to combine faux leather with fabrics you didn’t think it would work with. The glamorous results could surprise you.
Supplies
•
1/3 yard 55-inch or 60-inch-wide faux leather for the
side panels, trim, and wrist strap
• 1/2 yard cotton fabric for the lining and pockets
•
1/3 yard silk dupioni for the center panel and pockets binding
• 1/2 yard muslin for interlining
•
10-inch plastic- or metal-toothed zipper (Wawak.com)
• Topstitching thread, 12-weight (RedRockThreads.com)
Optional:
• 3/4 yard lace yardage for center panel overlay
•
3/4 yard clear iron-on vinyl to laminate center panel
(CreateForLess.com)
Prepare the bag exterior
Follow the pattern in the PDF below to cut the pieces. The wristlet is made without a bottom seam. The exterior folds to wrap from one top edge to the other. Seam allowances are 1/2 inch wide unless noted otherwise.
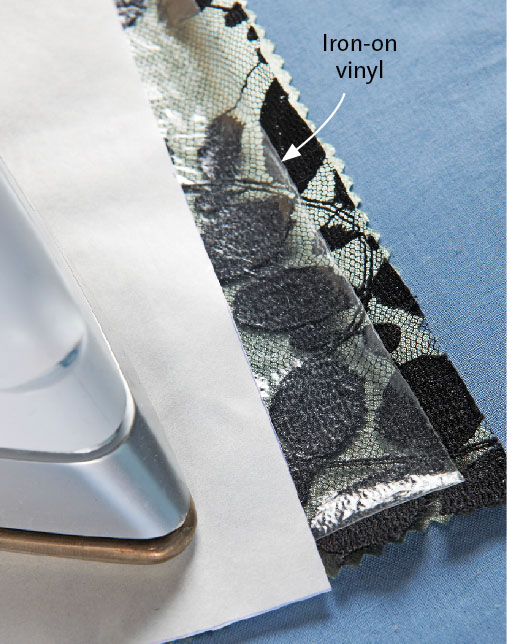
1. Stack the center panel pieces. With right sides up, place the muslin, then silk, then the lace. Align the edges. Make sure that the lace is free of lint or threads before applying the iron-on vinyl.
2. Peel off the iron-on vinyl’s backing and set the backing aside. Center the vinyl over the panel. Follow the instructions to bond the vinyl. Once the vinyl is bonded to the panel surface, pin the panel layers together within the seam allowance.
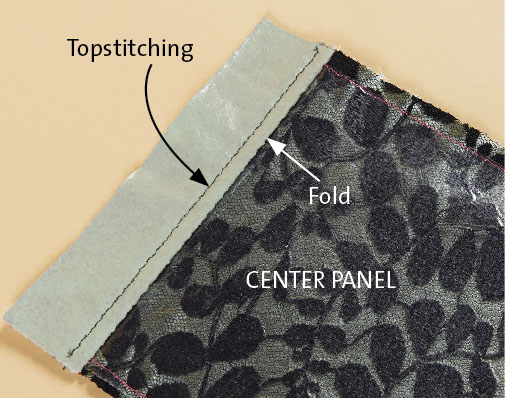
3. Finish the center panel’s short ends. With right sides together, align a panel trim piece’s long edge to a center panel short edge. Sew with a 1/2-inch-wide seam allowance. Repeat at the center panel’s other short end with the other trim piece.
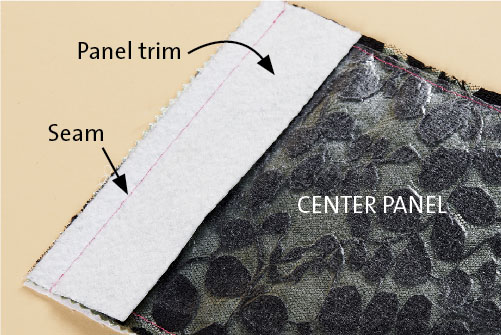
4. Fold the panel trim along the seams. Topstitch through the center panel and the seam allowances 1⁄4 inch from each seam.
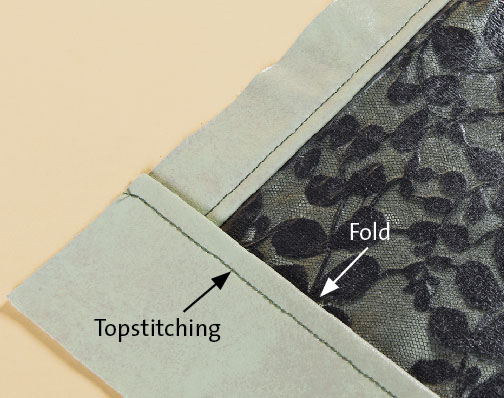
5. Connect a side panel to the center panel. With right sides together, align the long edges. Sew with a 1/2-inch-wide seam allowance. Fold the side panel along the seam and topstitch.
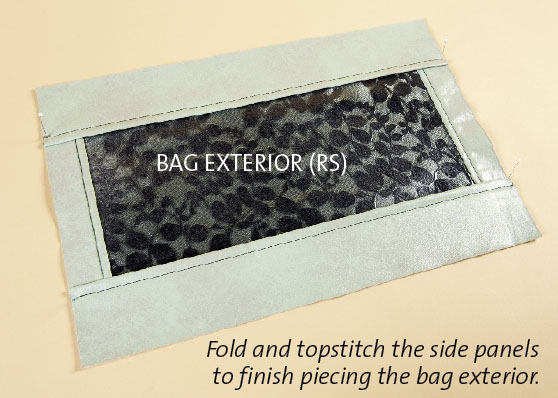
6. Complete the bag exterior. Sew, fold, and topstitch the other side panel along the opposite center panel’s edge. The pieced rectangle forms the wristlet.
Sew the strap
The flat wrist strap is folded and stitched for three layers of faux leather and four rows of topstitching.
Always stitch with the same side uppermost and in the same direction to achieve even, designer-look topstitching.
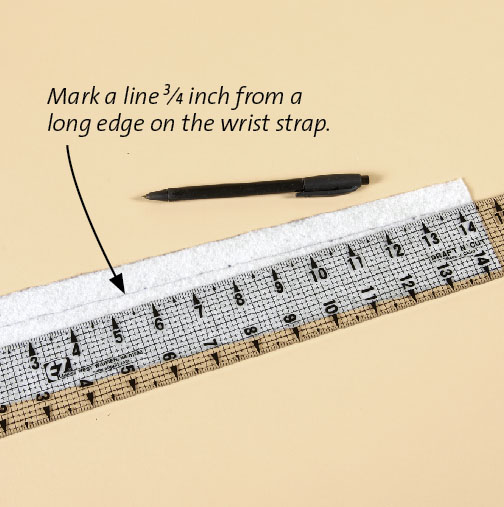
1. Draw a line 3/4 inch from a long edge. Use a ballpoint pen on the wrist strap piece’s wrong side.
2. Fold in the long edge farther from the line to the wrong side. Align the edge to the mark. Clip the fold in place. Stitch 1/16 inch from the fold.
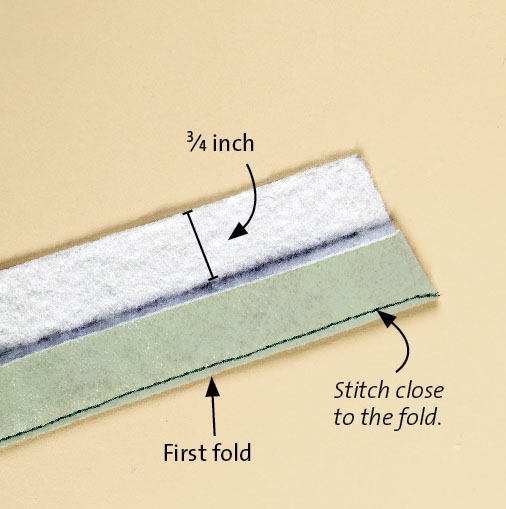
3. Fold in the wrist strap’s other long edge. Align it to the first stitching line. The strap is now three layers, with a fold along each long edge. Sew 1⁄16 inch from the first stitching line, through all layers and very close to the raw edge.
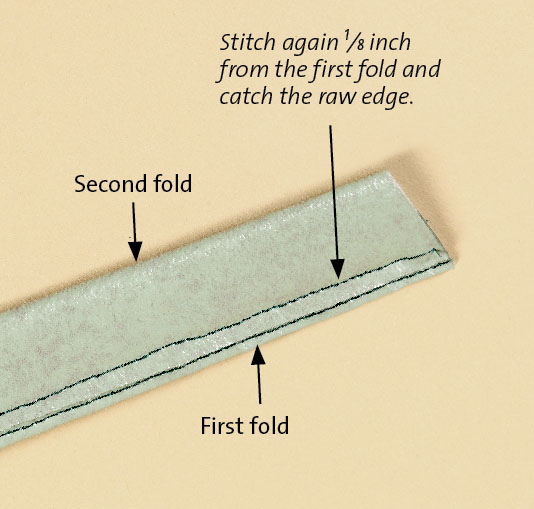
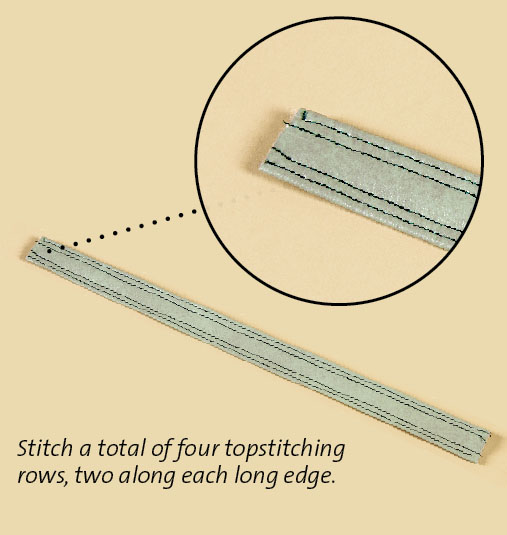
4. Topstitch twice more. Along the opposite folded edge, stitch 1/16 inch and 1/8 inch from the fold. The wrist strap should have four stitching rows, paired along each long wrist strap edge.
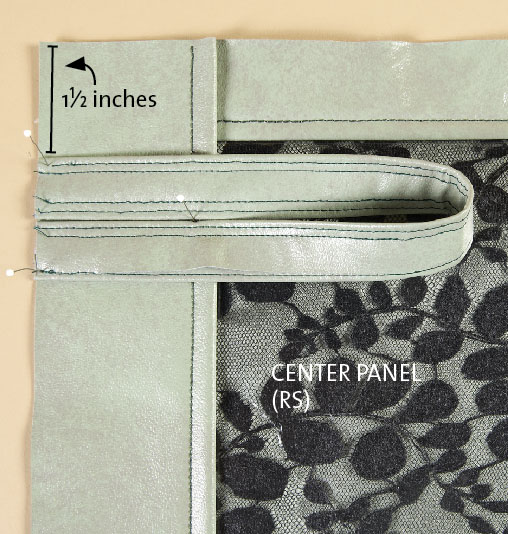
5. Align both wrist strap ends with the long edge. On the side panel’s right side, place the wrist strap so its folded edges abut, not overlap. Place the uppermost strap edge 1 1/2 inches from the bag’s top edge. Baste the wrist strap ends to the panel within the seam allowance.
Tip: Check Your tension
When using heavy topstitching thread, you may need to tighten the sewing machine tension to get a consistent stitch on the work’s right and wrong sides. Test stitches on remnants. Stitch length should be from 3.5 mm to 5.0 mm, to avoid weakening the faux leather.
Insert the zipper
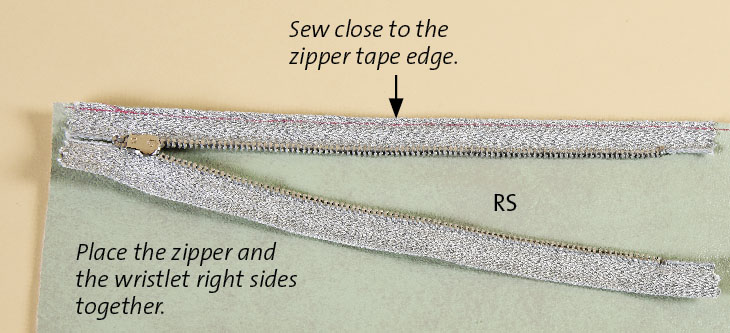
The zipper is attached before the wristlet’s side seams are sewn. The fabric is not sewn close to the zipper, to keep the fabric from getting caught in the zipper teeth.
1. Align the zipper tape edge to one of the wristlet’s top edges. Orient the zipper so the slider is at the wrist-strap end of the wristlet when it’s closed. With right sides together and the zipper tape on top, sew with a regular presser foot, 3/8 inch from the zipper teeth.
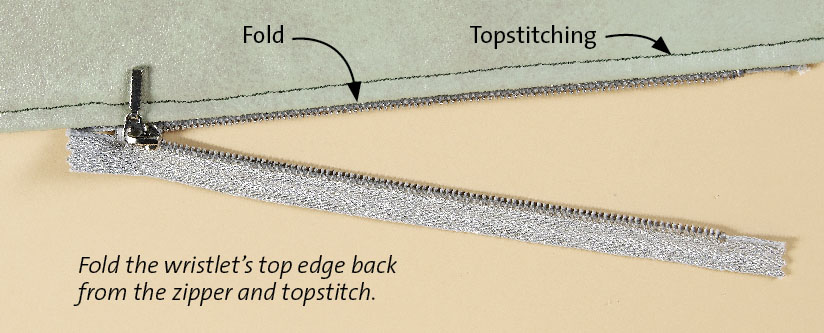
2. Fold back the wristlet’s top edge to align with the zipper teeth. Topstitch through all layers 3/8 inch from the zipper teeth. Repeat steps 1 and 2 with the other zipper side and wristlet top edge.
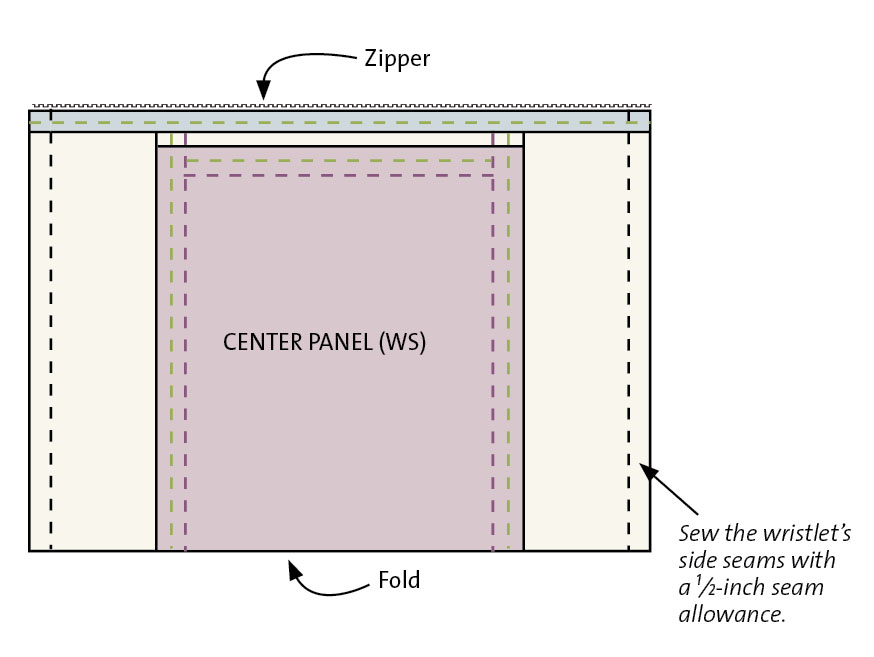
3. Fold the wristlet right sides together. Align the panel seams and the edges. Clip or pin within the seam allowance. Open the zipper. Sew the side seams with a 1/2-inch-wide seam allowance. Sew through the zipper tape ends on the closed zipper end, and up to the zipper teeth on the open zipper end.
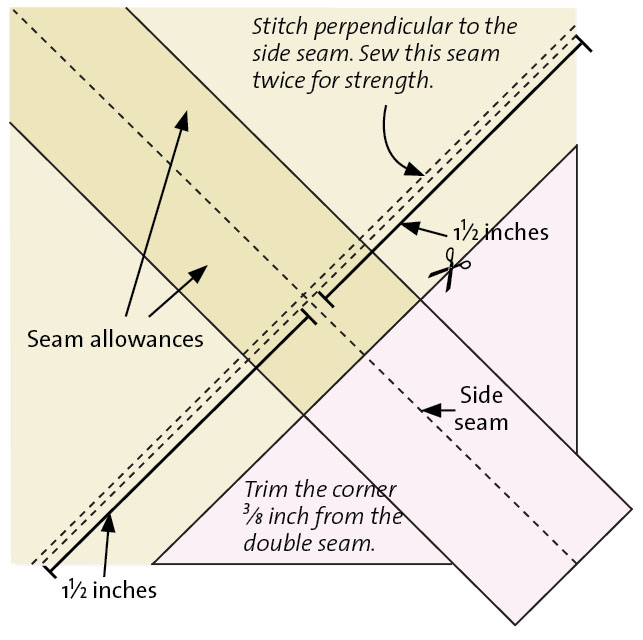
4. “Box” the wristlet’s corners to give it a flat base. Pinch a bottom corner into a triangle with the side seam at center. Lay the triangle flat, and with a ruler perpendicular to the side seam, mark a line at the point where there is 1 1/2 inches of material on either side of the side seam. Clip the folded corner in place, then stitch along the line perpendicular to the side seam. Pivot and stitch the seam again. Repeat for the other wristlet corner. Trim the triangle corners, leaving a 3⁄8-inch-wide seam allowance. Leave the wristlet wrong side out as you sew the interior.
Finish the bag
The lining is a single piece; it wraps from top to top like the wristlet’s exterior panels. Each side of the lining has a two–section interior pocket for a total of four pocket sections to stash your keys, makeup, etc. With the lining sewn, it’s a cinch to sew it to the wristlet and turn it inside.
1. Place the interior pocket pieces right sides together and edges aligned. Sew the bottom edge with a 3⁄8-inch-wide seam allowance. Press as sewn, then press the seam allowances open. Fold the pocket pieces wrong sides together along the seam. Press. Repeat for the other interior pocket pieces.
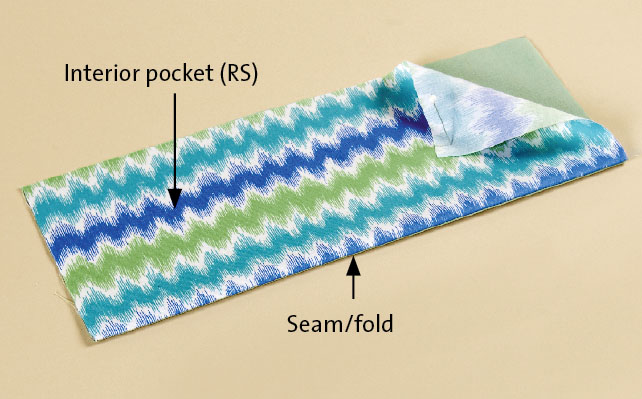
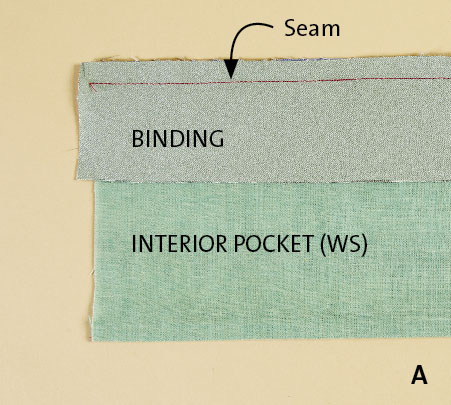
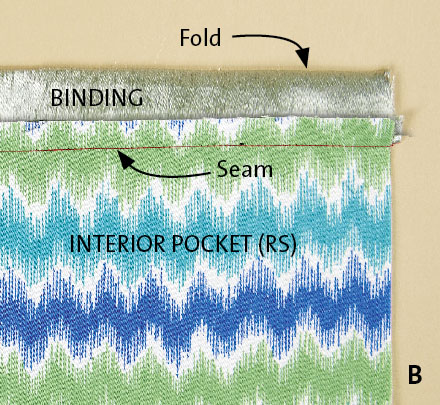
2. Bind the pocket top. Choose a wrong side for the pocket. Align the right side of the 2-inch-wide silk dupioni binding to the top edge of the pocket’s wrong side. Sew on the binding with a 3/8-inch-wide seam allowance (A). Press as sewn. Fold the binding up and over the pocket top to the right side. Fold the binding’s raw edge under to meet the pocket’s top edge (B). Then wrap the binding over the pocket top’s raw edges and topstitch through all layers 1/16 inch to 1/8 inch from the inner fold. Mark a stitching line, perpendicular to the binding, about one-third of the way from one pocket end.
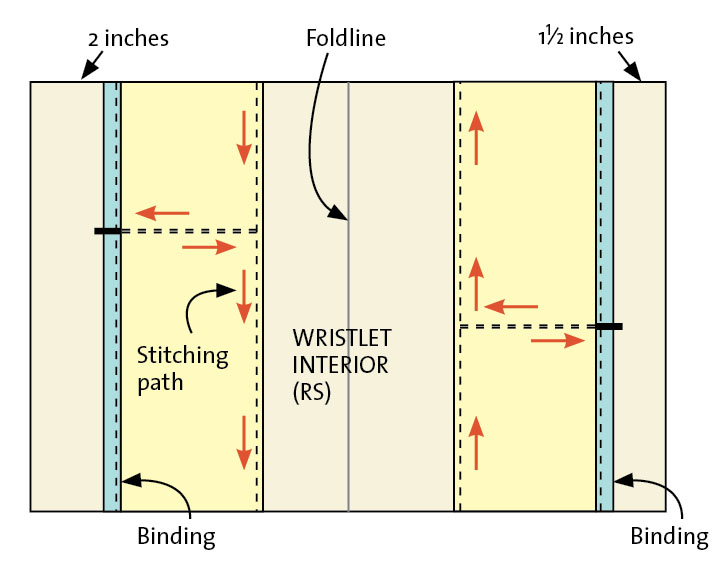
3. Layer the lining pieces. With right sides up, place the lining on top of the muslin interlining and align the edges. Pin around the edges through both layers to prevent shifting. Pin an interior pocket to the lining, 1 1/2 inches from a lining’s short end. Pin the other interior pocket 2 inches from the opposite lining end. Orient the pockets so that the pocket binding is closest to the lining’s short ends.
4. Sew on the interior pockets. Start at a pocket bottom at the lining edge. Edgestitch 1/8 inch within the pocket, pivoting 90 degrees at the pocket division marking. Stitch to the pocket top, and use a machine tack or satin stitch to finish to secure the pocket edge. Stitch back down to the pocket bottom, pivot the work, and finish sewing the pocket bottom to the opposite lining edge. Repeat for the other pocket.
5. Fold the lining in half, right sides together. Sew the side seams, and box the lining bottom as for the wristlet exterior (see step 4, above, under “Insert the zipper”).
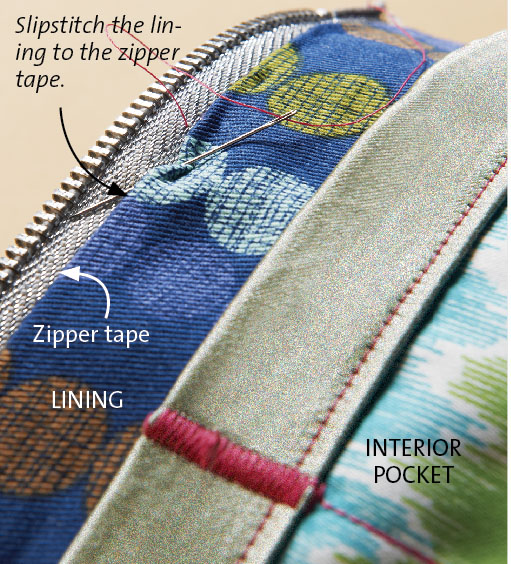
6. Turn the lining right side out. Slip it over the wristlet’s wrong side. Fold under the lining’s top edge about 1⁄2 inch, or as needed, to cover the zipper tape’s edge. Pin the lining fold to the zipper tape, then slipstitch it to secure. Turn the wristlet right side out.

This article, by Cheryl Kuczek, was originally published in Quick Stuff to Sew, Winter 2012. Kuczek is the creator of Paradiso Designs. Check out her patterns and tutorials at ParadisoDesigns.com.
Photos: Sloan Howard. Stylist: Jessica Saal. Illustrations: Emily Bronson
View PDF


Log in or create an account to post a comment.
Sign up Log in