

Corset ornaments make stylish gifts for friends and family. Hang these tiny symbols of fashion from the tree, fill them with lavender to freshen up a drawer or car, or use them as gift tags. How’s that for being cute and stylish?
They’re easy to make: You can prepare, quilt, and construct corset ornaments in less than an hour.
Supplies
• Fabric scraps
• Fusible interfacing
• Iron
• Chalk
• Sewing machine
• Cotton batting
• Point turner
• Hand needle and thread
• 1/8-inch-wide ribbon
• Free pattern PDF
Fabric and pattern preparation
1. Cut the fabric.
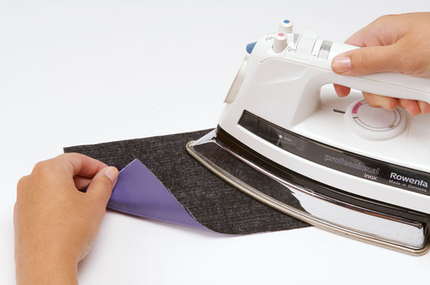
Cut two 6-inch fabric squares. Fuse interfacing to the wrong side of the fabric.
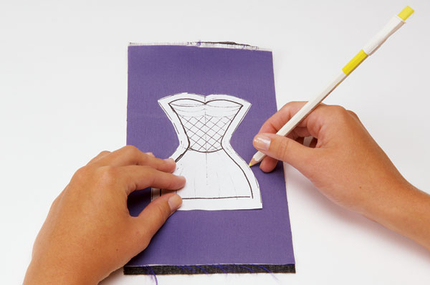
2. Trace the pattern
Trace the corset-shape pattern onto the right side of the fabric with chalk. If you plan to quilt the bodice, mark quilting guidelines. Download the free pattern PDF.
Stitch the ornament
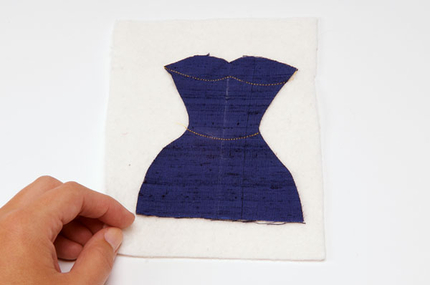
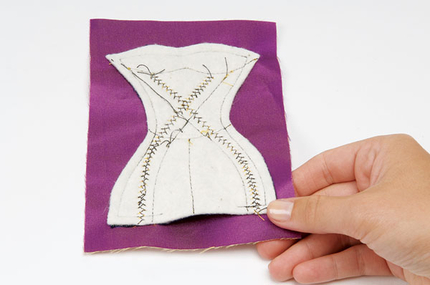
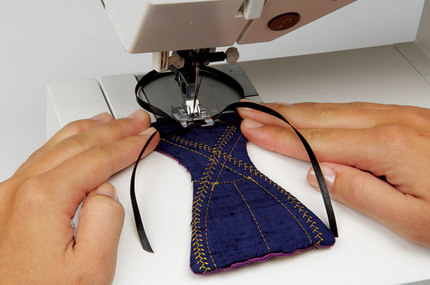
1. Quilt the corset
Choose a shiny rayon or polyester thread to quilt the corset. Place a layer of thin cotton batting behind the interfaced fabric. Set your machine for a straight stitch and a stitch length of 3.0 mm. Define the bust and waist as shown.
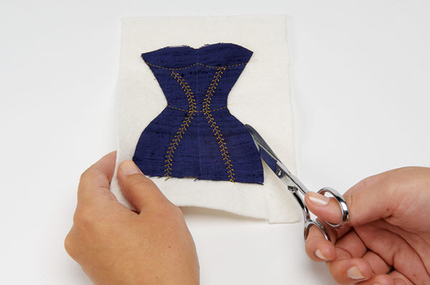
2. Sew with decorative stitches
Change to a decorative stitch and sew to your liking—be creative. Trim all threads and extra batting.
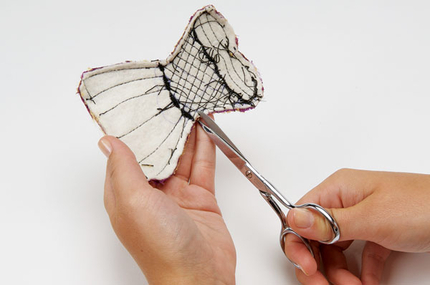
3. Construct the corset
With right sides together, place the quilted front against the remaining piece of fabric. Sew around the edges using a 1/4-inch seam allowance. Leave a 2-inch opening on the bottom to turn. Trim the backing even with the quilted top.
4. Trim, clip, and turn
Trim all the corners. Clip the curves at the waist and center bust. With a point turner, turn the ornament right-side out. Press.
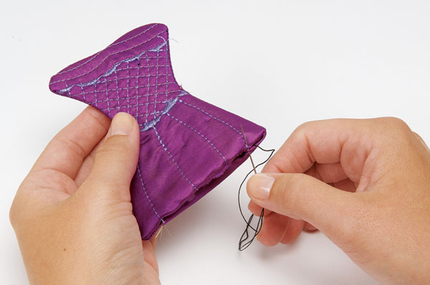
5. Close the opening
Turn the seam allowances in on the bottom edge of the ornament. Slipstitch closed.
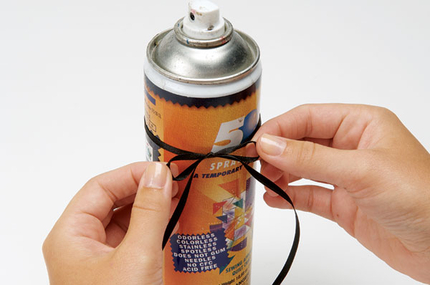
6. Make a bow hanger
Cut a 12-inch piece of 1/8-inch-wide satin ribbon. Tie it around a round object such as a can of starch. Make a small bow, and then slip the ribbon off the can. Center the bow at the top of ornament. Tack it on with a few machine stitches.
This post by Jennifer Stern was originally published November 29, 2016 on Craftstylish.com. Photos by Sloan Howard and Scott Phillips.
More Winter Sewing Ideas
12+ Projects for the Winter Holidays


Log in or create an account to post a comment.
Sign up Log in