
Festive Napkins and Place Mats
Follow a step-by-step guide for creating hand-embroidered table linens with pom-pom trim.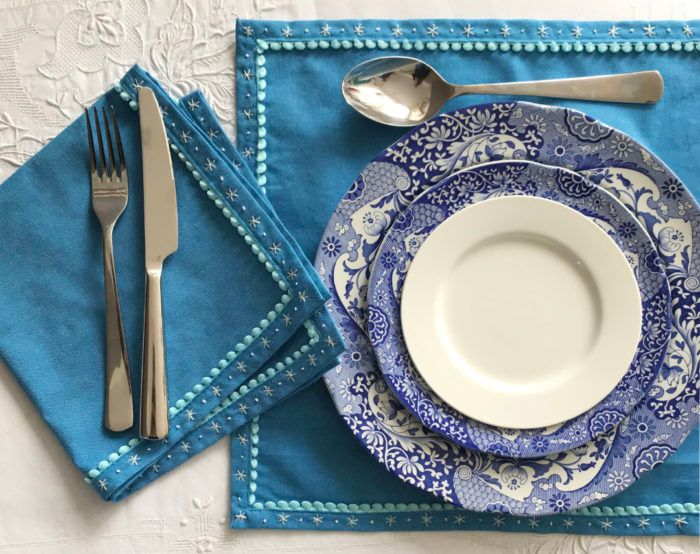
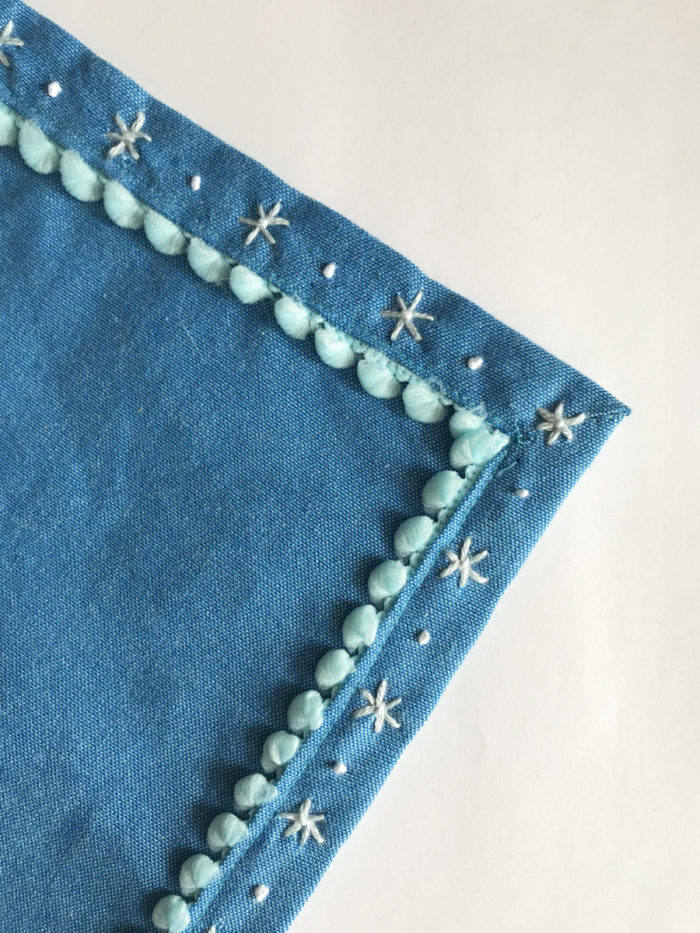
Decorate your holiday table with a set of hand-embroidered linens with whimsical pom-pom trim. Make these festive napkins and place mats with neat mitered corners and a delicate scattering of snowflakes around the border.
Fabric and trim
For each napkin:
14 1/2-inch square blue cotton or linen
60 inches mini pom-pom trim (also called ball fringe; Amazon.com)
For each place mat:
24-inch by 14 1/2-inch rectangle blue cotton or linen
78 inches of mini pom-pom trim
Tools and supplies
Air-erasable fabric marker
Embroidery needle
Embroidery floss in blues and white
Sewing machine
Sewing needles and pins
Sharp scissors
Thread to match the fabric
Hem and trim the linens
The instructions show a place mat, but the process is the same for napkins.
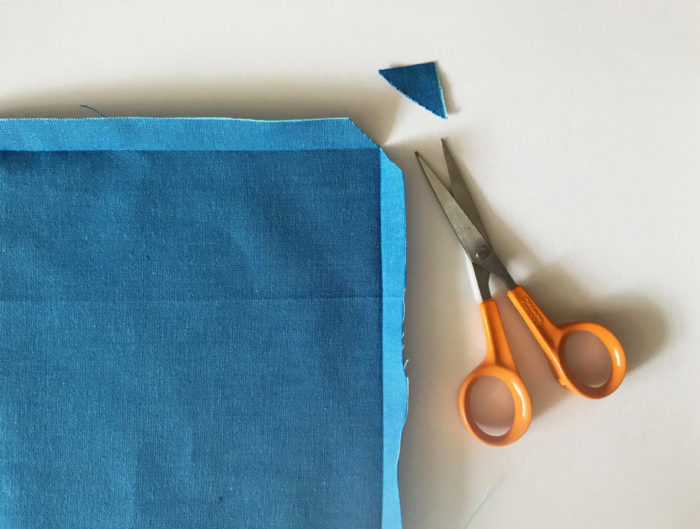
1. Press the edges.
Press the raw edges to the wrong side by 3/8 inch. Open out and trim each corner at a 45-degree angle.
2. Press the corner under.
Fold the diagonal corner edge in by 3/8 inch, then press. 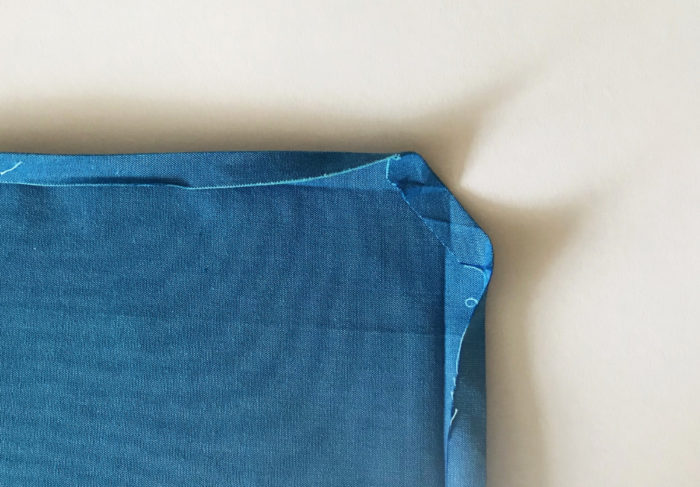
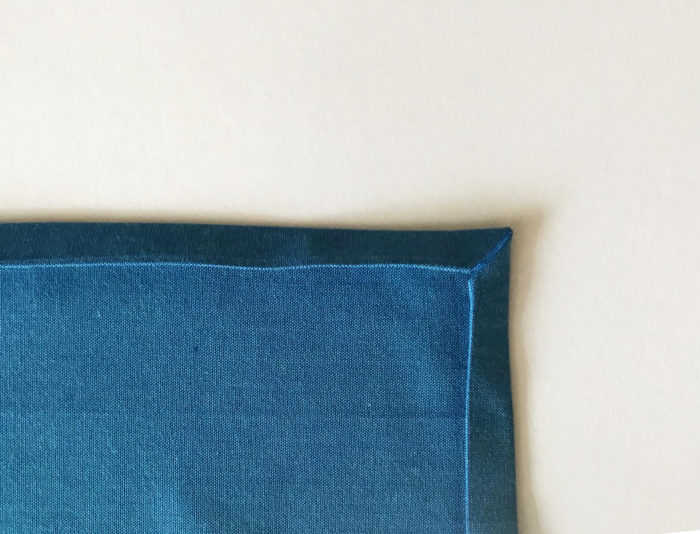
3. Complete the mitering.
Fold one edge in along its first crease, and then again by another 3/8 inch. Press. Repeat this with all remaining corners and edges.
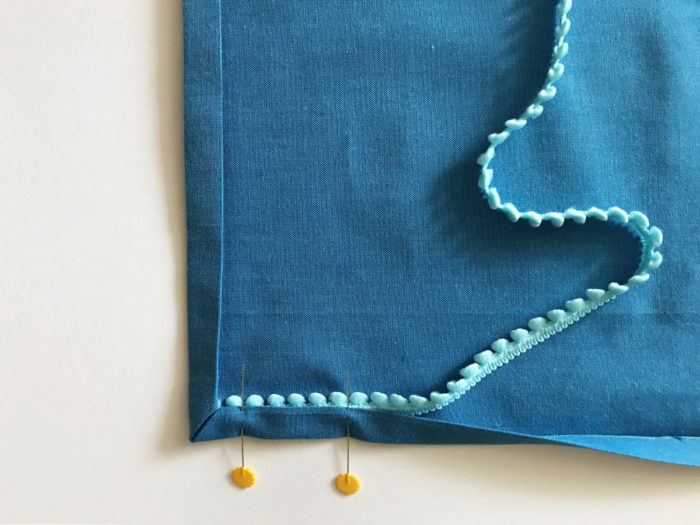
4. Insert the trim.
Starting snug into one corner, tuck one trim end under the pressed hem; make sure that at least a 3/16-inch width is tucked under the fold to be anchored by the topstitching to follow. Cut the trim with an extra 1/4 inch as you meet the next corner. Pin or baste in position. Repeat with the remaining three edges, overlapping the trim to form neat mitered corners.
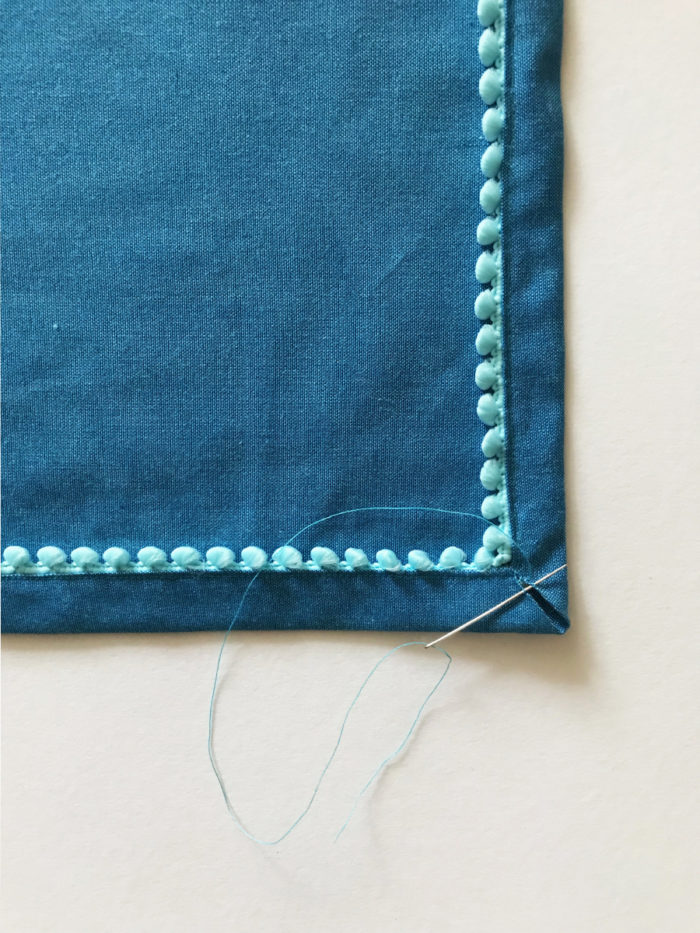
5. Topstitch the edges.
Stitch slowly around the edges, 1/16 inch from the inner fold. Make sure to catch all layers and secure the trim in place. Close the corner miters by hand with small slipstitches.
Decorate the linens
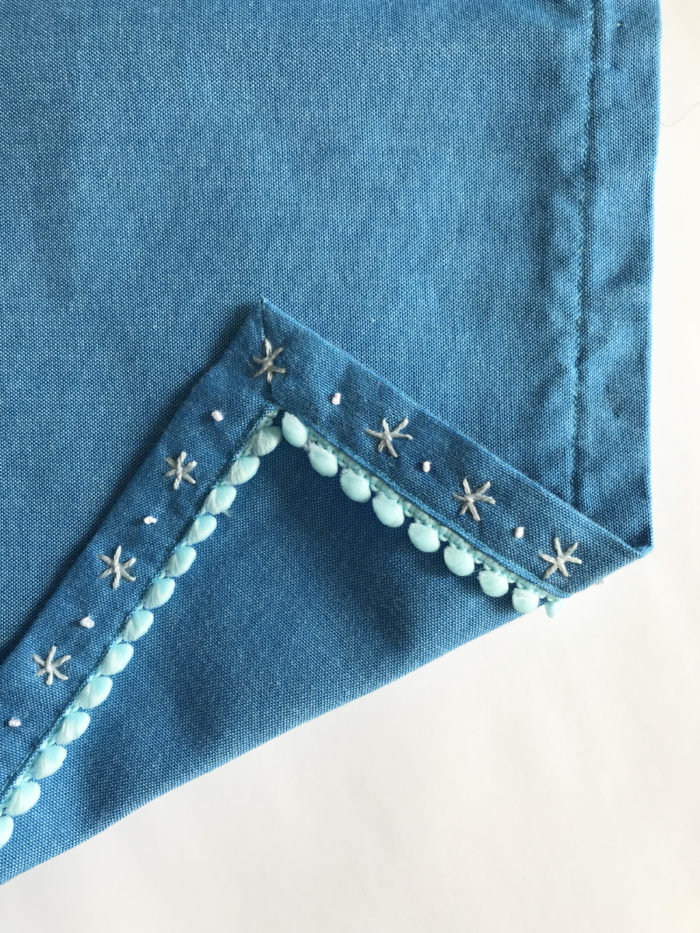
Embellish the festive napkins and place mats by embroidering six-point stars or snowflakes around the border hem. All your work along the hem should be made through only one thickness of fabric, ensuring that no stitching shows through on the linens’ wrong side.
1. Begin with stars/snowflakes.
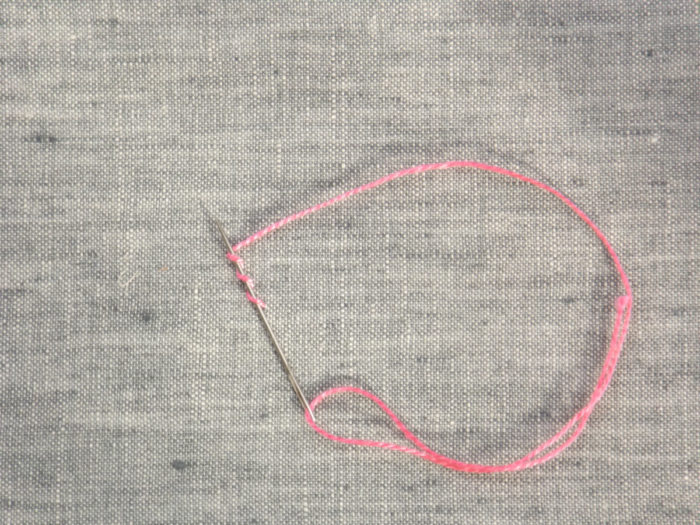
Embroider little stars in pale blue embroidery floss. I divide six-strand floss to work with three threads only. Starting at one corner, push your needle up from behind the trim and out 1/8 inch from the folded edge of the hem. Give the needle a gentle tug so that the knot at its end disappears into the hem. Trim off any excess. Now follow the stitching sequence shown in the diagram to make three crossing stitches roughly 5/16 inch long, to represent a star or snowflake. Be sure to slide the needle between the hem’s fabric layers rather than pushing it through the item’s wrong side.
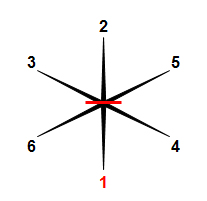
Stitch stars all around the border, spacing them that their centers are roughly 3/4 inch apart. Now thread your needle with white cotton and, again starting at one corner, make a little anchoring stitch (marked in red on the diagram) at the center of each star.
2. Add French knots.
Center them between the stars as you work your way around the border. For how to stitch a French knot instructions, read on.
How to stitch a French knot
1. Wrap the needle.
Bring the thread to the fabric’s right side. Hold the thread down where it emerges with the thumb of your other hand and wrap the thread three times around the needle’s point with your sewing hand.
2. Form the knot.
Pull the needle, sliding the ‘wraps’ of thread down the needle, holding them in place with your thumbnail, and then sliding them down to the fabric surface where they will create a small knot on the fabric’s surface.
3. Complete the stitch.
Insert the needle back through, close to where the thread first emerged (not in the exact same place or it will simply pull back through). Pull the needle through to the back, leaving a knot on the surface.
4. Continue stitching.
Bring the needle through to the front again in position for the next knot.

Tips for creating the festive napkins and place mats
Use different trims and embroidery threads on each napkin or place mat to add variation and create an eclectic look. It’s a good way to use up precious scraps from your stash.
For a speedier project, you can embroider the borders by machine using contrasting thread and a decorative stitch.
For another holiday project by Jemima Schlee, see Holiday Fabric Gift Bags.


amazing