

A cute patch pocket is as simple as picking out a textile that works well with your main fashion fabric, choosing a style, and sewing the pocket and garment together. Here are three fresh and inventive ideas for applied pockets. These techniques are swift and easy. Since they work with ready-to-wear as well as sewn garments, you’ll never have to wish for a pocket again. And since they’re “patches,” who says they have to be permanent?
Shopping list
Fabric.com:
• 1/4 yard fabric (for pockets); more may be needed for bias binding
JoAnn.com:
• Bias strips (for bold and bound pocket)
• Paper (for patternmaking)
• Pins
• Ribbon for drawstring (for cinched circle pocket)
• Scissors (for fabric and paper)
• Sewing machine
• Thread
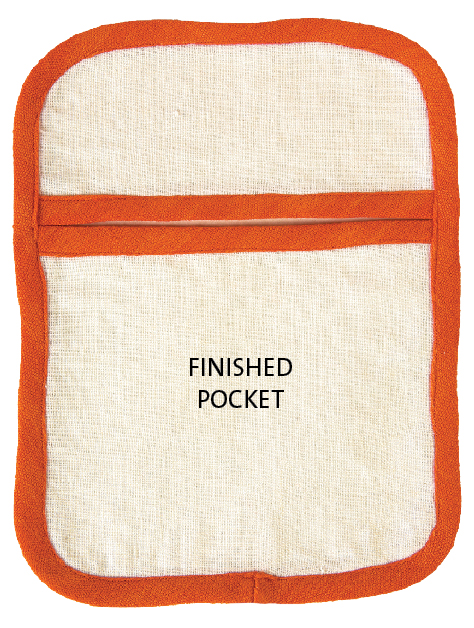
Bold and bound
Binding is a simple and quick way to add detail to a patch pocket. It can be subtle or high-impact, depending on the colors you combine. This pocket features a split across the pocket, and the bright orange binding makes a graphic statement on a white ground.
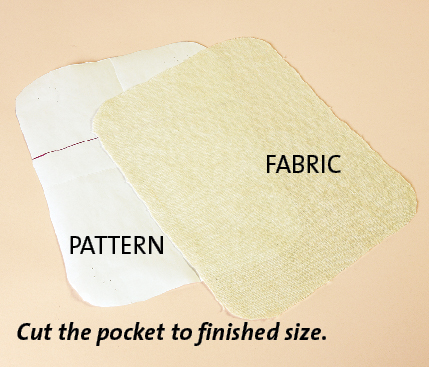
1. Cut out the pocket. Because the pocket edges are bound instead of folded under, cut the pocket to finished size. Round the corners.
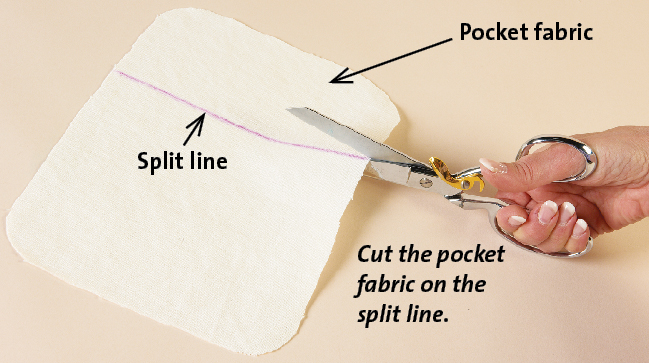
2. Split the pocket. Cut the pocket piece where you want it to open. You won’t be able to keep items in the top half, so make it smaller.
3. Cut the bias binding. Two-inch-wide binding strips result in the 3/8-inch-wide binding shown on the example garment. Cut two binding strips the length of the pocket “lips.” Measure the pocket perimeter. Cut a binding strip this length, plus 1 inch to overlap and turn under to finish.
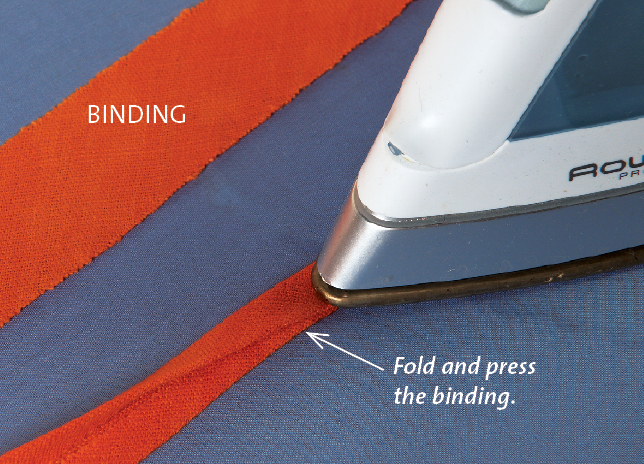
4. Double-fold and press the binding. Fold the binding in half lengthwise, with the wrong side in and aligning the long raw edges. Then fold each raw edge 3⁄8 inch, to meet the center fold. Press to a sharp crease.
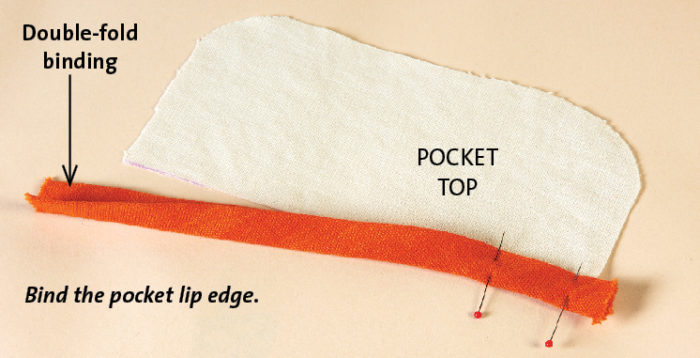
5. Sew the binding over the pocket lips’ edges. Start at one side and tuck the pocket lip’s edge in to the binding’s center fold. Edgestitch close to the binding’s inner edge on the pocket, being sure to catch all layers.
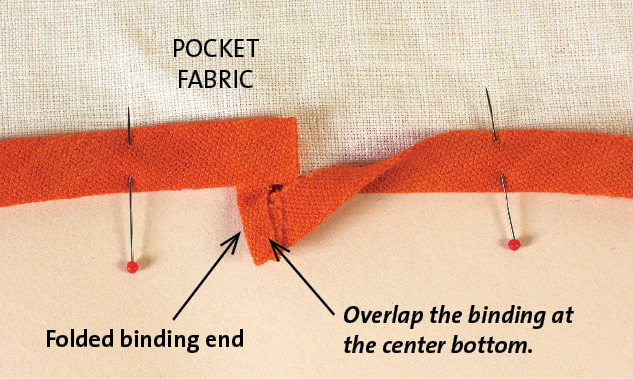
6. Bind the pocket’s outer edges. Press a binding short end 1⁄4 inch to the wrong side. To bind the pocket perimeter, start at the center bottom with the binding end that is not turned under. Pin the binding around the pocket’s unbound edges, securing the upper and lower pocket pieces so that the lips meet flush across the pocket. Sew the binding around the pocket, overlapping it at the pocket center bottom. Use the tucked end to cover the raw-edged beginning.
7. Sew the pocket to the garment. I recommend sewing by hand along the binding’s outer edge; or sew by machine in the seam well, just within the binding.
Cinched circle
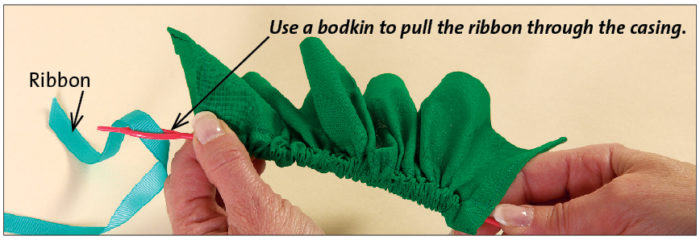
Dimension and a new shape are as easy as adding gathers to your patch pocket. This pocket was made with a fabric rectangle cinched into a circular shape by a ribbon.
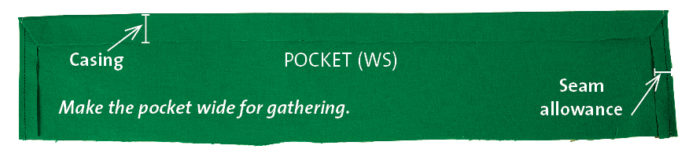
1. Plan the pocket size. The pocket piece’s width is one and a half to two times the gathering amount, depending on the desired fullness. The example pocket was gathered tightly to make a circle. Add 1/2-inch seam allowances to the pocket sides and bottom. Add a 3/4-inch allowance for a 1/2-inch casing to the pocket’s top edge.
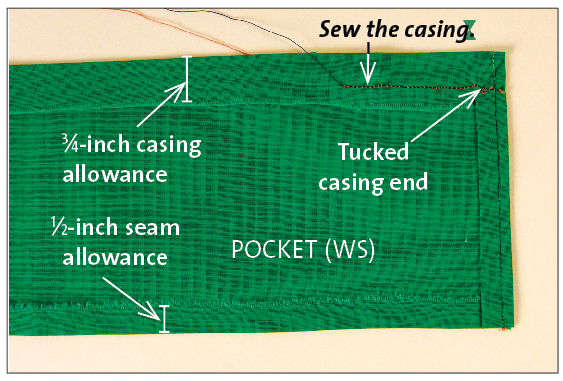
2. Fold and sew the pocket edges. Press the short ends 1/2 inch to the wrong side. Topstitch 1/4 inch from the fold. Press the bottom edge 1/2 inch to the wrong side, but don’t sew along the edge (it is edgestitched later). Press the top edge 3/4 inch to the wrong side to form the drawstring casing. With the pocket right side down, tuck in each end of the drawstring channel allowance at a 45-degree angle. Sew 1/2 inch from the pocket top to complete the drawstring channel.
3. Draw the ribbon through the drawstring channel. Pull the pocket into a U shape around the ribbon, distributing the gathers evenly.
4. Pin, then sew the pocket to your garment. Edgestitch it in place around the curved bottom edge/sides.

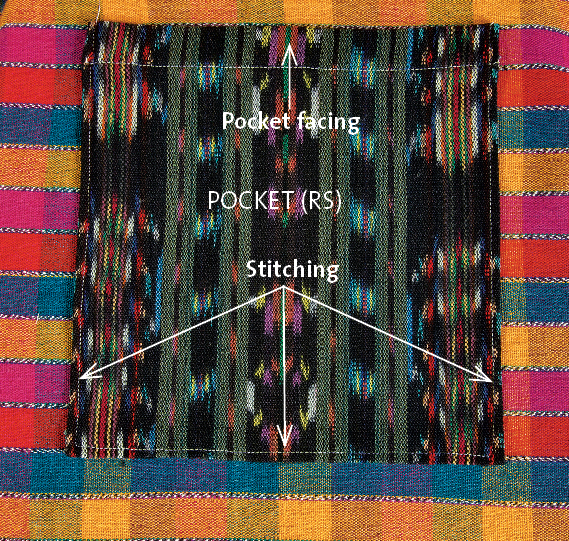
Classic rectangle
These easy pockets are useful and decorative. This simple pocket style can create a fantastic finished look, whether you choose self-fabric, coordinating fabric, or contrasting fabric.
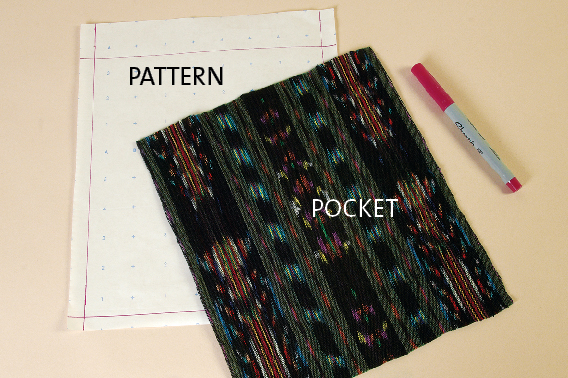
1. Plan the pocket. Draw a rectangular pattern of the pocket’s finished size. Add 1/2-inch-wide seam allowances to each side and the bottom. Add a 1 1/4-inch self-facing across the pocket top.
2. Cut out the pocket and press the seam allowances. If desired, serge-finish the raw edges. Then press the side seam allowances and the bottom seam allowance 1/2 inch to the wrong side.
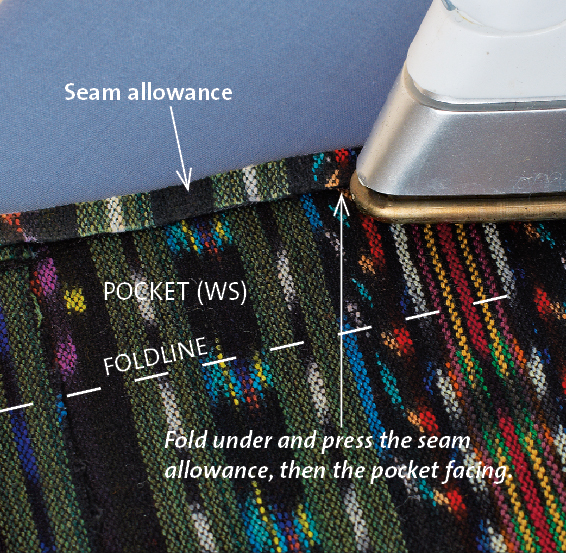
3. Press the pocket facing. Fold the top edge under 1/4 inch and press. Fold the top edge under again, 1 inch from the first fold, enclosing the raw or serged edge. Press.
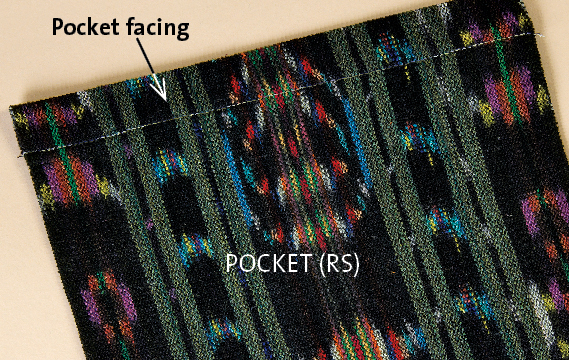
4. Anchor the pocket’s facing with topstitching. Stitch 1/8 inch from the facing’s bottom fold, securing the pressed-under side seam allowances at each end of
the facing.
5. Edgestitch the pocket to the garment. Decide on the pocket’s placement, and pin it in place. Edgestitch 1/8 inch from the folded edges, starting at one upper corner. Pivot the work at the corners, with the needle in the fabric.


Log in or create an account to post a comment.
Sign up Log in