

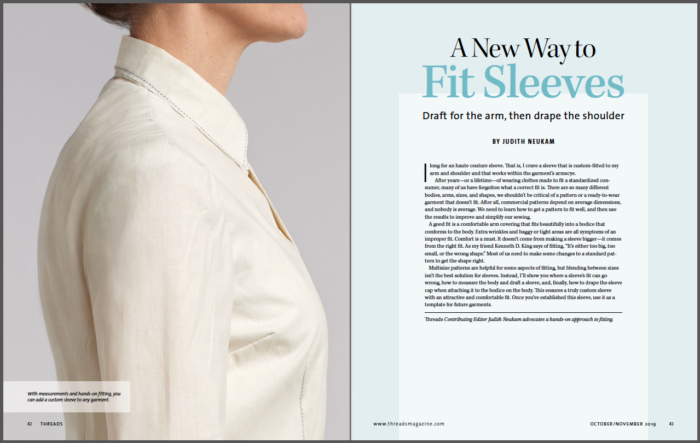
A New Way to Fit Sleeves
Draft for the arm, then drape the shoulder
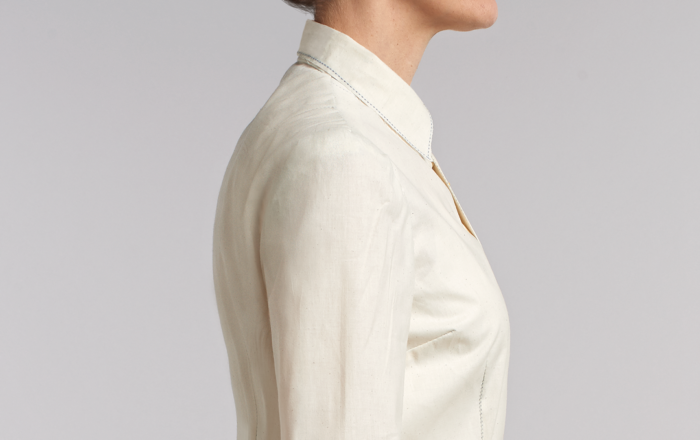
I long for an haute couture sleeve. That is, I crave a sleeve that is custom-fitted to my arm and shoulder and that works within the garment’s armscye. After years—or a lifetime—of wearing clothes made to fit a standardized consumer, many of us have forgotten what a correct fit is. There are so many different bodies, arms, sizes, and shapes, we shouldn’t be critical of a pattern or a ready-to-wear garment that doesn’t fit. After all, commercial patterns depend on average dimensions, and nobody is average. We need to learn how to get a pattern to fit well, and then use the results to improve and simplify our sewing.
A good fit is a comfortable arm covering that fits beautifully into a bodice that conforms to the body. Extra wrinkles and baggy or tight areas are all symptoms of an improper fit. Comfort is a must. It doesn’t come from making a sleeve bigger—it comes from the right fit. As my friend Kenneth D. King says of fitting, “It’s either too big, too small, or the wrong shape.” Most of us need to make some changes to a standard pattern to get the shape right.
Multi-size patterns are helpful for some aspects of fitting, but blending between sizes isn’t the best solution for sleeves. Instead, I’ll show you where a sleeve’s fit can go wrong, how to measure the body and draft a sleeve, and, finally, how to drape the sleeve cap when attaching it to the bodice on the body. This ensures a truly custom sleeve with an attractive and comfortable fit. Once you’ve established this sleeve, use it as a template for future garments.
Anatomy and the pattern
The design and cut of garments and patterns have changed over the decades. They don’t always match the reality of the body’s shape. It’s helpful to consider the arm and torso shape and compare it to how most patterns are drafted.
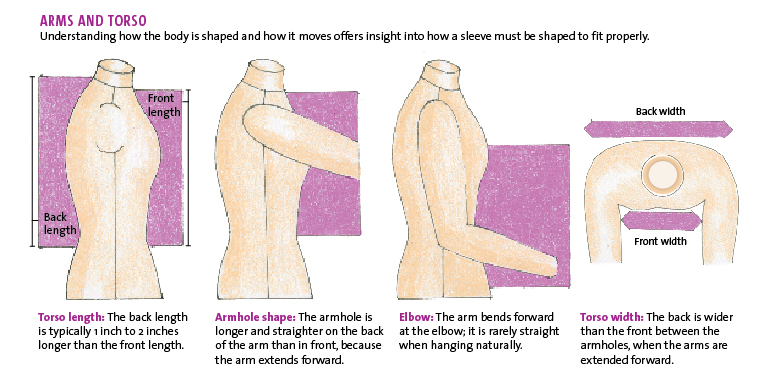
Bodice and sleeve pattern shapes
Compare correct and incorrect patterns to see how they reflect what we know about the body’s shape.


Where patterns go wrong
Once you understand how a pattern should reflect the body’s shape, you can proofread a pattern and quickly see potential problems. Test a standard one-piece sleeve pattern by folding it in half lengthwise from the shoulder point to the wrist. If the front and back halves match, the sleeve can’t fit properly.
|
The back cap is larger, but both sides are |
 |
|
This sleeve lacks shaping entirely, and has almost no difference between the front |
 |
|
Even though a dart has been included to shape the elbow, the sleeve-cap sides almost match, which causes excess fabric above the bust, among other things. |
 |
|
This is a dropped shoulder sleeve. It has a lot of ease, little shaping, and is not a flattering choice for most women. |
 |
Even if the sleeve measurements are correct, the fit may be badly off. Many patterns have adequate fabric to cover the arm, but incorrect shaping. You can’t simply add or subtract fabric needed in a pattern to make it fit. You need to apply some rules of shaping to correct fitting issues that arise when a sleeve is not drafted to fit a real body. Common fitting issues include:
• The bodice is too full above the bust.
• The bodice is too low under the arm.
• The sleeve circumference is too big or too small.
• The sleeve cap is the wrong shape and size.
• The sleeve has no elbow shaping.
Draft your working pattern
In my search for better sleeves, the best and easiest solution I’ve found is to start with a custom draft, based on my arm measurements. A straight sleeve is the starting point. Read “Shape the sleeve,” p. 47, to add the needed elbow shaping.
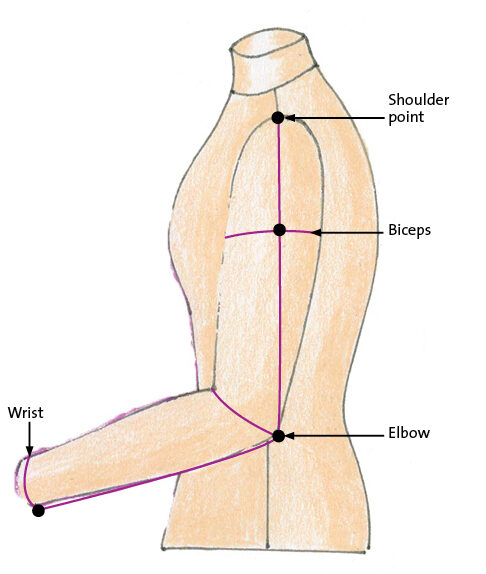 Measure the arm
Record the following measurements. If your arms are substantially different in size, measure both.
Circumferences
Wrist, at the prominent wrist bone
Elbow, with arm bent at 90 degrees
Biceps, at the underarm level
Lengths
Upper arm, from shoulder point to elbow
Sleeve-cap length, from shoulder point to biceps level at underarm
Full-arm length, from shoulder to wrist
 Create the draft
1. Establish the length. On a sheet of paper 4 inches longer than your arm length and wider than your biceps circumference, draw a horizontal line 2 inches above the bottom edge. This line represents the wrist level (A). Draw a perpendicular line, centered on the line, to the top of the page.
2. Mark the lengths on the center line. Measure up from the bottom line and mark the full arm length; this is the shoulder point (B). Measure down from the shoulder point and mark the biceps (C) and elbow (D) levels, respectively.
3. Mark the circumferences. Square horizontal lines at the biceps and elbow level marks. On each side of the center, mark half the biceps/elbow circumference plus 1 inch on the respective lines. Do the same for the wrist circumference on the bottom line.
4. Connect the marks. Connect the marks vertically. This establishes the correct circumference, which includes 2 inches of ease beyond the arm measurement. This is the master sleeve pattern, without seam allowances or a sleeve-cap seamline.
Shape the sleeve
The straight draft is improved with one of these two shaping options. For a one-piece sleeve, add an elbow dart. For jackets and coats, consider creating a two-piece sleeve.
Add an elbow dart
1. Divide the sleeve vertically. Measure and divide each of the horizontal lines into equal fourths. Connect these points, extending the middle three lines to the top of the paper. Mark one vertical edge “Front” and the other “Back.” Sketch a provisional sleeve-cap seamline to connect the underarm and shoulder points.

2. Cut at the elbow level. Cut from the back seam to the front, leaving a hinge on the front edge. Spread to open a dart. Spread the back seam 1-1⁄2 inches, and tape paper in the open wedge. Draw dart legs about 3 inches long from the back edges. Add seam allowances to the vertical seams.

Create a two-piece sleeve
 1. Separate the back section. Begin with a divided sleeve pattern, as described in step 1 of “Add an elbow dart.” Within the back quarter, make a mark on the biceps line 5⁄8 inch toward the back seam (A). On the elbow line, make a mark 1⁄4 inch toward the back seam (B). Draw a line connecting these points and extending from the hem edge to the sleeve cap. Cut along this line. Label the new back sleeve seam on each piece.
2. Separate the front piece. Split the front quarter in half vertically.
3. Create the undersleeve section. Align the front and back strips along their underarm seams. Tape the pieces together and label the final piece “Undersleeve.” Label the larger section “Upper sleeve.”
4. Shape the elbows. On each piece, cut along the elbow line, from the back sleeve seam to the opposite side, leaving a hinge. Spread the upper sleeve 1-1⁄4 inches; spread the undersleeve 3⁄4 inch. The longer upper sleeve seam will be eased to the shorter undersleeve seam when the sleeve is sewn.
5. Complete the pattern. Redraw the newly shaped seamlines. Add seam allowances to all vertical edges.

The provisional sleeve-cap seamline
The sleeve-cap seamline you sketched in step 1 is only a guide that makes it easier to visualize your work as you add the elbow dart or split the sleeve to create a two-piece pattern. When you proceed to fitting the muslin sleeve, this cap line can be largely ignored.
Simply cut the muslin sleeve with a tall rectangular shape extending above the cap line. Then drape the sleeve cap for a custom fit. The final sleeve-cap seamline will likely differ substantially from this provisional line.
Drape the sleeve cap
For most sewers, the sleeve-cap seamline shape needs refinement, but it’s difficult to do on the pattern. Instead of working from a pattern, I developed a version of a tailor’s method, in which the sleeve cap is draped on the body for a custom fit. Begin with the pattern you drafted, and fit a muslin test sleeve. Then use this as the basis for a master pattern.
| 1. Sew the sleeve. Cut the upper and undersleeves, leaving a rectangular extension above the sleeve cap. Sew the two seams. |  |
| 2. Prepare the armscye. Sew the bodice’s shoulder and side seams. On the garment’s right side, couch a length of rattail or narrow cording on the armscye seamline. Set the sleeve into the armscye, sewing it only in the undersleeve area. Leave the upper sleeve portion free. Put on the muslin. |  |
|
3. Pin the shoulder point. Smooth the cap fabric up and over the shoulder; insert a pin through the cording at the shoulder seam to secure it. |
 |
4. Complete the pinning. Continue to pin every 2 inches, smoothing the cap up and over the shoulder. Then place a pin between those pins. Pin only into the cording, and ease the muslin as you go.
 |
 |
 |
| 5. Draw the armscye seamline. With a marker, draw along the cording to mark the seamline. |  |
| 6. Add a seam allowance. Remove the muslin, smooth the marked seamline curve, and add a seam allowance outside the seamline. |  |
| 7. Test the drape. Cut off the excess sleeve-cap fabric to set in the sleeve. Following the new seamline, sew the sleeve into the armhole completely. Then assess and adjust the fit as needed. |  |
|
TIP: Create templates. The draped sleeve, in conjunction with a well-fitting armscye, can be applied to other patterns. Make templates by tracing the sleeve cap and the armscye that fit onto poster board. Omit the seam allowances, except the shoulder seam allowance. Use these templates to check and correct commercial patterns, so you start with a better sleeve and armscye fit. Just as all figures require a different crotch curve in pants patterns, they need different armscye curves and sleeve-cap shapes for a sleeve that fits correctly.
|

See the rest of the article by clicking below.
View PDF


love this article but I noticed there was no "ease" allowance in the cap. Always seems to be too much in commercial patterns. Can't wait to try this! Thanks
It's a beautiful method, but... pretty much impossible to do the sleeve cap part on yourself. Any tips if you sew alone?
Author Judith Neukam shares her response to GmaCma:
The beauty of this method is that, by custom-pinning the sleeve cap along the corded armscye seamline, you can build in as much or as little ease as you prefer. When you pin the sleeve to the cord, start with the first pin at the shoulder point. I prefer to pin perpendicular to the cord. Then continue to place pins 2 inches to either side of the first pin until you reach the area where the sleeve as been stitched along the underarm curve. The fabric will ripple between pins along the armscye seamline. That is the ease, and you can control how much to add by smoothing the cap close to the upper arm, or leaving a bit of space there. Continue to pin to conform the sleeve cap to the armscye seam shape. Once you’ve pinned the sleeve cap, mark the “seamline” onto it by following the cord. After you’ve copied the seam shape, added the seam allowance, and trimmed the excess fabric, you can add easing stitches to the sleeve. Note: The middle half of the sleeve cap is on the bias. If you align the armhole and sleeve cap edges and stretch the sleeve cap edge perpendicular to the seam, it shrinks while you sew it. You can use this method to avoid ease stitches and get any little tucks in the stitching.
Thanks, Judith. --Jeannine Clegg, managing editor, production
Thank you for your comment, Tiger B. Judith Neukam has several suggestions for you:
I sew alone, too, and that is a hidden benefit of fitting a sleeve in this way, because once you have established the armhole and sleeve cap shapes, you can use those to adjust any pattern without needing a helper. I’ve also realized, over the years, that I’m not satisfied with the way many people pin. Here are my tips for fitting the sleeve cap alone: You have a bodice with an armhole that fits, and you have a sleeve that fits. As described on p. 48, set the sleeve into the armhole under the arm. Sew the bottom third to half of the sleeve into the armhole. Then set the first pin into the cord at the shoulder point. Make sure the grainline stays straight on the arm. You can then add the second pin to the front. Pin across the cord just catching a small bite of the sleeve. The next part is tricky because you don’t want to twist or curve any part of your body. Reach over your shoulder and pin the third pin behind the shoulder pin. That’s only 2 inches over your shoulder—you can do it. Then finish pinning the front part of the sleeve cap every 2 inches. Take off the muslin and study the sleeve. Make sure the grain is right. Pin between all of the front pins and then pin the back. The back will have more fabric than the front and the seam is longer. Start in the middle and add pins to either side and then in between to establish the ease. Then try on the garment again. If it is too tight shift the pins to be looser. If it is too big adjust as needed. This is only a distance of 7 inches or less and even though putting on and taking off the garment is a hassle, it doesn’t take five minutes and once it’s done you can use the same fitted pattern repeatedly.
I sew alone too. This is such a helpful article and I plan to do this immediately. Thank you, Judith. I love Threads!
Interesting method that I will try the first chance I get. I have a comment/question though: When you mark the circumference at the guide points A, C and D to determine underarm seams, it is entirely possible that the points don't align. Would you connect A and C and hope that C falls in line or more logically use C and D levels and extend to intersect at elbow level? Or fit a curve?
An article on how to use the armhole template described in the article would be helpful. In the example, would you just trace along the template and then add seam allowance?