

One of the most important steps in preparing to sew a garment is staystitching. These lines of stitching, placed at key garment edges, prevent the pattern pieces from becoming distorted during the construction process. This is an essential technique for any sewer who wants great results. Even if your pattern’s instructions don’t mention staystitching, it’s well worth the time to add this step.
Why staystitch?
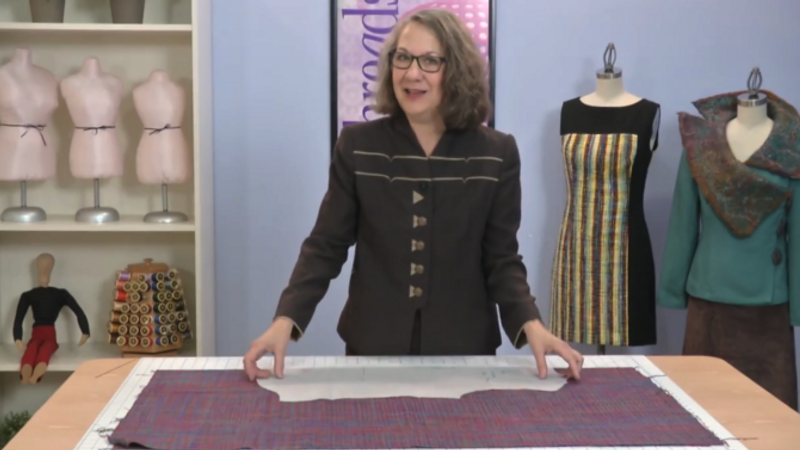
Sewing and weaving expert Daryl Lancaster gives an in-depth explanation of staystitching and talks about how it relates to the fabric’s grain. She describes how fabric is woven and why it can stretch out of shape when it’s cut on any angle other than the true lengthwise or crosswise grain. As she shows, any garment edge that curves or is on even a slight diagonal lacks stability. That’s where staystitching comes in.
Where to staystitch
On most garments made of woven fabric, it’s essential to staystitch along the neckline and shoulder seams. You may also want to staystitch angled or curved side seams, and armhole seams. On pants and skirts, staystitch along the curved hip area.
Apply staystitching immediately after cutting the pattern and transferring any notches, darts, or other marks. Daryl recommends using a regular stitch length—about 2.5 mm—and placing the staystitching line within the seam allowance, about 1/8 inch from the seamline. On a pattern with a standard 5/8-inch-wide seam allowance, staystitch at 1/2 inch.
Directional staystitching
It’s important to staystitch directionally, that is, in the direction that causes the least distortion as the machine applies the stitching. The general rule is to sew from the wider area to the narrower area, or from the higher to the lower portion. For example, for a neckline, stitch from the shoulder end—the wider part—to the center front or back, the narrower part. On a shoulder seam, stitch from the neckline end, where this seam is higher, toward the armhole, where it is lower. Daryl shows what happens if you staystitch in the wrong direction—you’ll be surprised how great a difference there is.
When you construct the garment, sew the seams in the same direction as the staystitching. This prevent distortion and ensures that both sides of the garment are symmetrical.
To find out about staystitching knits, see Daryl’s tip: How to Decide Whether to Staystitch Knits.


Thank you so much for this excellent explanation of directional sewing and staystitching.
I understood about the importance of staystitching, but nobody ever told me the reasons for directional sewing. It sure explains a lot of the issues I've had!
So now I'll always remember: highest to lowest, or widest to narrowest. :-)
Thanks again,
Sandy
Nice, clear discussion and demonstration of stay stitching. I was taught to do so when I first learned to sew, but have not always kept up the practice. Thank you for clearly showing its importance and demonstrating why it's so vital.
Understanding Why you do something is important if you are going to change your behavior.
Finally, I understand why pieces don't match. I've been sewing in the wrong directions.
I will Change my behavior!
Thank you.
Thanks! Makes perfect sense. Unfortunately, there are a few sewing experts out there that poo-pah directional sewing. This just verifies that I want to discount their opinions.
What a fantastic video! I never knew this stuff. I was riveted and watched it twice. Terrific information. From now on I will staystitch and sew directionally. Thank you so much!
Thank you for the excellent, clear and well demonstrated explanation of why thus is important. I aim for precision in sewing and this information is gold.
Thanks a lot for this very nice explanation, I've a question I didn't understand: how staystich on the armhole please?
Someone could tell me ?
Thanks a lot
Thank you so much. Surely a wonderful refresher and presentation.
Thank you ...never thought about staystitching the side seams... and I will make better use of directional sewing.. I have some questions - would you staystitch before you serged finished an edge before construction? or would the serged edge act in lieu of the staystitch? Should one directional serge?
Thank you in advance
Great, concise instructions...I will try this since I know it has been done incorrectly on my part...This will be replayed to be certain I get it right. It is unfortunate that many You Tube sewers demonstrating the sewing techniques omit this procedure. I found it very important. Thanks
Brava! Thanks so much for this clearly illustrated, sensible explanation.
R
I’ve been sewing for many years and never fully understood the theory behind staystitching, except for curved edges. I will be sure to follow this advice, and pay more attention to stitching the seams together as well. Concise and clearly presented.
Wow! As an engineer myself, Daryl is so knowledgeable and careful in her explanations. Whew! I learned a lot about the structure of woven cloth and various methods to protect the integrity of the material. So well done! Thank you.
Bill--Columbus Ohio
Excellent information. What about armholes?
One of the best Threads videos I have seen - many thanks Daryl. More of this, please?
Thanks for this clear and concise explanation. I've been sewing for many decades have never known why stay-stitching and directional sewing were considered important. This will take my sewing up a notch.
Excellent video. Makes it all so much clearer! It's so helpful to understand why we do what we do, rather than just follow instructions 'blindly'!
Well, just using my head after seeing the explanation in the video, I'd assume that the sensible thing to do with armholes is to stitch from the bottom (armpit) edge to the middle, then from the top (shoulder) edge to meet the first stay stitch line. An armhole is not too different from the neckline in the issues it presents, so use similar reasoning.
Other questions asked above: serger stitching is stretchy, so your serged edge is not going to act in any way like a staystitch line. Look inside any $5 T-shirt and you'll see that it is likely sewn with a serger and nothing else, because this allows the knit fabric to stay elastic at seamlines.