Add Crystals to a Sweater
Craft your own runway-inspired motifs for any fabric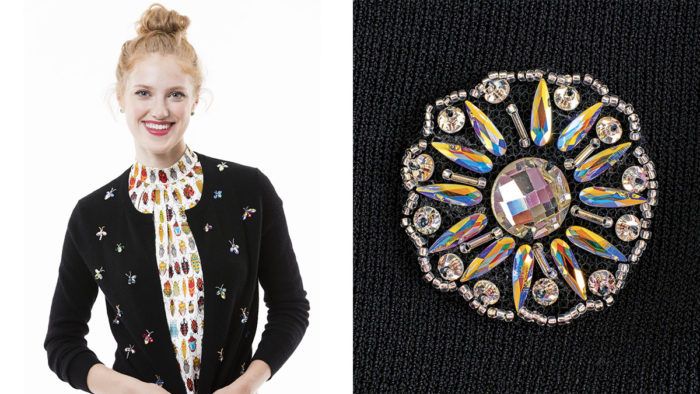
Recent couture shows featured garments with jeweled accents. I was inspired by looks from designers such as Alexander McQueen, Chanel, and Valentino, and I decided to develop my own method for re-creating these garments at a fraction of designer prices. My technique enables you to create positionable designs with no risk of damaging the fabric, as the motifs are fused to a backing fabric that is then sewn onto the garment. I’ll show you how to add this touch to your projects and elevate the looks to runway status.
Look for inspiration. Recent collections by top design houses are wonderful sources, as are vintage jewelry and fancy buttons. Printed fabrics are another source of design inspiration. The cardigan embellished with jeweled insects, shown at above, was inspired by the print in the accompanying silk blouse. Sparkly designs can be scaled to reflect your own aesthetic, from small, localized details to large motifs covering the garment. Experiment and find out what works best for you.
Gem varieties and setting methods
With many types of crystals available, consider what works best for the planned project. Different crystal types have varying qualities, from ease of care to longevity and expense.
Types
Many shapes, colors, and sizes are available from online sources or local craft stores. Swarovski crystals are the most expensive, followed by other glass stones. Plastic gems are the least costly but sparkle less brilliantly than crystal or glass. Plastic gems can’t be applied by heat. There are also flat-back pearls in multiple colors and sizes.
Attachment
Ease of application and the effect on the fabric’s hand are some of the factors to consider when choosing an attachment method.

Prong-set
Prong and rim settings are available for crystals of different sizes. The prongs pierce the fashion fabric and are bent by hand or with a press to grasp the crystal.
Sew-on
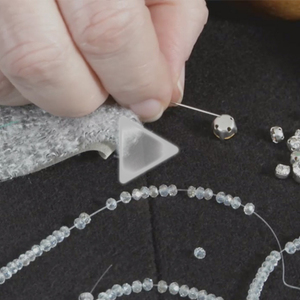
Sew-on crystals can be arranged and attached with hand stitches. When using plastic crystals, polyester thread is fine. For Swarovski or other glass crystals, use silamide thread, which is stronger and less likely to fray. It comes in many colors and is available from tailoring supply stores. Light gray thread seems to blend in with most stones. Nylon beading thread is another option.

Heat-set
These gems have a fusible glue backing. You can use a tool such as a BeJeweler or Crystal Crafter, which heats the gem to melt the glue. These heated wands can be fitted with different size tips to match the stone being set. The stones must be set one at a time with this method. A dry iron set on the wool setting can also be used. Some fabrics might be damaged by the heat required to melt the glue on heat-set stones.
Glue-on
Glue is another option, but it can be messy and rigid when dry and may not be the best choice for clothing embellishment.
Transfer film
Sticky silicon transfer film is helpful when creating motifs with heat-set gems. Clear and tacky, it holds the crystals until they can be fused. Arrange the crystals, wrong side up, in the desired pattern and press the completed design onto the garment without steam.
Create a sew-on appliqué
Attaching crystals to a backing fabric that is then sewn onto the garment makes it simple to create embellished garments, especially if the fashion fabric is delicate. Circular backing shapes are the easiest to create, even if the motif is not a true circle.
1. Create the backing circles
The backing consists of two or three layers of fabric. Select sheer backing fabrics that blend in with the fashion fabric. Make the first circle just large enough to fit the motif. Cut this from cotton tulle, silk organza, or two layers of nylon tulle that have been fused together with fusible web. Cut a second, larger circle from silk or nylon tulle. Make it the same size as the first circle plus 1/4-inch-wide seam allowance. Hand-stitch large running stitches around the edge of this circle.
2. Arrange the crystals
Draw your design on paper, place the transfer film sticky side up on top of the design and position the crystals wrong side up on the film. Alternatively, work with the crystals right side up. Arrange the stones, then carefully place a square of transfer paper sticky side down on top, taking care not to move the crystals. Long, pointy tweezers are helpful when placing tiny stones.
|
|
|
3. Set the crystals
Center the larger tulle circle on top of the smaller backing circle. Position the motif on top of the layered circles and fuse. The fabric layers are fused together at the same time. Allow the crystals to cool and remove the transfer film. Add any desired sew-on crystals or beads. 5 Attach the appliqué. Remove the cardboard by folding back the seam allowance. Then pull the gathering thread to reset the pressed edge. Trim or remove the stitches as desired. Secure the completed motif to the garment in matching thread with small, hand-worked fell stitches.
4. Finish the edges
Make a pressing guide from lightweight cardboard, cut in a circle the same size as the motif. Place the pressing guide on the wrong side of the fused motif and pull the gathering threads to draw the seam allowance to the wrong side. Press, using the cardboard’s edge as a guide. The tulle’s folded edge gives a clean, no-fray finish.
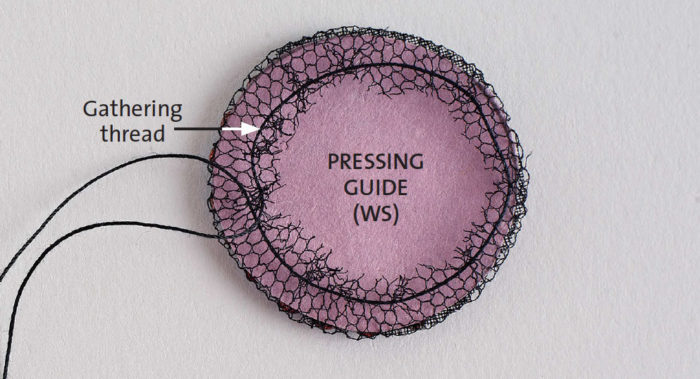 |
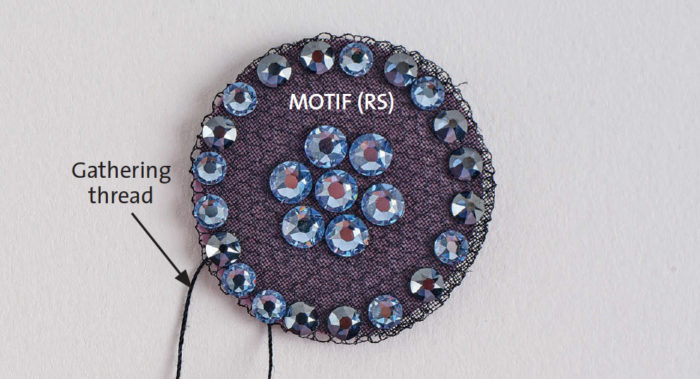 |
5. Attach the appliqué
Remove the cardboard by folding back the seam allowance. Then pull the gathering thread to reset the pressed edge. Trim or remove the stitches as desired. Secure the completed motif to the garment in matching thread with small, hand-worked fell stitches.

Mary Funt specializes in couture sewing and enjoys re-creating designer garments. CloningCouture.com
Sources:
Basic crystals, tools, and supplies can be found at local craft stores, but for a greater variety look to these online stores.
- ArtBeads.com
- Beadaholique.com
- BeadSmith.com
- DreamTimeCreations.com
- FireMountainGems.com
- RhinestoneGuy.com






Where exactly is the embroidery pattern download from page 25?
You can find the embroidery pattern in our "Sparkly Faux Suede Flower" Web Extra. Note: The pattern is in .DST format, which is compatible with most embroidery machines.