


Velvet has always been prized as one of the most luxurious fabrics and for good reason. Its luscious, lustrous surface is the essence of sumptuousness. Wearing a garment made from velvet feels indulgent and sensuous. It’s a perfect fabric for many evening looks.
Velvets range in weight from chiffon to heavy upholstery weights. Originally made of silk, velvet is now also available in cotton, rayon, acetate, polyester, and various blends. It’s made by weaving two layers of fabric simultaneously, one on top of the other. The pile, which joins the two layers, is then cut to create velvet’s signature texture.
Velvet also has the reputation of being difficult to sew. But with new technical information and sewing aids, there’s no reason to be intimidated. With a few skills, you’ll be able to sew velvet with ease. Read on to learn how to distinguish among the different velvet types, the best pattern styles to use, and how to work with them. You’ll also find essential information on how to cut, mark, sew, press, and even hem this delectable fabric.
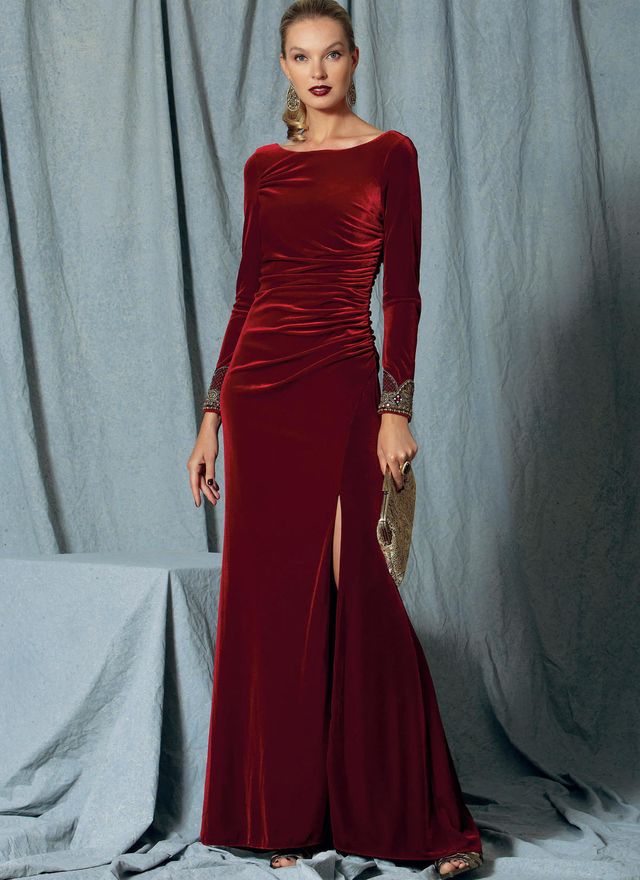
Gathers, soft folds, and drapey styles work better than those that are fitted and contoured.
Styles and Patterns
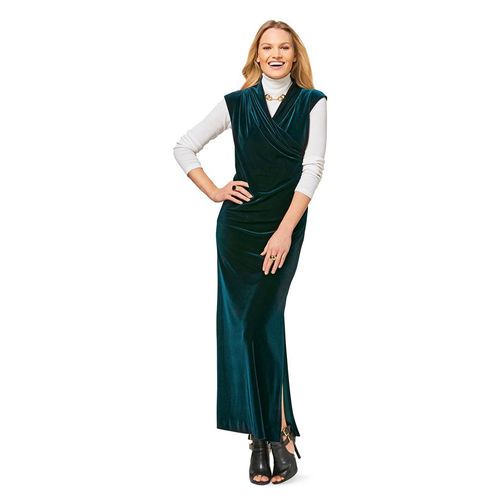
Because of velvet’s surface texture, stitching lines tend to show. Choose styles with minimal design details such as darts, seams, buttonholes, and topstitching. Designs with simple lines and semifitted to loose-fitting styles best display velvet’s qualities. Gathers, soft folds, and drapey styles work better than those that are fitted and contoured.

Some straight lengthwise seams (e.g., back seams) can be eliminated by placing the seamline on the fabric fold. Other details such as zippers and buttonholes can be hand worked instead of machine sewn. Avoid ripping out stitches; it makes the fabric look damaged. It’s always best to refine the garment’s fit before sewing it in velvet.
Velvet has a definite nap. Nap is the direction of the pile. When you run your hand over the fabric, you will be able to tell whether the nap feels smooth to the touch (the pile is going down) or rough and prickly (the pile is going up, against the nap). If the nap is up, the velvet looks darker and absorbs light. If the nap is brushed down, the velvet’s color looks lighter and the nap reflects more light.

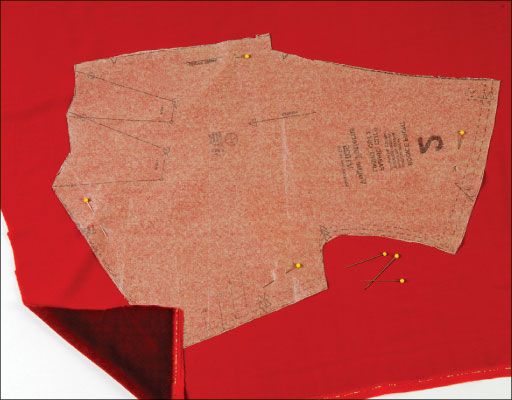
Lay the fabric wrong side up in a single layer on your cutting table so the pattern pieces are on the fabric’s flat side. When pattern tissue is placed on the pile side, it moves and shifts, making pinning difficult and cutting inaccurate.
Cutting and Marking
There are no hard and fast rules about which way to cut velvet, but typically, velvet garments are cut with the nap going down. Velvet often wears better and mats less when cut with the nap down. However, if you prefer a richer, darker color, cut the garment with the nap going up. It’s important to be consistent and cut all of the garment pieces with the nap running in the same direction. Use a chalk marker or a sliver of soap on the fabric’s wrong side to mark the nap direction.

Lay the fabric wrong side up in a single layer on your cutting table so the pattern pieces are on the fabric’s flat side. When pattern tissue is placed on the pile side, it moves and shifts, making pinning difficult and cutting inaccurate.
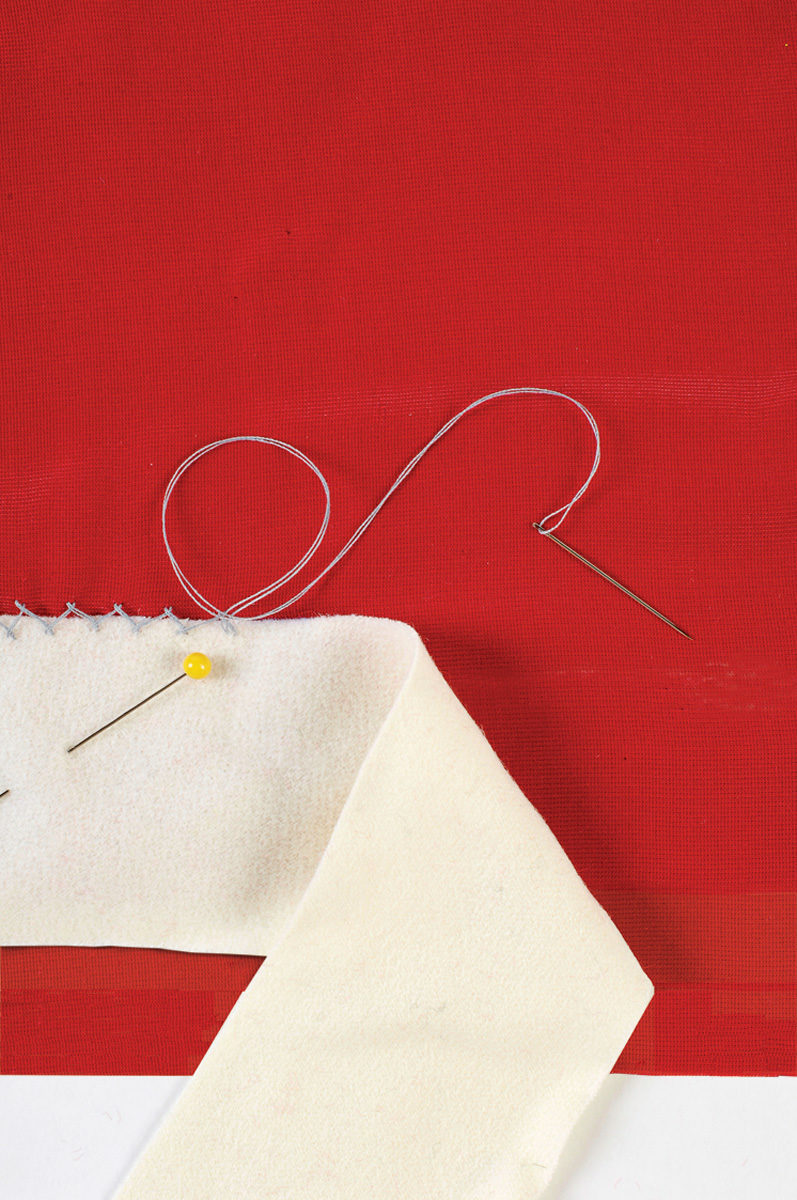
The best way to mark velvet is with tailor’s tacks.
You can use chalk or tailor’s pencils to mark dots and other necessary markings from the pattern on the fabric’s wrong side, but the best way to mark velvet is with tailor’s tacks. Thread a very fine, sharp hand-sewing needle with silk thread to sew the tacks. Silk thread is less damaging to the fabric than pressing chalk into the backing, and thread can be removed easily. If you need to mark long edges such as a hem, thread-trace them. Avoid using a tracing wheel and tracing paper. To mark notches on the edges of the pieces, make a small snip into the seam allowance for a single notch or multiple snips for double and triple notches.

Sewing
Stitching two pieces of velvet together can be the most challenging aspect of working with it. The traditional methods of sewing simply do not apply to velvet. When placed right sides together, the piles of two pieces of velvet shift against each other. No amount of pinning or basting will prevent the fabric from shifting and moving—in both directions—when you sew. Here are some classic tips for sewing seams in velvet:
• Hand-baste with one or more of three basting methods—double, backstitch, or diagonal basting.
• Loosen the machine tension.
• Hold the fabric taut as you sew.
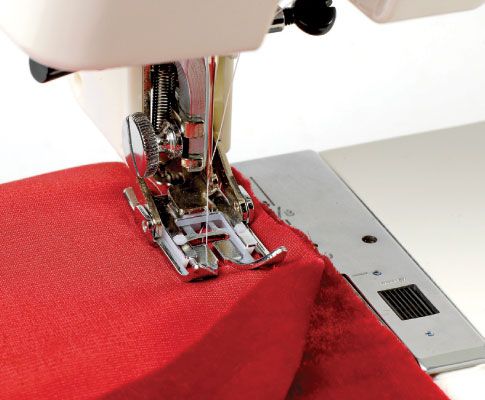
• Use a walking foot, Teflon foot, or roller foot.
• Stitch with tissue paper or a stabilizer between the layers and/or between the fabric and the feed dogs.

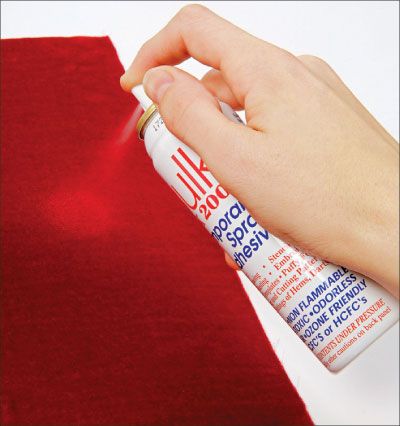
Although all of these suggestions are useful and certainly aid in the sewing process, there is a product that saves time and frustration: temporary spray adhesive. Instead of pinning, basting, stabilizing, and hoping for the best, simply spray a light line of adhesive along the seamline on the fabric’s right side. Then place the right side of the corresponding piece along the seamline, finger-press together, and stitch the seam. No pins are necessary. If you don’t get the pieces positioned perfectly the first time, pull the layers apart, and press them together again. The adhesive retains its sticking power.
You also can use this process when sewing a layer of velvet to other types of fabric such as lining or any other smooth, no-pile material. Eventually, the adhesive dissipates without leaving a residue.
Although the adhesive dissipates from the fabric, it won’t disappear from your table, the floor, or the surrounding surfaces, so always cover your workspace to catch overspray. Adhesive manufacturers also make products to help remove the overspray from hard surfaces.

Pressing
Pressing velvet is always delicate work. It is easy to mar the pile with an iron, so use only steam—never allow the iron to touch the fabric. There are several pressing-board surfaces you can use to safely position the velvet pile-side down while steaming from the wrong side.

Needle and Velva boards are good surfaces, but they are small and need to be moved frequently while you work. It’s better to cover your entire pressing surface with a piece of stiff-pile fabric such as heavy velveteen, mohair upholstery, frieze (a coarse fabric, often woolen, with a shaggy surface or uncut nap), or a thick terry-cloth towel; that way, you don’t have to shift the surface as you steam. Use a large scrap of velvet as a press cloth.
Velvet basics
When sewing velvet, use universal or sharp size 70 or 80 machine needles and 100 percent cotton or silk thread. Always stitch in the direction of the pile. To minimize bulk, trim and grade seam allowances, and slash darts along the fold; press the darts open.
Cut facings from lining fabric, rather than velvet, and understitch by hand with a pickstitch to reduce bulk and shifting. Two layers of velvet on garments often “walk” when worn.
When gathering, use a heavy cord in the bobbin. Sew two rows of basting stitches—one on the seamline and one within the seam allowance. Pull the bobbin cord to gather the fabric.
If you like using a walking foot, stitch on a swatch first to make sure that it doesn’t leave tracks on the pile; some tracks steam or brush out, but some don’t.
Seam Finishes

Some of the finest and most expensive designer garments—even velvet—do not have seam finishes and are left raw-edged. Unless the velvet ravels excessively, this finish is the flattest and the least bulky. For extra security, trim seam allowances with pinking shears.
If the garment needs a seam finish, experiment with serged edges. A three-thread overlock stitch might work—unless it doesn’t grip and tends to fall off the edge. In that case, use a four-thread overlock stitch.
Long before the invention of sergers, sewers used a version of the Hong Kong finish, incorporating strips of tulle fabric wrapped around the raw edges to minimize bulk.

Hem Finishes
Before hemming the garment, hang it for at least 24 hours to let the fabric relax. Depending on the fabric and the garment’s cut, it may stretch considerably. Remeasure and recut the hem length if necessary.
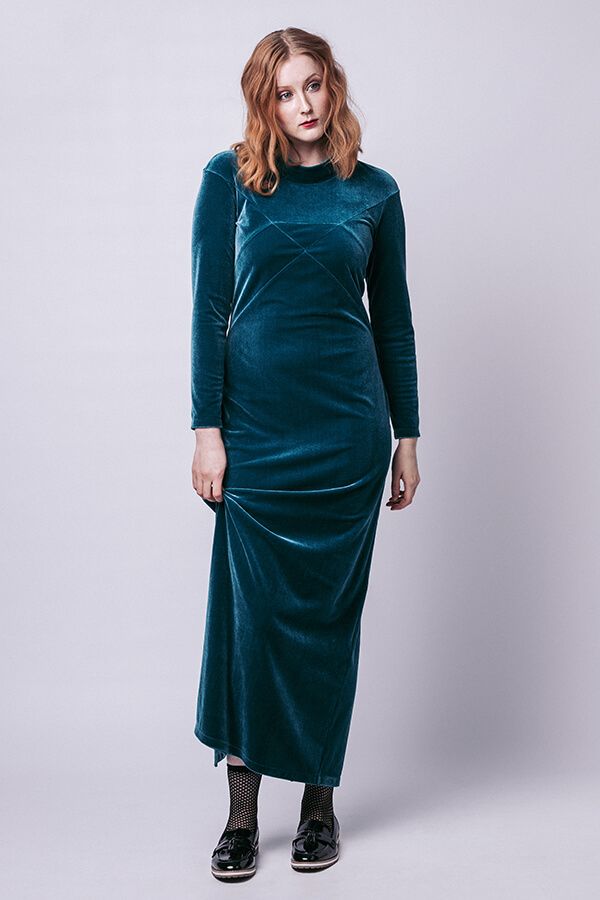
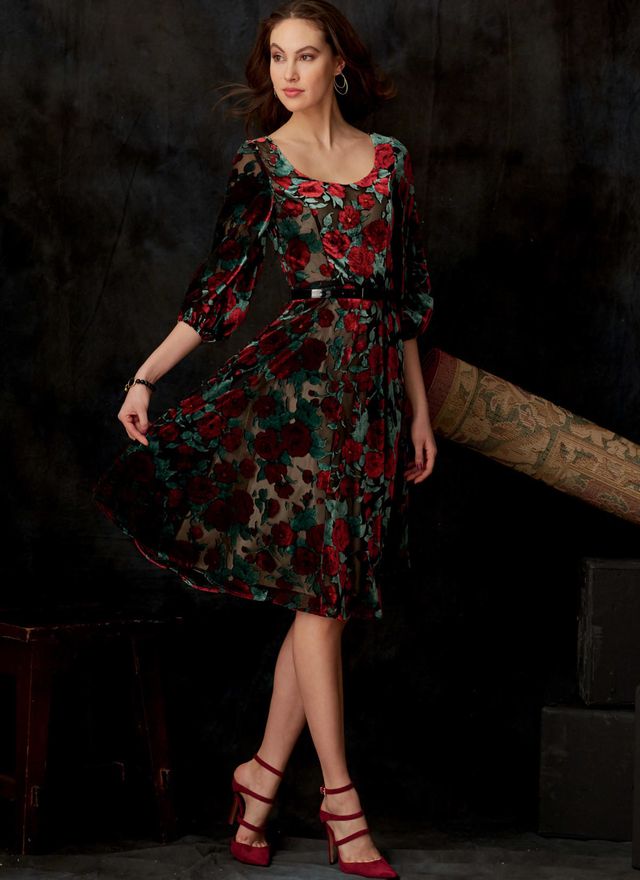
A hem may not need an edge finish. Simply turn it up and stitch by hand, using a hand catchstitch, or by machine with a blindstitch. Either way, steam the hem; never let the iron touch the fabric. Finger-press the hem to leave a soft fold at the bottom. Or leave the hem raw, as in our example dress.

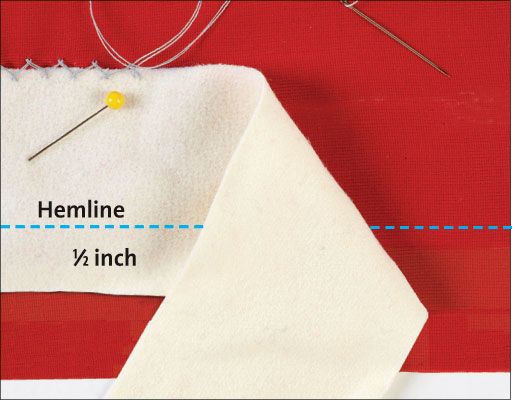
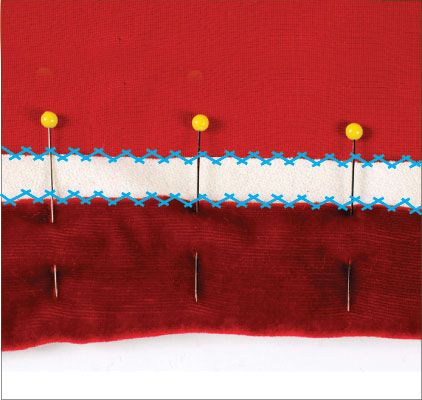
For lined garments such as coats, use strips of bias-cut cotton flannel 1 inch wider than the hem allowance to interface the hem. Position the strip parallel to the hem, with the lower edge overlapping the hemline by 1/2 inch. The upper edge will extend above the hem allowance 1/2 inch. Catchstitch the top and bottom interfacing edges to the velvet’s wrong side. Fold up the hem allowance, and catchstitch the bottom edge to the flannel only.
Armed with all of these tricks and techniques, you can approach sewing velvet with a new attitude. Introduce it into your wardrobe with confidence, and wear your newly (and easily) stitched velvet garments with pride.


Terrific, one of the best tips I've ever seen, this works so well! After many attempts to get velvet right, I came across the adhesive method mentioned above and am delighted with the results!
Does anyone know how to repair cuts in velveteen dresses? It is 1 1/2" long (on the thigh at the front ).
Not that I would know much about moving and patching together fabric, but I suppose it's a good skill to know at the back of your head for when you have some elaborate velvet costume party that you need to get to…
Looks really terrafic
Leave the hem raw - what a great idea! It looks fine on the example.