

Like many of you, I have been making cotton face masks. Local hospitals and health agencies in my area provided several patterns that would work for them, and my local sewing guild sent them in the latest newsletter. I wasn’t sure if I could do it. The sewing part was not the issue. Mentally, I wasn’t sure I wanted that reminder in my face, literally. I found, however, if I focused on the people who would be wearing them and not the reason they needed them, it was doable. Making face masks seems akin to previous generations winding bandages during the world wars. I know it helps, even in a small way, but that we need to do it at all makes me sad.
The version of mask I chose required four 18-inch ties in the corners. I picked this one because I could make ties with supplies I already had.

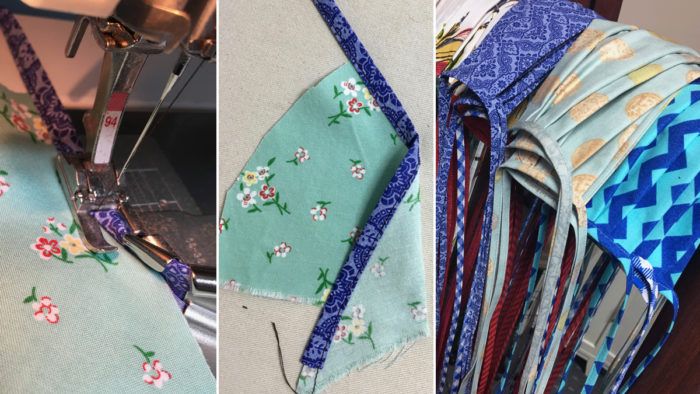
I immediately pulled out my sewing machine’s binding foot. I really love this foot but haven’t used it in a while. It was the bomb for making masks.


Binding foot magic
The binding foot works like a bias tape maker attached to your sewing machine.

Feed in a bias strip and it is folded and moves under the needle to be stitched. If you simply use a bias strip, you get a nice “tie.” If, as the strip is being pulled through the machine, you insert the side of a mask, you get a neatly bound edge and another tie on the other side of the mask. Brilliant.


If you have one of these little gems, you know how easy it is to bind the edges of almost anything. What you may not have tried is using the binding foot for garment construction. Because it seams and finishes in one slick pass, it makes a tidy finished garment.
Let me show the method I used to make a summer top.
Prep the pattern and materials
Preparation is the key to this technique. Some seams must have smaller seam allowances and other edges need the seam allowances removed completely. The order in which the seams are completed is also critical. Be sure to enclose all the raw edges as you sew.
The pattern fit must be good before you start. Once the seams are in place, it is difficult to make adjustments, so knowing the garment will fit is important from the start. The pattern I started with has just two pieces, and I have used it for tops and vests before.

1. Make a copy of the pattern. Mark the seam allowances.
2. Determine in what order to put the garment together. Shoulder seams needed to be connected first, in my case, and then covered with the edge bindings. I left a 1/4-inch seam allowance at the shoulder and sides and cut the seam allowances away altogether on the edges.
3. Eliminate corners. If you have ever used a binding foot, you know that corners are not easy to maneuver. Turn corners into curves wherever possible to make the garment easier to assemble and nicer looking when it is finished. The white lines indicate my new edges.


Note: If you wonder why my pattern paper always looks wrinkled and used, it is because it is. I save the packaging from things that are shipped to me and use it to make patterns.

Now the pattern is ready to go, except . . .
4. Cut facings if needed. I told a slight untruth when I said there were only two pattern pieces. If you are working with a heavyweight fabric and can make buttonholes in the single layer with no problem, forge ahead. If, as in my example, you are working with a lightweight fabric, or prefer a facing, cut that piece as well. I traced the front edge and left 3 inches to accommodate buttons and buttonholes. (Finish the facing’s straight inner edge before putting it into the garment.)

Create the bias strips
Now for the bindings. My bias binding foot makes a 1/4-inch-wide finished binding. I start with a 1-inch to 1 1/8-inch-wide strip of fabric depending on the weight of the binding fabric. In this example, I used 1 1/8-inch-wide strips. How did I decide this? By testing, of course.

Cut strips that are specific for each seam or edge to avoid lots of seams in the binding. It’s my way of controlling where the binding seams end up. My top calls for a long strip that covers the front hem, the center front edge, the back neck edge, down the other front edge and front hem in one go. It will require a seam or two.

Now let’s put this baby together.
Sew the binding using the binding foot
1. Sew the shoulder seams first. Start a strip through the binding foot to make sure it is folding evenly, then hold the shoulder seam with wrong sides together and feed it into the foot. This connects the shoulders and finishes the seam in one pass. It creates one neat row of stitching.


2. Next, bind the armhole edges. To prevent the curves from stretching out of shape while binding, staystitch carefully 1/8 inch from the edge, or, as in this case, use spray starch. This keeps the edges firm and minimizes any distortion from stretching.
The shoulder seam’s end gets caught within the armhole binding.


3. Next, bind the front opening and neckline edges. First be sure the front facings are pinned or basted in place. (I say this after getting halfway up the center front without them.) Start the binding at the side of the front hem, bind the front hem, the center front, the back neck, the other center front, and front hem, ending at the second side. You will cover the inside ends of the shoulder seams with this step and catch the facings along the center-front edges.

4. To close the side seams, pin the side seams with wrong sides together. Then feed them into the binding foot as you did with the shoulder seams. Be sure to leave a bias strip tail of 2 inches or more of on both ends of the seams to be able to finish these neatly.
5. Make a little knot at the hem of the side seams, or turn the binding strip tails to the inside, as I did at the underarm. Topstitch the side seam binding flat to add stability. (That can also be done at the shoulders.)

Finishing
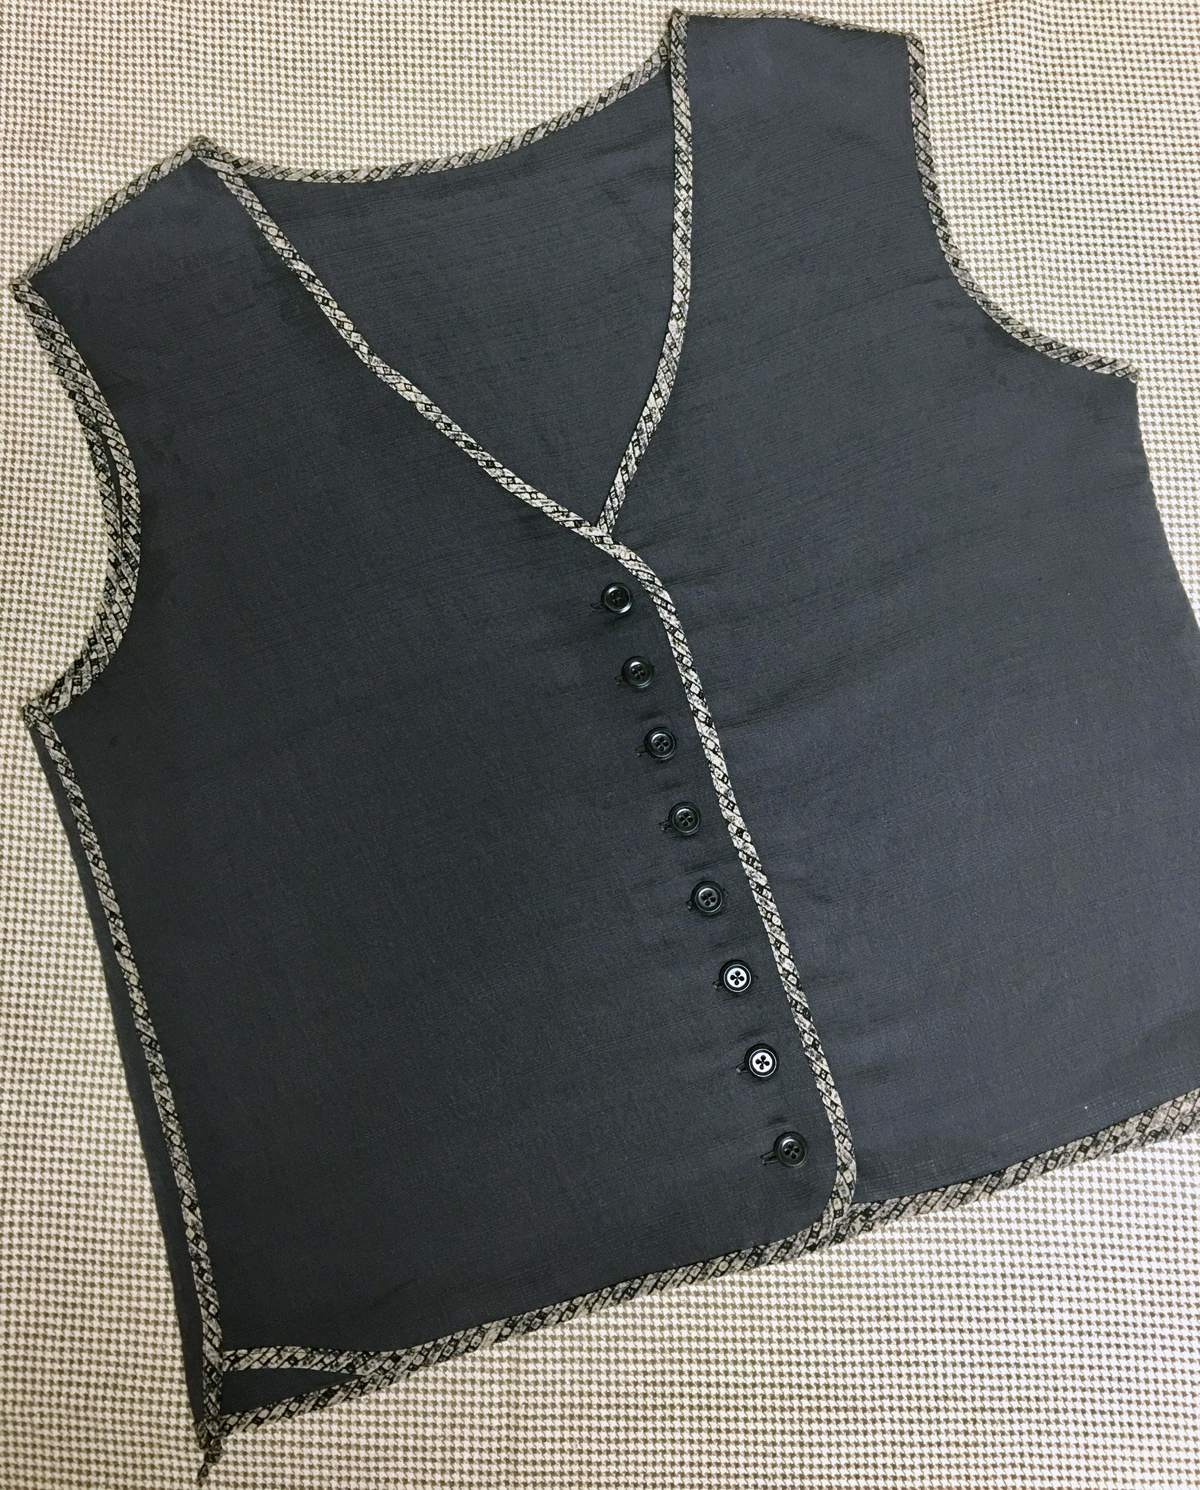
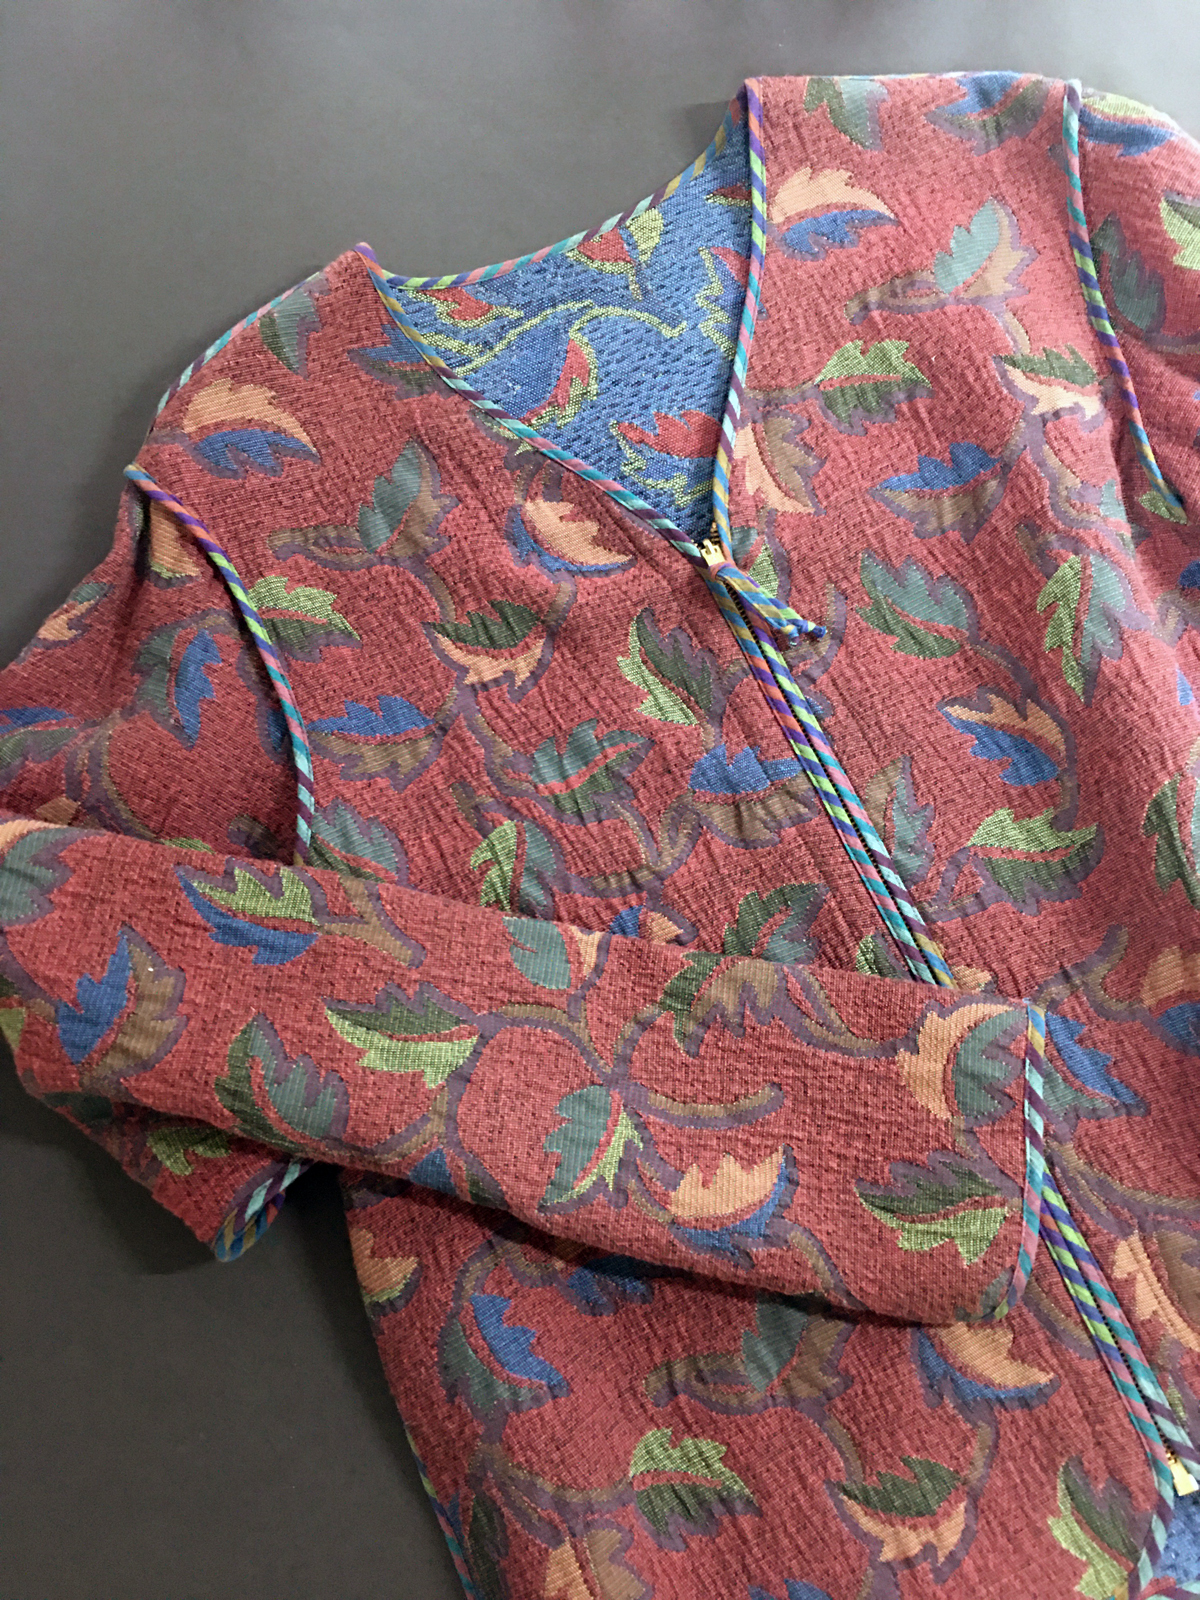
Add buttonholes and buttons, or you can make a zippered front as shown below, and you’re done.
I love the neat finish this construction technique gives. It is lovely for reversible garments, too. Here is a jacket that I sewed using an upholstery fabric. I just couldn’t decide which side I liked best. I made the jacket reversible, so I could enjoy both.


If you have a binding foot that has only ever been used for quilting projects, give garment construction a try. The binding foot is an old tool with which you can try new tricks.


Thank you for this great demo on paper, but is there a way this could be done on a video with the THREAD group since, as myself, some people are better able to understand the step-to-step by watching the process. I realize the steps look easy for some folks. Thank you so much
I don't understand how you get the side of the mask into the binding and still manage to finish the other side. I have a Babylock Ellisimo II and I do have several binding feet.
Becky says: I start with a 9-inch X 12-inch piece of fabric. I stitch it into a tube that is approximately 9 inches X 6 inches (depending on the seam allowance). The 9-inch sides are finished and the 6-inch ends will be finished with the binding. I flatten the tube and pleat it. I make about 18 inches of binding then insert one end of the mask that gets bound, and then continue binding for an additional 18 inches. Repeat for the other end of the mask. I hope this helps
Thank you for your post. I took my binding attachment out and made straps and finally advanced to putting the mask in the binder and finishing it that way. I appreciated the extra info on other uses for this attachment, especially how you plan your seams - I need help in streamlining using this attachment and my serger when completing my projects. Thanks again.
This is great. Thank you so much for this tutorial.
Where can one purchase that machine bias making foot....At least that is what it looks like to me...I have not seen what looks like an attachment to the machine..thanks os muc
This is indeed a great technique for masks. I use my vintage 201 and its original binding food for mask making. My modern machine gets cranky with all the layers. I found binding tape does not have to be bias as most of these masks are sewing with straight edges and I get cranky cutting on the bias. Obviously you'd use true bias for any project with curves.