

Claire B. Shaeffer, a frequent Threads contributor and expert in couture sewing methods, shares her essential pressing tools and techniques. She notes that pressing and shaping are important in couture construction, and sewing enthusiasts likely spend more time pressing than stitching.
Key pressing tools
Ironing board: Any board is fine; make sure the cover is clean and smooth.
Pressing stand: This is like a small ironing board that can sit on a table. You can do detailed pressing tasks, while the table supports the garment as you press.
Steam iron: Make sure it can deliver a burst of steam.
Hardwood pressing tools: All wooden pressing tools should be made of hardwood. When moisture is applied to hardwood, the wood grain doesn’t show. The wooden tools you’ll need are:
Point presser: Used for pressing collars, etc.
Clapper: Helpful for flattening seams.
Seam stick: Enables you to press open seam allowances along a seamline without creating impressions on the garment’s right side. (Also see “Q & A: Press without creating a shine,” Threads #203, June/July 2019)
Shaping tools: These help you mold fabric as you press.
Ham: Newer ones are lighter and easier to handle than the older kind, which were filled with tightly compacted sawdust. If you can find one, also purchase a ham holder; this supports the ham as you press and mold fabric over it.
Seam roll: Use this like a seam stick or like a small ham.
Shoulder stand: This fabric-topped wooden form is used for shaping a sleeve cap.
Sleeve board: This small ironing board is generally more useful for ironing shirt sleeves than for pressing during construction, but you may find occasions to use it as you’re sewing.
Small hobby iron: With a soleplate that’s just a couple of inches long, a mini-iron is good for pressing into small areas.
Needle board: Considered essential for pressing velvet, a needle board can also improve your results when you are working with lofty wools. A needle board is expensive and long-lasting; you’ll have it for a lifetime.
Additional pressing aids
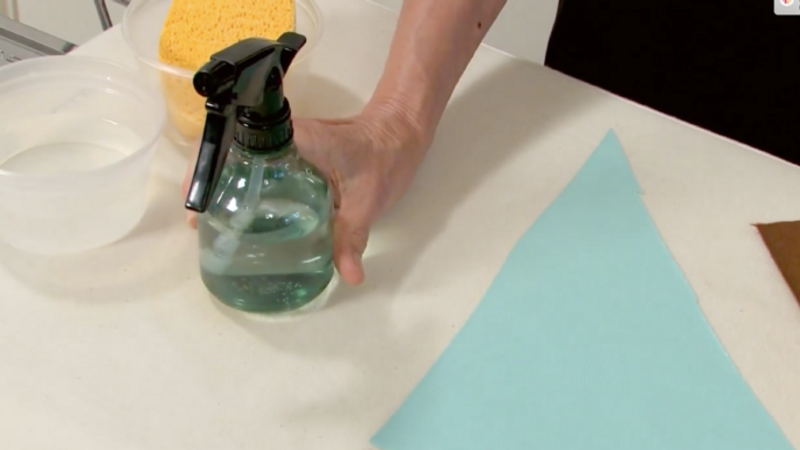
Spray bottle/mister: You won’t have pinpoint accuracy with a spray bottle, but you can achieve an even, broad distribution of water.
Sponge: When pressing woolen fabrics, a damp sponge helps you apply moisture in a targeted manner.
Brown paper: Press through a sheet of kraft paper to absorb excess moisture.
Soap: A thin sliver of basic soap, without cream, encourages wools to form a sharp crease. Claire demonstrates this when pressing and turning a corner.
Press cloths: Keep an assortment, including silk organza; wool for pressing wool; cotton, including a gauze diaper; cotton drill for wool; synthetic chamois to wet and wrap around the iron to produce a lot of steam.
Iron cleaner to clean soleplate
Basic techniques
Claire demonstrates how to press properly on silk and wool fabrics. You’ll learn how to test for correct heat and moisture levels and how to create a crisp, neat corner, even with bulky wool.


Log in or create an account to post a comment.
Sign up Log in