

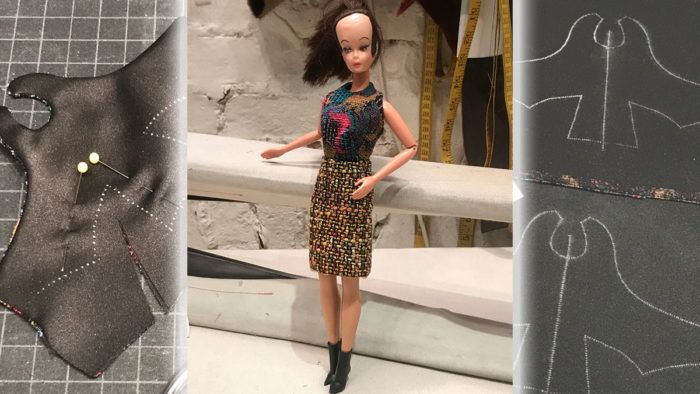
Crazy Bella likes to wear halter blouses, so she’s sharing her little blouse pattern and instructions with you. She’s such a doll!
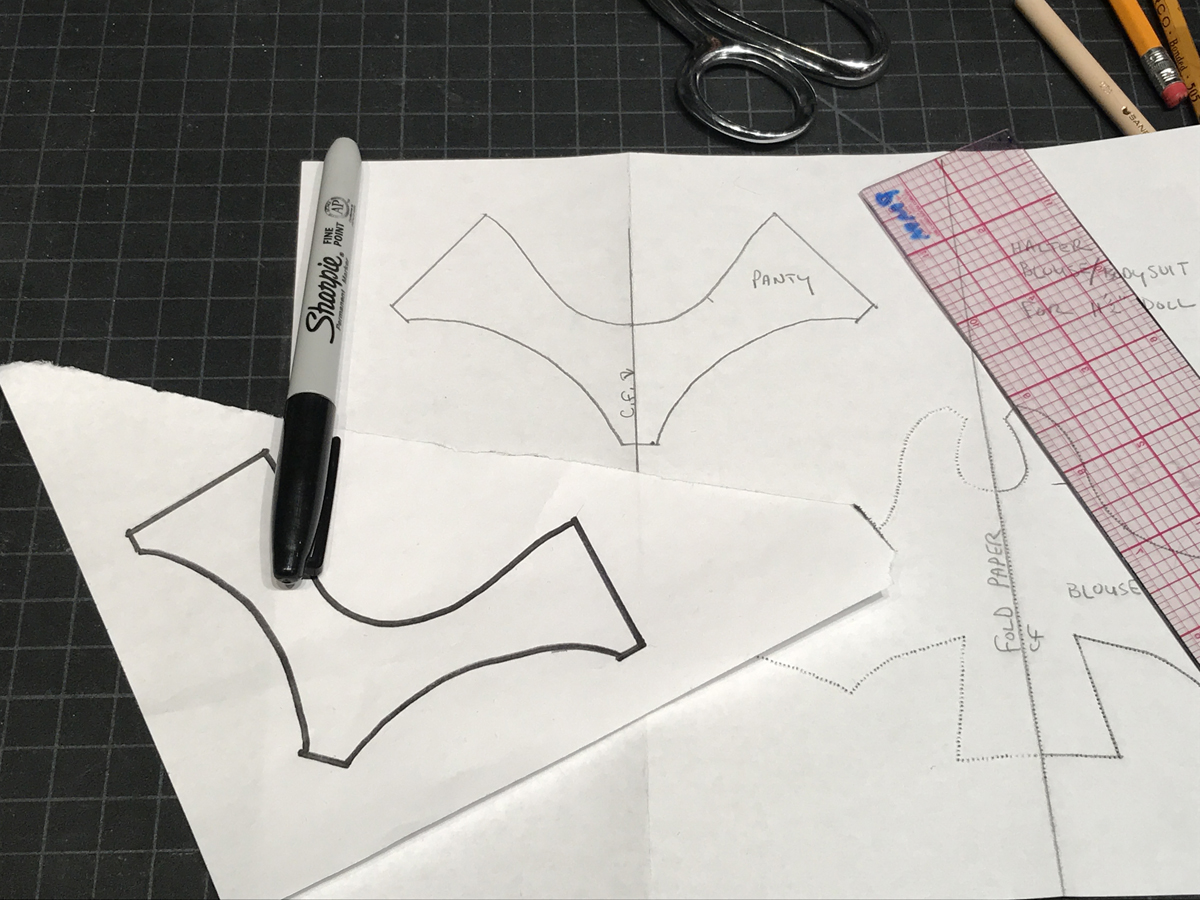
Little blouse patternwork
You can download the pattern for the little blouse here. Print it at 100 percent on a standard 8.5-inch by 11-inch sheet of paper.
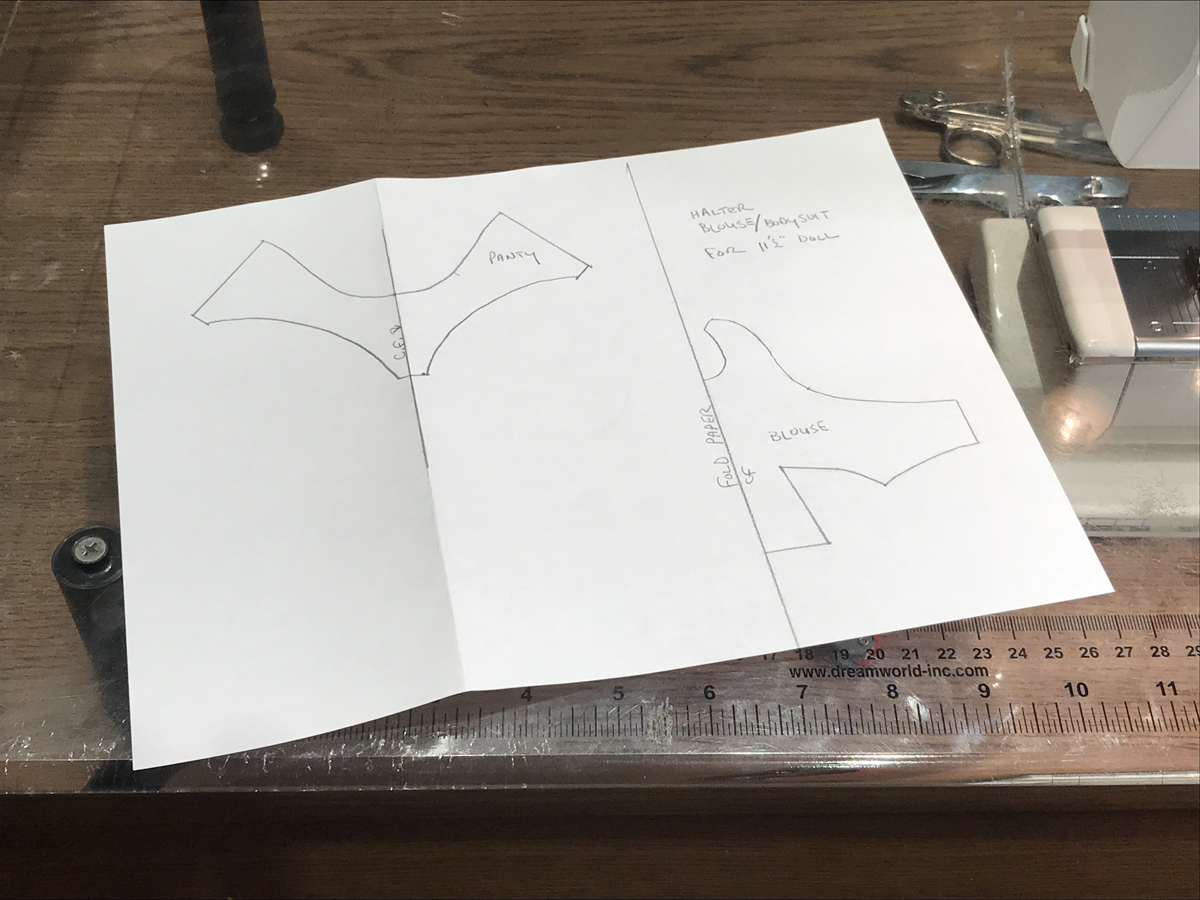
Fold the paper along the center-front line on the blouse. Unthread your sewing machine and “stitch” along the lines on the pattern to perforate the paper. Make the stitch length 1.5 mm.
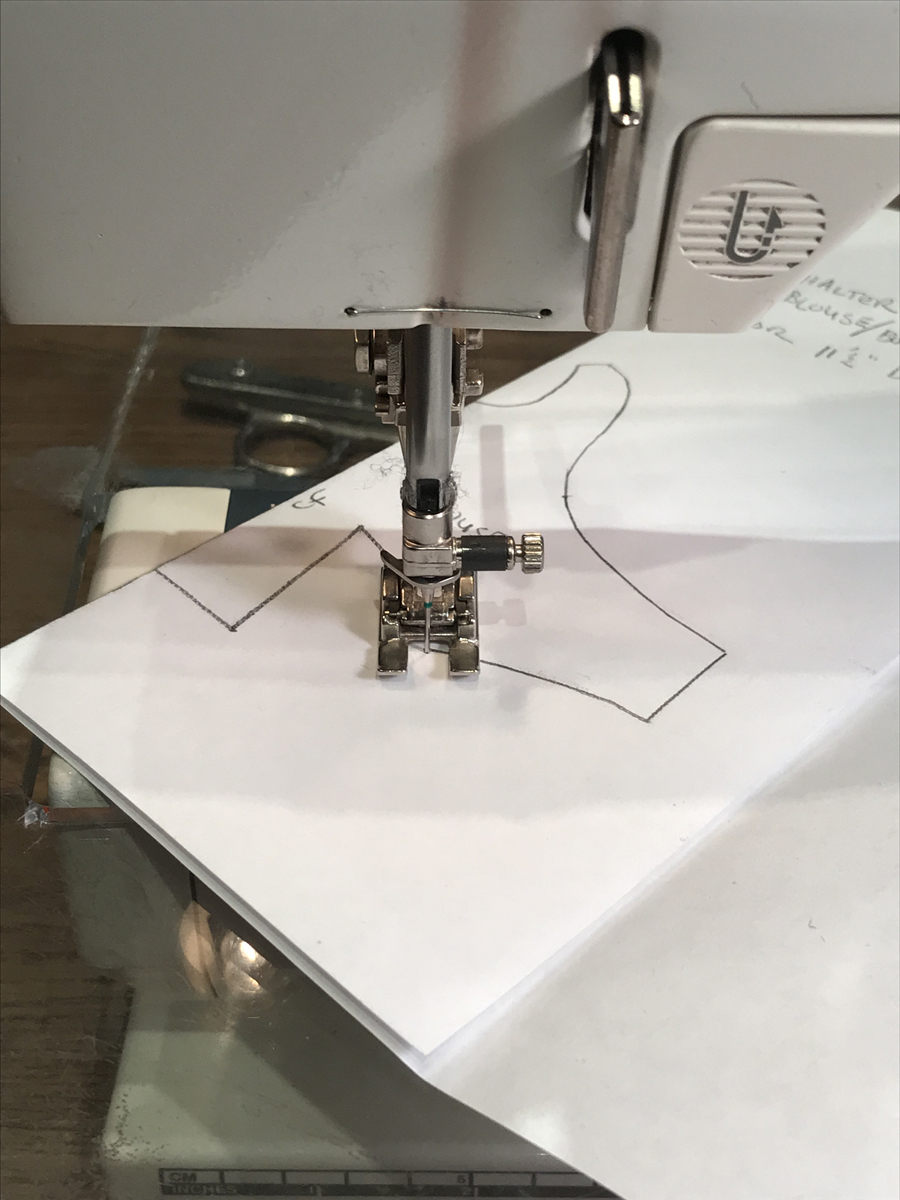
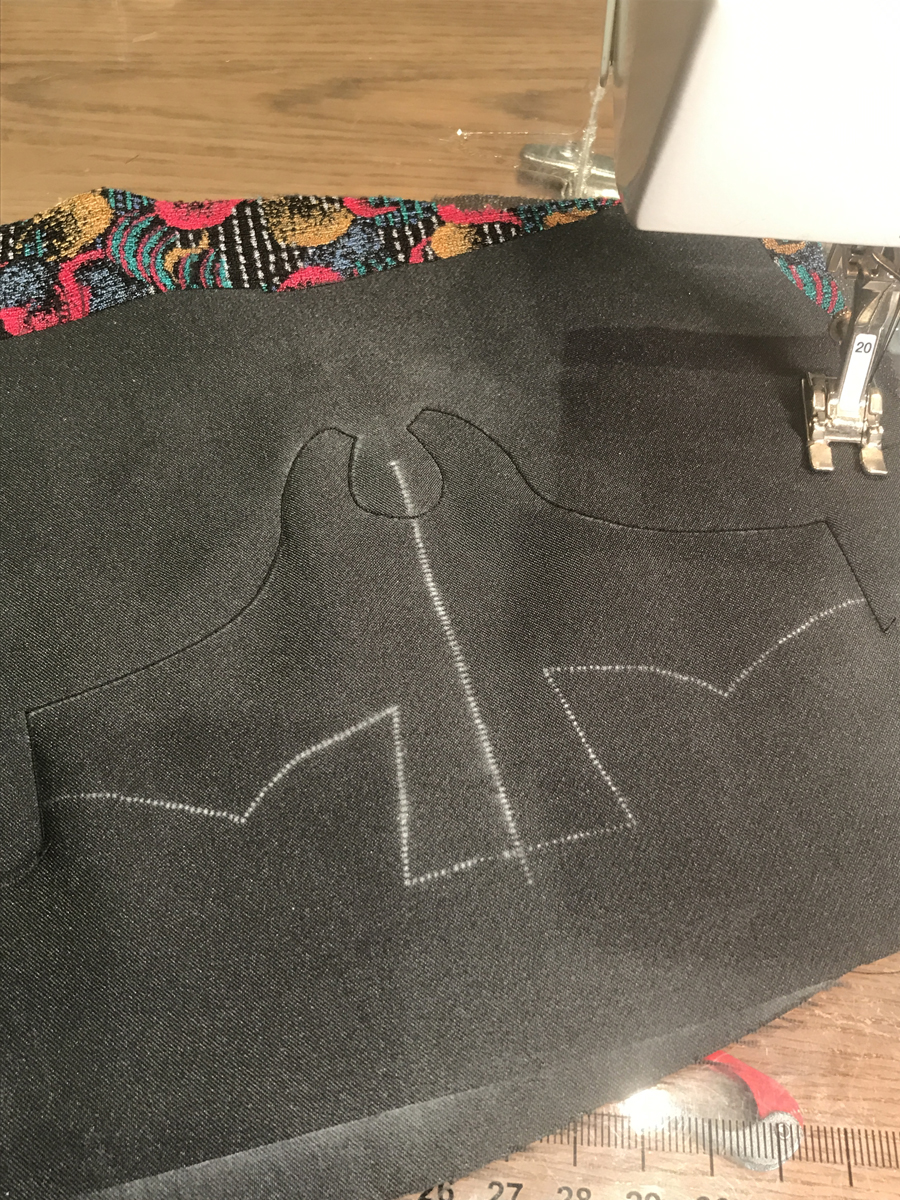
This is the pounce pattern, with which you will mark the fabric.

Marking
Using the pounce pad, mark the wrong sides of the fashion fabric.
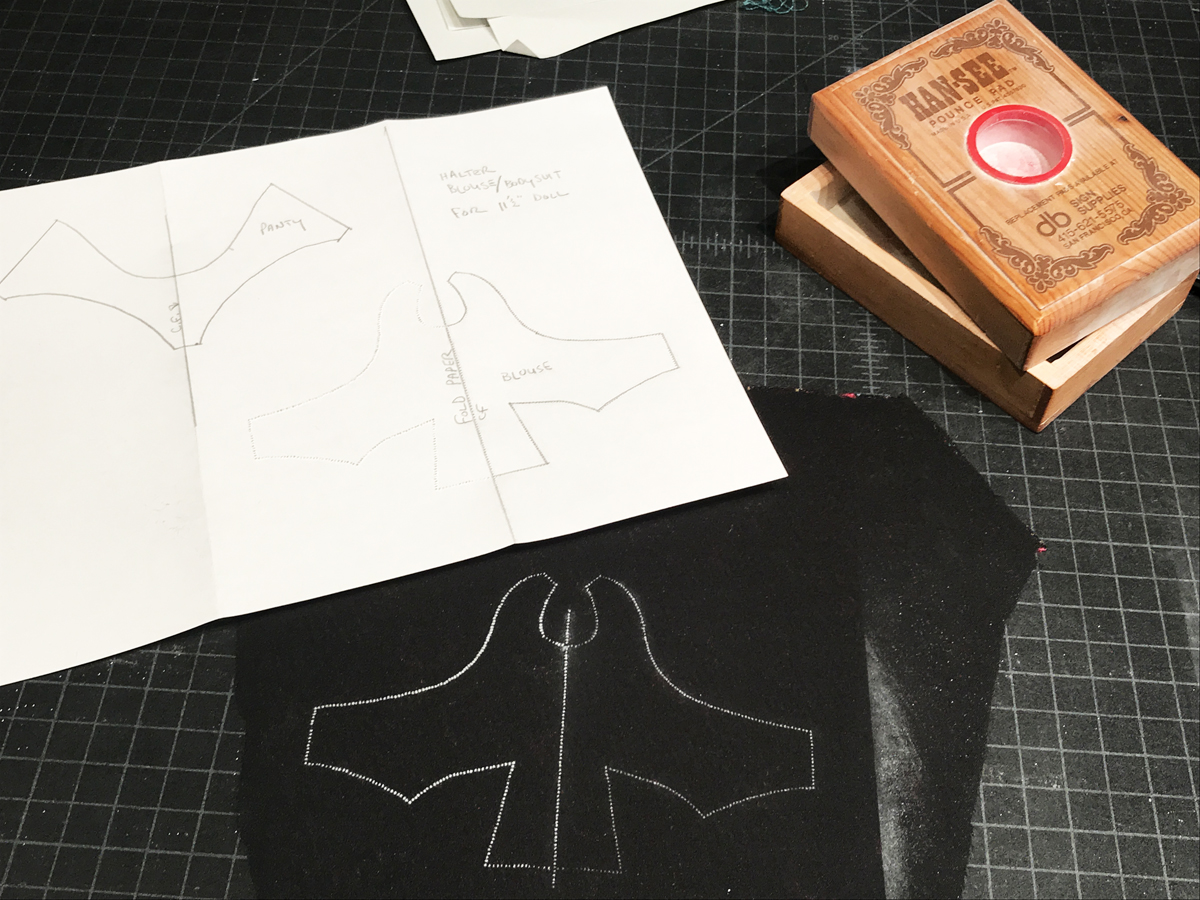
Mark the lining, too.

Make a copy of the panty on a separate piece of paper—this will be destroyed when making the panty.
Little blouse construction
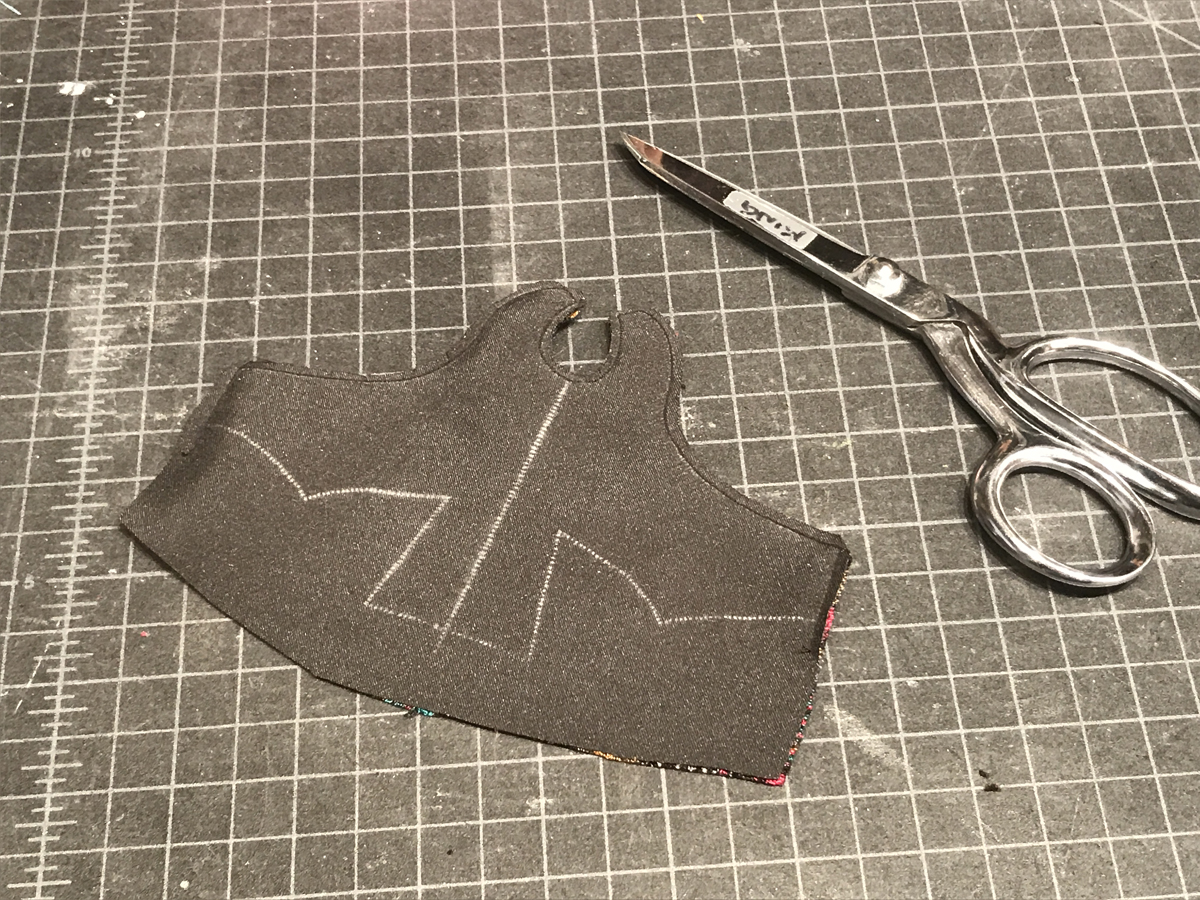
Bodice
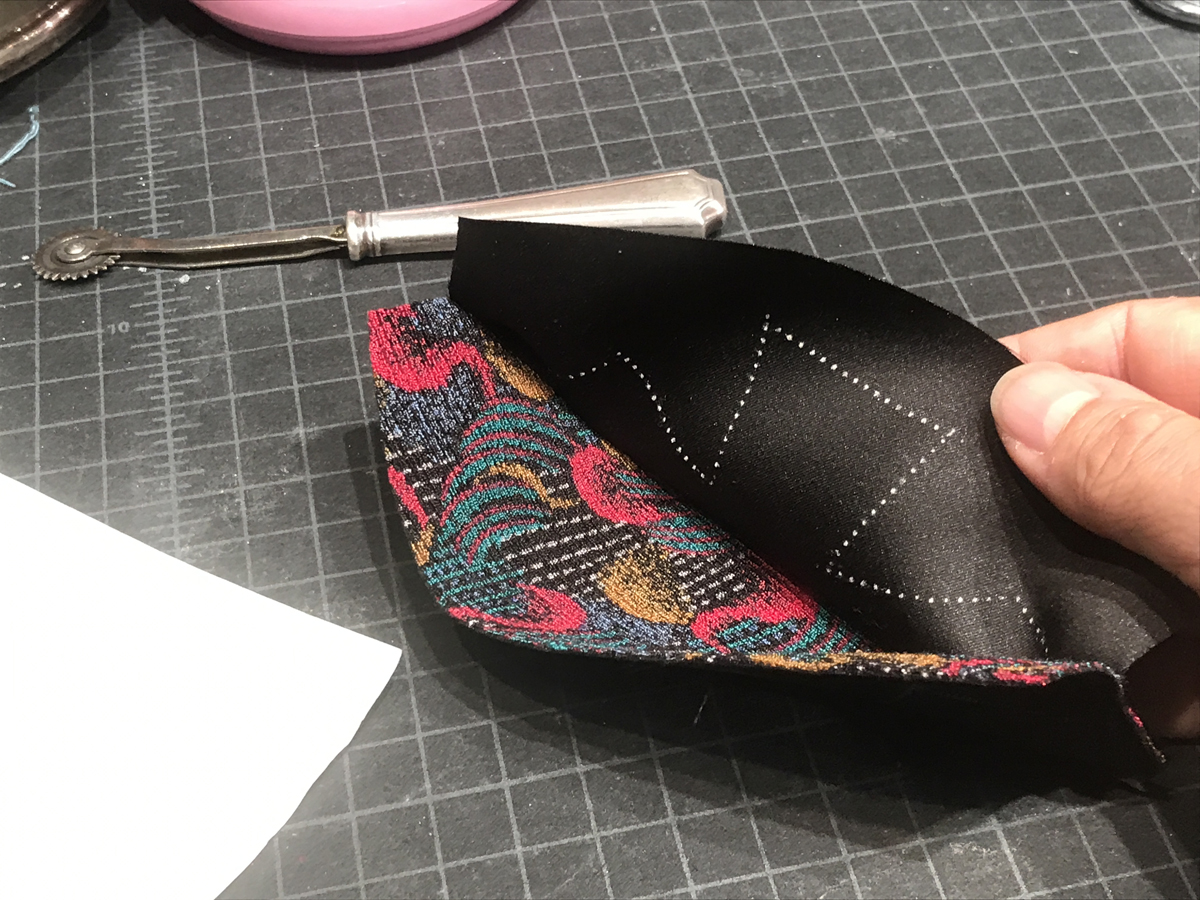
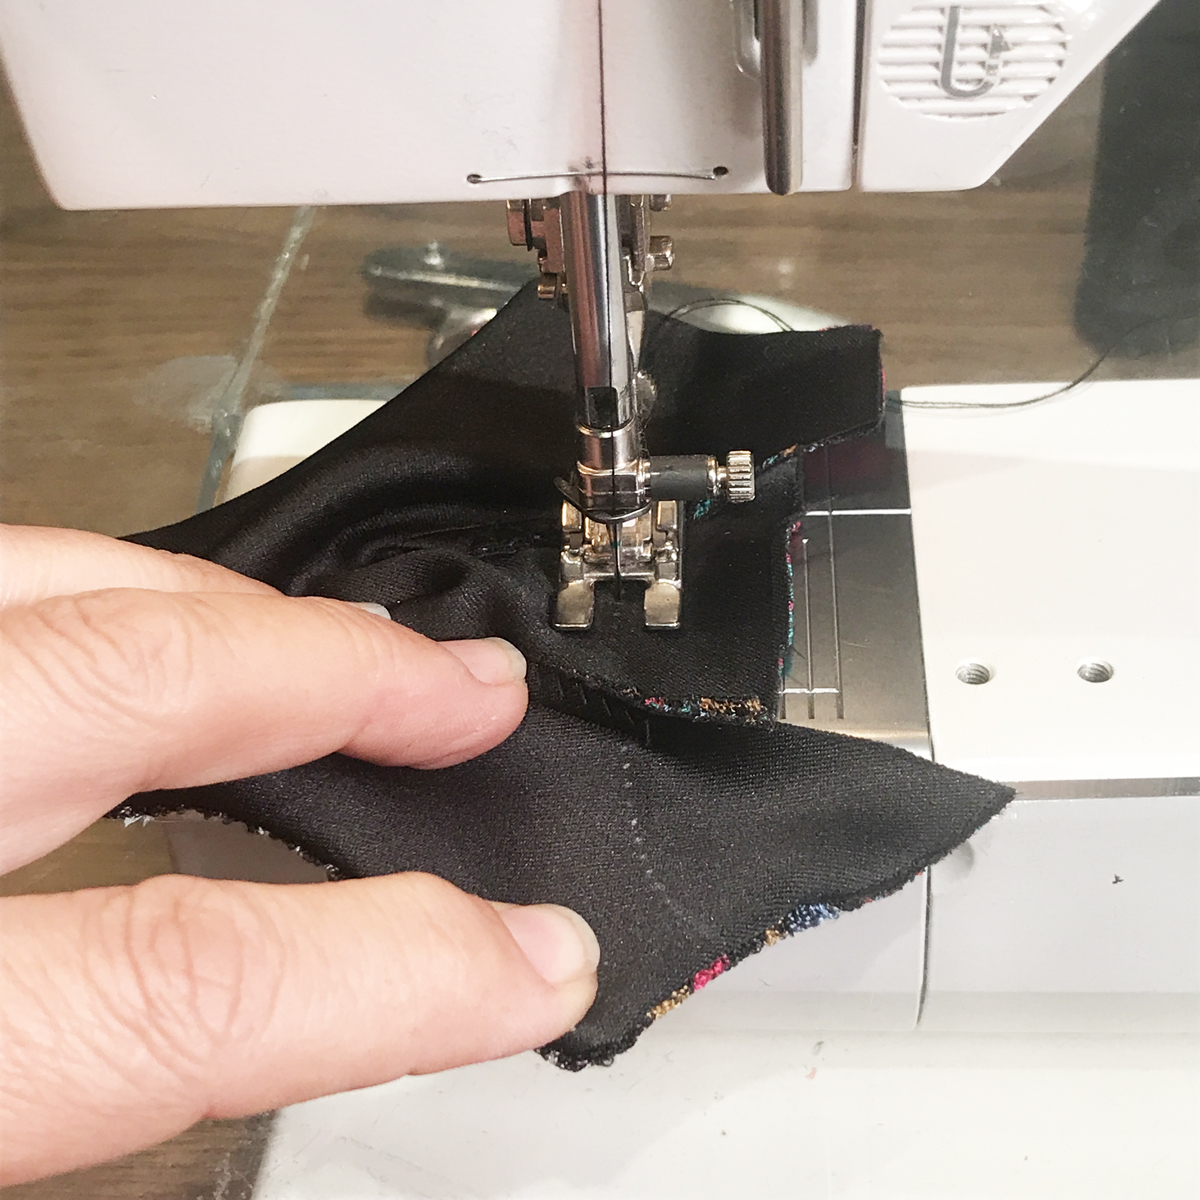
Pin the fashion fabric and lining with wrong sides together. Sew along the stitching lines as shown in the photos below. Make the stitch length 0.75 mm. A short stitch will enhance control as you feed the work through the machine and help when turning the work inside out. The short stitch is also more secure.
 |
 |
Trim the seam allowances to 1/8 inch. Clip corners and clip curves.
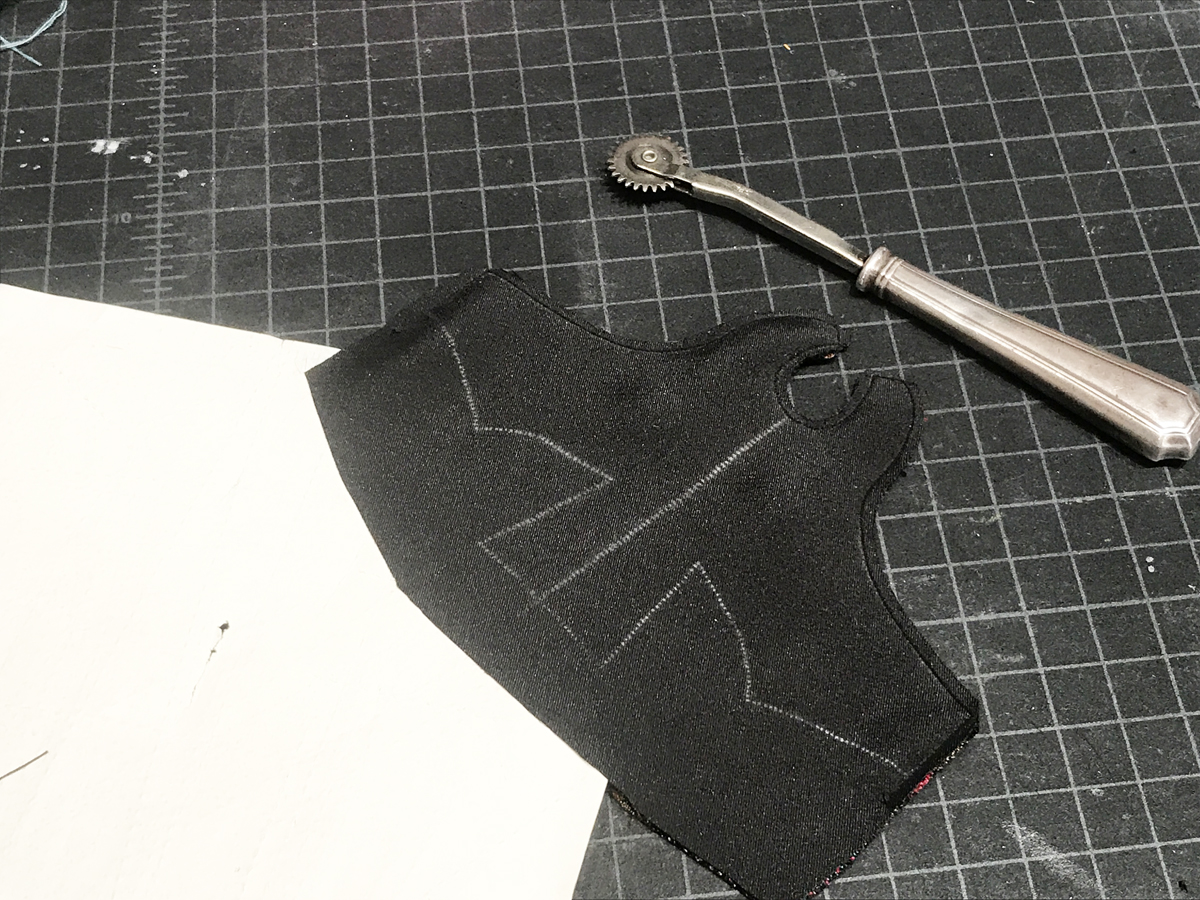
Before turning the work right side out, use tracing carbon to transfer the stitching lines for the dart and waist seam to the lining’s right side.
 |
 |
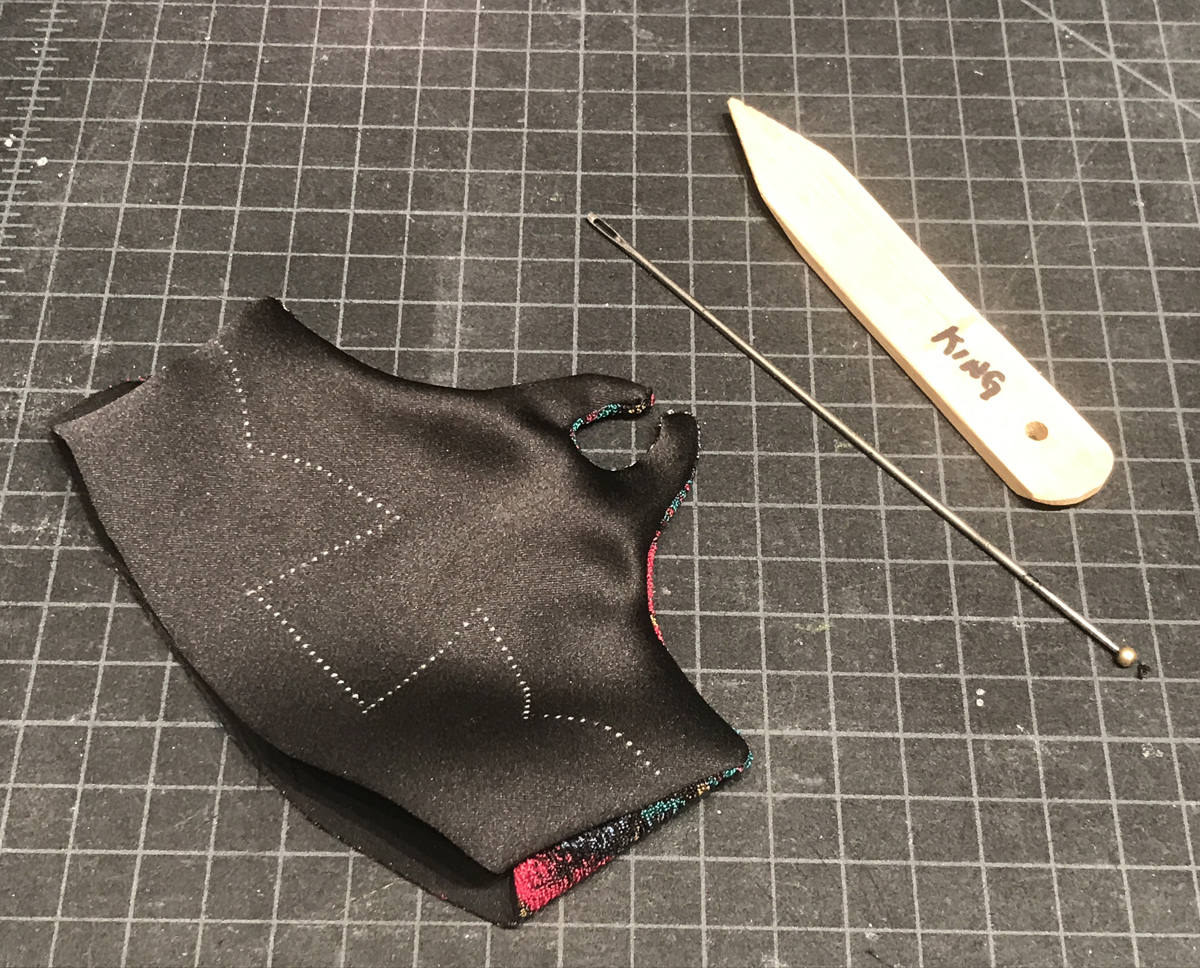
Turn the work right side out. Use a point turner or large-eyed needle to gently create crisp corners.
Before you sew the darts, pin the two layers together, outside the dart legs. Slash the dart midway down.
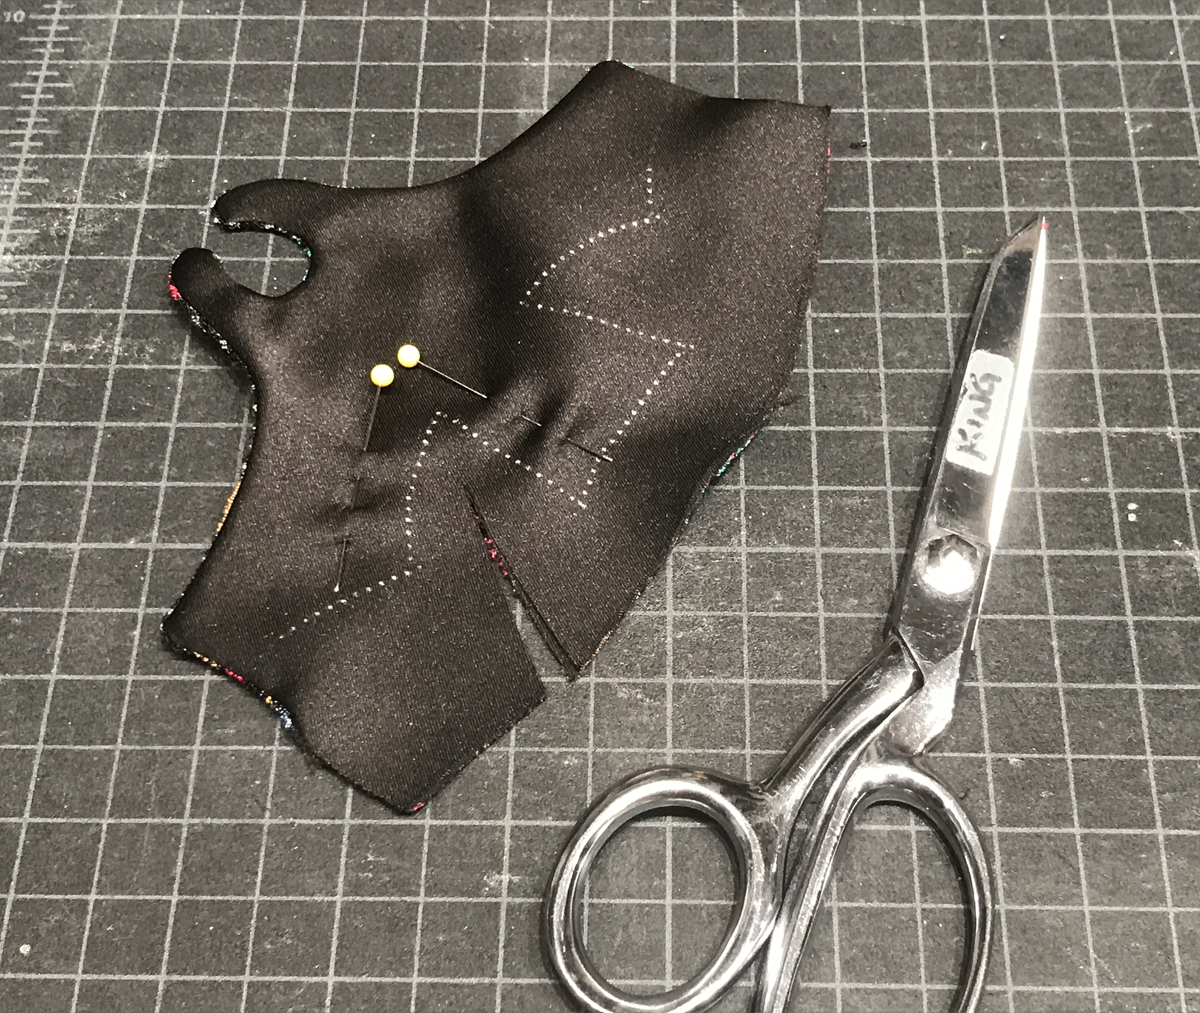
Pin-baste the darts together.
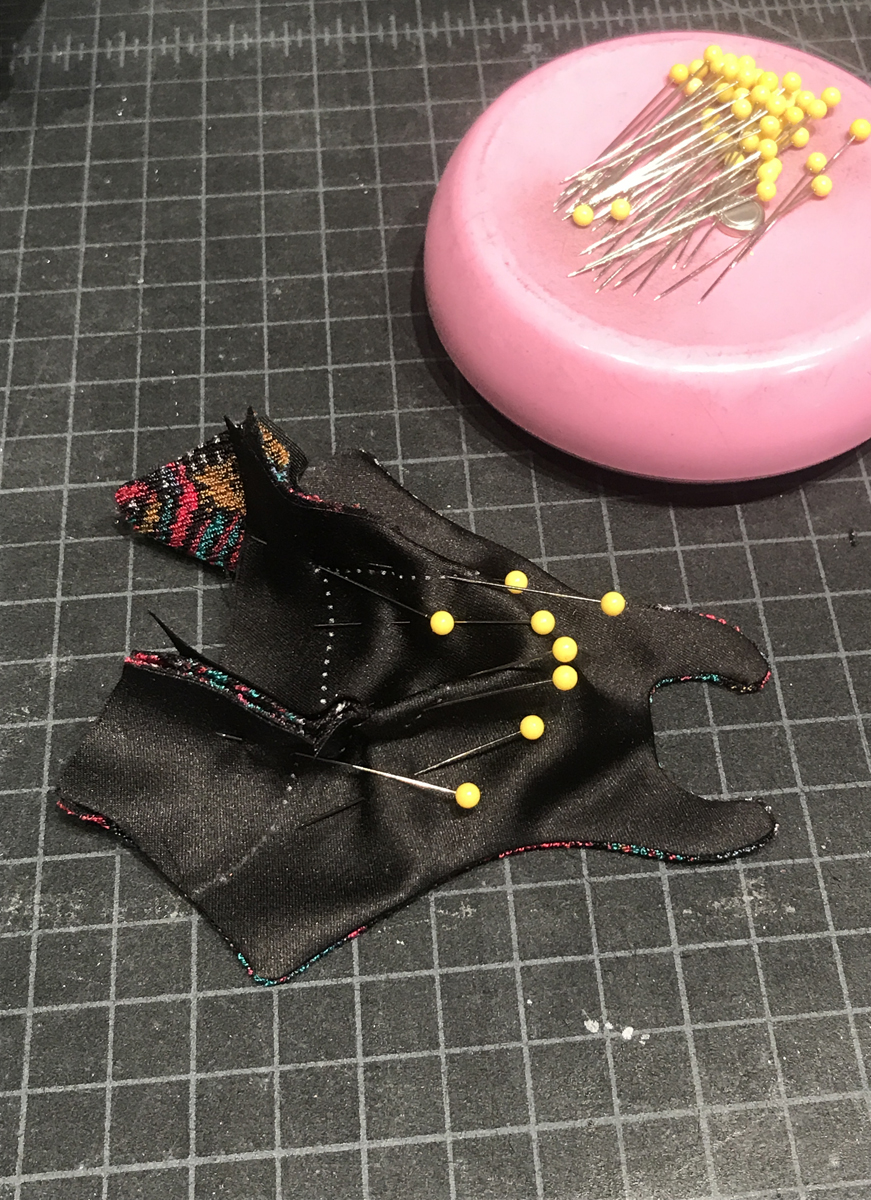
Sew the darts, and finish with a narrow zigzag stitch. Use a 2.0 mm stitch width and 2.0 mm stitch length.
Staystitch the waist seam after pressing the darts.
Panty
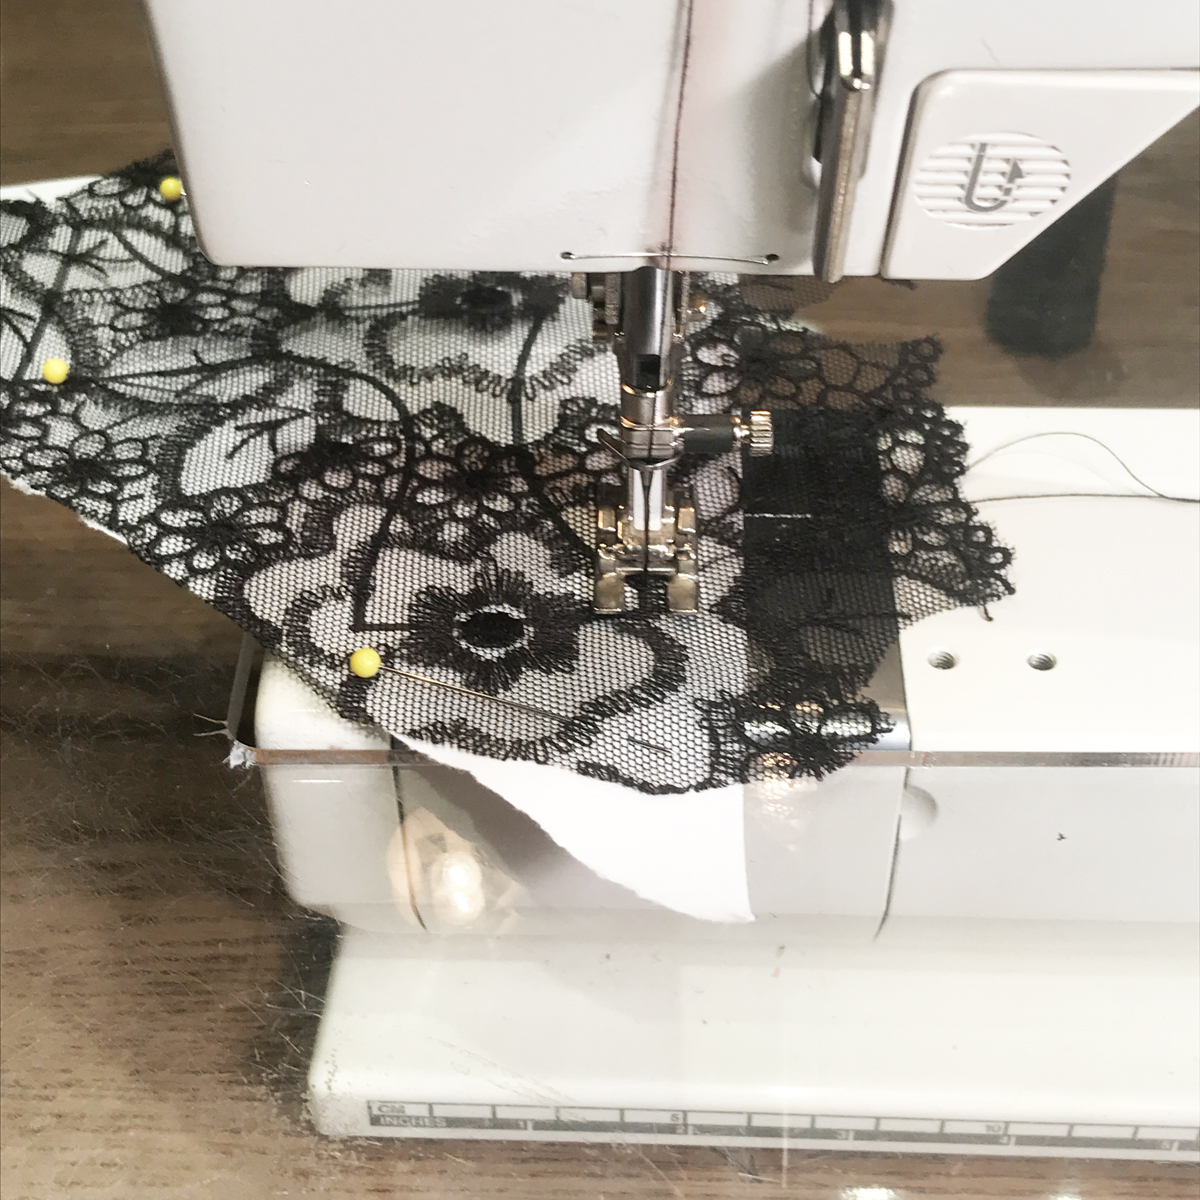
Using the copy of your panty pattern, lay a piece of lace, or tulle on top, and pin.
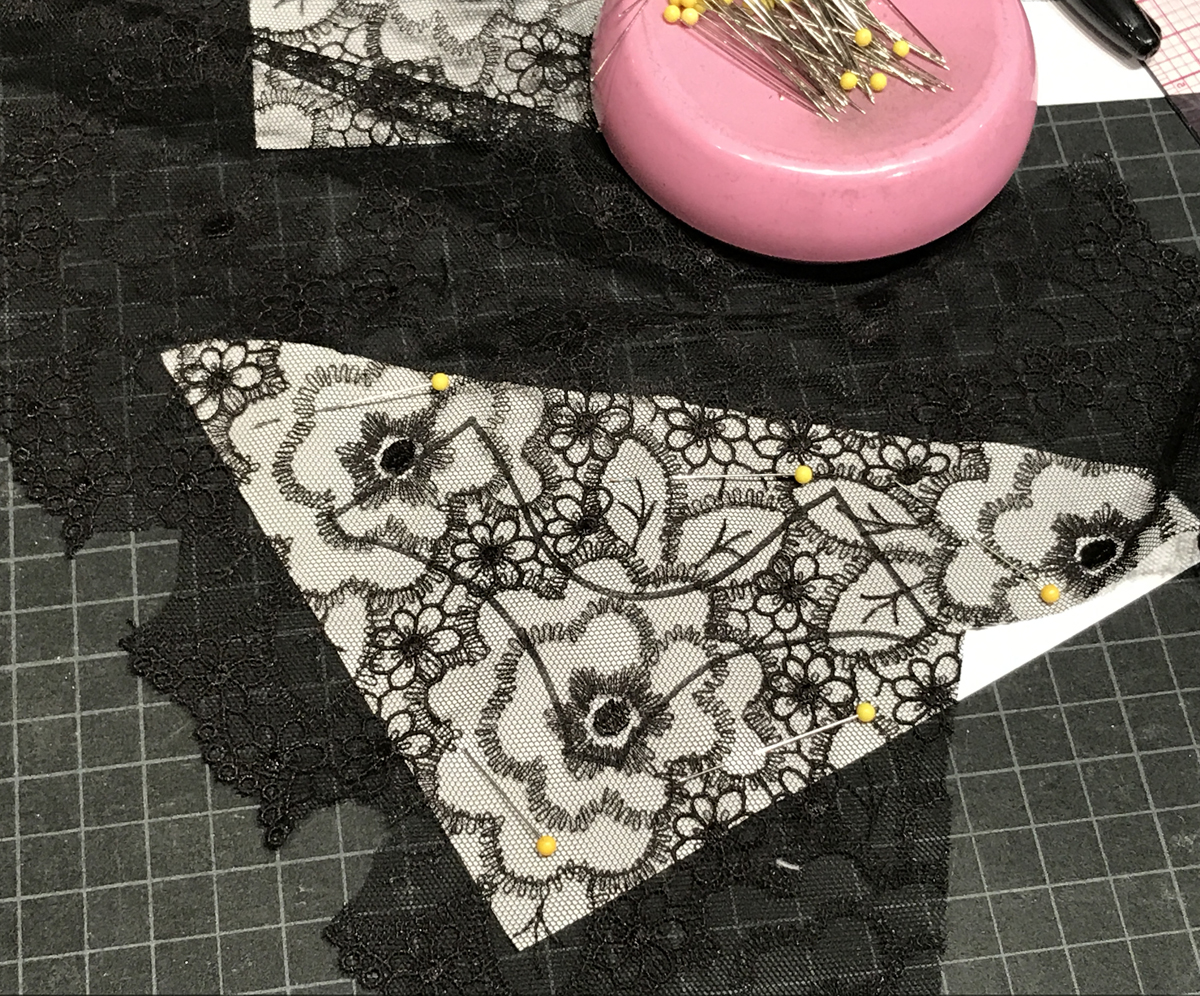
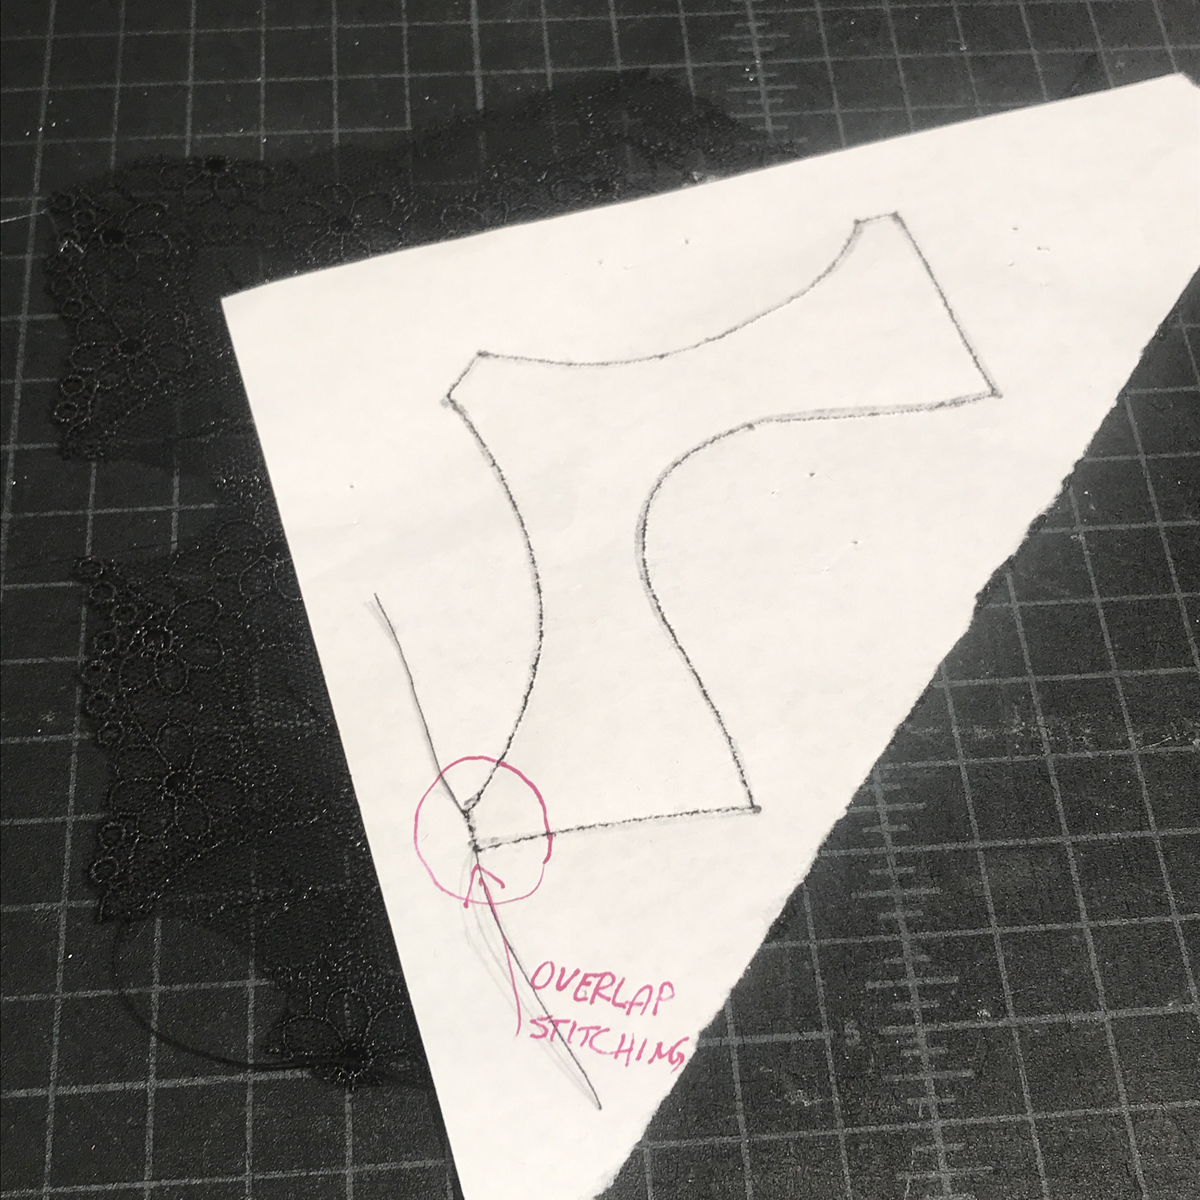
You will sew along the drawn lines, using a stitch length of 0.75 mm. Overlap the stitching line as indicated on this pattern.
Sew the stitching line, stitching through the paper.
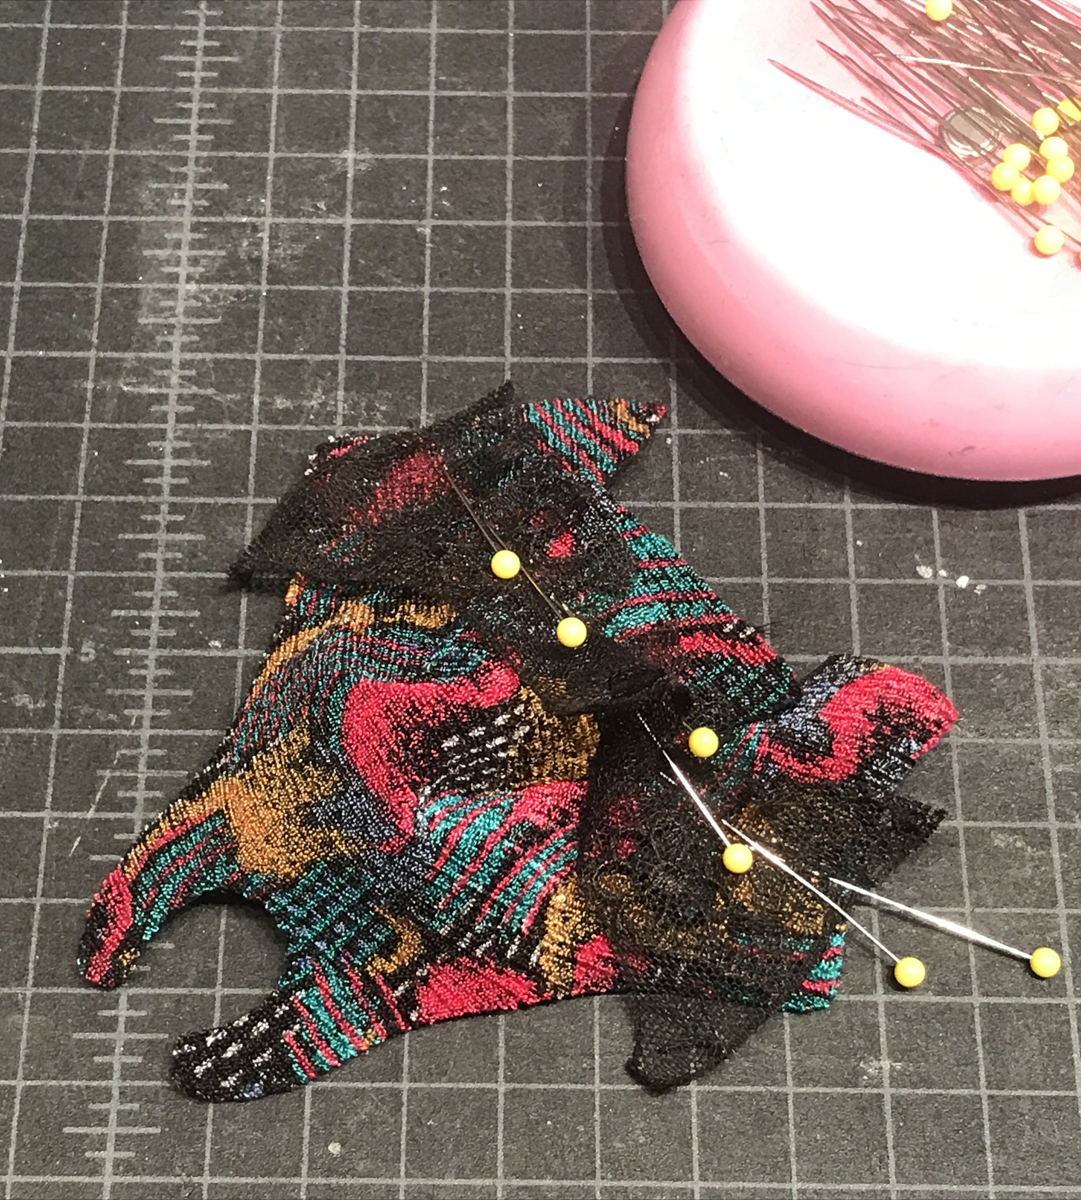
Tear away the paper from the lace. The short stitch will make it easy to do. Cut the lace around the outside of the remaining panty pattern, then peel that paper off the lace panty section.

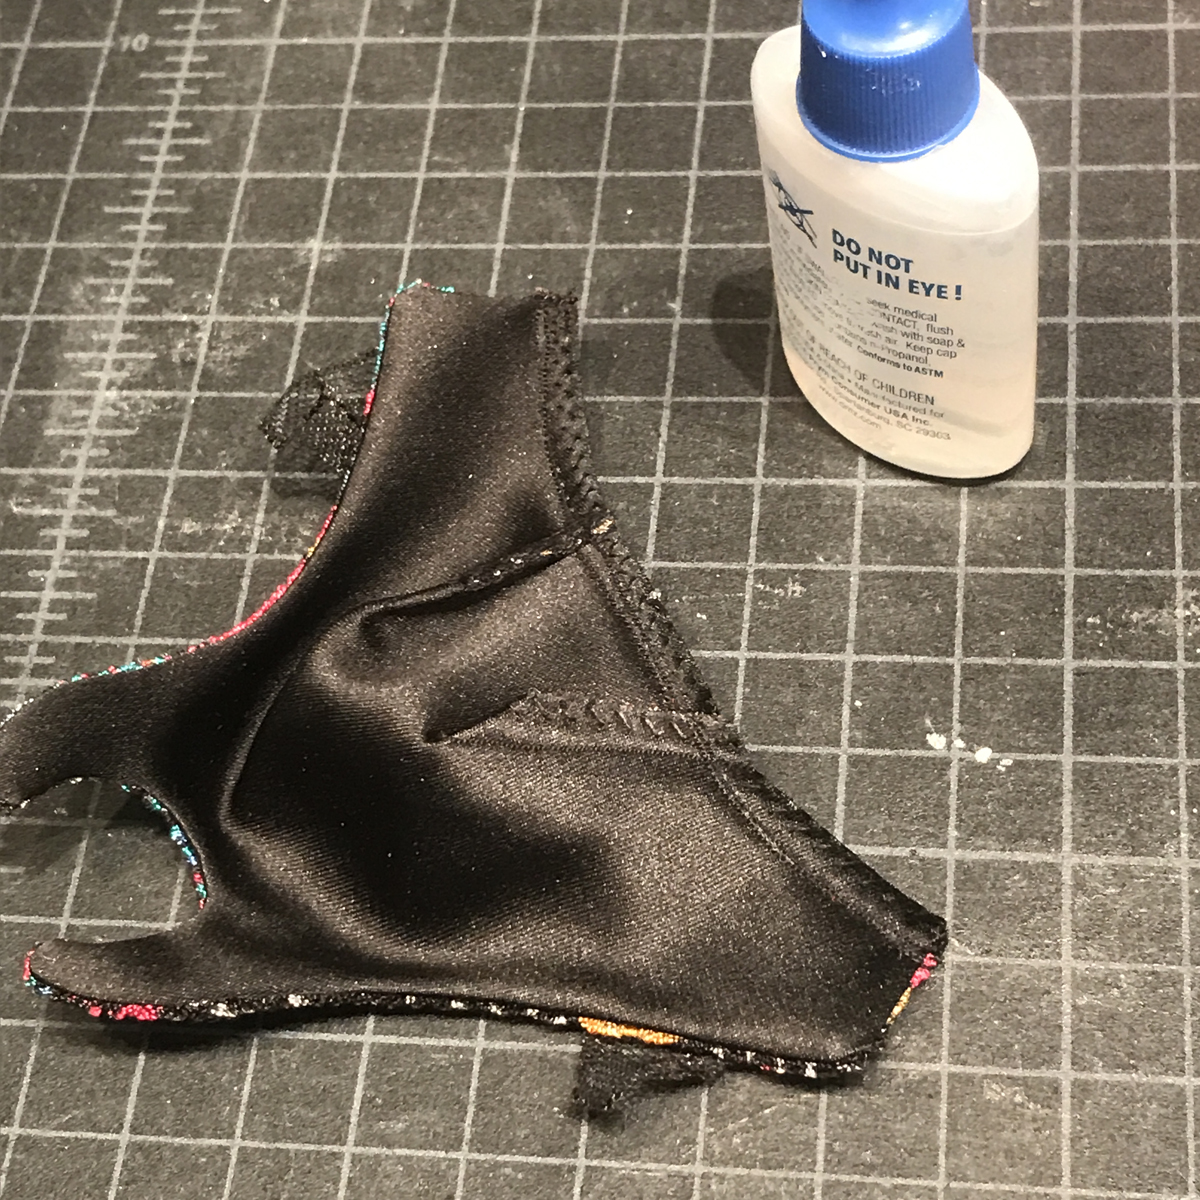
Pin the panty waistline to the the blouse waistline.
Sew and finish with the zigzag stitch. Trim the seam allowance, and apply Fray Check.
Finishing
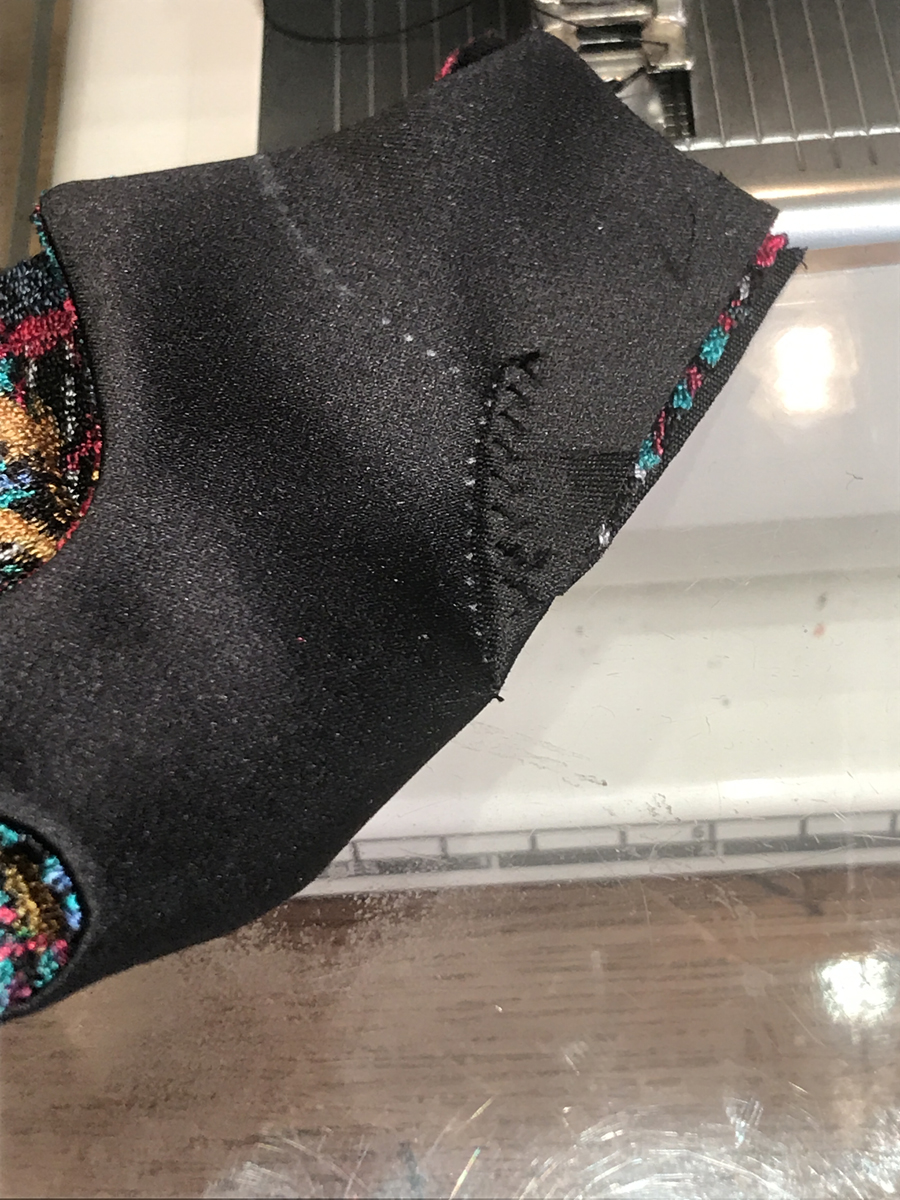
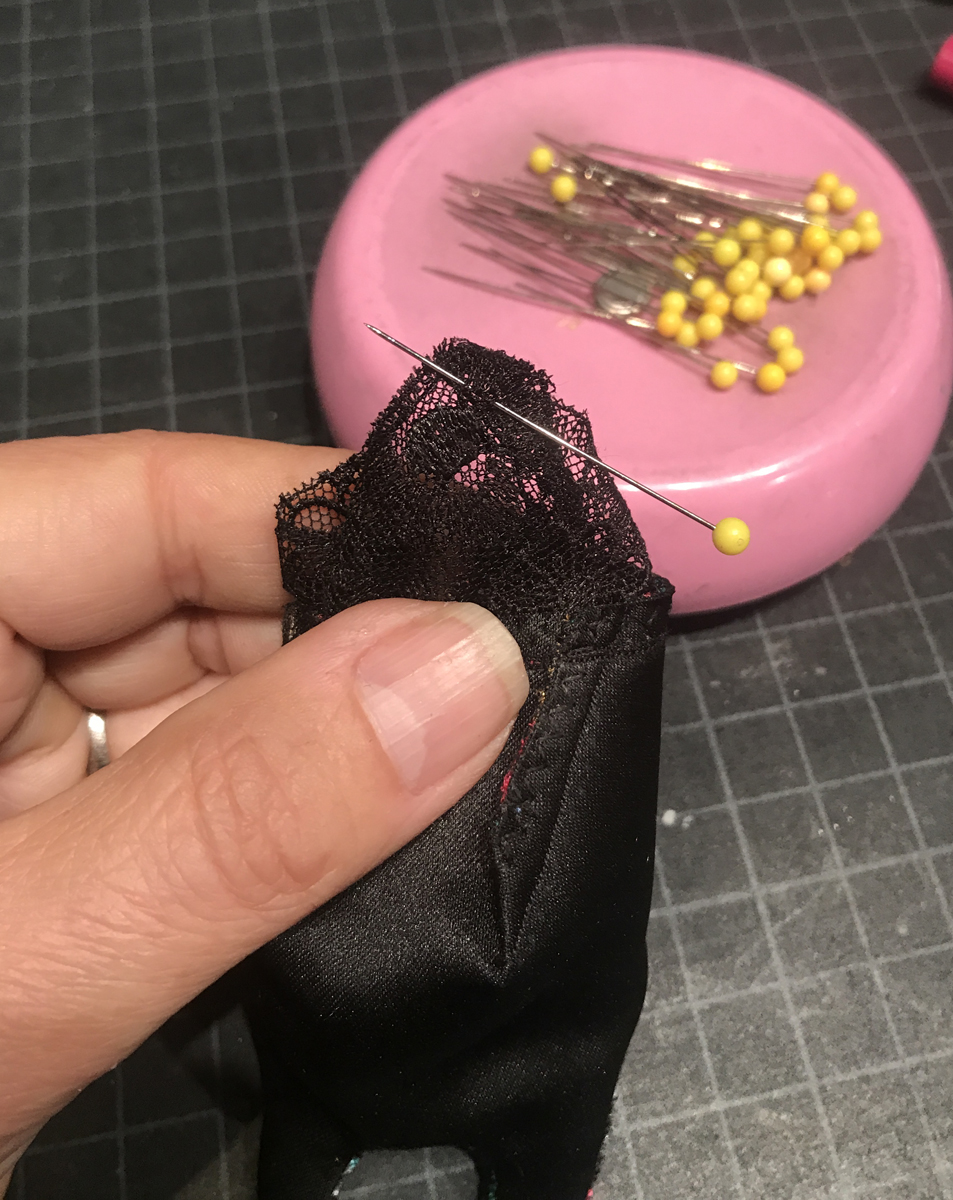
Overlap the three crotch seams, and whipstitch.
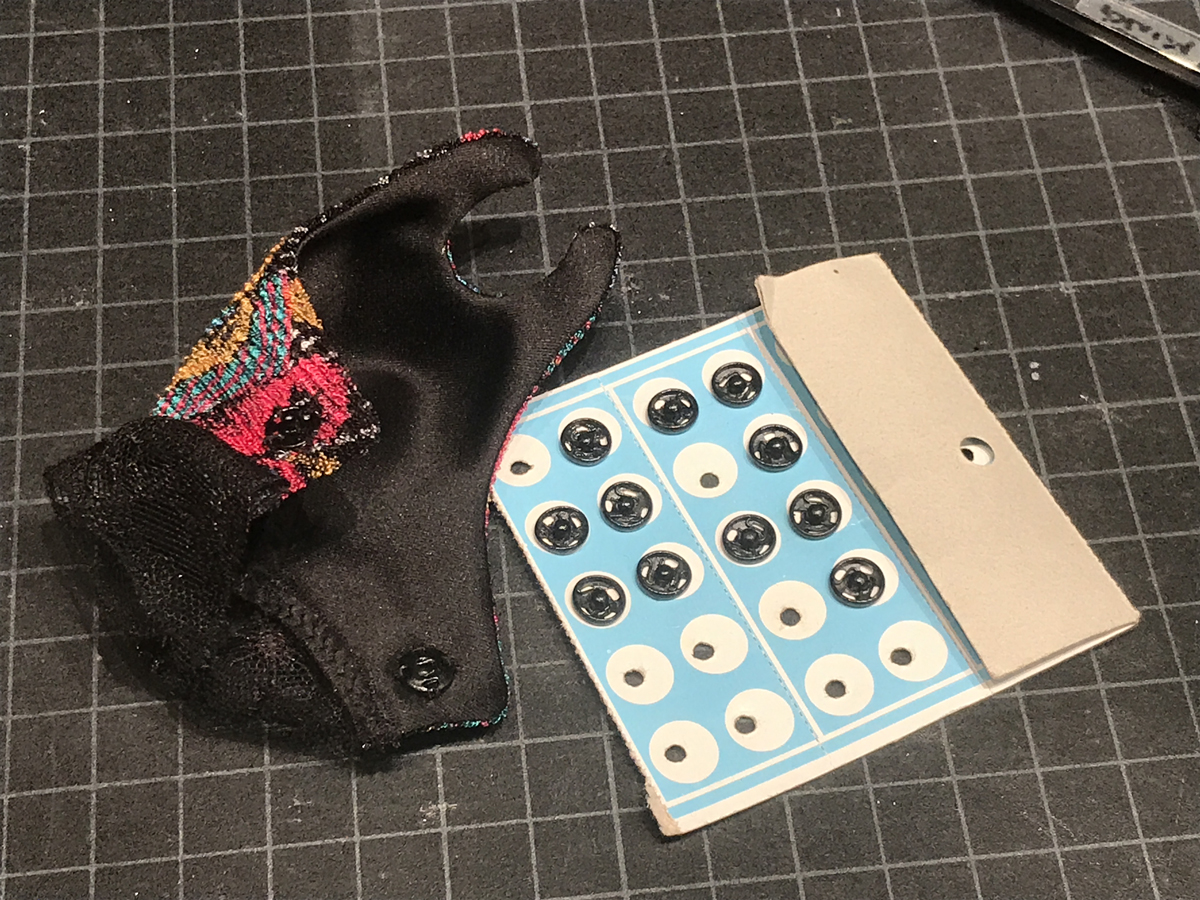
Sew on a snap closure.
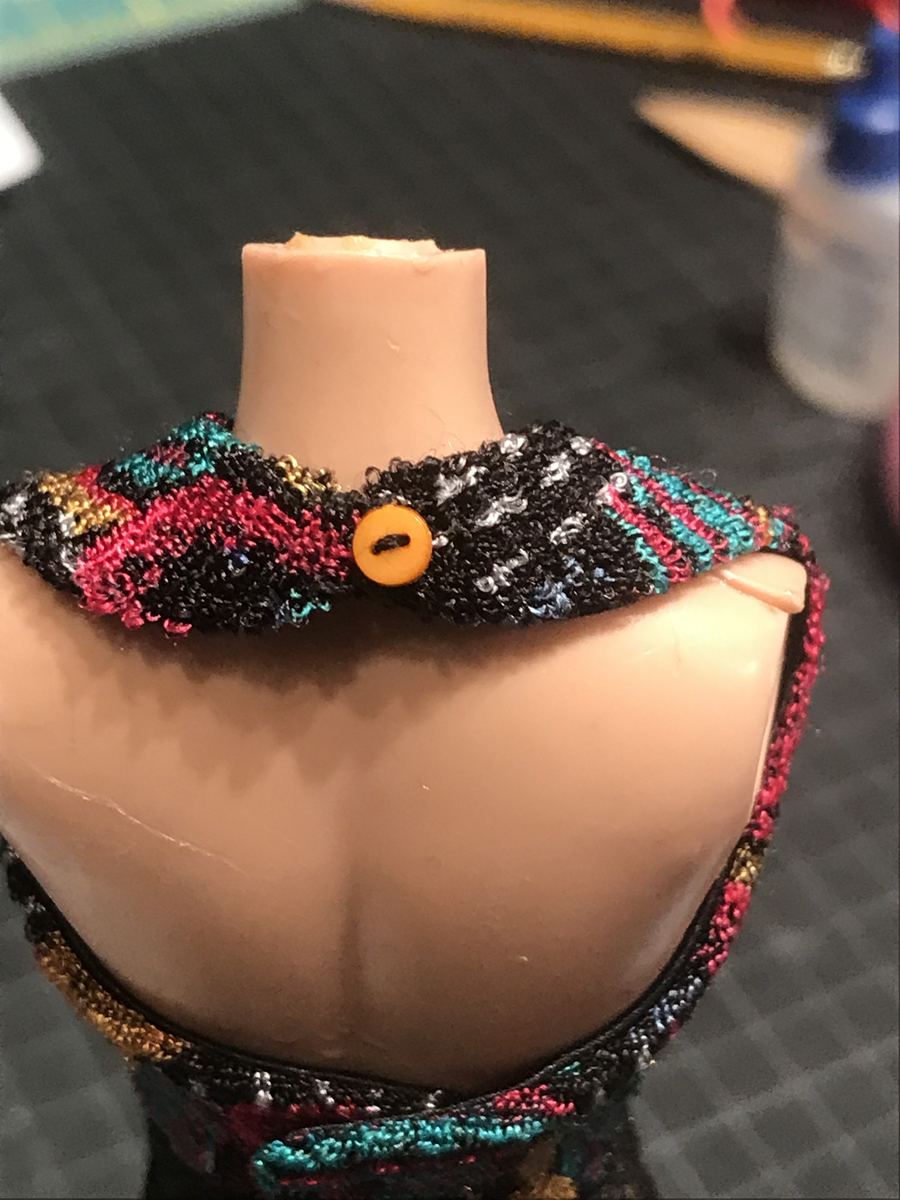
Then sew a button and loop at the neck of the little blouse. The loop is a thread chain.
 |
Learn how to sew a thread chain by watching one of these videos:
To find out more about sewing tiny couture garments, see the other installments in my Doll Series: “The Little Sewing Tools,” “The Little Trousers,” and “The Little Dress.”
.


Log in or create an account to post a comment.
Sign up Log in