

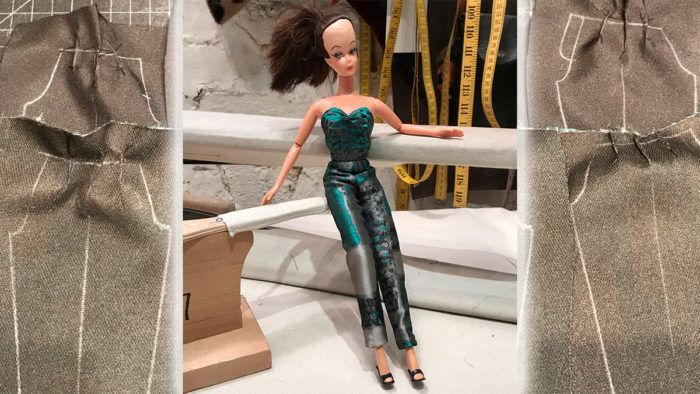
As you see from Crazy Bella’s outfit, well-fitting trousers are crucial for anyone’s wardrobe. We will be constructing fully lined trousers from this pattern.

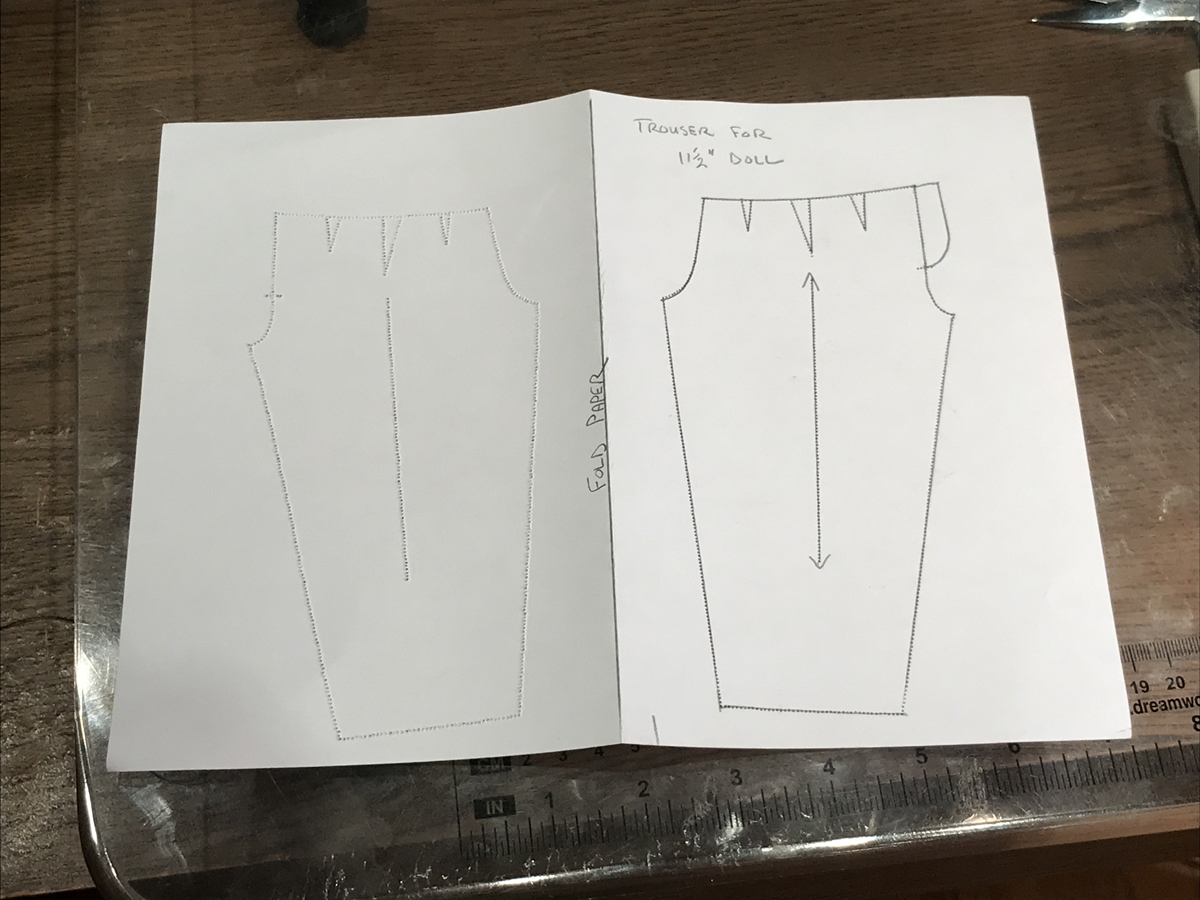
Trouser patternwork
The pattern we are using is in a PDF file you can download from Threads magazine by clicking here.
Print the pattern at 100 percent onto a regular sheet of 8.5-inch by 11-inch paper. The lines drawn are stitching lines, not cutting lines.

Fold the paper on the drawn line.

Proper marking is key here. You will use a pounce pad to transfer the stitching line markings to the wrong side of the fabric, and therefore your pattern’s seamlines need to be perforated. This is how you can create an easy pounce pattern.
Unthread the sewing machine—needle and bobbin. Using a 1.5-mm stitch length, perforate the paper by “sewing” on the drawn lines. Perforate all lines except the center-back opening extension.

Unfold the paper. You now have a mirror image of the original pattern: One side is for the right leg, the other for the left.
Finally, perforate the center-back extension, through just the single layer of paper.

Mark the fabric
My assistant—who’s a lot like Crazy Bella—needs help holding the pounce pad when marking, but she knows to take care to do it accurately. This is how she does it.
Lay the perforated paper pattern onto the wrong side of the fashion fabric, and rub the pounce pad over it. You can pat the paper with the pad as well. The goal is to have the powder sift through the holes in the paper.
 |
 |
Go over the marks with pencil, if you like, to make sure they last.

Flip the paper over and lay it onto the wrong side of the lining fabric. Repeat the process. Flipping the paper will ensure that you have a mirror image and can sew the pieces together correctly.
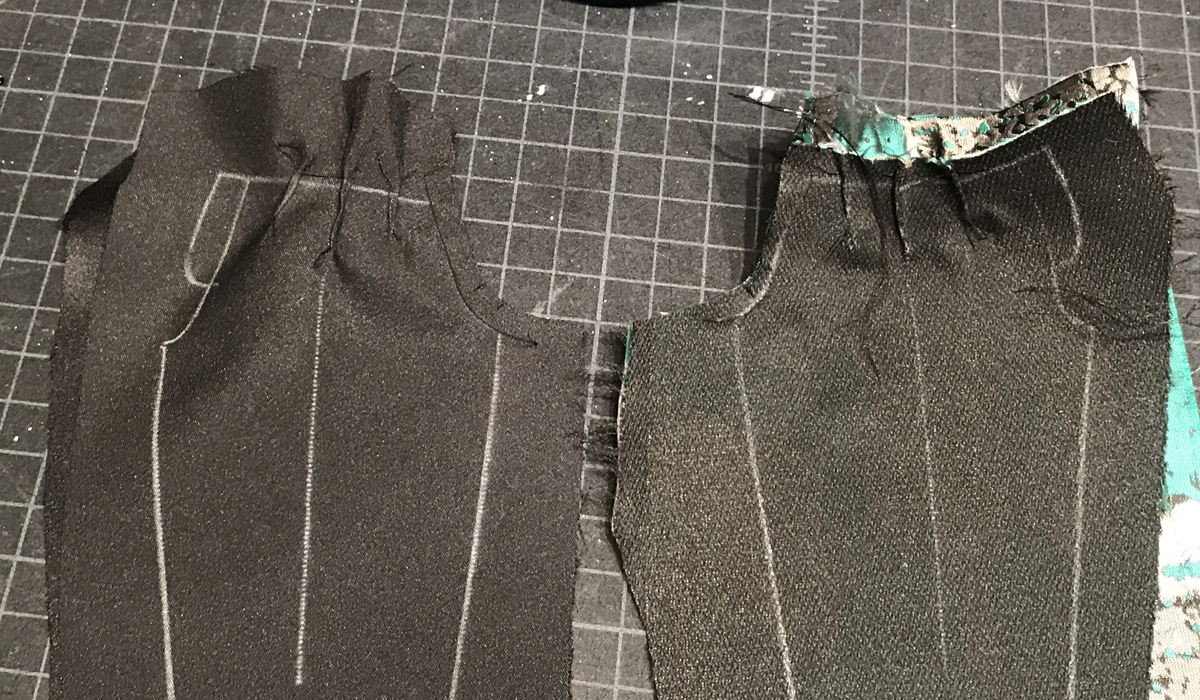
Now you have all four pieces marked—two in fashion fabric, two in lining.

Finally, on the hem of the lining, pieces, redraft the hem line by raising it by 1/8 inch. This will ensure that the fashion fabric will fold over, concealing the lining after the pieces are sewn together.

Construct the trousers
Now that the fabric is marked, my assistant sends the pieces to the stitcher.

His preferred stitch length in this case is 1.0 mm. Notice that he doesn’t cut the fabric out. He’ll sew on the stitching lines and trim afterward. This makes for easy construction on such a tiny garment. He follows this process:
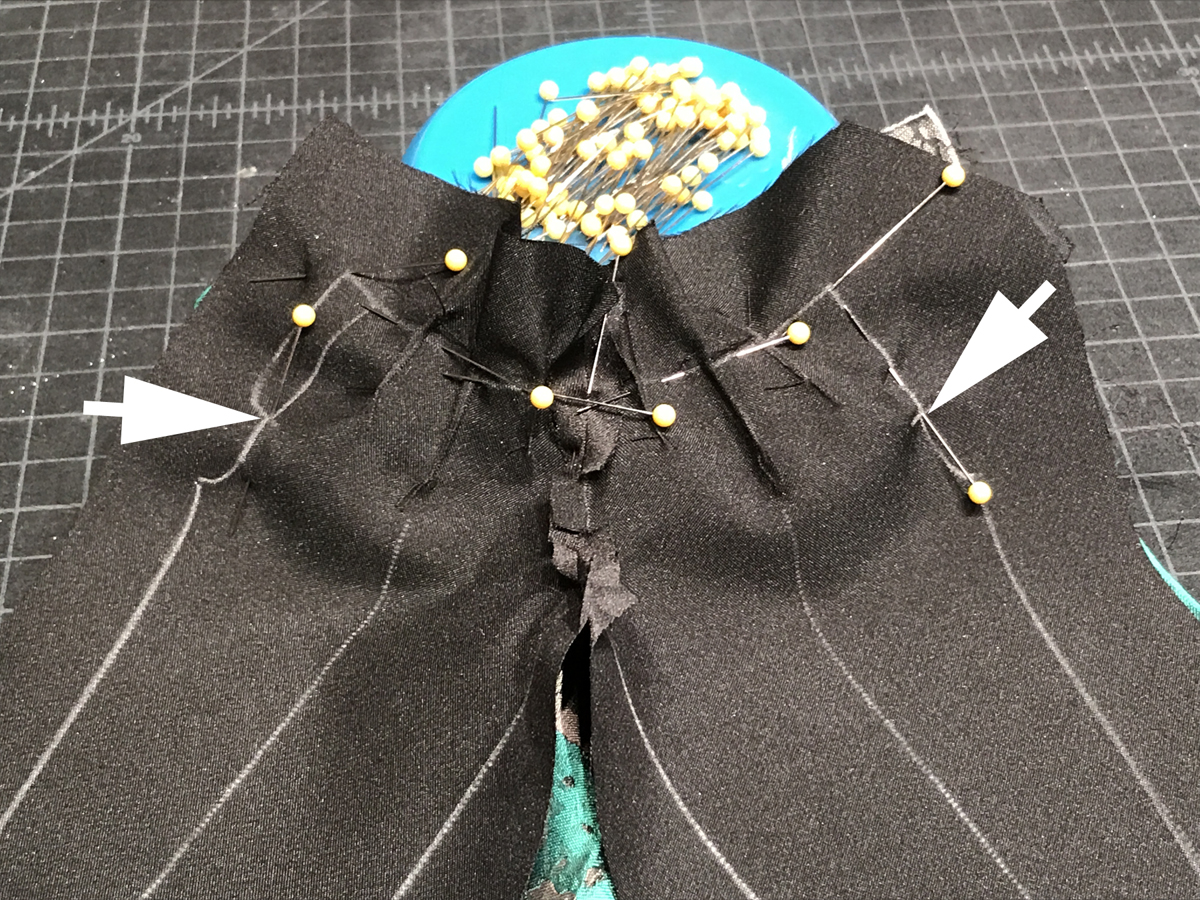
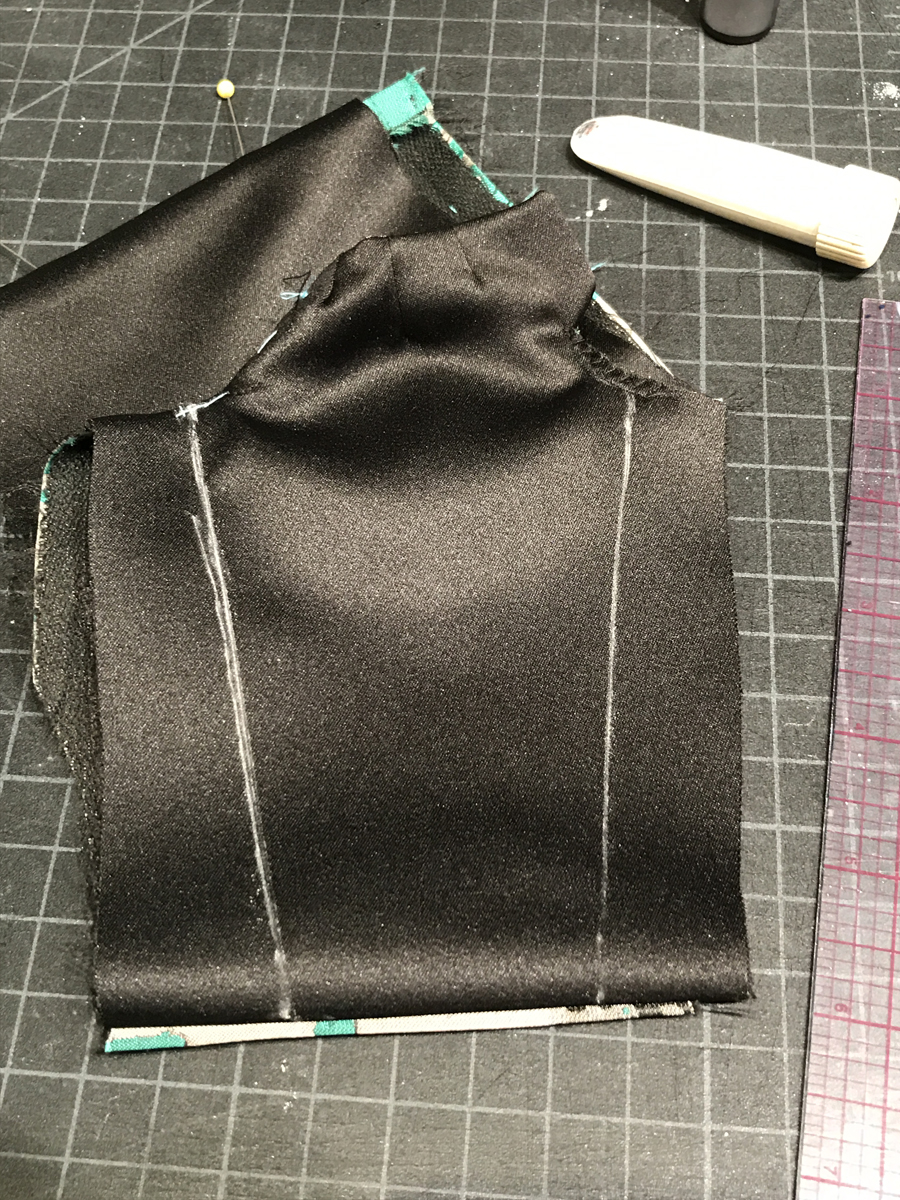
Sew and press the darts on the body and lining (left), pin the center-front seams on the body and lining (right) and sew the center-front seams.
 |
 |
Press the seam allowances open after trimming them to 1/4 inch.
Next, pin and sew the waist portion of the lining to the fashion fabric. Also sew the center-back seams, from the waist to the bottom end of the extension.
Pin and sew the hems of the lining to the fashion fabric.

Next, clip at the ends of both overlap and underlap at the center back.
 |
 |
Trim the seam allowances to 1/8 inch, clip the corners, and turn the work right side out. Then press.

Join the center-back seam below the opening (left), and sew the seam. Finish it with a zigzag stitch, 2.0 mm long and 2.0 mm wide.
 |
 |
Draw the inseams in chalk, transferring the marks from the wrong side of the fabric.
With right sides together, pin the trouser legs together and sew the inseams, finishing the seam with the zigzag stitch. Trim the seam allowance close to the zigzag stitch.

After sealing the seam allowances with Fray Check, use the hemostat to turn the trousers right side out.
 |
 |
Press lightly over a dowel, and sew a snap closure at the back waist.
To find out more about sewing tiny couture garments, see the other installments in my Doll Series: “The Little Sewing Tools,” “The Little Dress,” and “The Little Blouse.”


Please show how the stitcher's view on sewing those tiny darts without the sewing machine either failing to advance the fabric or sinking it into the plate's hole. Size of needle? Thank you!