
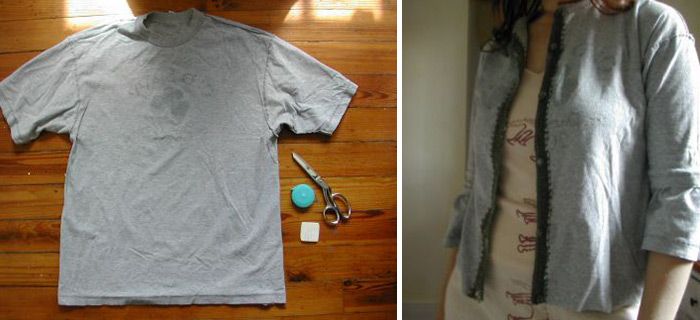
I love layering. Since I have lived in space-challenged apartments in New York City for the past 18 years, rotating my wardrobe seasonally just hasn’t been an option. There’s been nowhere to put the off-season garb. Instead, I pretty much wear the same clothes year-round; I just wear more of them when it gets colder. Hoodies, cardigans, and wraps play a huge part in my costume during cooler months, and I’m always on the lookout for new styles. Because I can’t get enough of revamping tees, I came up with this girly outfit topper for my weekly project.
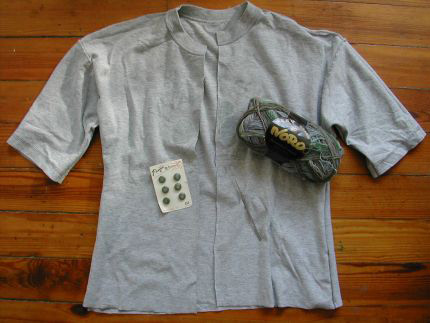
Supplies
- An oversized T-shirt
- Tape measure
- Thread
- Scissors
- Chalk
- Buttons
- Sock-weight yarn
- A small crochet hook
Prepare the T-shirt
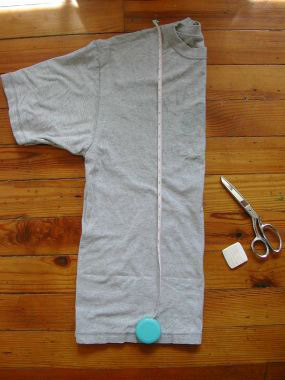
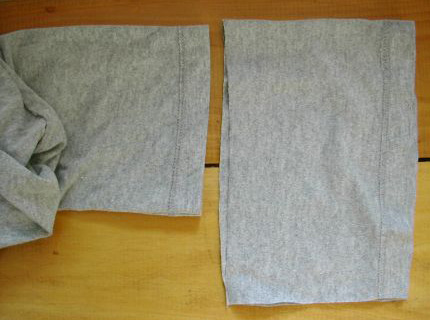
1. Trim and reshape the shirt. Measure your bust, biceps, and armhole circumferences, or find a top or cardi that fits you well. Fold the tee in half lengthwise, as shown. Cut off the bottom at the length you wish your cardigan to be (I made mine 22 inches). Set aside the piece you cut off, as it’ll become the cuff ruffles.
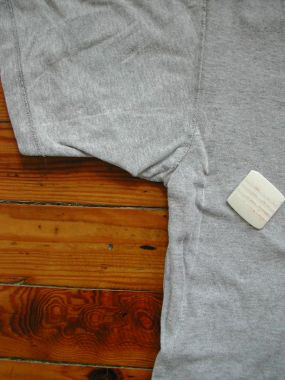
2. Still folded, measure and mark a snug 1/2 biceps, 1/2 armhole, and 1/4 bust widths and connect with a chalk line. This is to reshape the side and underarm seam. If that’s too complicated, just fold your other shirt (the one that fits) the same way, lay it on top of this one, and trace the side and underarm seam. Cut on your line, through all four layers.
|
|
|
|
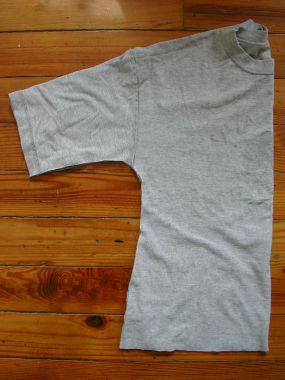
3. Cut the center front open. Using the tape measure, mark a few centered points until you have a line down the center front. Cut on this line for the cardigan placket.
Time to crochet
Now you’re ready to crochet the placket, so have the buttons handy as you’ll need them to determine how big to make the buttonholes.
First, we’ll do the left side, the “button side.” Using a small, pointy hook, make a slip knot with your yarn and join onto the top of the left-side placket edge, about 1/4 inch down from the neck edge and 1/4 inch over from the center front, with a single crochet.
Chain one and sc again into the placket edge. (Note: If this is your first time crocheting into fabric, practice on a scrap to get your spacing and tension down.)
|
|
|

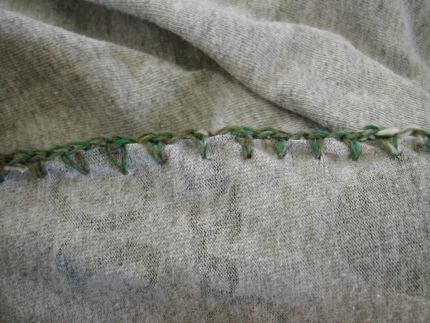
Continue alternating sc and chain 1 down the entire edge of the placket, chain 1, and turn.
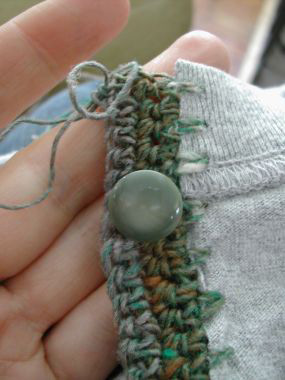
For the second row, sc in each sc and in each chain. For the third and all consecutive rows, sc in every sc. After the third or fourth row, hold one of your buttons up to the placket to see if it’s wide enough.
I decided five rows was just right for my buttons, but you might want more or less. When yours is wide enough, finish off and weave in the ends.
Now comes the “buttonhole side” of the placket. Join onto the right side of the placket and crochet two rows just as you did for the other side. Next, you’ll need to measure the length of the placket and divide it by the number of buttons you plan to use. Place stitch markers (or safety pins) where you want each hole.
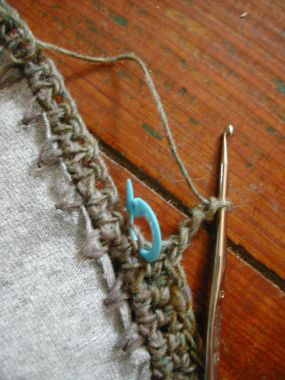
Also measure one of your buttons against your stitches to determine how many stitches wide each buttonhole should be. Mine are three-stitch holes. The row you make the holes in should be the center row of your placket. Mine is five rows wide, so I put the holes into the third row. If you are using an even number of rows, put the holes in the row after the halfway point (so for six, use the fourth row). To make the buttonholes, sc up to the beginning of the hole, chain the required number of stitches (I did three)…
…skip the same number of stitches, and sc into the very next stitch (in my case, the fourth).
Continue in sc to the next hole and repeat. On the following row, sc into each chain of the holes as you come to them. Complete the remaining rows in sc, finish off, and weave in the ends. Sew the buttons onto the left-side placket.
Make the cuff ruffles
1. Cut the scrap you trimmed from the bottom of the shirt in half. Still folded, trim each half to 1-1/2 times the cuff width.
2. Seam the short ends and run a gathering stitch along the unfinished edge. Pull the gathering threads and distribute the fullness evenly.
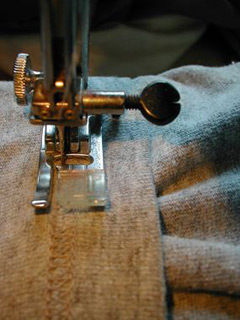
3. Pin the ruffle layered underneath the sleeve cuff edges. Stitch over the existing hem with a wide zigzag.
|
|
|
And that’s it. Yet another old, unworn tee is reincarnated and becomes a staple.


Log in or create an account to post a comment.
Sign up Log in