
Flounce a Dress
Transform a dress or skirt pattern with this elegant vintage detail

This romantic floral georgette dress from the 1940s skims over any figure, creating a flattering silhouette. It camouflages the stomach and adds a strong vertical influence in the back as the flounce arcs at the hipline, wraps over the side seams, and drops gracefully to the floor on each side. The flounce’s softly draping vertical folds flutter elegantly for a feminine effect. Read this article from Threads #166 for how to add this flounce to a dress pattern.
This 1940s dress is streamlined and graceful—an effect emphasized by its fluttering skirt flounces. To get the look, add a seam to almost any dress or skirt pattern, create the flounces from several circular pieces, and insert them into the new seam, as described.

1. Copy your pattern. Starting a few inches below the center-front waist, draw a diagonal line toward and through the side seam, ending about halfway to center back. Pivot and continue the line down to the skirt hem at an angle that complements the skirt’s silhouette. Measure the line’s length from center front to hem; this is the length to make the flounce. Cut along the new seam and add 1 ⁄2-inch seam allowances to both edges on all of the pattern pieces.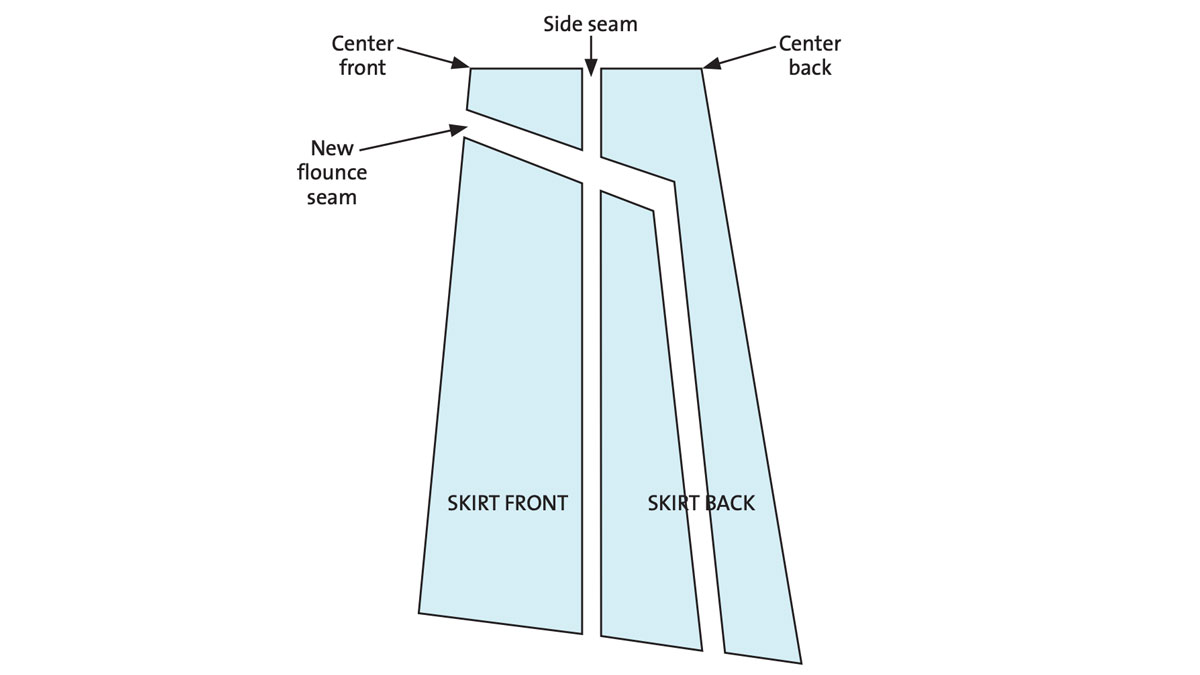
2. Draw a circular pattern. The amount of flare in a flounce is determined by the difference in length between the long edges; a 2:1 ratio is typical. For a 4-inch-deep finished flounce: Use a protractor to draw a circle with a 5-inch radius. Draw another circle around the first with a 10-inch radius. Cut out the doughnut-shaped pattern. Cut a straight line from the exterior circumference to the interior circumference.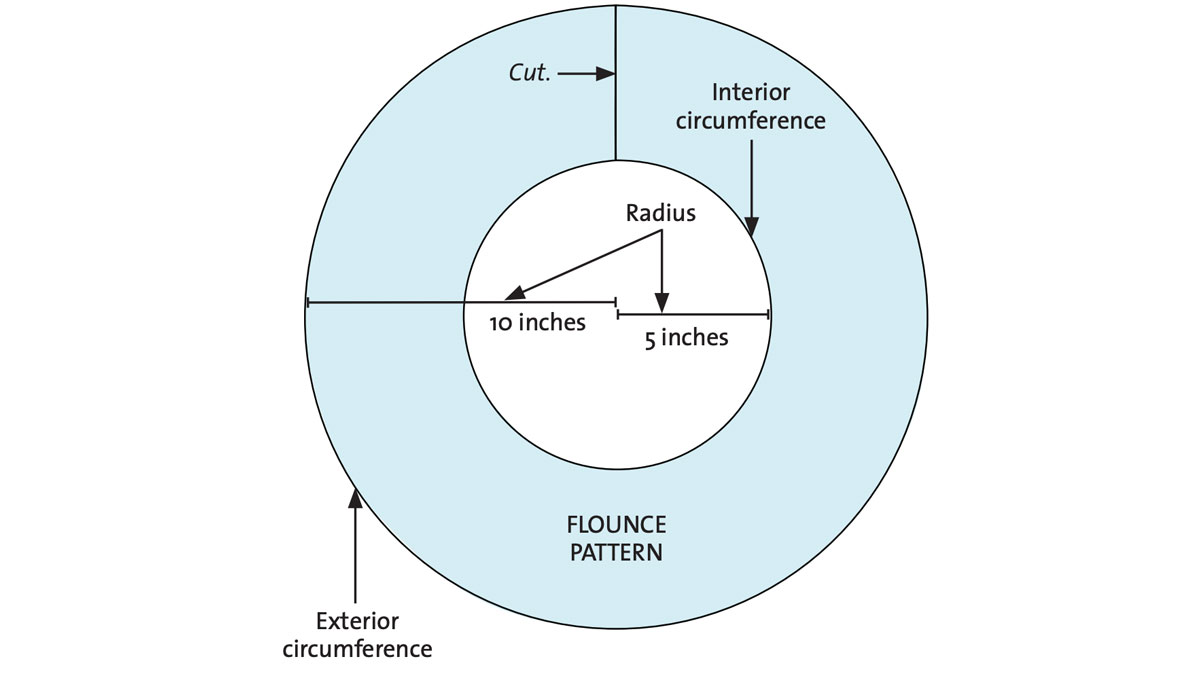
3. Using this pattern, cut several individual flounces from the fabric. Sew them end to end, right sides together, using 1 ⁄8-inch to 1 ⁄4-inch-wide…
Start your 14-day FREE trial to access this story.
Start your FREE trial today and get instant access to this article plus access to all Threads Insider content.
Start Your Free TrialAlready an Insider? Log in


Log in or become a member to post a comment.
Sign up Log in