
How to Sew Guatemalan Cotton
Sew a statement project with vibrant, narrow yardage

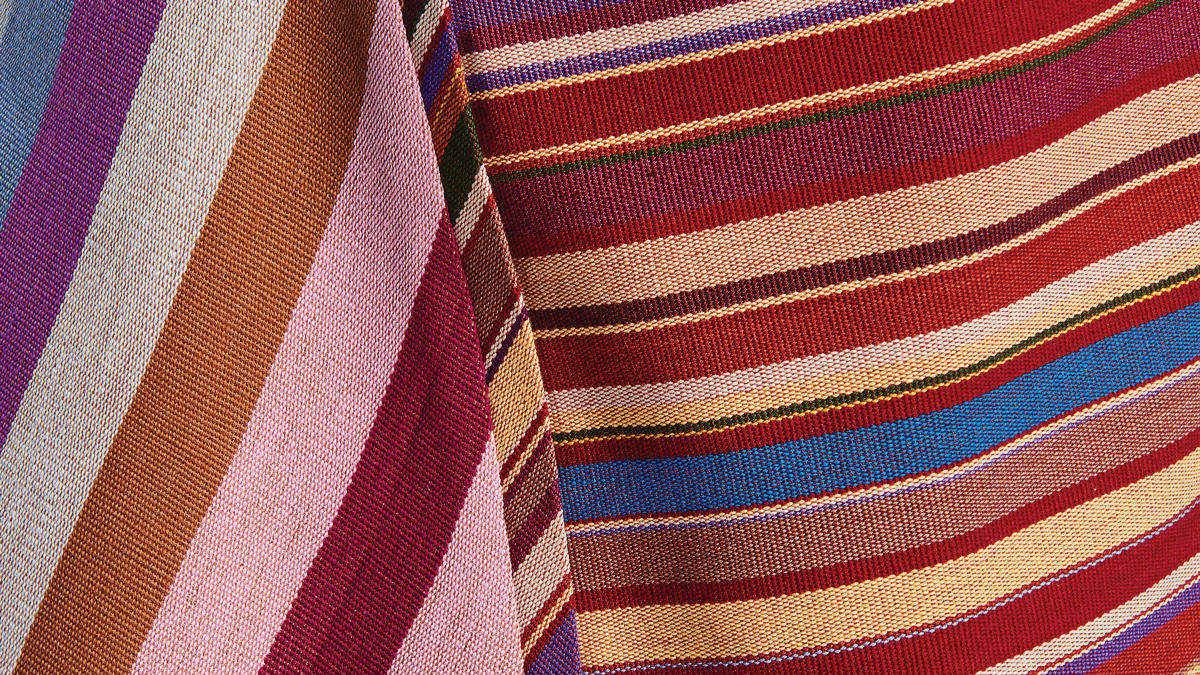
With rich colors and bold stripes, Guatemalan textiles evoke the ethnic designs of the Central American country where they are made. Handwoven in 100 percent cotton, they often feature ikat details that introduce more complex motifs.
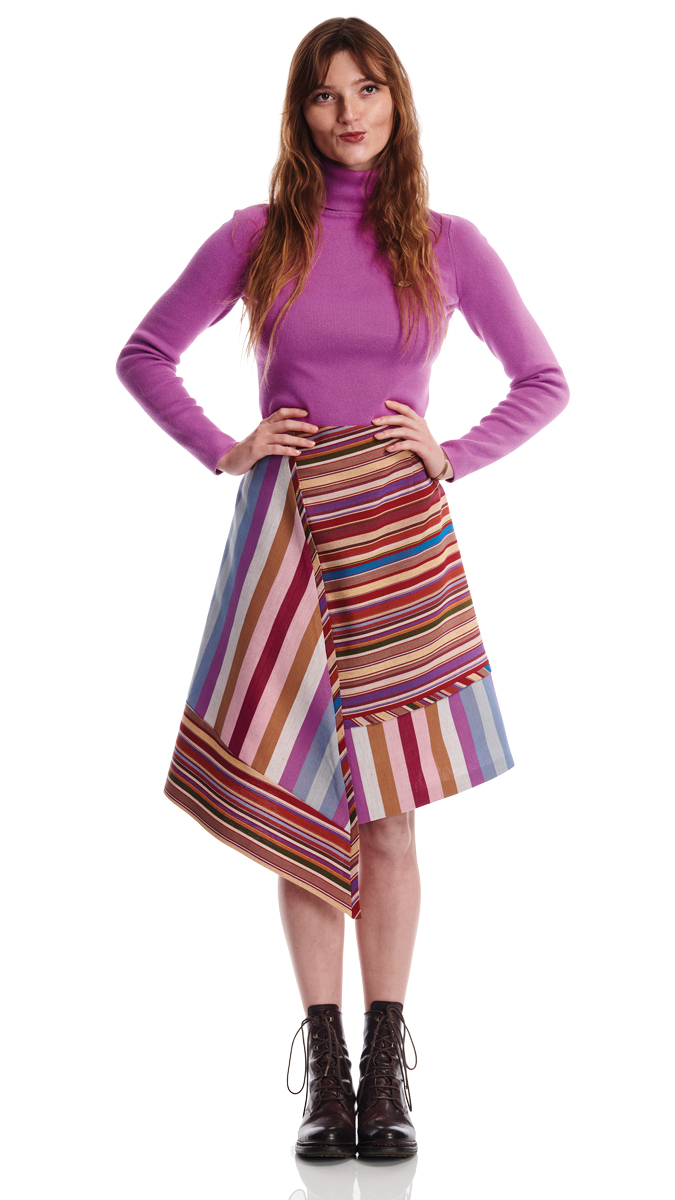
These fabrics start out crisp but soften after washing. Air- or machine-dry the fabric and garments separately to prevent abrasion, which can make the fabric appear aged prematurely. To retain crispness, dry-clean the finished garment. Available in a range of weights—from lightweight to a sturdy midweight—Guatemalan cottons are suitable for easy-fitting skirts, unstructured jackets, tops, and soft furnishings such as napkins, place mats, and pillow covers. Because the cotton weave has some give, pants and fitted skirts may stretch out and sag at the seat and knees.
Note that these handwoven textiles are made on small looms, so the yardage is usually only about 36 inches wide, with some examples slightly wider or narrower. The fabric is sometimes sold by the piece and may be several yards long. Be sure to test a layout for the pattern you intend to make, with the fabric’s actual width and length. If the fabric doesn’t accommodate larger pattern pieces, consider dividing the pattern pieces or introducing coordinating solid fabrics. Most Guatemalan textiles can be cut on either grain, so try orienting the stripes in different directions for an efficient layout and a striking finished garment.
Preparation and cutting
This all-cotton fabric is straightforward to work with. Its only disadvantage is that the dye may not be entirely fast, especially in the first few washes.
Fabric care: Preshrink the fabric by machine-washing it in cold water. Be sure to add Retayne, a dye fixative, or 1⁄4 cup of Epsom salts to lessen color loss. The fabric will lose some color but not nearly as much as in a plain wash. The fabric softens after prewashing. Machine-dry on the regular cycle. Air-dry dark colors to maintain color crispness. For better color retention, skip preshrinking and send the completed garment to the dry cleaner.
Pressing: Use a steam iron on the cotton setting.
Cutting: A rotary cutter or pair of scissors is suitable.
Layout: In general, a without-nap layout in double thickness is fine. However, see the advice below for handling stripes.
 Appropriate notions
Lightweight to midweight wovens like these call for basic sewing tools and supplies you may already have.
Marking tools: The Clover Chaco Liner, tailor’s tacks, or a Clover white marking pen show up well on the dark or vibrant colors typical of Guatemalan cotton.
Interfacing: Fusi-Knit or Sewers’ Dream provides lightweight support and stabilization.
Thread: Choose all-purpose polyester or cotton thread.
Needle: Use a size 80/12 needle with a universal point.
Presser foot: A standard zigzag or all-purpose foot is all you need, for typical construction steps.
Closures: Because Guatemalan cotton is relatively sturdy and stable, you can choose from a range of closures, including corded buttonholes, faced button openings, loops, snaps, and invisible or exposed zippers.
Technique advice
Plan the layout carefully, stabilize where needed, and finish edges neatly.
Plan a stripe layout. For identical or mirror-imaged garment sections when working with striped fabrics, never use a double-layer layout. Cut the first piece through one fabric thickness. Then lay the cut piece on the fabric, right sides together, and match the stripes exactly. The cut piece works as a template to mark and cut the second piece. Consider whether you want to match the stripes at horizontal and vertical seams, and cut the pieces sequentially to ensure you’ve established the match you want.
Stabilize horizontal seams. At the shoulders and waistline seams of more loosely woven examples, apply straight-grain fusible tape, straight-grain strips of fusible interfacing, or 1⁄4-inch-wide selvage cut from lining fabric.
Stitch smoothly. For straight stitching, set the machine for a length of 2.5 mm. As the fabric moves through the machine, let it feed naturally. Don’t pull, as this may stretch and distort the grain.
Apply a sturdy seam finish. This fabric is prone to raveling, so flat-fell seams are the neatest and most durable option.
Topstitch and hem cleanly. Place topstitching and edgestitching rows 1⁄8 inch to 1⁄4 inch from a seamline or finished edge, and use a 3.0-mm stitch length. For hemming, press in a double-fold hem. Topstitch from the right side with a twin needle for wovens.
Sandra Betzina is the author of All New Fabric Savvy (The Taunton Press, 2017), from which this article is adapted.


Log in or create an account to post a comment.
Sign up Log in