

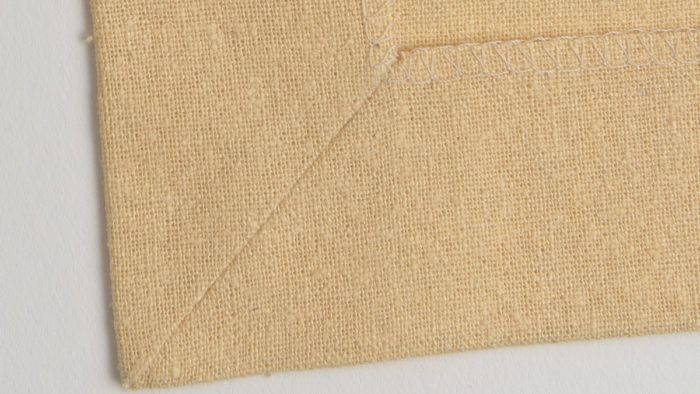
Nothing elevates the finish of a garment like a beautifully mitered corner. Louise Cutting, a Threads contributing editor, gives her method for drafting complex miters in “Precise Mitered Corners,” Threads #210 (Aug./Sept. 2020). Now she shares how to draft a basic miter with a serged-edge finish.
Benefits of mitered corners
Mitered corners can be of any angle, and the hem allowances can be whatever width you prefer, from narrow to several inches wide. They cut down bulk at hem corners by reducing the number of fabric layers to sew through, compared with simply folding the hem up. A mitered corner with a serged edge eliminates even more fabric layers and is the most streamlined option. If you plan to serge the edges, follow this method.
Properly engineering a mitered corner at the pattern stage makes the sewing easier and neater. Miters are simplest to make when the hem edges meet at a 90-degree, or right, angle and both edges have the same hem allowances. This basic method begins before construction and uses graph paper to create an accurate miter every time.
Plan a mitered corner on paper
1. Draw the hem foldlines on graph paper. For this exercise, the hem allowances are 1 inch wide, although they can be any width. 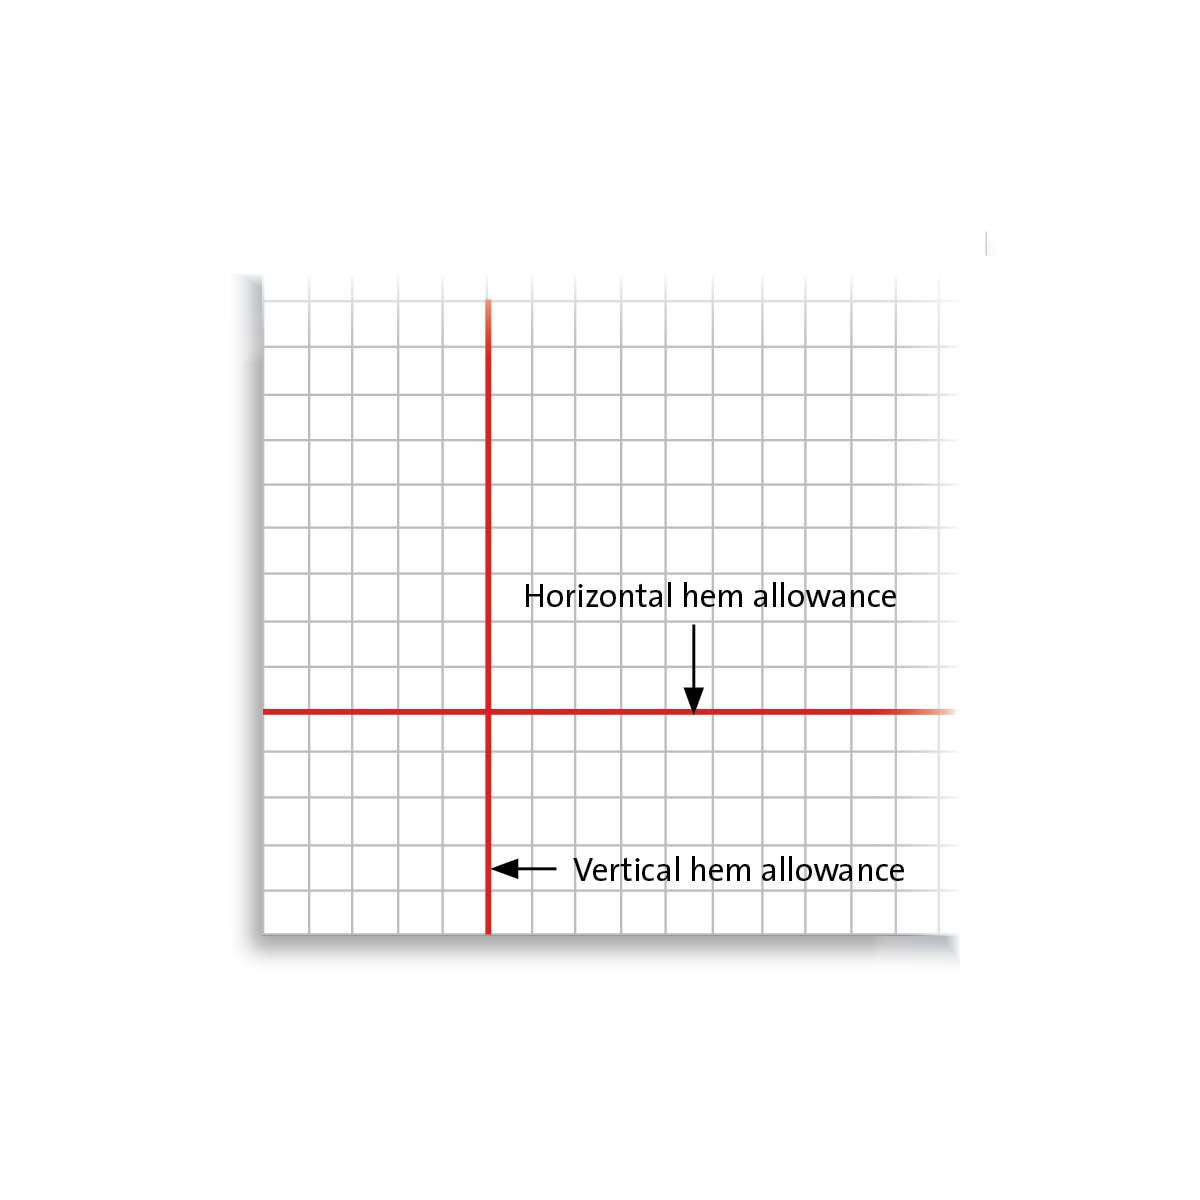
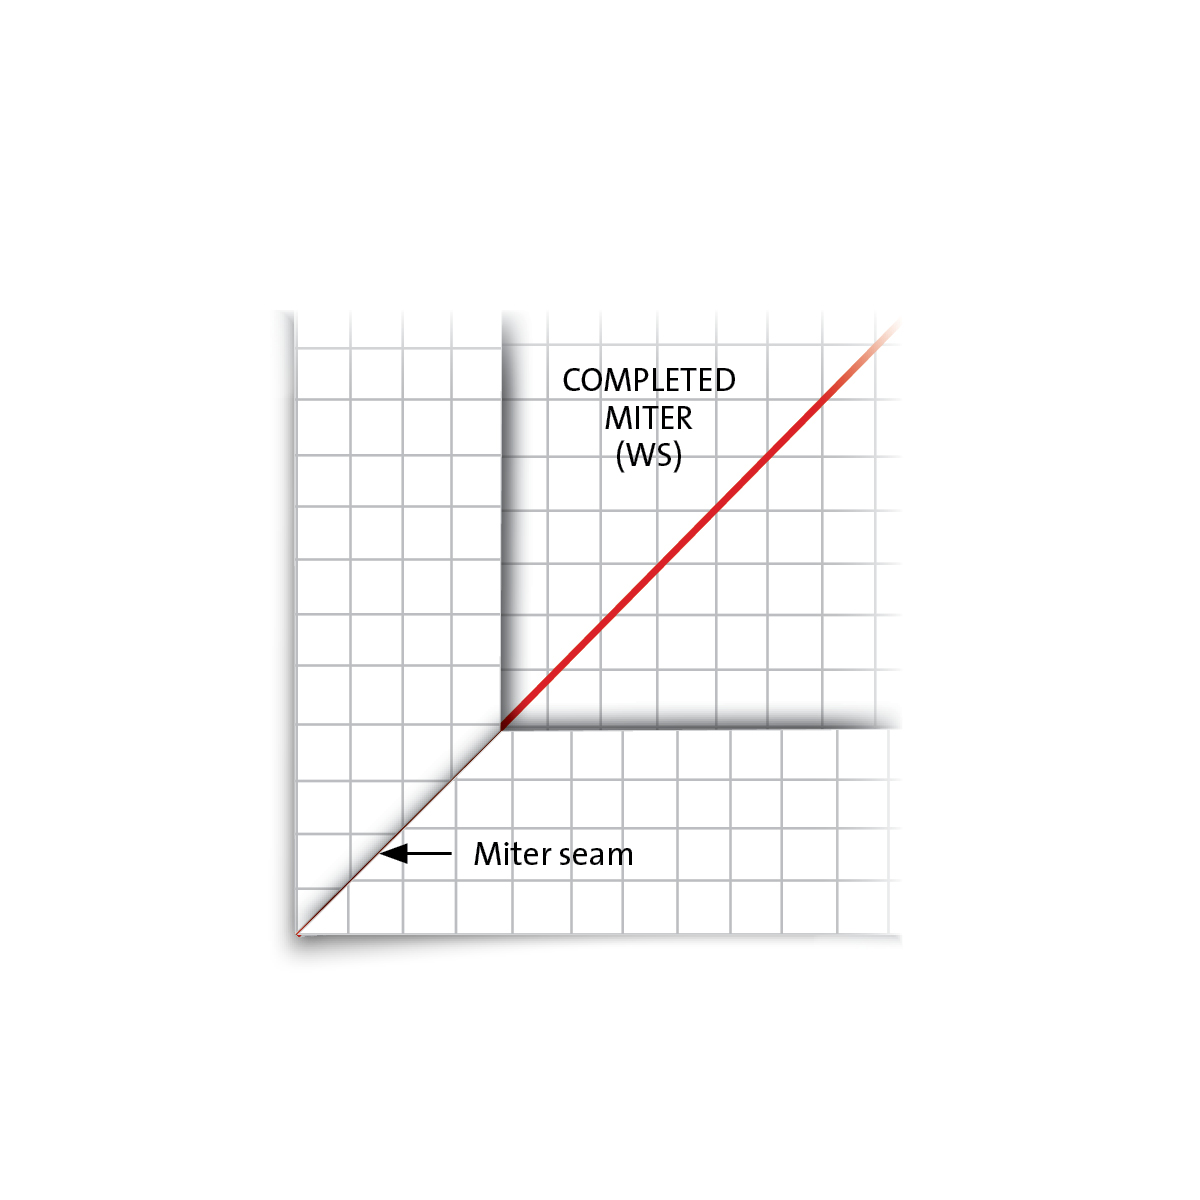
2. Add a diagonal line. Trace a line from the corner, intersecting the point where the vertical and horizontal foldlines meet. This line marks the eventual miter foldline. 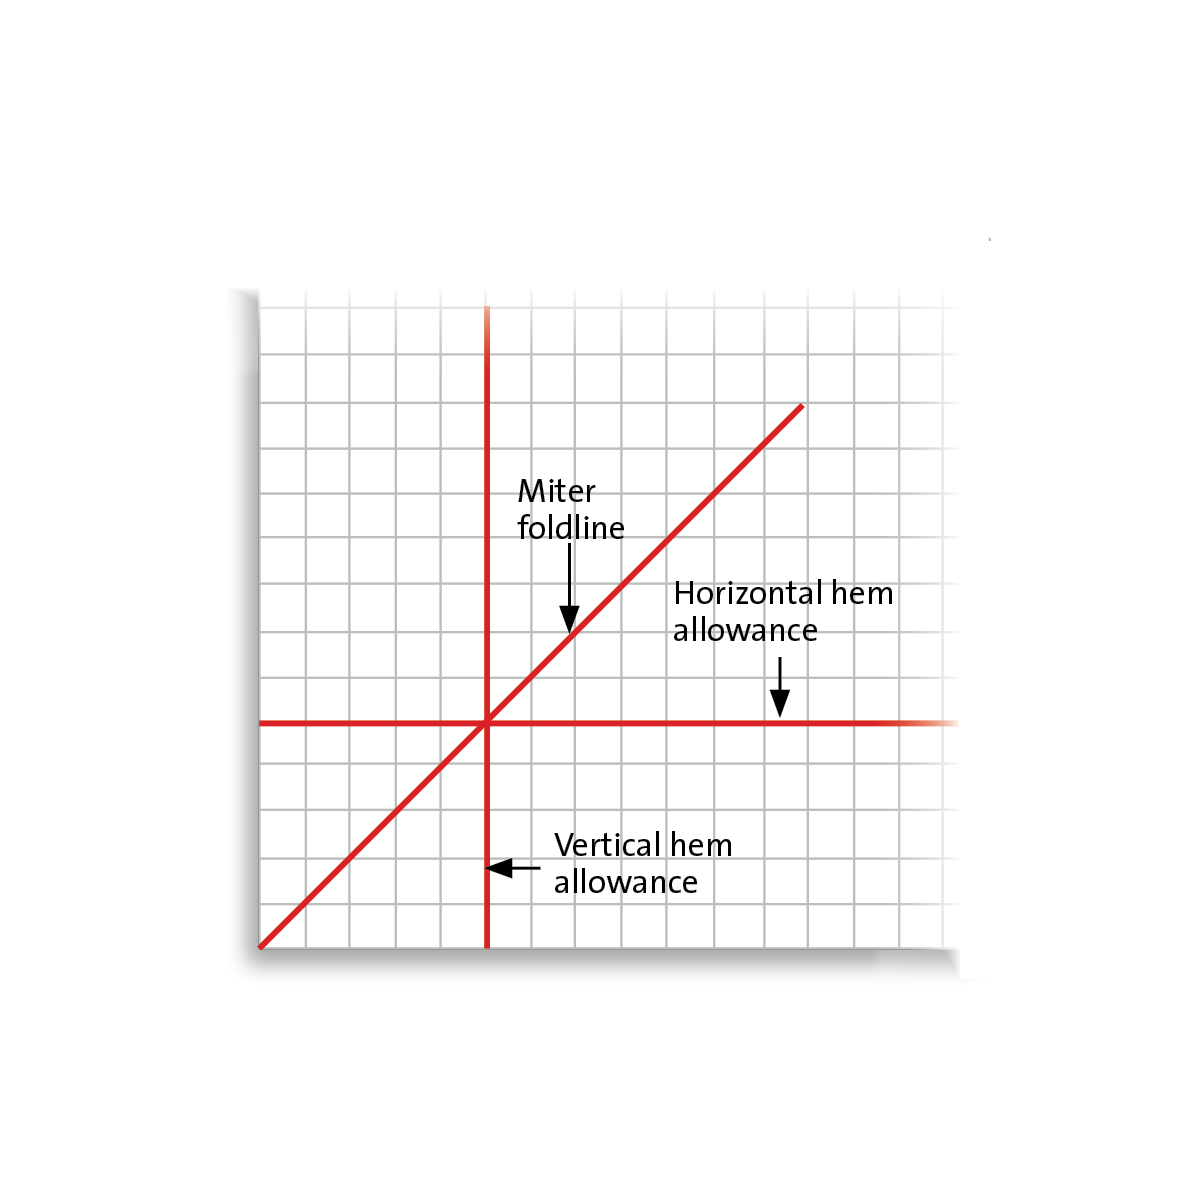
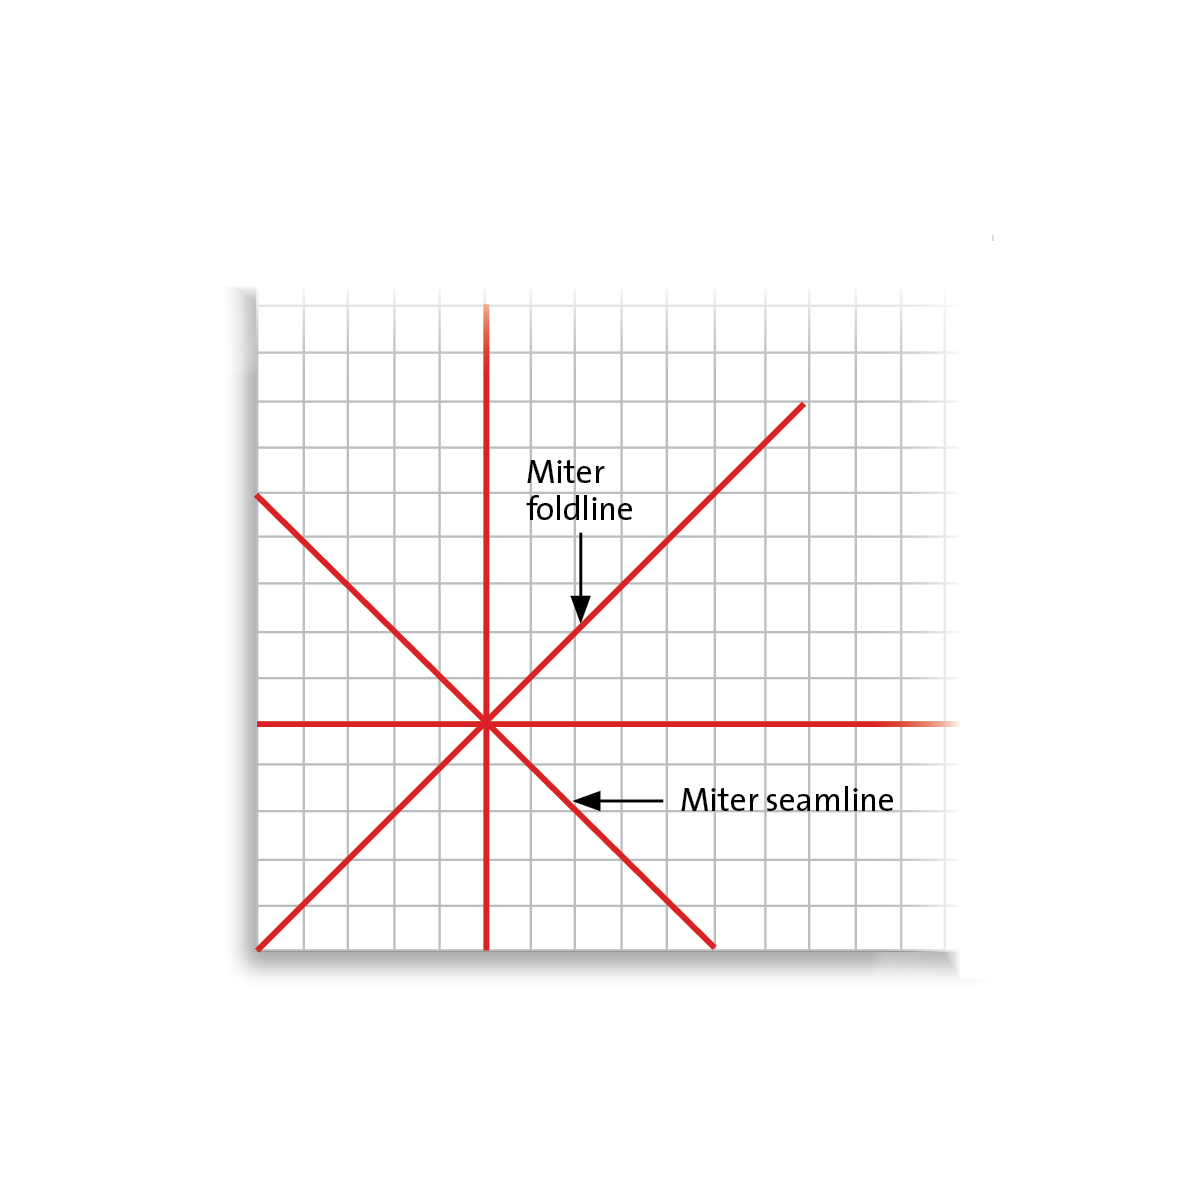
3. Make a second diagonal line perpendicular to the first. It should intersect the vertical and horizontal foldlines at the same point. This is the miter seamline.
4. Add a seam allowance. Draw a parallel line 3/8 inch outside the miter seamline, within the hem allowances. Cut along this line to remove the corner triangle, as this material is extraneous. The 3/8-inch width may be easier to turn than a wide allowance.

5. Check the miter. Fold the corner seam allowance up. You may need to clip the paper at the corner to make it fold neatly. Then fold the paper along the marked horizontal and vertical foldlines, and align the corner’s fold to the miter’s marked folding. If the edges don’t meet neatly along the miter foldline, correct the pattern.
 Illustrations by Steven Fleck.


Nice Post!