
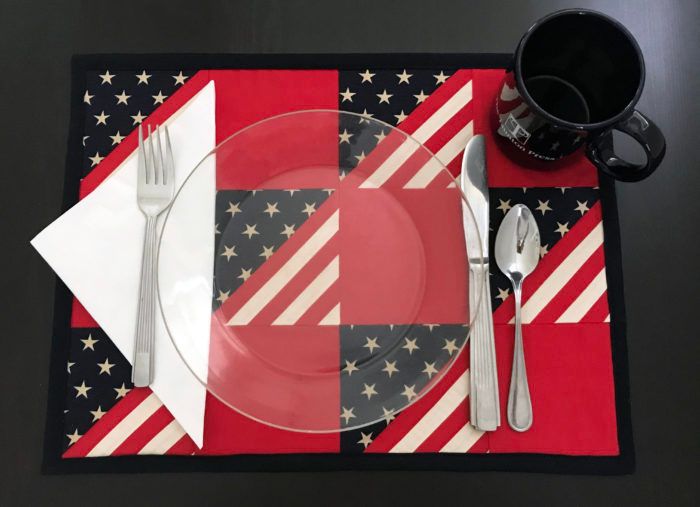
Fourth of July Place Mat
Add a personal touch this Independence Day with some festive table décor.
If you’re in search of a quick project with easy quilting techniques, this place mat is for you. It requires only fabric and batting. Plus, when you’re done, you’ll have a festive table decoration that can be used for multiple occasions throughout the year (e.g. Memorial Day, Labor Day, Veterans Day, etc.). Feel free to make a matching coaster or pot holder with any extra materials. Let’s get started.
Materials
These supplies are for one 12 1/2-inch by 16 1/2-inch place mat.
- 1/8 yard off-white fabric
- 1/4 yard star fabric
- 1/4 yard red fabric, for squares and stripes
- 1/2 yard backing fabric
- 1/2 yard batting
Note: Sew all seams with 1/4-inch-wide seam allowances, unless otherwise indicated.
Prepare the pattern
All of the pieces in this place mat are made with rectangles, except for the striped triangle piece. In order to make this pattern piece, simply draw a 4 7/8-inch-wide square on a piece of paper. Halve the square by drawing a diagonal line from one corner to the opposite corner. Then cut one triangle. Use this pattern for step 6 below.
Cut the pieces
1. Begin with the star fabric. Cut three 4 7/8-inch star fabric squares.
Note: Plan where the stars fall within a square, and then cut the same star print section for the remaining two pieces. This creates a more uniform look.
Next, cut the squares in half diagonally, starting at one corner and ending at the opposite corner. This yields six triangles.

2. Make the red squares. Cut six 4 1/2-inch red fabric squares.
3. Prep the strips. Cut four 1-inch-wide by 25-inch-long strips of red fabric and three 1-inch-wide by 25-inch-long strips of off-white fabric. Starting with red, arrange the strips in alternating color order, as shown below.
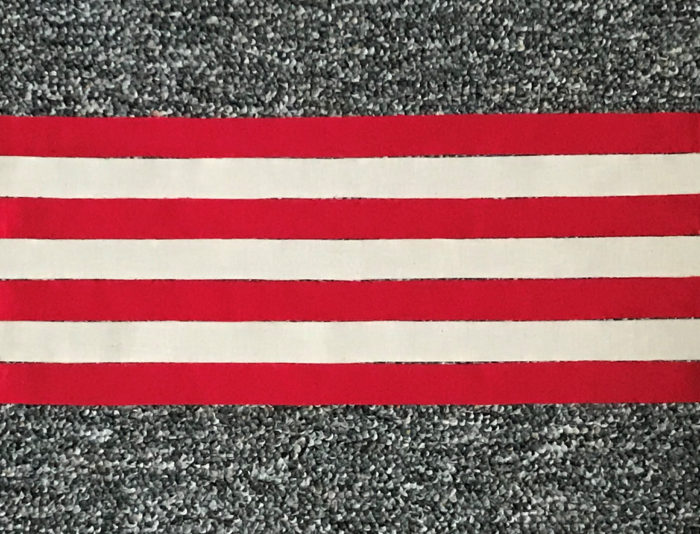
4. Create the stripes. With right sides together and edges aligned, sew one red strip to the adjoining white strip. Sew along the entire length. Continue attaching the adjoining strips until all seven strips are sewn together.

5. Set the seams. With the wrong side up, press the seam allowances toward the off-white strips to reduce bulk, as shown at left. The front side of the striped panel should look like the image at right.

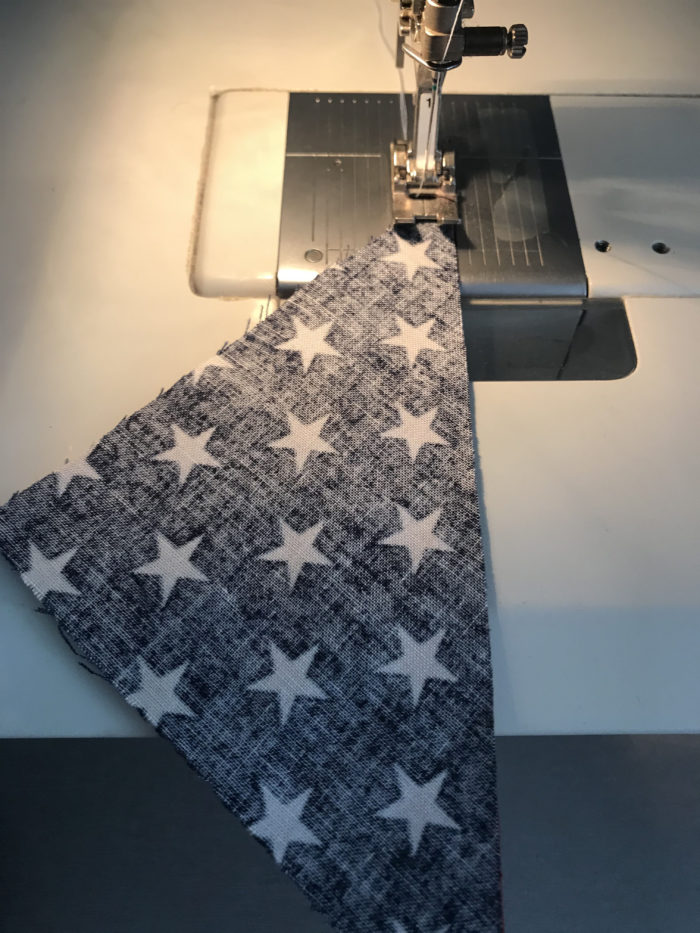
6. Form a triangle. Using the triangle pattern piece from “Prepare the pattern” above, place the pattern—with the widest part at the bottom—along the lower corner of the striped panel. Be sure the striped panel is right side up. Pin the pattern in place, and use the pattern as a guide to cut the fabric. Try not to cut beyond the tip of the triangle to avoid running out of fabric. See the image in step 7 to reference how the second triangle is cut.

7. Flip the pattern. Rotate the triangle 180 degrees so the widest part is on top, and place the pattern along the upper edge of the striped panel next to where the last triangle was cut. Repeat steps 6 and 7 until all six triangles are cut. Note: There will be slight gaps between some of the triangles to account for the shorter red triangle tip.

Assemble the place mat top
1. Combine the stars and stripes. Take one star triangle and one striped triangle. With right sides together, align the long edges and stitch. Press the seam allowances toward the darker side (in this case, the star fabric). Trim the corners. Repeat five more times.
2. Stitch four squares into a strip. Using the image below as a guide, arrange the fabric squares into a 3-by-4 grid. Next, with right sides together, take the first square and align it with the square to its right. Sew along the adjoining vertical edge. Repeat until all four squares are sewn. Then sew the remaining two rows of squares together in the same way.

3. Press the seam allowances. To reduce bulk, press the first and last strip’s seam allowances in one direction and the middle strip’s seam allowances in the opposite direction. This makes it easier to align the intersecting seams in the following step.

4. Complete the grid. With right sides together, align the long edges of two adjoining strips, making sure to match the existing seams. Since the seam allowances are pressed in opposite directions, the seams should lock into place when placed together. Simply place your thumb and index finger on either side of two adjoining seams, and lightly shift them until you feel the creases align. Pin the seams together. Repeat for the remaining seams. Then pin the rest of the strip together and sew. Attach the final strip in the same way.

5. Square it off. Press the horizontal seam allowances for each square in opposite directions to reduce bulk. This is also a great time to check the place mat top’s measurements to ensure everything is squared off. Trim edges as necessary.

Create the place mat backing
1. Cut the backing. Cut a rectangle of batting the dimensions of the place mat top, in this case 12 1/2 inches by 16 1/2 inches. Then cut a rectangle of the backing fabric the dimensions of the place mat top plus 1 1/8 inches on each side. This 1 1/8-inch extension accounts for the 1/2-inch-wide double-fold binding along all edges and 1/8 inch for ease. Here, the backing rectangle came to 14 3/4 inches by 18 3/4 inches.

2. Hem the edges. With the backing wrong side up, turn and press all edges in 1/2 inch. Repeat a second time to create a double-folded edge.

3. Miter the corners. To create a clean corner finish, unfold the pressed edge at one corner and mark a dot at the two center points where the creases meet (see below). Draw a straight line connecting these dots. Using a see-through gridded ruler, align one ruler edge with the interior dot’s center and place one ruler gridline directly on top of the line connecting the two dots. Draw a perpendicular line from the interior dot that extends to the fabric edges.
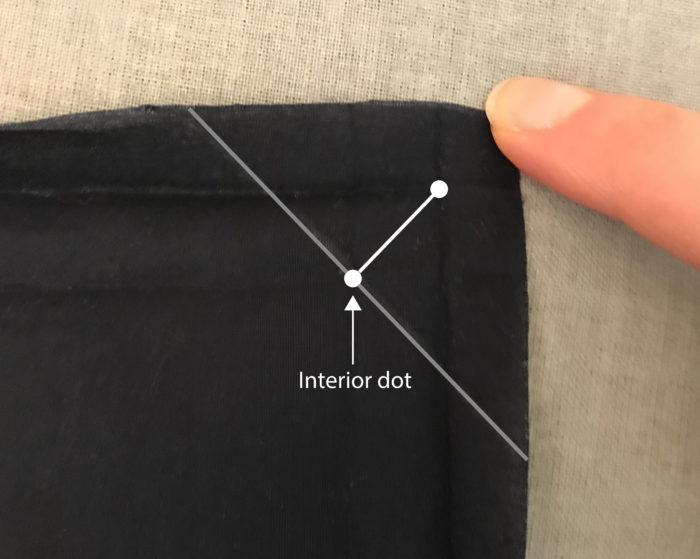
4. Sew and turn. Fold the corner in half, with right sides together, using the first line you just drew in step 3 as a guide. You should still be able to see the markings at this point. Pin the corner together, making sure the perpendicular line from step 3 aligns on both sides of the fabric. To check this, place a pin through one fabric side along the marking and make sure it meets up with the marking on the other side. Stitch along this line from the interior dot to the first crease. Backstitch at both ends, as shown below. Trim the seam allowances to 1/4 inch from the stitching line. Then turn the corner right side out, re-press the edges under, and use a point turner to create a sharp point.

5. Repeat. Follow steps 3 and 4 for the remaining three corners.
The backing should look like this.

Finish the place mat
1. Secure the binding. Align the place mat top, right side up, with the batting edges. Then insert the two layers so they lie flat inside the backing fabric. Be sure the two layers meet the backing fabric’s edges on all sides and pin or clip in place.

2. Edgestitch. Finally, edgestitch along all four bound sides.

Now you have a finished place mat. Do you enjoy decorating for holidays? How would you personalize this pattern? Let us know in the comments below.


Log in or create an account to post a comment.
Sign up Log in