
How Did They Sew That: Edged with Elegance
Finish a curved facing with hand embroidery
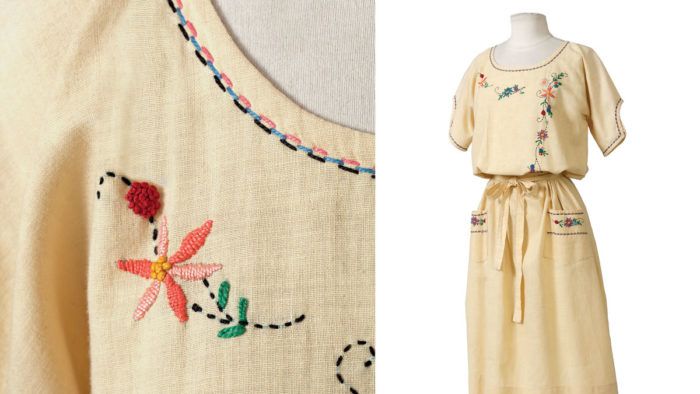
Designs weave in and out of fashion through the decades and sometimes even hundreds of years. The simple pullover style of this ensemble’s top has been worn for centuries, yet it is as pleasing today as it was in the 1930s when this example was made. You could easily wear this exact look while walking on the beach in Italy or shopping in town. Or, you could change the fabric to fluid black crepe, embroider it and a matching skirt with tone-on-tone thread, and wear the ensemble on New Year’s Eve. The top’s hand-sewn edge finish yields smooth curves with colorful topstitching. Read on to learn more about this edging method from Threads #195.
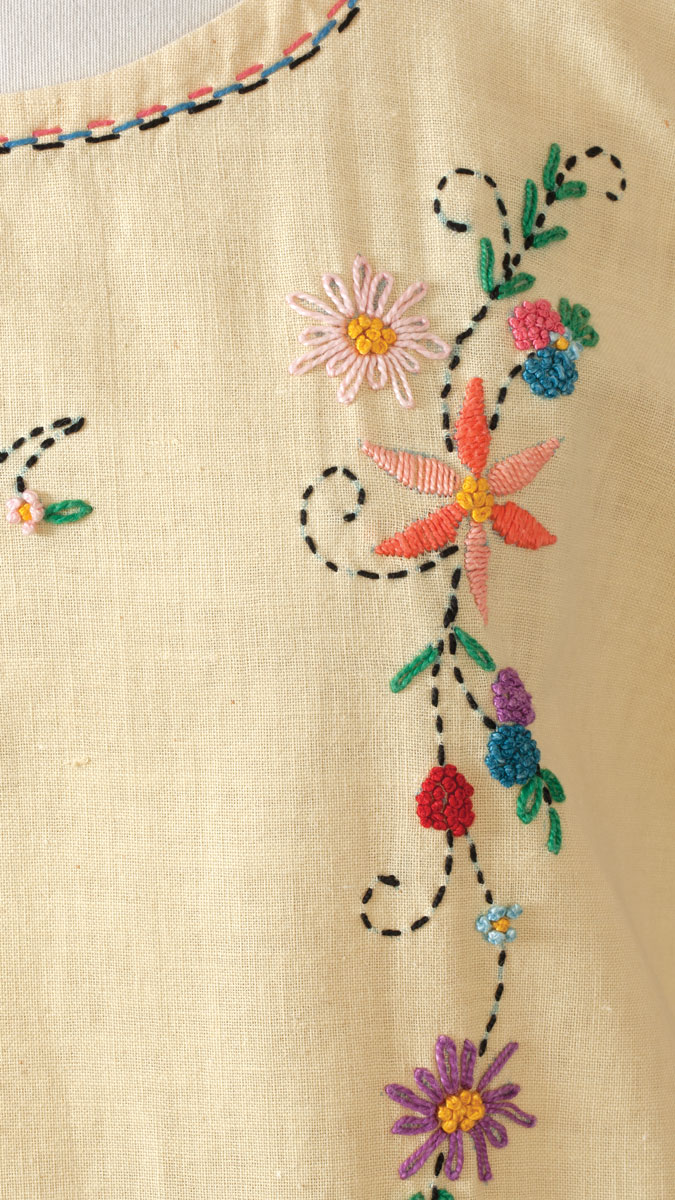
Part of this timeless blouse’s charm is the hand embroidery, fashioned in No. 5 pearl cotton, and the coordinating hand-finished edges. The simplicity of the execution is fetching. The flattering round neckline and interestingly shaped sleeve hems (see the facing page and the back cover) are faced with bias strips of self fabric. When you choose this edge finish, the proper preparation of the bias strips is essential. That includes the right fabric choice, prewashing, and pressing the facing to a template. This last shaping step ensures a smooth, flat finish on any shape.
1. Cut the bias strips. Use a plain-weave (not twill) fabric with a loose weave. The facing can be cut from matching or contrasting fabric. Prewash, dry, and press it before cutting. Cut bias strips 2 inches wide and long enough to cover the edges to be faced. Piece the strips, if necessary, to make longer strips.
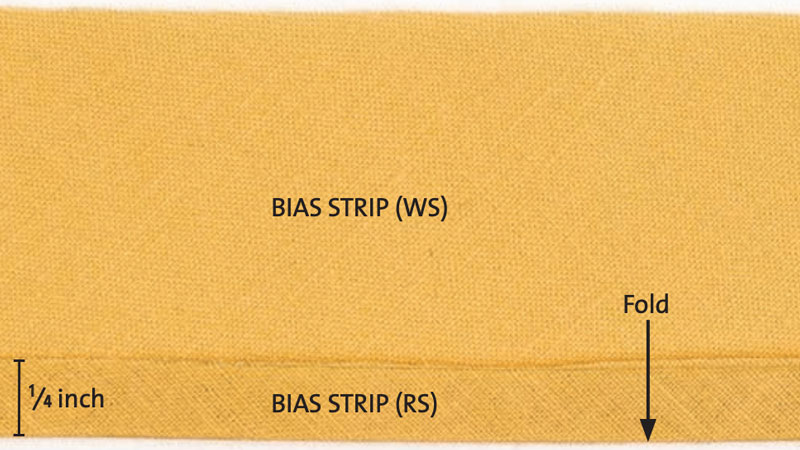
2. On each strip, press one long edge under 1⁄4 inch. Use a pressing template to ensure an even edge.
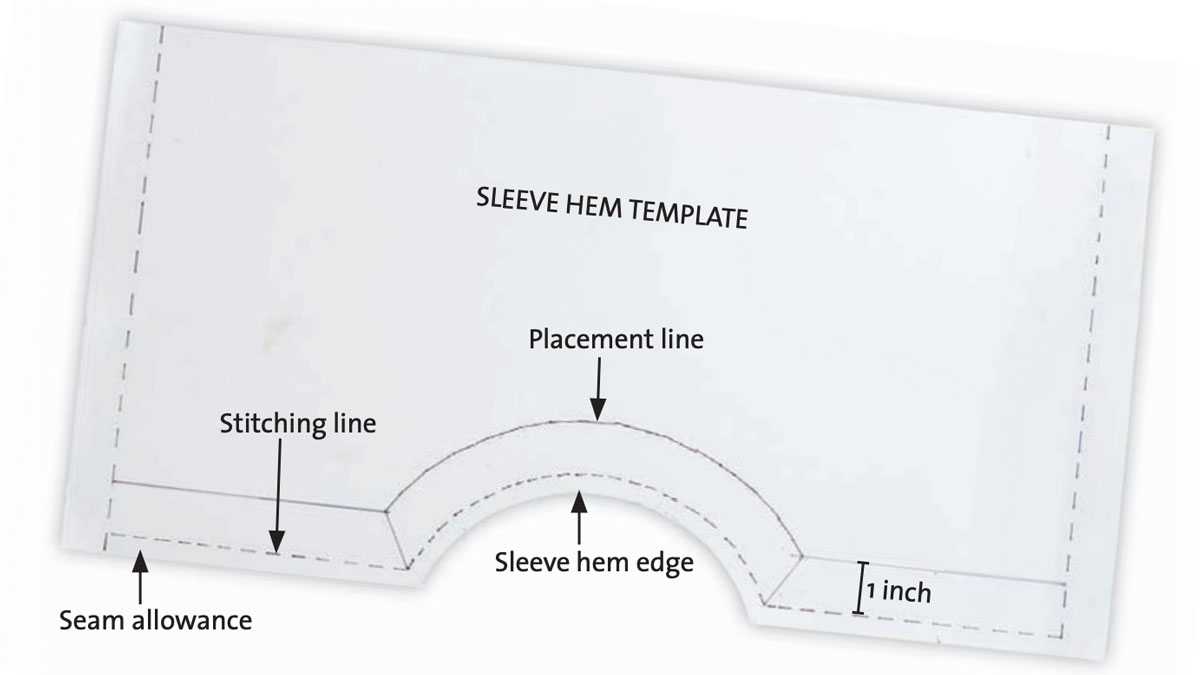
3. Make a template of each edge to be faced. On a piece of stiff paper or…
Start your 14-day FREE trial to access this story.
Start your FREE trial today and get instant access to this article plus access to all Threads Insider content.
Start Your Free TrialAlready an Insider? Log in


I am delighted with the design of this outfit. You have combined my two favorites, sewing and embroidery. Once again , thank you J.N.
I love these articles! I also agree with Tulafitz that it combines two favourites- sewing and hand embroidery. I always read anything from Judith, well explained and as I have a particular interest in wonderful vintage design and techniques, I eagerly look for these articles.
I have to say that I give Threads magazine a 10/10.