
Conceal the Zipper Pull on a Hand-Picked Zipper

This method for concealing the zipper pull when installing a hand-picked zipper was taught to me by my friend Emily.
Many of us who sew were taught by a family member, neighbor, home economics teacher, or friend. Often, it was a combination of several of these sources, along with available books. Even if you’ve sewn for a long time, it’s important to acknowledge those who helped along the way. A fellow custom clothier, Emily showed me a trick that conceals the pull for a neat and clean appearance.
This method came in handy a few years ago when I did lots of hand-finished details on my client’s garments. I never liked seeing the zipper pull near the waistband or facing at the top of the zipper.
Stabilize and baste
1. Determine the length of the zipper you will use, and cut a piece of fusible stay tape or interfacing in the no-stretch direction a little longer than the zipper. Your goal is to stabilize the seam to keep it from rippling after installing the zipper. If you prefer not to use fusible products, use selvages of lightweight fabrics, such as silk organza or fabrics used for linings. Any of them should be at least 1 inch wide and extend 1/2 inch longer past the bottom zipper stop.
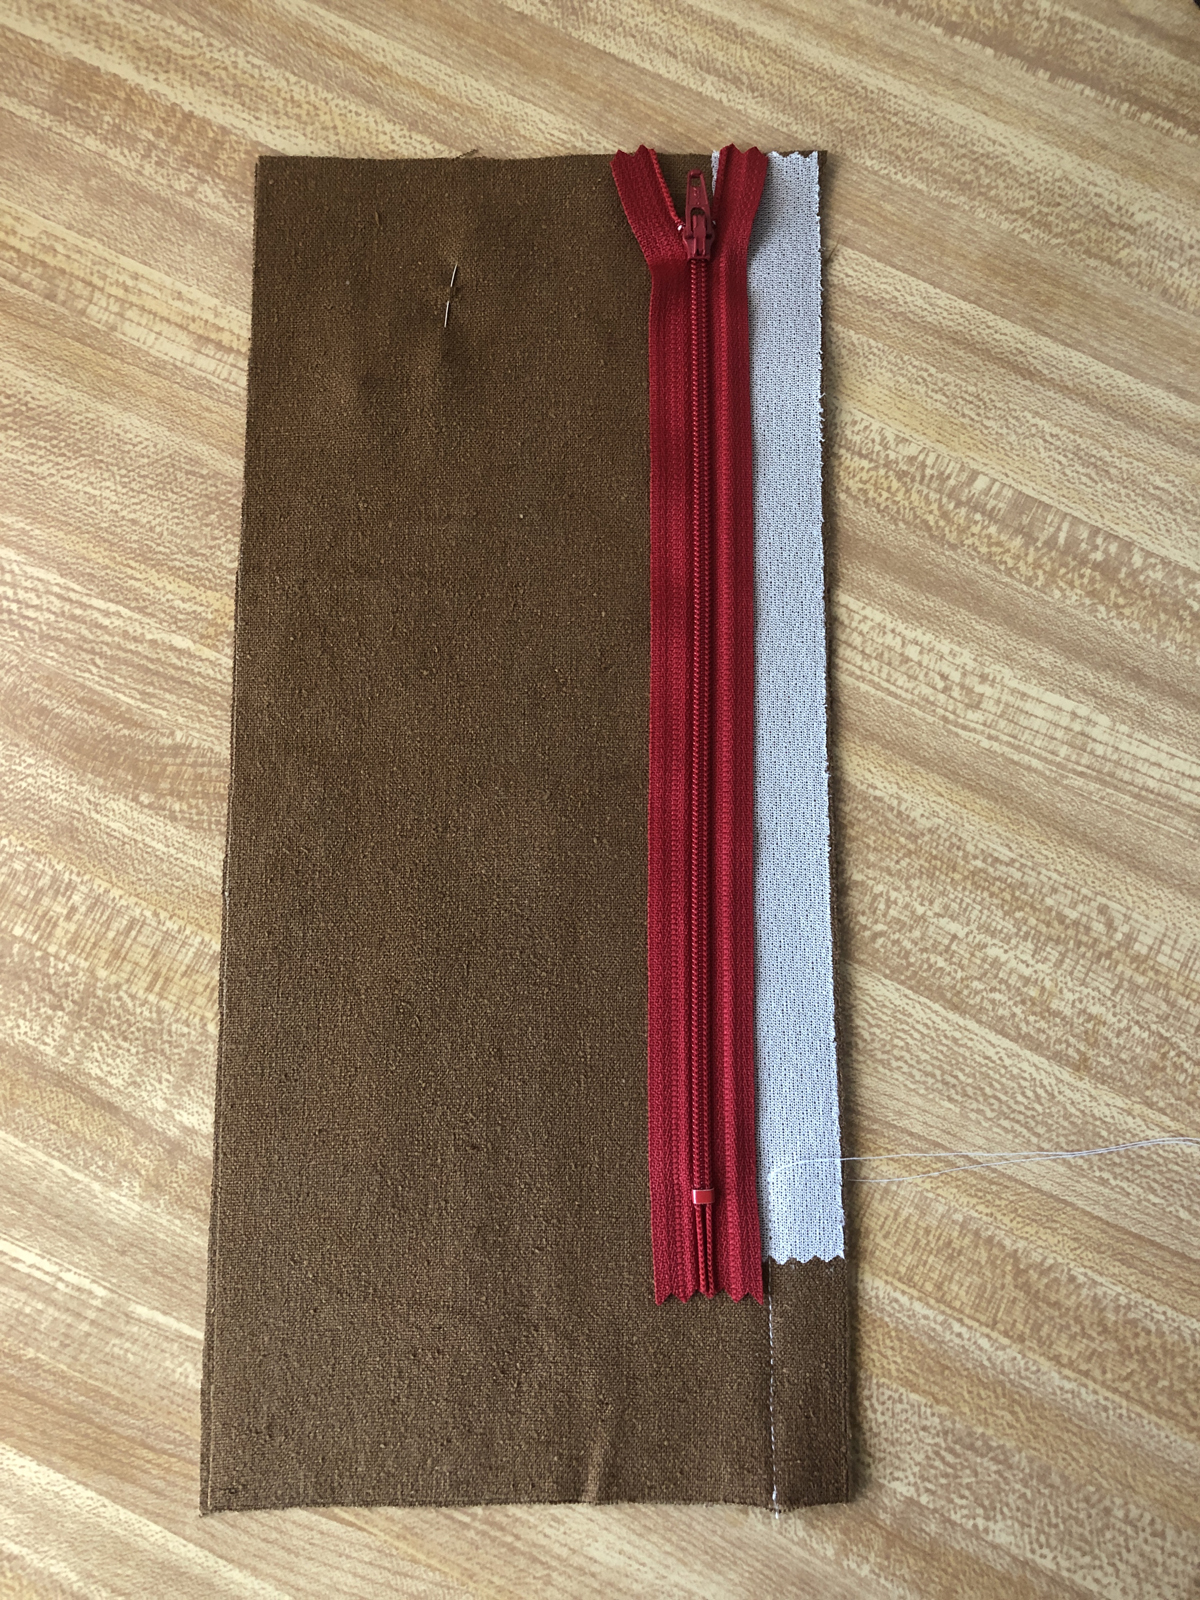
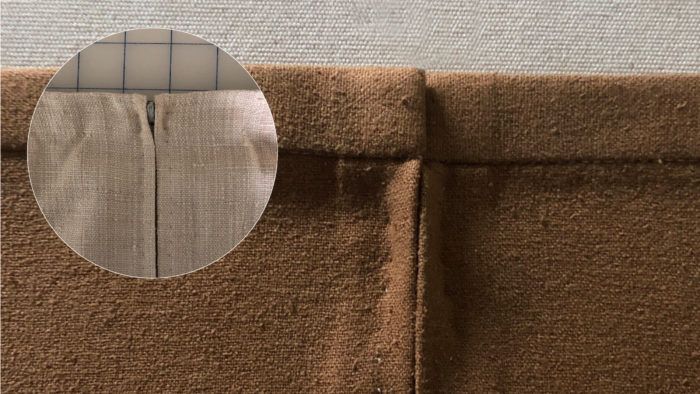
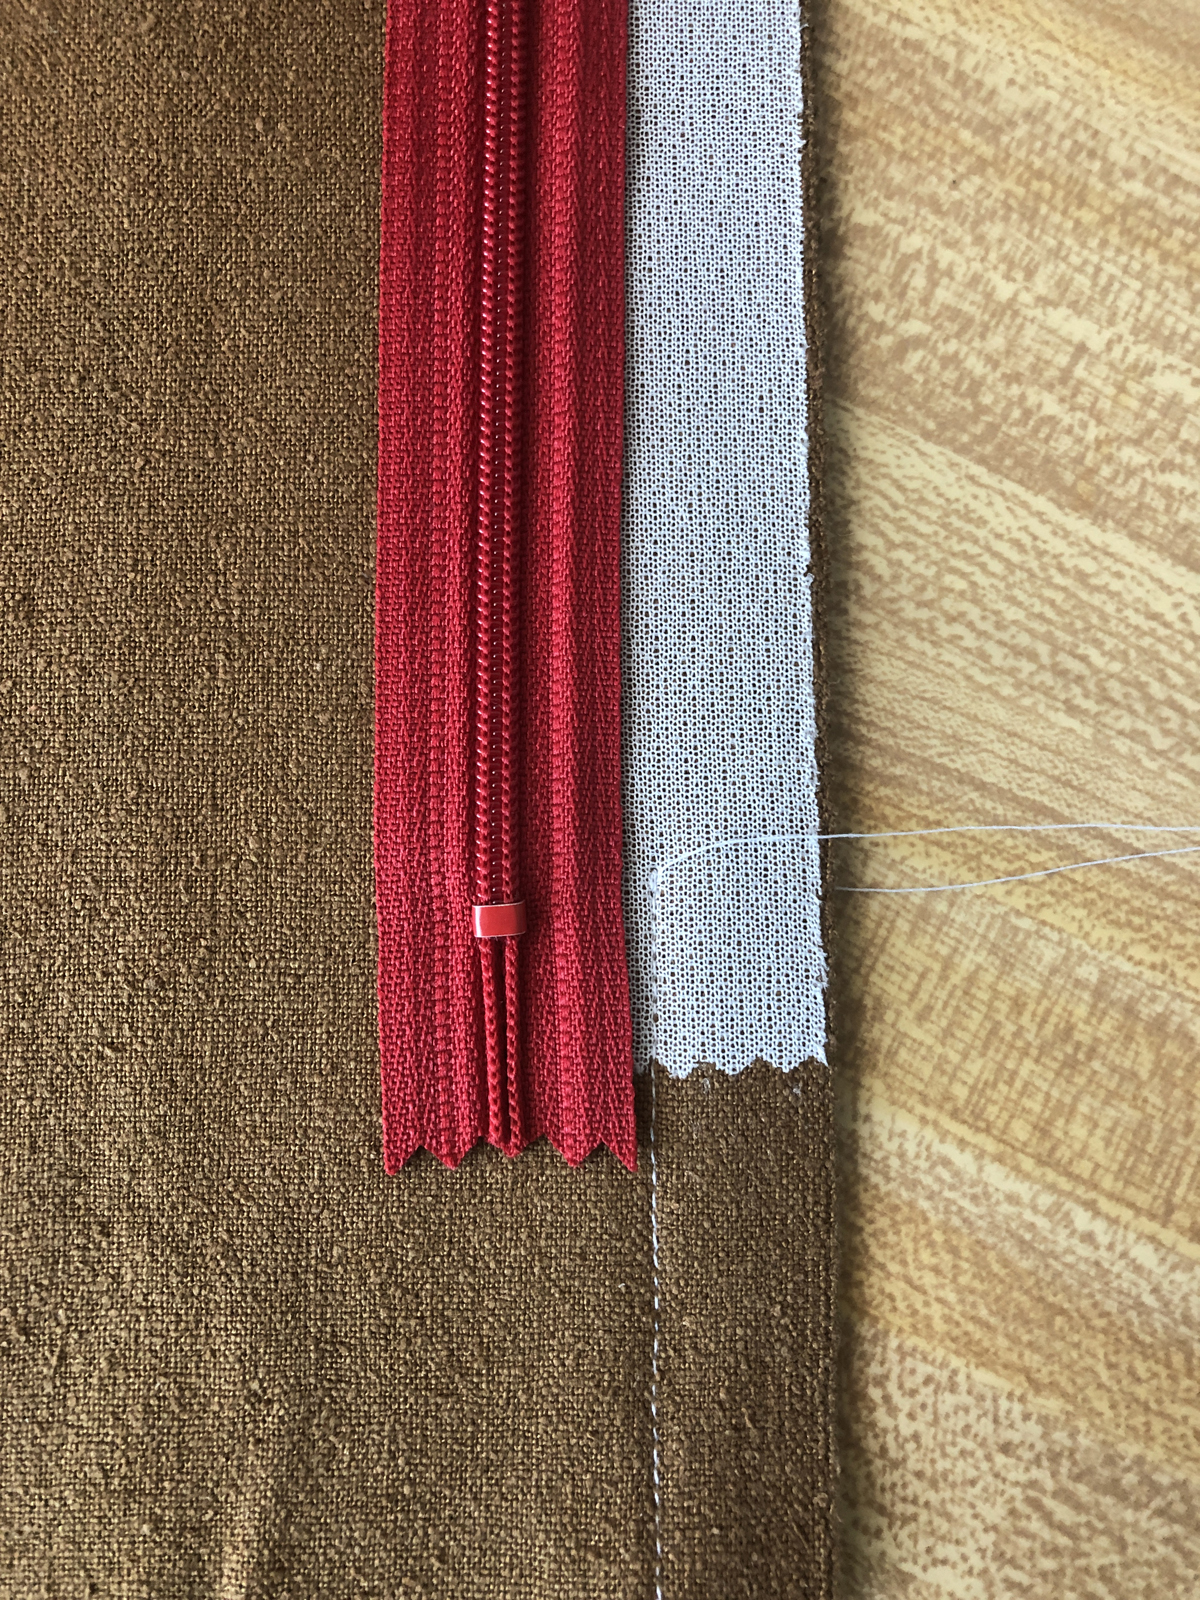
2. Lay the zipper next to the opening, and note the location of the bottom stop.
Tip: Starting about 1/8 inch above the bottom zipper stop, sew the seam closed down to the end of the garment. Remember to backstitch so the seam won’t come apart below the zipper stop. This will hide the metal stop when the zipper is opened.
3. Turn the garment over and use a 4.0-mm stitch length to machine-baste the seam closed. You will remove this thread after installing…
Start your 14-day FREE trial to access this story.
Start your FREE trial today and get instant access to this article plus access to all Threads Insider content.
Start Your Free TrialAlready an Insider? Log in


Hi Pamela,
Thank you so much for sharing this! Like you wrote: it’s not often you meet a kindred spirit. I never handpicked a zipper, but I absolutely will keep this technique in mind.
Last year I went back to school: I am a proud student of the school for master tailor in Amsterdam #moc. I am 58 years old and my class contains a diversity of women who speak our language of sewing. They range in age from 22 to 62 and we are a happy group, exchanging tips and tricks and thoughts. I am so happy to be part of it, even though I have to travel more than an hour to reach it. In the Netherlands everything further than half an hour travel is veeeery far :) Hope to read more of you in the future.