
How to Sew a Bejeweled Waist
Make a simple waistline spectacular.
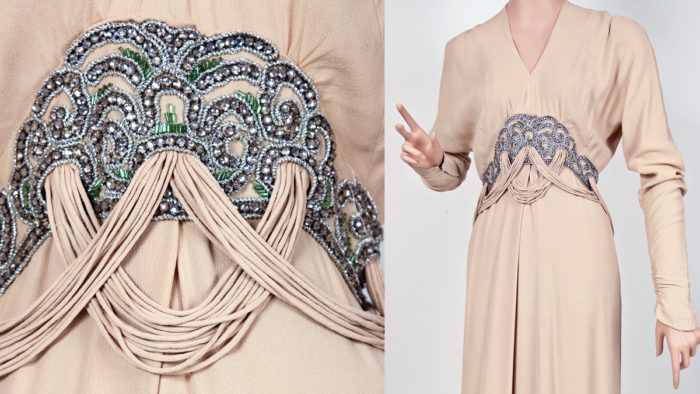
Destined for the social event of the season, this 1930s gown is fit for one of high society’s doyennes or one of Hollywood’s glamorous stars. The simple cut of the floor-length crepe gown reflects the style of a Grecian goddess, and the ornate waist honors the stately architecture of an Italian fountain. Self- fabric cords pour from the encrusted waistband of faceted stones and bugle beads to unite simplicity and flamboyance in this head-turning creation. For instructions on how to create a similar waistband treatment, read this article from Threads #152.

The elegant waistline shown on the back cover is an uncomplicated addition anyone can make to a gown. You can even apply it to a ready-made dress, if you have enough fabric to make the 3⁄16-inch wide bias cords.
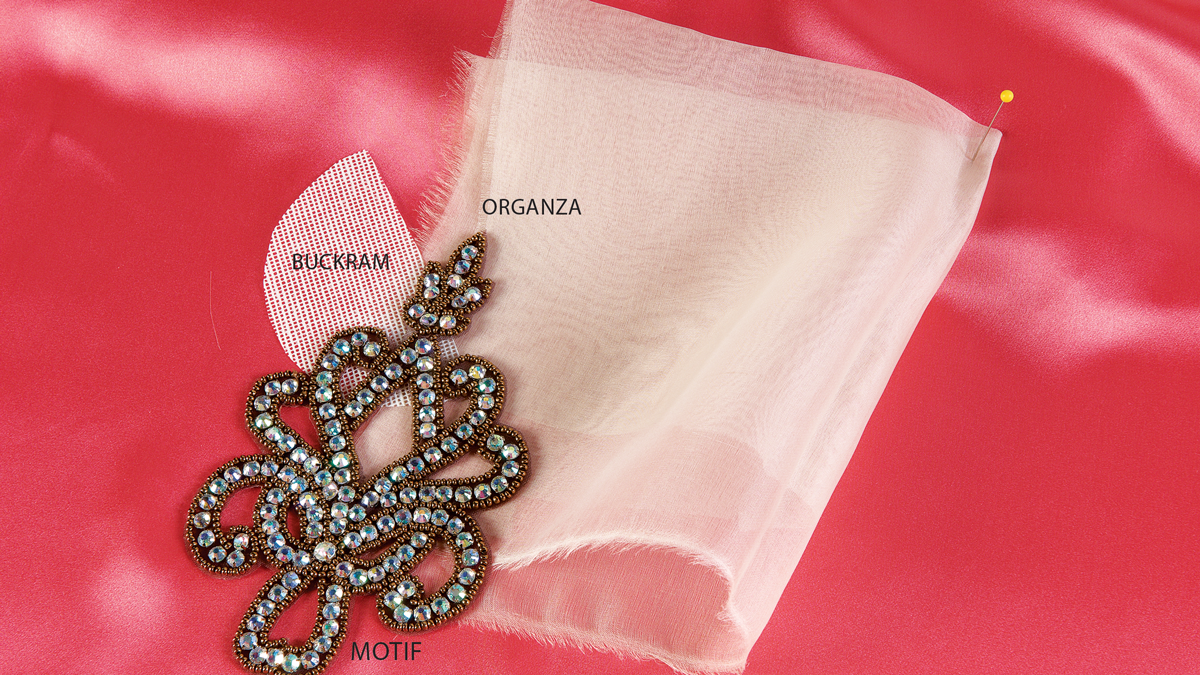
1. Collect your supplies. You’ll need a scrap of silk organza and buckram, a purchased large jewel-encrusted embellishment
motif with at least three holes (MJTrim.com; glitzonline.com;
shinetrim.com), and 3⁄16-inch-wide bias-tube cords to match the dress fabric. (See ThreadsMagazine.com for a bias tube cord tutorial.)
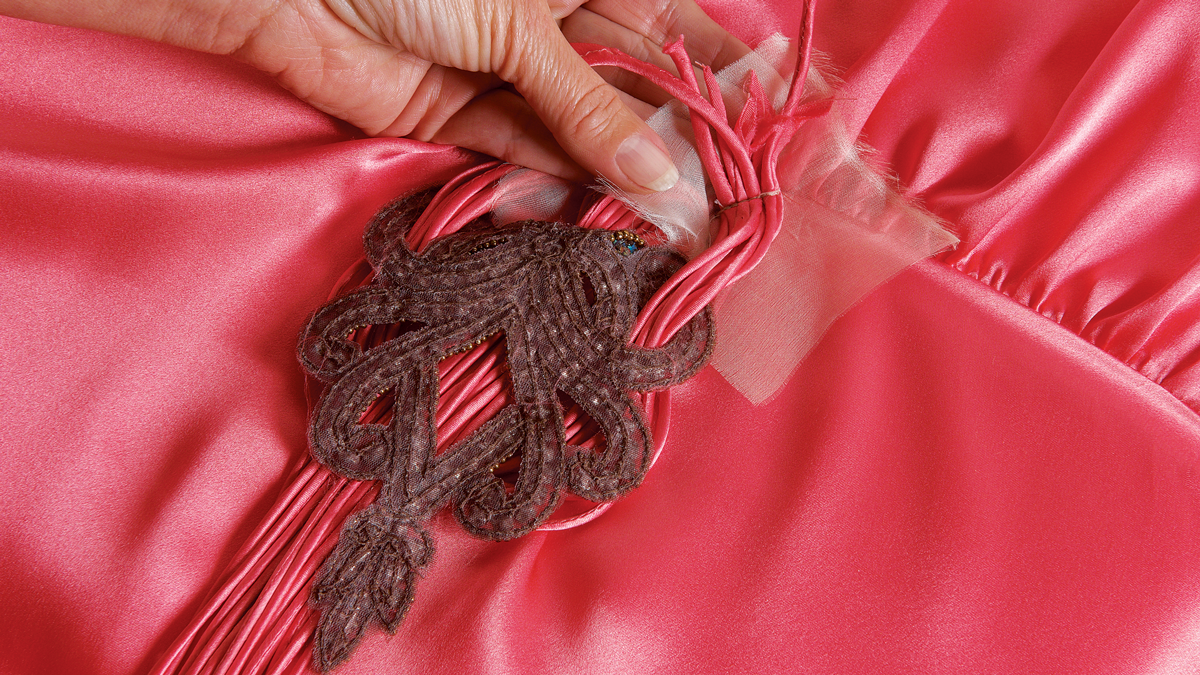
2. Stitch a cord set. Gather eight or more cords, and machine-sew one end of the bundle to an organza scrap. This keeps the cords neatly joined and flattens them. Repeat for each set. Push the cord ends through the right side of the motif. Attach them to the dress, which is supported by a buckram backing. Make sure the ends can be hidden by the motif.
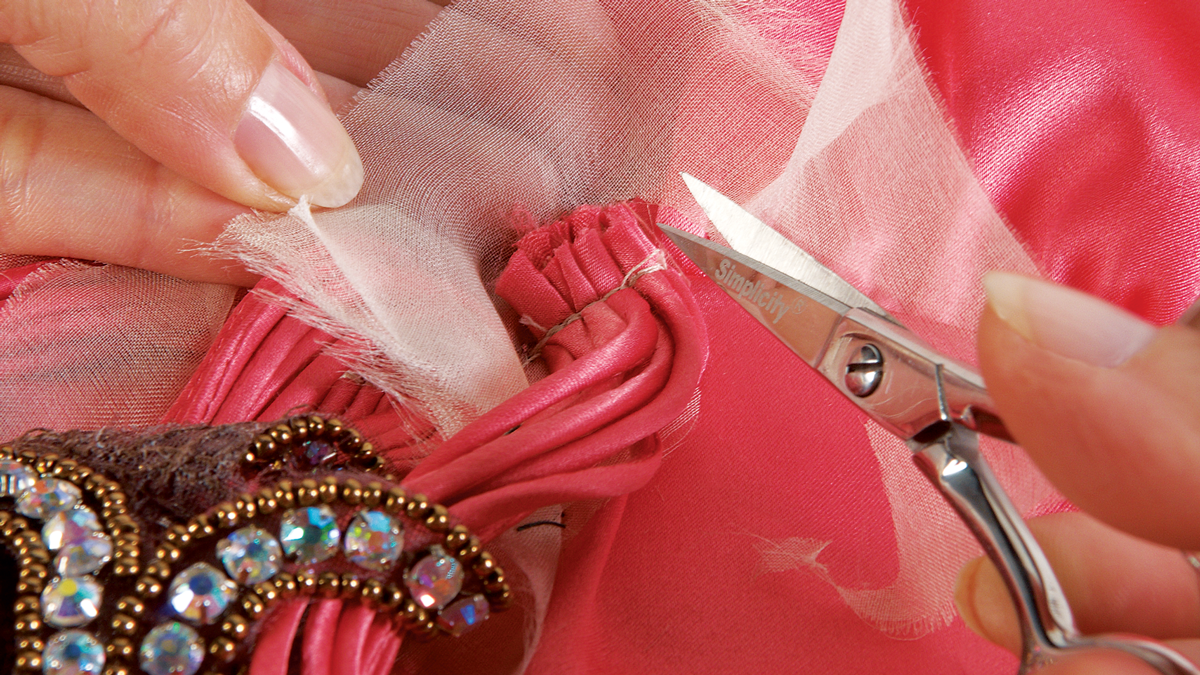
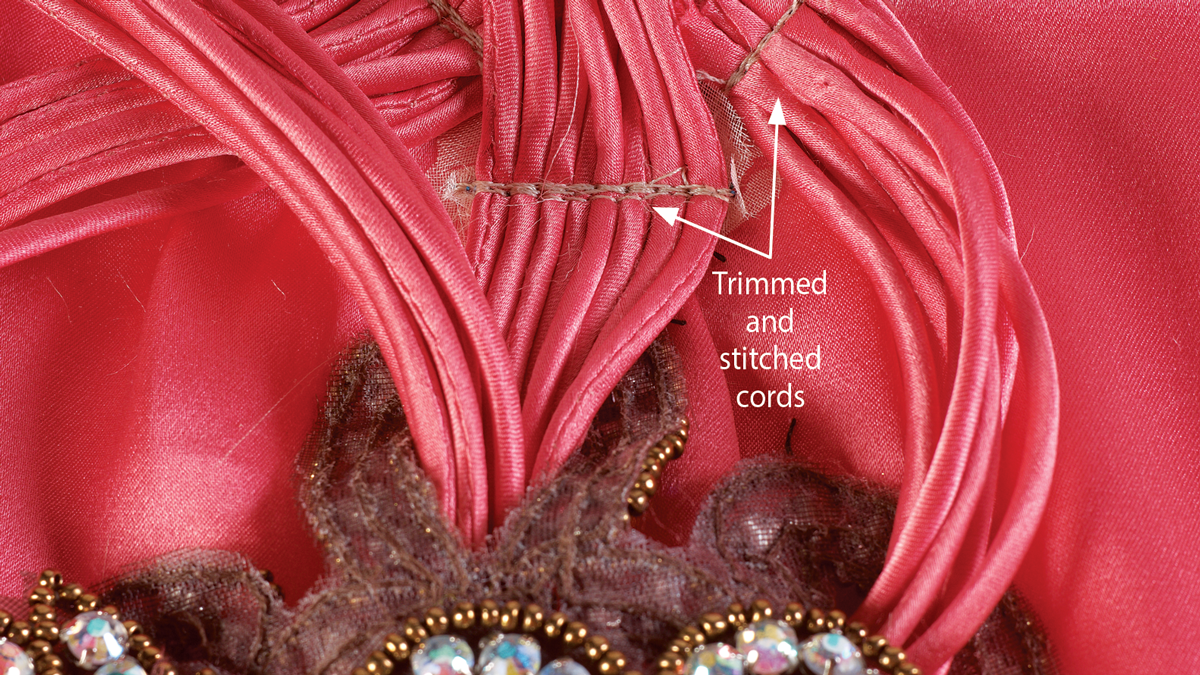
3. Trim away the organza. Turn the motif over the cords to cover the ends, arrange it as desired, and hand-stitch it in place. Catch the loose cord ends in a seam, under a train, in the folds, or in a pleat of the dress.
Photos: Sloan Howard


Ooooh, this is so elegant. This well written article inspires me to utilize my beading designs. Using cording to create fabric dimension has been a fantasy since I saw a black wool coat embellished with satin rat tail cording in the 1970s. It was in a nouveau shop in Minneapolis, garments were shipped from New York and they were testing our market in conservative MN. Thank you for sharing this article. I’m adding this skill/ design element to my creations.