
Enhance Garment Edges with Echo Stitching
Sew multiple parallel lines for strength and emphasis
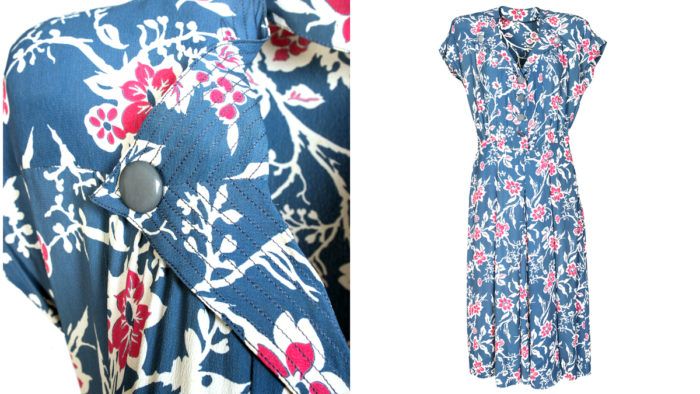
This circa 1940 rayon day dress must have been fairly simple to sew and fun to wear and accessorize. It offers a wonderful setting for extra details that highlight the dressmaker’s skills. From the slanted bound buttonholes to the skirt pleats and decorative stitching, the sewing enhances the style. Echo stitching was used at the collar to stabilize and accent an otherwise straightforward neckline construction. Learn more about echo stitching from Threads #211.
A single line of decorative stitching is attractive and useful for defining a garment. Imagine the effect of sewing many parallel rows of topstitching. In addition to offering greater visual impact, this stitching supports the treated area. Each additional row adds body to the garment section.
The 1940s day dress shown on the back cover features echo stitching on its collar, which differs from other types of decorative stitching.
Edgestitching is typically sewn 1/16 inch to 1/8 inch from the finished edge, or follows a motif outline. Topstitching is a decorative element that may appear throughout the garment, not just along an edge. Channel stitching consists of many parallel, equally spaced straight rows that cover the fabric as a surface design; they can be oriented in any direction.
Echo stitching also consists of multiple rows of stitching, but they follow the shape of an edge, a garment detail, or a fabric motif. The first row outlines the desired element, and is followed by more concentric rows. Echo stitching is sometimes used to quilt, adding enough rows to cover the entire piece.

Choose suitable thread
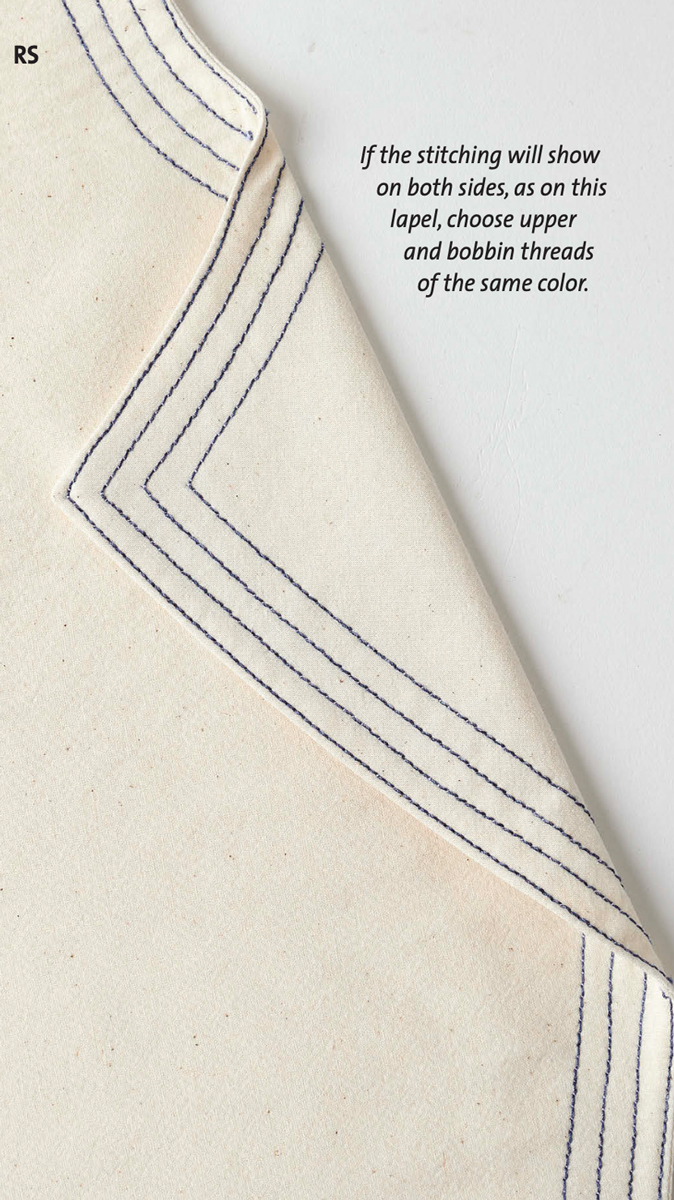
Cotton or silk thread is a good choice for visible stitching because it doesn’t stretch and causes the fewest problems with tension, especially on natural fiber fabrics. Thread designed for topstitching is preferred; it’s thicker than regular sewing thread. When working with topstitching thread, use a finer thread in the bobbin, unless both sides will be exposed. The upper thread can match or contrast with the fabric; bobbin thread that won’t show should match the fabric.
Test the thread on the project’s fabric, with all the layers that will be in the finished item. Experiment with different types of interfacing or backing, stitch lengths, and spacing between the echo stitching rows. I recommend finding a spot on the presser foot that can serve as a spacing guide, and/or shift the needle laterally to obtain the desired spacing.
Plan the stitching
At what point in the construction process you add the echo stitching is determined by the project’s design components. It is ideal if the stitching rows terminate within a seam allowance. Echo stitching may be sewn halfway through construction, after the interfacing is attached, and before the facing is attached.
If the echo stitching follows an edge with an angle, mark the turning point for each line or use an existing landmark, such as the miter seamline in the example at right, to guide your stitching. This ensures an even, precise result.

1. Prepare the garment. Interface the area to be stitched, sew any seams, trim and grade the seam allowances, and turn the facing to the wrong side, if this is how you planned the construction. Press to form a crisp, even edge.

2. Mark any key turning points. Add a “miter” line by hand- or machine-basting to indicate where to pivot on any seams with angles. If the edge already includes a miter seamline, use that as a guide.
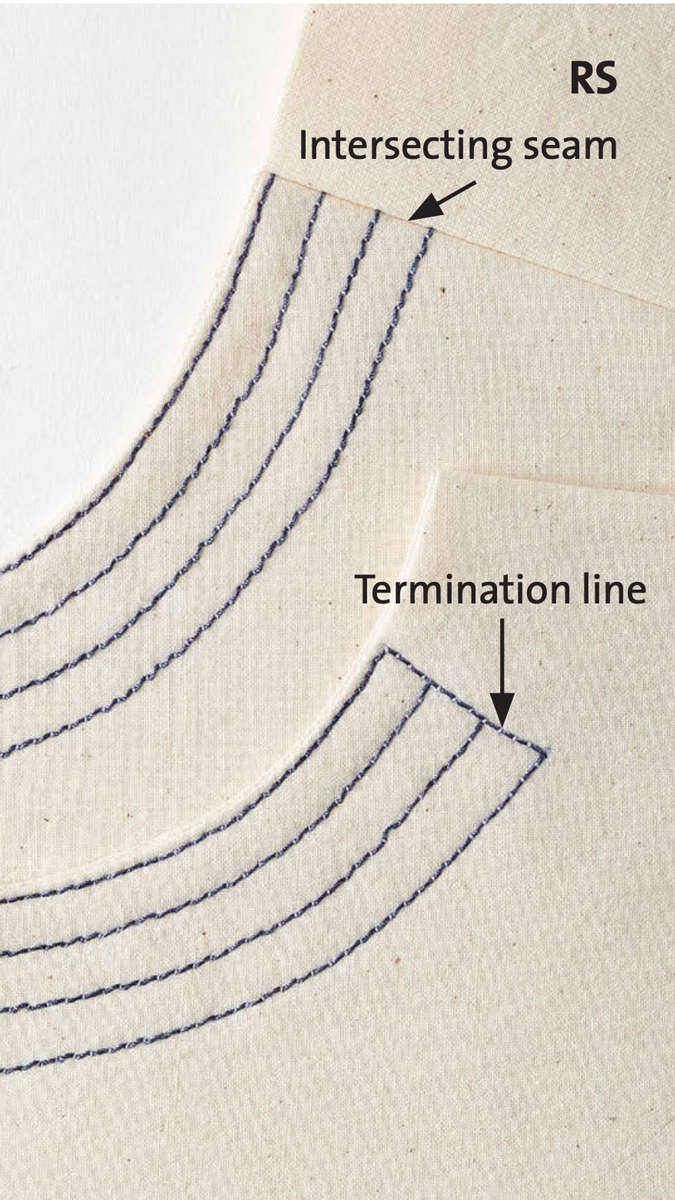
3. Apply the echo stitching. Work with the project right side up, and start with the row closest to the garment or motif edge. Align the edge to the alignment point on the presser foot and stitch. Realign for subsequent rows. Sew three rows, then press the work and check whether the fabric layers have shifted. If they have, sew the next three rows from the opposite direction, changing the needle position or alignment guide to maintain the desired spacing. Continue to complete the stitching. If the echo stitching doesn’t terminate at an intersecting seam, sew a perpendicular termination line.

4. Secure the thread tails. If you run out of thread, or when the stitching ends outside a seam allowance, pull the thread tails to the wrong side. If the wrong side won’t show, knot the tails and clip them. If the wrong side will be visible, thread the tails into a hand needle and bury them between the fabric layers.
Judith Neukam is a contributing editor based in Omaha, Nebraska.


Log in or create an account to post a comment.
Sign up Log in