
Basics of Silk-Ribbon Embroidery
Hand-embroider exquisite designs with just a few basic stitches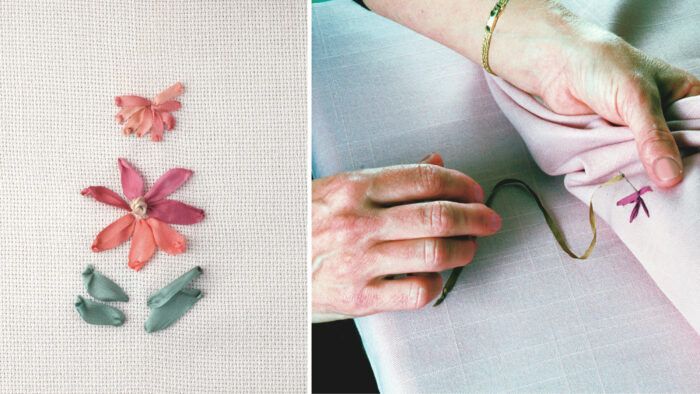
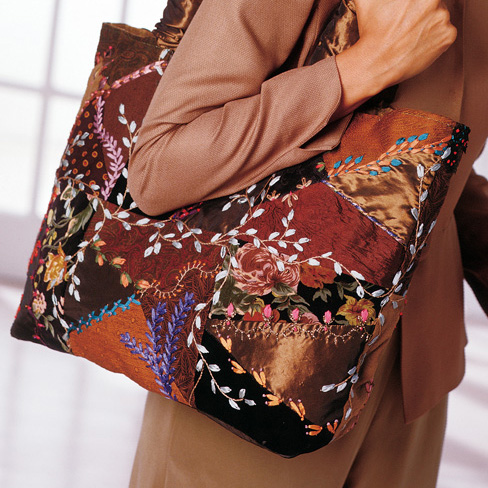
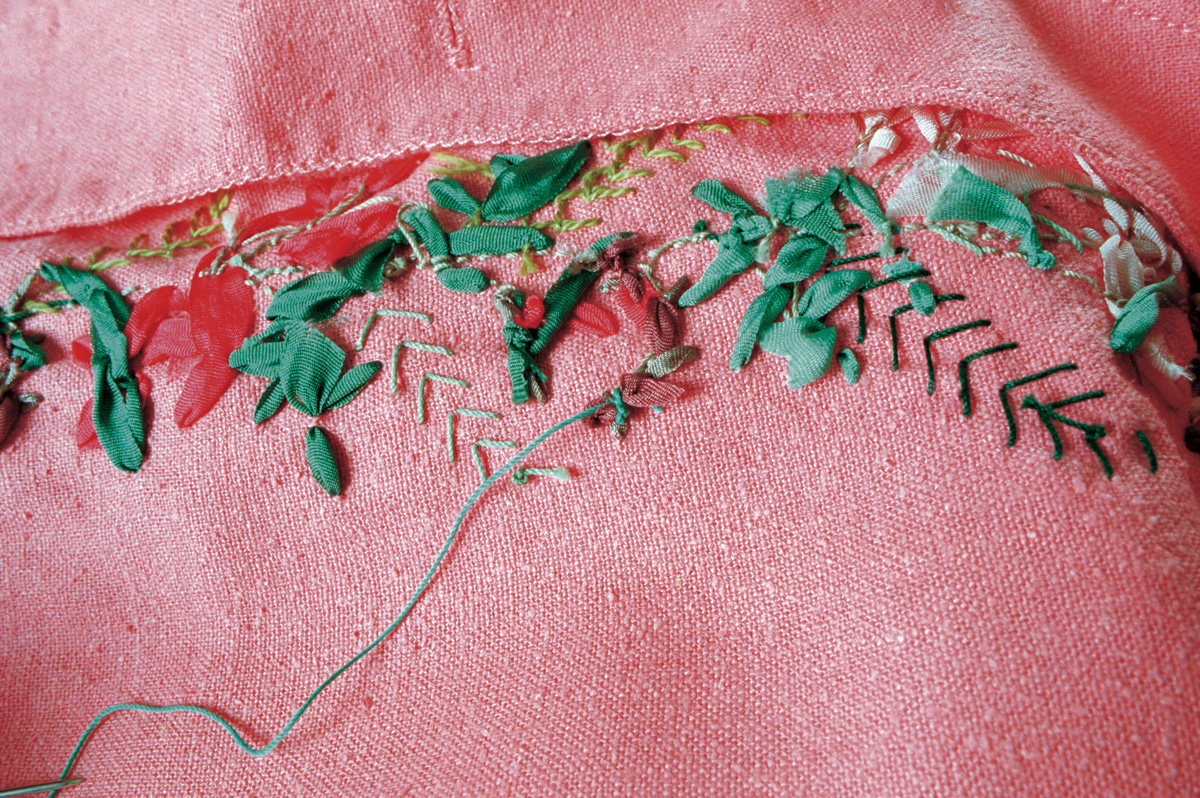
Silk-ribbon embroidery is a romantic, old-time art that uses ribbon, embroidery floss, and perle cotton to work beautiful floral motifs and decorative stitch patterns by hand on garments and accessories. I love the antique quality of this form of embroidery, and I use it to embellish crazy-quilted bags and purses, as well as contemporary garments cut from a single fabric. Silk-ribbon embroidery is easy and fun to do. Even a novice embroiderer can create elegant floral arrangements and beautiful patterns with some simple stitches.
You will need only a few supplies and tools to begin. I’ll show you my five favorite stitches, so you can start right away creating flowers, leaves, vines, berries, and other beautiful patterns. I’ll also explain how you can easily create your own embroidery designs and transfer them to your fabric or an existing garment.
Embroidery tools
To get started, you’ll need a supply of ribbons, threads, and needles (see “Embroidery supplies” below). You can use rayon or polyester ribbon, but nothing equals 100% silk ribbon for its drape and wide color selection. Silk ribbon is available in widths up to 24.0 mm (approximately 1 inch) wide, but the most common widths used for embroidery are 2.0 mm (about 1/8 inch wide), 4.0 mm (1/4 inch) and 7.0 mm (3/8 inch). To stitch the stems, vines, ferns, and other fill areas in your design, you should have on hand embroidery floss and No. 8 and No. 12 perle cotton.
I recommend using a size 18 or size 22 chenille or tapestry needle; their large eyes are easy to thread, and their large points perforate the fabric with holes big enough for the ribbon to pass through easily. These needles are exactly the same, except that the chenille needle has a sharp point and is used for woven fabrics, and the tapestry needle has a rounded point and is recommended for knits, because it doesn’t pierce and potentially break the fibers.
An embroidery hoop is optional, but you might find it useful for holding the fabric taut as you stitch. Keep in mind some fabrics, like velvet, should not be hooped at all, as hooping will mark the fabric.
You’ll also need interfacing on hand to use as a stabilizer for the embroidery. I prefer using a lightweight, woven fusible, which I fuse to the wrong side of the fabric in the area to be embroidered. This prevents puckering, helps reduce stress on the edges of the ribbon, and allows it to pass through the fabric more easily. Lightly fuse interfacing to the back of the design area only. Then, when the embroidery is complete, peel the stabilizer away from the fabric, and trim it close to the embroidery. If the embroidery is to be positioned in an area that already calls for interfacing, you don’t need additional stabilizer.
I don’t interface sweatshirts and sweaters because of the fabric’s stretch, but when I embroider knits, I’m careful not to stitch so tightly that it puckers the fabric. Crazy quilting also does not require interfacing because the individual fabric pieces are stitched to a muslin backing, which acts as a stabilizer for the embroidery.
Choose complementary fabrics and colors
Silk-ribbon embroidery can be worked on almost any fabric, but simple stitches on solid colors of plain-weave or slightly textured fabrics, like velvet, linen, silk dupioni, or taffeta, complement the embroidery best. If you embroider on printed fabrics, as I do on my crazy-quilted pieces, be sure the prints aren’t so large or busy that they would obscure the stitches.
Choosing colors for a project is an important—and fun—part of the process. You’ll want to select ribbons and threads that harmonize with your fabric and have the same intensity, or purity, of color (for more on color, see “A Color Workshop,” in Threads No. 82, pp. 36–43). When I start a project, I gather up the ribbons and threads that I think I want to use and put them together on a table or on the floor with the fabric I intend to use. Then I stand back, squint at them, and weed out any that jump out. I might end up with a number of colors that work together on one garment or only a few. For a crazy–quilting project, I combine printed and solid fabrics (I’ve worked with as few as five), and several colors of ribbon and thread, all of the same intensity. I try to stitch the lighter colored ribbons to darker fabrics and darker ribbons to lighter fabrics to show off the embroidery.
Plan a design
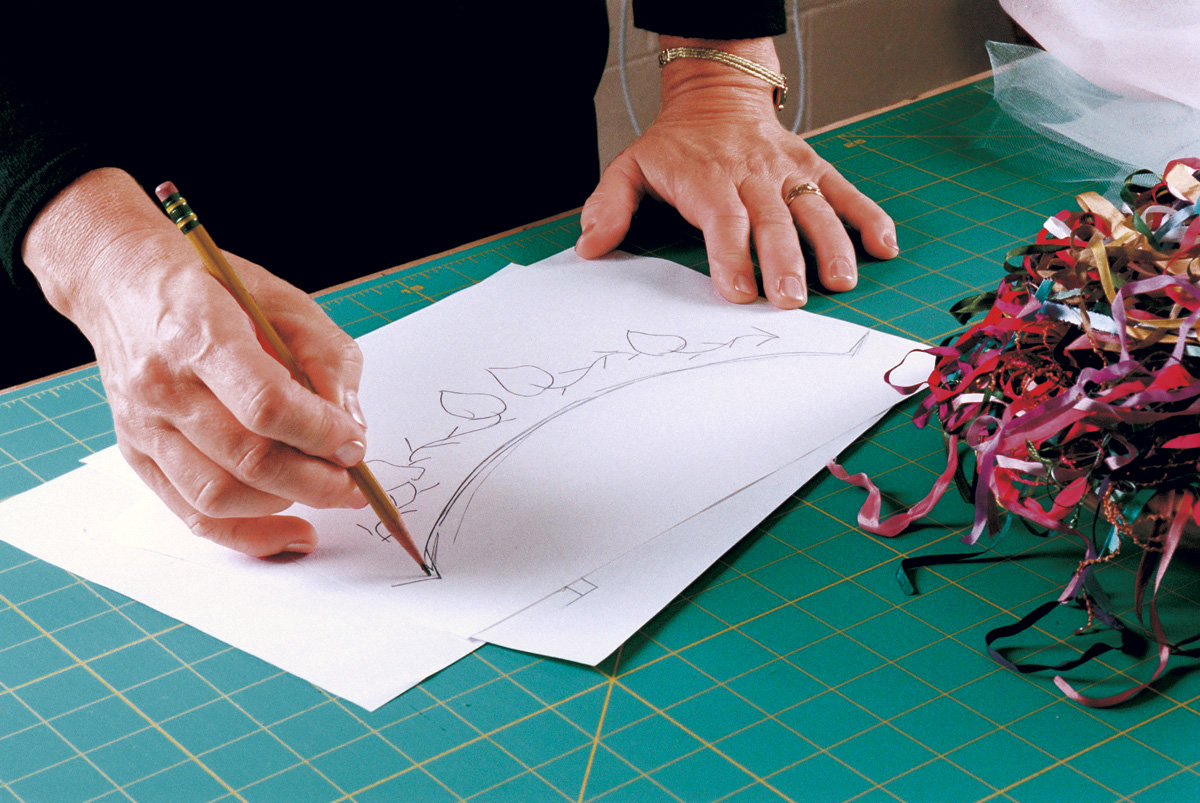
Many beautiful embroidery designs are available in patterns and books, but why not try to create your own designs? Start by collecting ideas that can be translated into a design. I often find inspiration in places like seed and flower catalogs, greeting cards, woven trims, even wallpaper—anything that gives examples of flowers and foliage and how to arrange them. Make simple sketches first, playing with combinations of flowers, stems, and leaves. Add buds, berries, ferns, or whatever you choose to be a part of the design. Then develop these designs on a paper cutout of your project (see the top photo on the facing page). If you’re making a vest, for example, trace both fronts on the paper, indicating neckline, front opening, shoulder, and armhole seams; and roughly draw in (to scale) the flowers you want to stitch. Decide if your flowers will be connected with vines or a common stem, or if they’ll “float” unconnected. Draw in any large, unconnected flowers first, then add smaller groups of flowers and leaves. To join single flowers or groups of flowers, draw a meandering line the length of the vest fronts and around the neckline placing the flowers on or near it and indicating whether they grow up or hang off the vine. Then complete the design by filling in with leaves, berries, ferns, and so on. At intervals in this sketching process, it’s helpful to stop and hold up the drawing to be sure all of the design elements are well placed.
Your designs will be more successful if you make them asymmetrical, rather than the same on both sides, because the soft nature of the silk ribbon makes it difficult to exactly duplicate any two stitches. I don’t consider this a problem, however, because it adds to the charm of the embroidery, but be aware of it when planning a design.
For my crazy-quilting projects, I generally embroider a single flower or sprig of flowers on one or two of the individual patches with random vines and stitch patterns along the patchwork seamlines in typical crazy-quilting style. When crazy quilting, I don’t find it necessary to sketch out the designs but simply create them as I stitch.
Transfer the design
I use one of two methods to transfer a design to the fabric: free-hand drawing or tulle transfer. With free-hand drawing, I simply use the paper sketch as a guide, and redraw the major elements of the design directly on the fabric with a water-soluble marking pen or tailor’s chalk (for dark fabrics). It’s not necessary to transfer all of the
details. You can use circles to indicate where the flowers will be stitched, lines for the vines and stems, dashes for leaves and buds, and dots for berries.
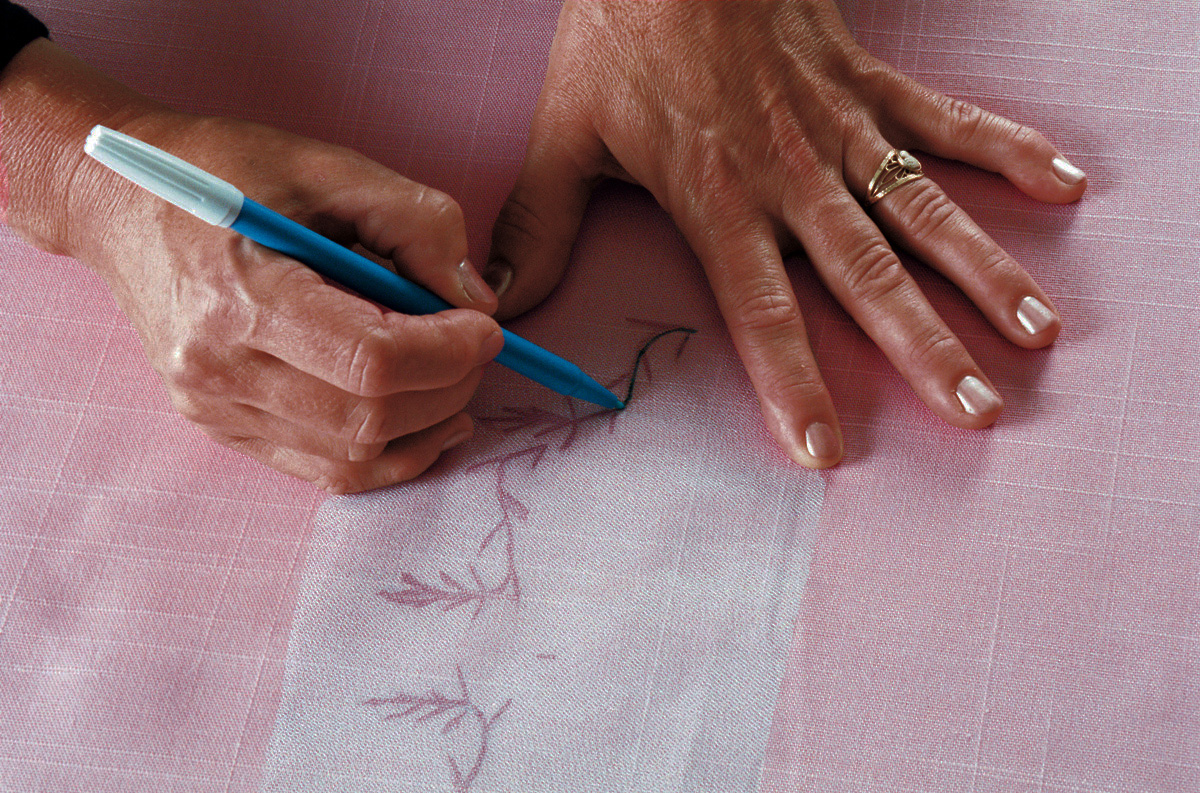
For more complex designs, tulle transfer is an easier method (see the bottom photo on the facing page). To transfer with tulle, place a piece of nylon or polyester tulle over your paper sketch and trace the design on it with a marking pen. I find laundry markers work well for this step. Next, trace the garment’s seamlines to give you a registration point when you transfer the design to your garment. Place the tulle over your fabric and pin it in place, then trace over the design with a water-soluble marker or tailor’s chalk. Remove the tulle before stitching the embroidery.
Ribbon embroidery is a relaxing way to get back to doing handwork. And when you’ve finished your garment, care for it by hand-washing and line-drying or dry-cleaning. Avoid ironing the embroidery; just lightly spritz with cold water to restore the ribbon.
Basics of embroidery
1. Use short lengths of ribbon
Repeatedly pulling the ribbon through the fabric frays its edges. Use a 12 inch to 15 inch length for 2.0 mm and 4.0 mm ribbon, and a 7-inch to 10-inch length for 7.0 mm and wider ribbon.
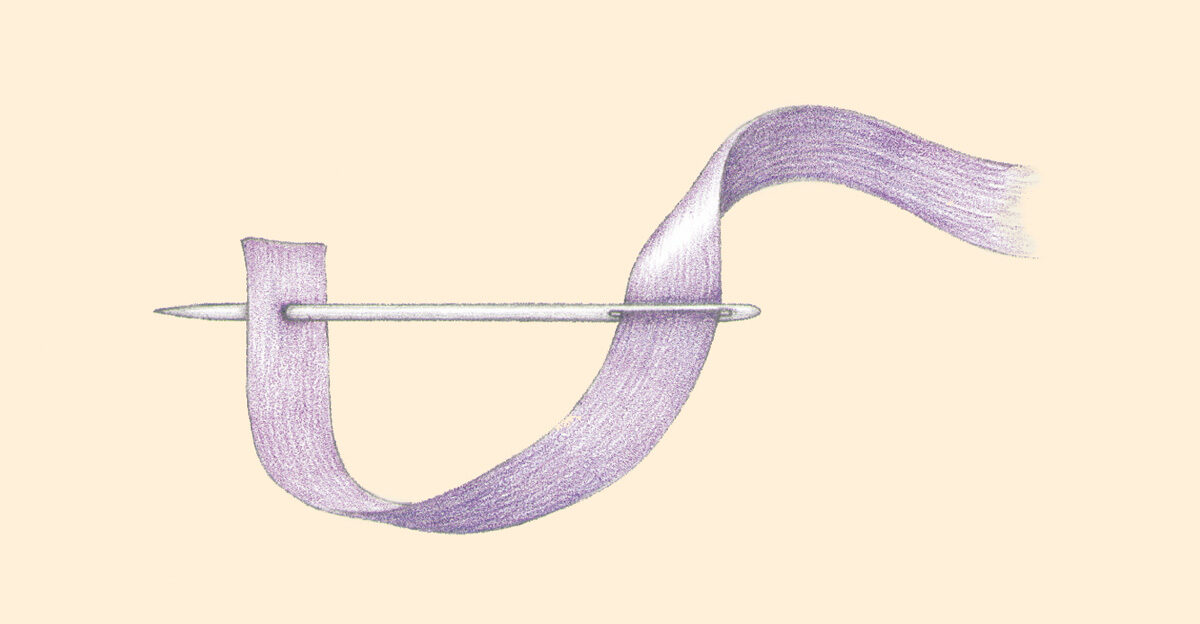
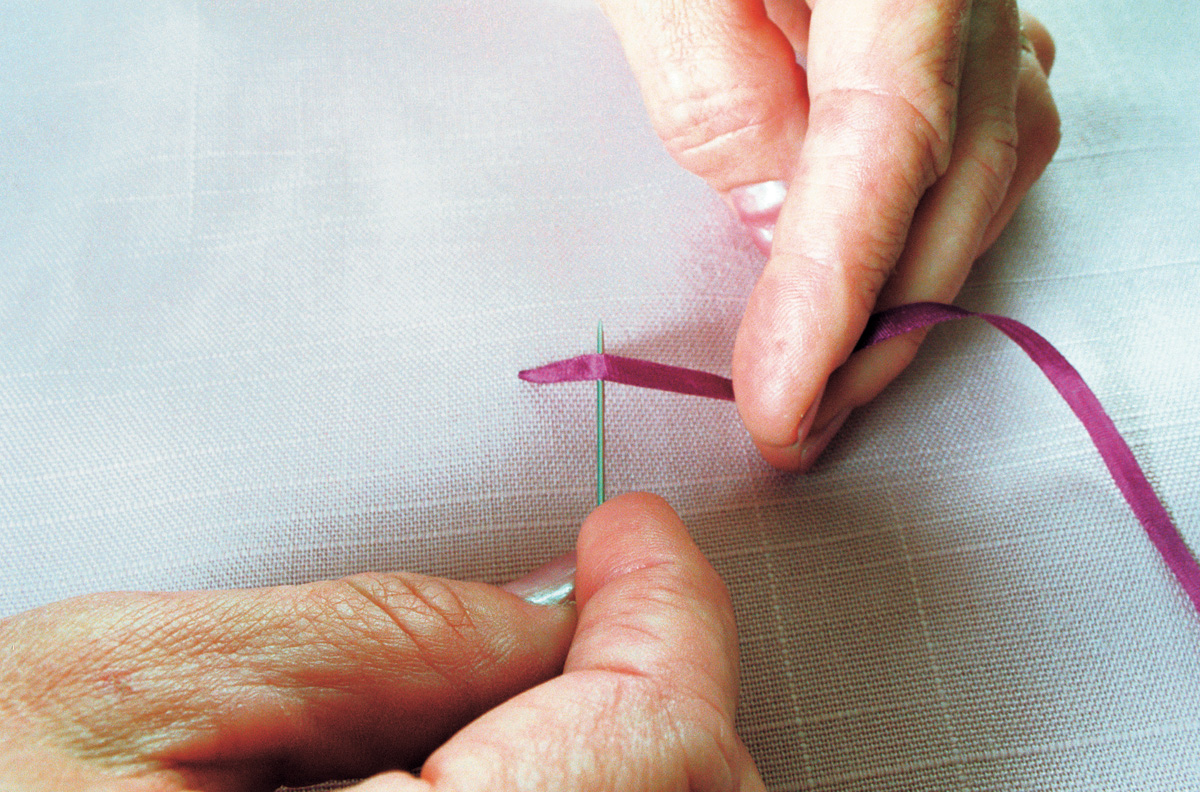
2. Needle-lock the ribbon
To prevent the ribbon from slipping out of the needle’s eye while stitching, thread it through the eye, then pierce the same end of the ribbon with the needle 1/4 inch from the end (as shown in the drawing above). Pull down on the long tail, locking the ribbon in place. (I don’t, however, recommend needle-locking for ribbons 7.0 mm and wider.)
3. Maintain loose tension
Pulling the ribbon too tightly while stitching causes it to curl.
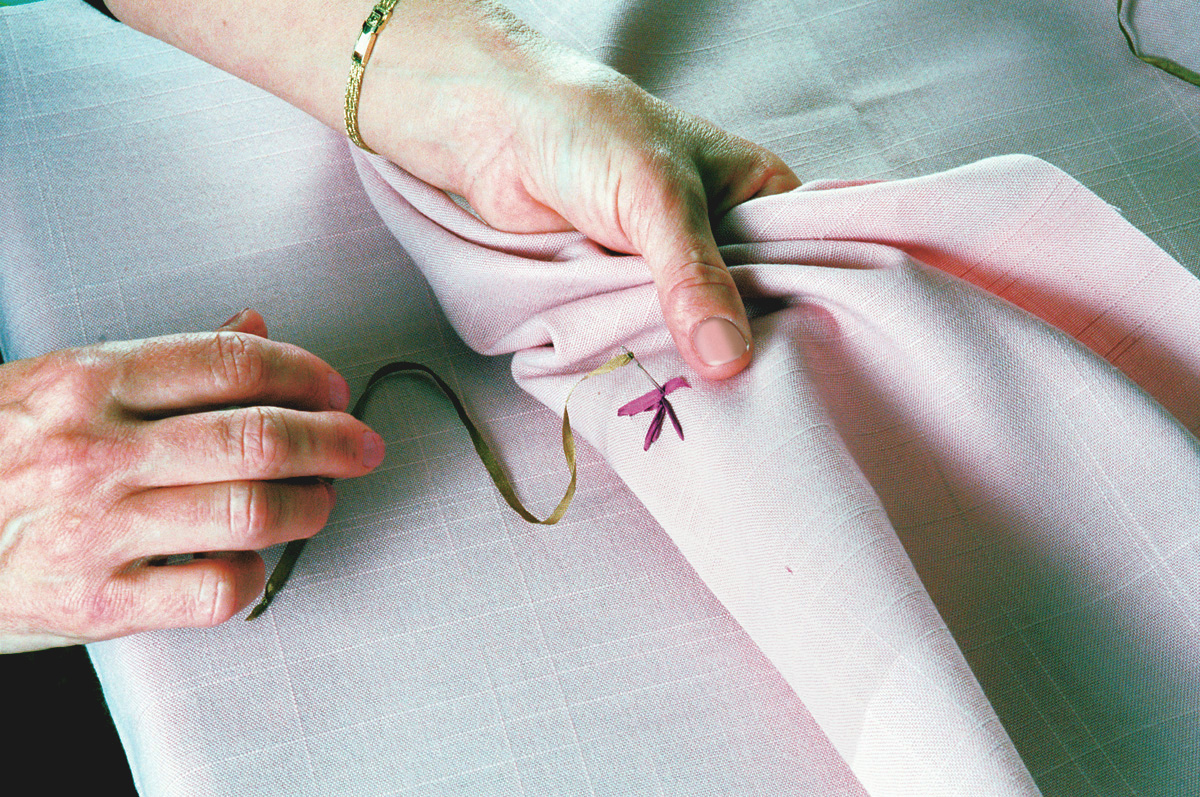
4. Keep the ribbon flat
Gently hold the ribbon in place with your thumb. Place the needle under the ribbon, sliding it back and forth from thumb to needle hole to smooth and flatten the ribbon as you pull through each new stitch.
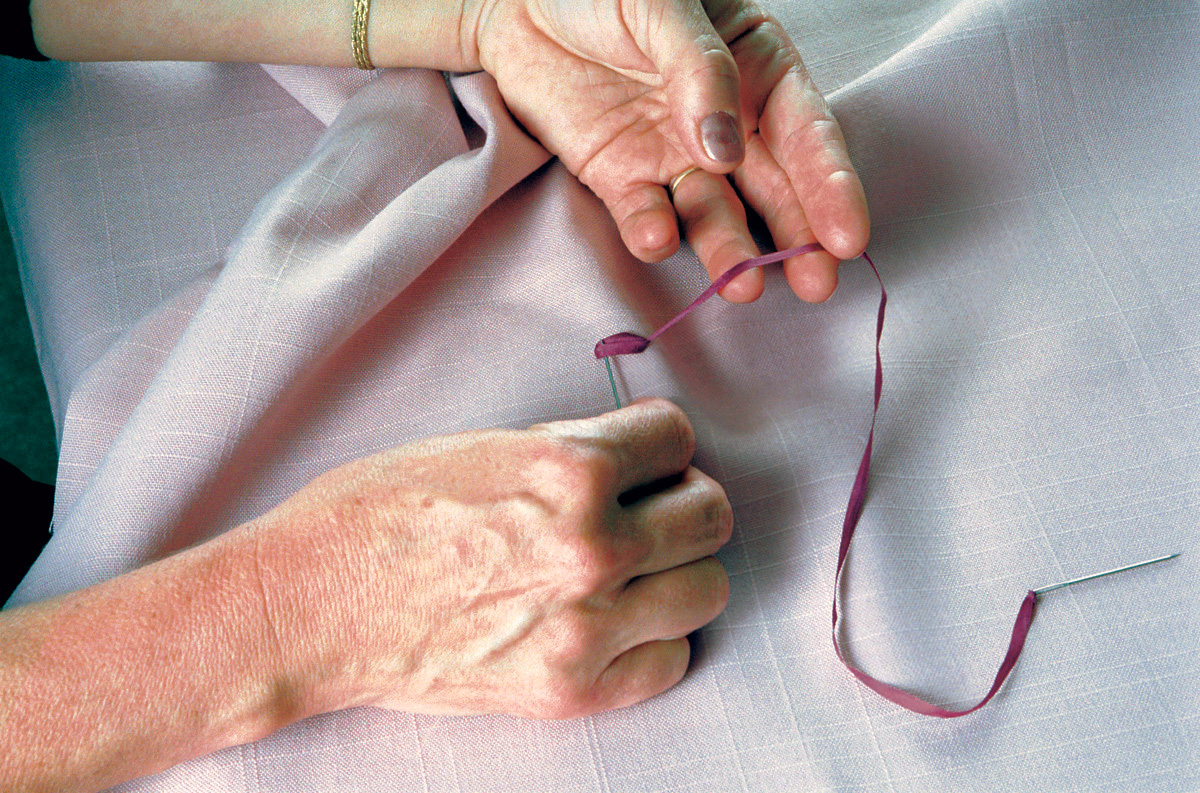
If the ribbon twists, place a second needle under the ribbon near the hole and gently pull up with this needle and as the ribbon is pulled through the next stitch, drawing the stitch to the back of your work.
5. Ending off
For 7.0 mm ribbon, trim the ribbon to about 1/4 inch on the back of the work and use thread to whipstitch the ribbon to a nearby stitch.
For narrower ribbons, take a stitch on the back of the work in a nearby thread or ribbon. Before pulling the stitch all the way through, slide the needle through the loop. Hold your finger over the last stitch on the front of the work to make sure it isn’t pulled too tightly. Trim, leaving about a 1/4 inch tail.


Log in or create an account to post a comment.
Sign up Log in