

Four Ways to Finish Seams For Your Sewing Project
Match the technique to the fabric for attractive and durable seam allowances.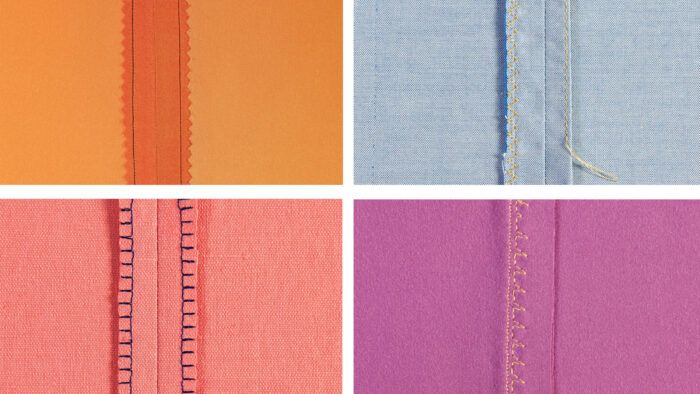
When do you think about the seam finishes for a new sewing project? Often, I suspect, many of us stitch the first seam then think, “What should I do with these raw edges?”
I’m always eager to plunge into a new project and see it take shape. However, I’ve produced enough raveled edges, weak seams, and generally disappointing garments to appreciate what planning ahead can accomplish. Here, I’ll share my simple techniques for sewing common seam finishes, as well as how to evaluate sewing projects to determine the right finishes to use where. It’s a process with the potential to improve your results time and time again.
In “Seam Finishes, Part 2,” you learn how to bind seam allowances, serge them, or sew flat-fell or French seams to enclose the seam allowances’ edges.
Start with a test sample
Samples bring all the factors together. Cut on-grain rectangles from remnants, sew seams to join them together, and then experiment with the seam finishes that enhance your work. If the project will be machine-washed and dried, wash and dry your samples. You’ll find out which finishes are easy for you to sew, which stitches on your machine work best, and what looks good on your project.
Keep these samples. You’ll eventually have a seam-finish library that saves time in the long run. Remember, you may choose to use more than one seam finish in a project.
Let’s take a look at some typical seam finishes. Each example began with a 5/8-inch seam allowance. The seam was pressed as sewn, then the seam allowances were pressed open or to one side.
Zigzag or overcast seam finish
This treatment is suited to many materials. On fabrics that fray easily, such as medium to heavy linens, use a wider stitch. Though you can use an all-purpose foot, many sewing machine companies make an overcast foot that incorporates a horizontal pin on the right side. As the stitch forms, the needle swings right over the pin; the pin supports the stitch and prevents fabric from tunneling.
Stitch each seam allowance edge with a zigzag or overcast stitch. Choose the stitch based on the fabric you are using (see the photos at right for three variations). Keep the outermost stitch points just inside the raw edge.
Press the seam as it was sewn, then open.
|
|
|
|
|


Single-fold seam finish
A single-fold clean finish is a good choice for lightweight fabrics that do not fray much. It can be modified for fabrics that fray more, such as handkerchief linen. It takes time, but it is neat and pretty.
Stitch 1/4 inch from the seam allowances’ raw edges. Turn under and press. (For a more delicate finish, stitch and turn under just 1/8 inch.) Edgestitch close to the fold. Press the seam again to finish. See the variations below for three stitching options.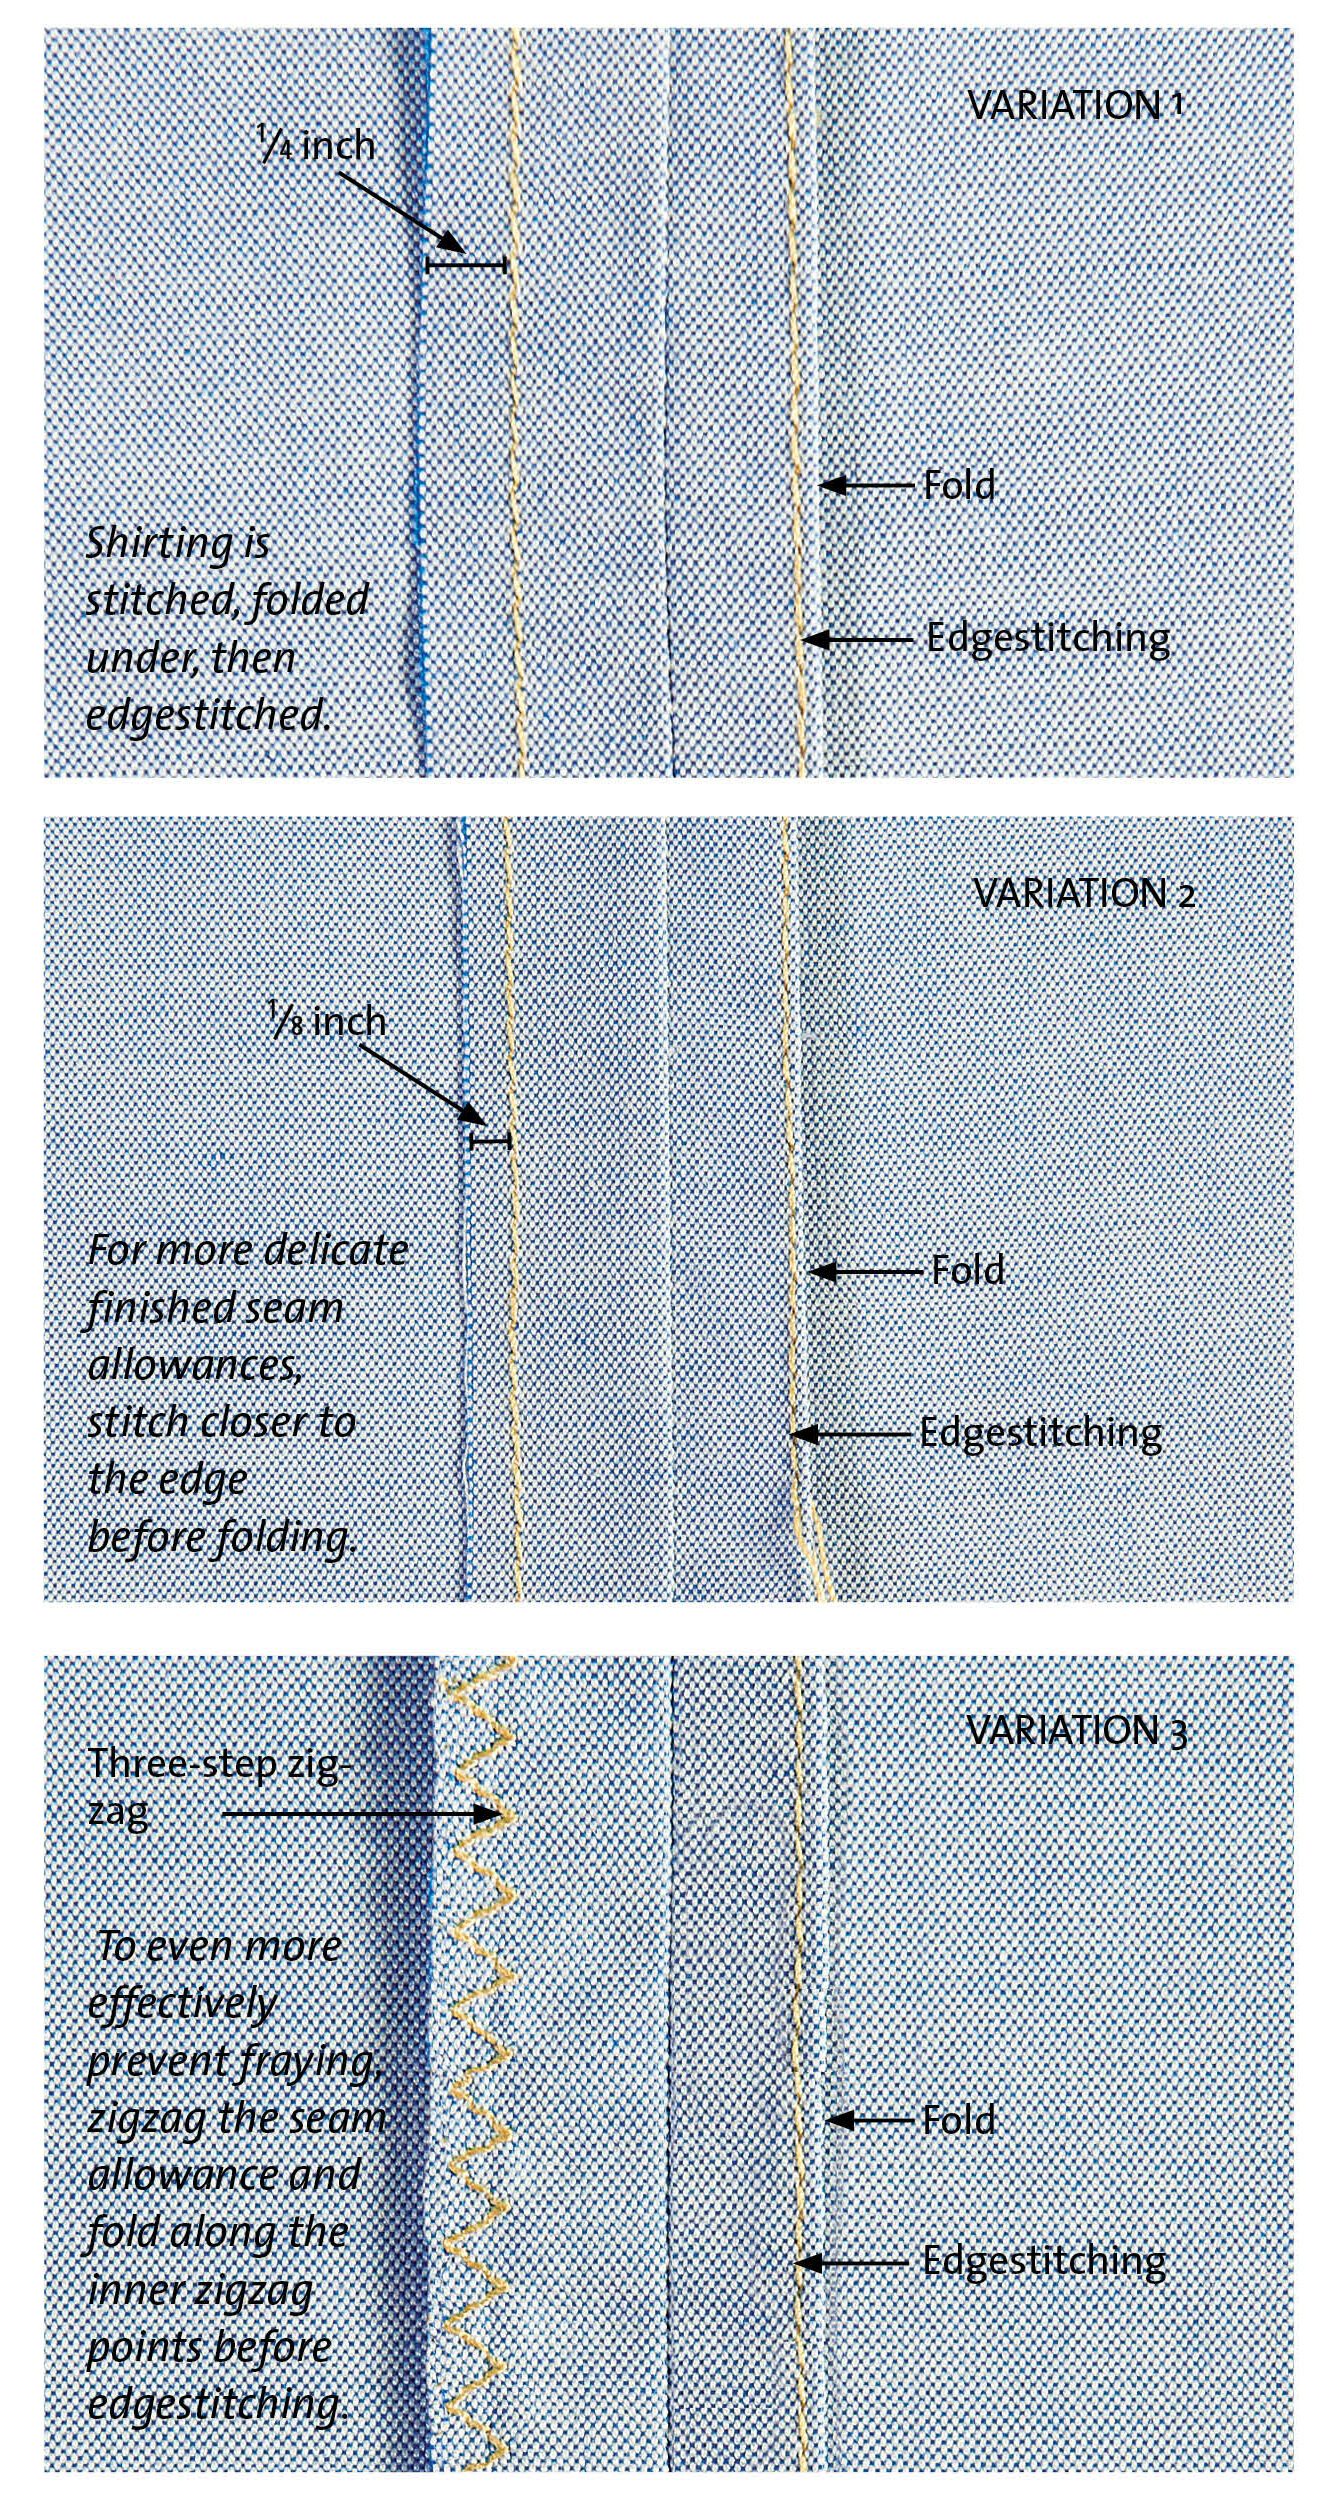
Stitch-and-pink seam finish
This finish is appropriate for firmly woven, lightweight fabrics such as cotton broadcloth and silk charmeuse. It won’t press through as a ridge to the project’s right side. Use a thin thread, such as 60-weight cotton, to keep it as light as possible.
|
|
|


Stitch together
These finishes can be used on woven fabrics, but they are particularly useful on knits to keep edges that curl flat and crisp. If you are working with a knit, sew the seam with a narrow zigzag (1.5 mm long and 0.5 mm wide).
Stitch the seam using a narrow zigzag stitch on knits and straight stitch on wovens.
Choose a wide stitch with a look you prefer, such as a three-step zigzag, overlock, blind-hem stitch, or zigzag—and sew the seam allowances together close to the seamline. See the variations below for different stitch options.
Trim the raw edges close to the second stitching. Press the trimmed seam allowances to one side.
 |
 |
 |
 |
This article by Sandra Miller was first published in Threads #165. Sandra tests designs and writes pattern instructions for Cutting Line Designs. She also teaches at sewing events across the country and sews for fun at home in Orlando, Florida.
Photos: Sloan Howard
View PDF


Excellent content really must be appreciated. Please update more different Textile Details related update.