
Four More Ways to Finish Seams For Your Sewing Project
More ways to sew seams neatly and efficiently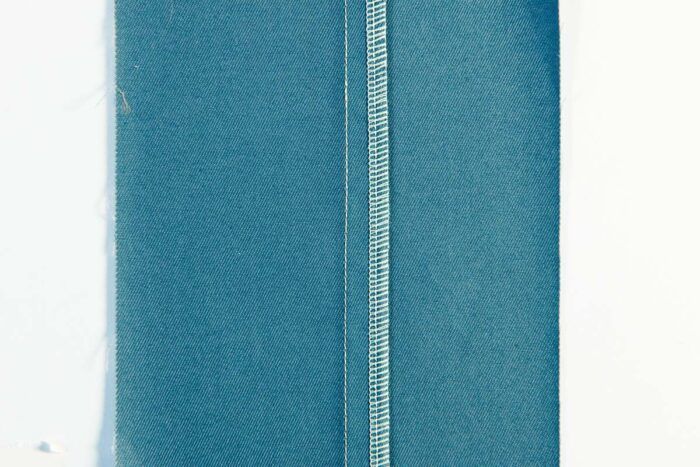
Beauty isn’t just on the surface of a sewing project. Finished seam allowances improve the durability and looks of any garment you create. In “Part 1: Seam Finishes” (Threads #165), I explained how to sew, press, fold, or trim seam allowances to create easy, precise finishes. In Part 2, I’ll show you even more methods.
These techniques bring more equipment and materials into play. Bind seam allowances, serge them in a jiffy, or sew flat-fell or French seams to enclose the seam allowances’ edges.
How to choose a seam finish
With so many choices, ask yourself a few questions to choose the technique you prefer and that’s right for your project:
• Is the fabric light or heavy?
• Does it ravel a little or a lot?
• Is it sheer or opaque?
• Will the project receive hard wear or be gently used?
• How will the project be cared for? Will it be dry-cleaned, machine-laundered, or machine-dried?
In my own sewing, for example, I used French seams on the organza overskirt of a wedding dress. Coordinating Hong Kong finishes gave my wool bouclé jacket a classy, special touch on the wrong side. I flat-fell the seams of shirts and blouses. If I roll up my sleeves, the seams look great on the wrong side, too.
I’ve used all of these seam finishes, including those in Part 1, during a lifetime of sewing. I’ve been delighted to see how a specific finish improves a project, and I think you will be, too.
Apply binding
Binding materials work on many fabrics. In an unlined jacket, binding can blend or provide an eye-catching contrast to the garment fabric. Here are three seam binding techniques. Each uses a different type of binding material you cut yourself, or purchase already cut.
Make a Hong Kong finish
This is a classic technique with beautiful results. You select the binding fabric and cut the bias strips.
1. Cut 1 1/4-inch-wide bias strips. Use a lining fabric or, for a luxurious garment, try a silk print. Press the seam allowances open. With the right sides together, stitch a bias strip to a seam allowance, 1/8 inch to 1/4 inch from the raw edges.

2. Fold the bias strip away from the seam. Press.

3. Turn the seam allowance wrong side up. Wrap the bias strip snugly over the seam allowance’s edge. Fold the seam allowance back.

4. Stitch in the ditch on the seam allowance only. Catch the bias strip’s edge underneath the seam allowance. An edge-joining foot can help. Trim the excess bias strip. Repeat the process on the opposite seam allowance. Press open the finished seam allowances.

Bias-cut nylon tricot strips
This binding’s lightweight flexibility makes it easy to apply to curved armhole seams and to lightweight silks and silky fabrics. It is sold as Seams Great.
Stitch a 5/8-inch-wide seam allowance. Press flat as sewn, then press open or together to one side, as appropriate for the fabric and garment.
Stretch the binding gently to see which side it wraps to. Anchor the end of the binding to the end of the seam, without cutting it to length yet. Gently stretch the binding, letting it wrap around the seam allowance. Straight-stitch or zigzag through both layers of the binding and the seam allowance, close to its edges. Trim the binding’s length after sewing it on.

Lightweight rayon tape
This 1/2-inch-wide binding is available in a range of colors. It is sold as Hug Snug.
Press the 5/8-inch seam allowances open. Cut the rayon tape a bit longer than the seam length.
Fold the tape in half over the seam allowance’s raw edge. Anchor the tape’s end with a few stitches. Continue folding and stitching to the seam’s end.

Serge the edges
Serging or overlocking works on nearly any fabric and can finish the seam allowances separately or together. A serger also can trim the seam allowances as it stitches. While serging is quick and easy, adjustments can improve it, or another finish may give better results.
Variation 1
Use a two-thread overlock finish on very lightweight fabrics. This finish reduces bulk and avoids adding stiffness to the seam.

Variation 2
Serge medium-weight fabrics with narrow three-thread overlock.

Variation 3
To finish seam allowances together, press them to one side and apply a three- or four-thread overlock stitch to the edges.

Sew a flat-fell seam
Flat-felling is a strong, neat finish for light- or medium-weight fabrics. It is often seen in sportswear or children’s clothing.
1. Press the 5/8-inch seam allowances as sewn, then open. Trim one seam allowance to 1/8-inch. Staystitch the other 1/4 inch from the raw edge.

2. Fold along the staystitching toward the seam. Then, turn the staytstitching over the 1/8-inch seam allowance. Press.

3. Edgestitch within the seam allowance, very close to the fold on the wrong side. Edgestitch again within the seam allowance, very close to the seam.

Stitch A French seam
French seams neatly enclose the seam allowances’ raw edges. The narrower you make them, the more professional they look.
To begin, strive for a 1/4-inch finished width on sheer, lightweight fabrics.
1. With wrong sides together, sew the seam with a 3/8-inch-wide seam allowance. Trim the seam allowances together, to 1/8 inch or 1/4 inch wide. When the seam is complete, it creates a 5/8-inch-wide seam allowance.

2. Press the trimmed seam allowances to one side. Fold the fabric right sides together, with the seam inside the folded edge.

3. Stitch again 1/4 inch from the first seam. This second stitching is on the 5/8-inch seamline. Press the seam allowances to one side. On the wrong side, the raw edges are enclosed.

Tip: Simplify with your serger. Sew the first French seam pass on the serger, wrong sides together. The seam allowances are trimmed as you serge. Complete the French seam in the manner described.
This seam finishes article, by Sandra Miller, was first published in Threads #166. Sandra tests designs and writes pattern instructions for Cutting Line Designs. She also teaches at sewing events across the country and sews for fun at home in Orlando, Florida.
Photos: Sloan Howard


Log in or create an account to post a comment.
Sign up Log in