Sew a Button Placket Extension with In-Seam Buttonholes
Learn an unexpected and creative closure option from Our Fabric Stash, a Seattle-based sewing consignment store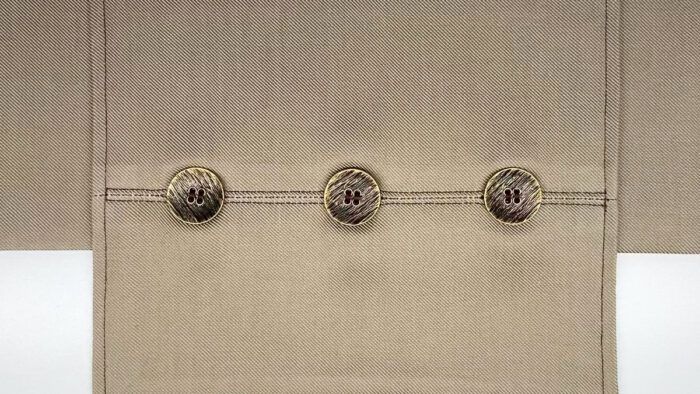
This technique, from a Seattle-based consignment store’s class series, will teach you how to create a button placket extension with a row of in-seam buttonholes. The store, Our Fabric Stash, is a consignment shop redistributing supplies to sewists internationally. This conservation-minded and community-oriented business is profiled in Threads #215, Fall 2021.
In addition to fabrics, trims, and other sewing goodies, owner Deborah Boone and the staff at Our Fabric Stash offer many tips and techniques. The placket extension can be buttoned on or off. It provides a quick, easy, and subtle garment closure. Because it extends beyond the garment, it can be used to alter clothing that is too small. There are many opportunities to sew a button placket extension with in-seam buttonholes.
There are other possibilities for this creative technique. Be sure to visit Our Fabric Stash online or in person at Pike Place Market, Level 3, Down Under.
Plan the placket and button placement
1. Draft the placket pieces. The finished placket has a seam that includes the buttonhole openings. If you plan to center the seam, cut the placket pieces one-half the width of the finished placket, plus seam allowances. The length is the desired length of the finished placket, plus seam allowances. Cut four placket pieces.

2. Mark the button placement. Place a pair of placket pieces with right sides together. Mark the locations for the desired number of buttons. Insert pins at the buttonhole beginning and end marks. Repeat with the other pair of placket pieces.
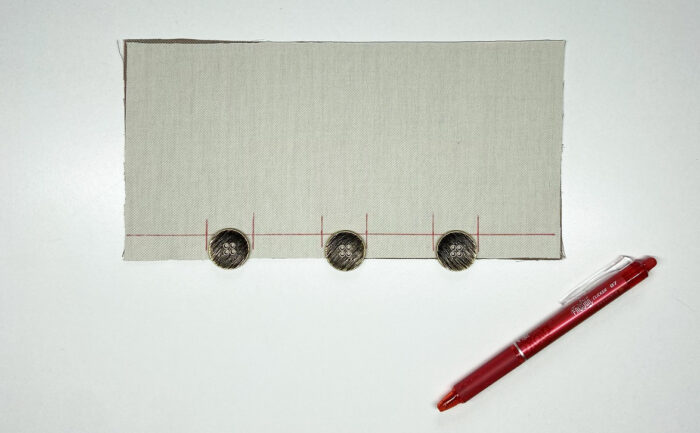

3. Sew the seam. Leave it unstitched at the buttonhole openings, and backstitch at each buttonhole start and end. Repeat the stitching with the other placket side. Clip the threads across the buttonhole openings.

4. Press the seam allowances open. Then, with right sides together, align the buttonholes on the placket layers. 
Press open the seam allowances along the buttonhole seam (top). The unstitched portions of the seam form buttonhole openings (bottom).
5. Stitch around three edges of the placket. First, sew along one edge, parallel to the buttonhole seam. Pivot across the placket’s end, then pivot again and stitch along the other edge. Trim the corners to reduce bulk, then turn the assembled placket right side out. Fold in the open seam allowances and press the entire placket.

7. Edgestitch to secure the placket edges and buttonhole seam. Sew close to the placket edges, and stitch along each side of the buttonhole seam as well.

8. Complete the closure. Hand-sew buttons to the garment to correspond to the buttonhole openings.
Make it your own
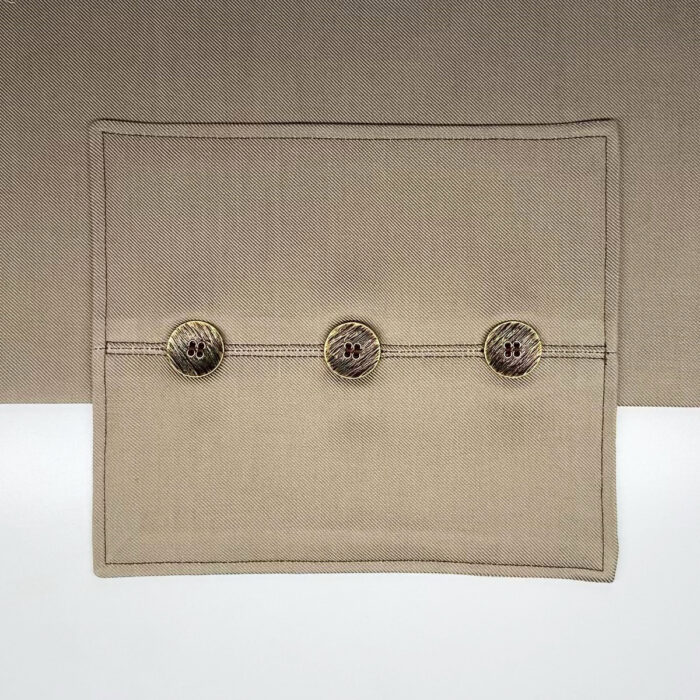
The completed placket extension can be buttoned on or off a garment. The sample shown illustrates the technique, and you can place the buttonhole seam closer to one edge of the placket extension, or incorporate the placket into a garment edge, or apply many other creative ideas. Experiment!
Here are some sketched ideas for the button placket extension with in-seam buttonholes, courtesy of Our Fabric Stash:

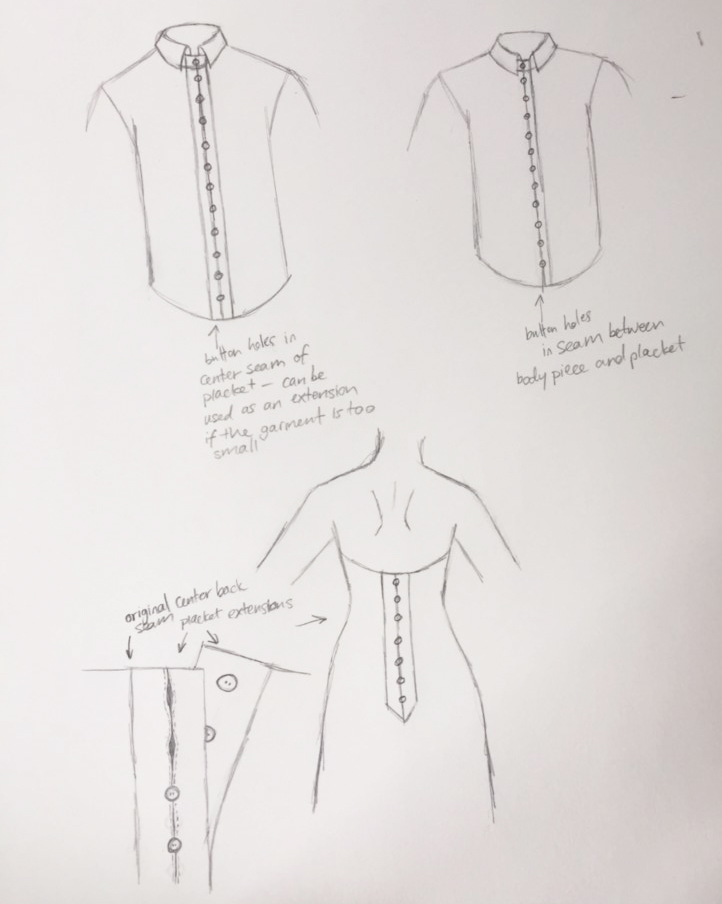
Use the button placket extension as a closure on shirts or dresses, and enliven the garments at the same time with coordinating or contrasting placket fabrics.





Log in or create an account to post a comment.
Sign up Log in