
Editor’s note: Sewing expert Karen Howland says a shirt’s yoke provides two seams for adjusting the fit at the shoulders, not just one. Below, she walks through pattern adjustments to answer a reader’s question about fitting yokes for a rounded back.
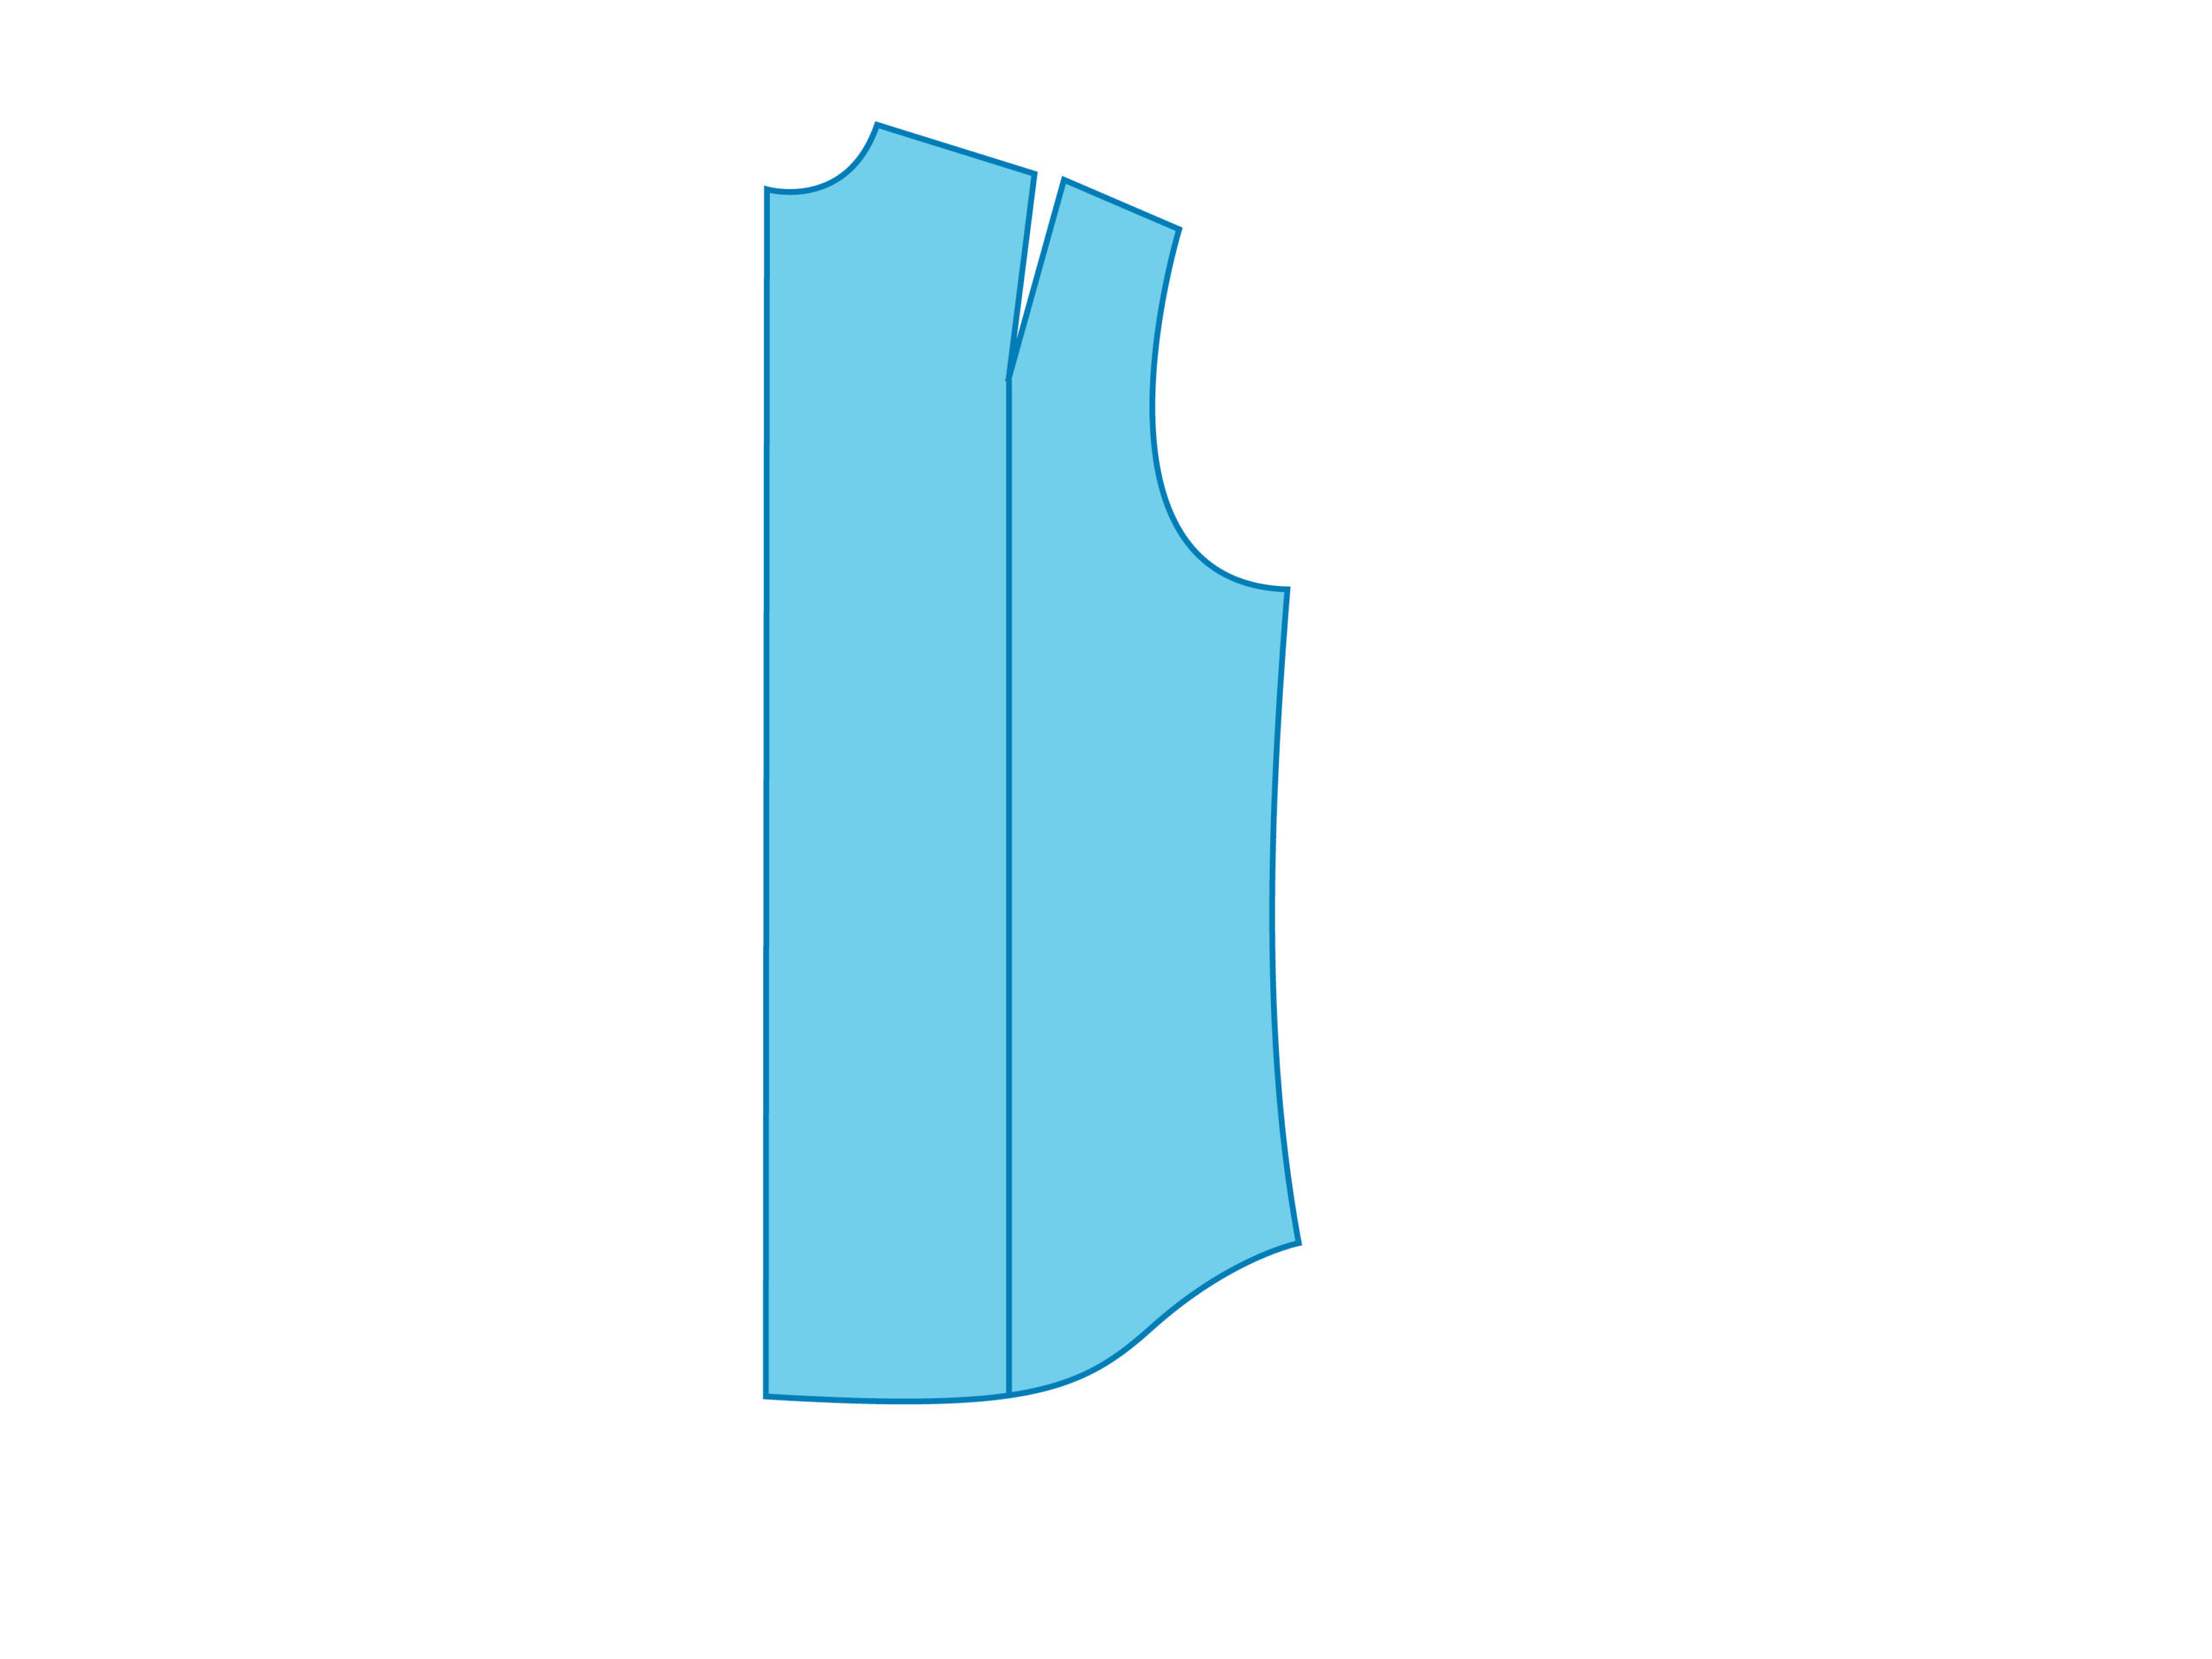
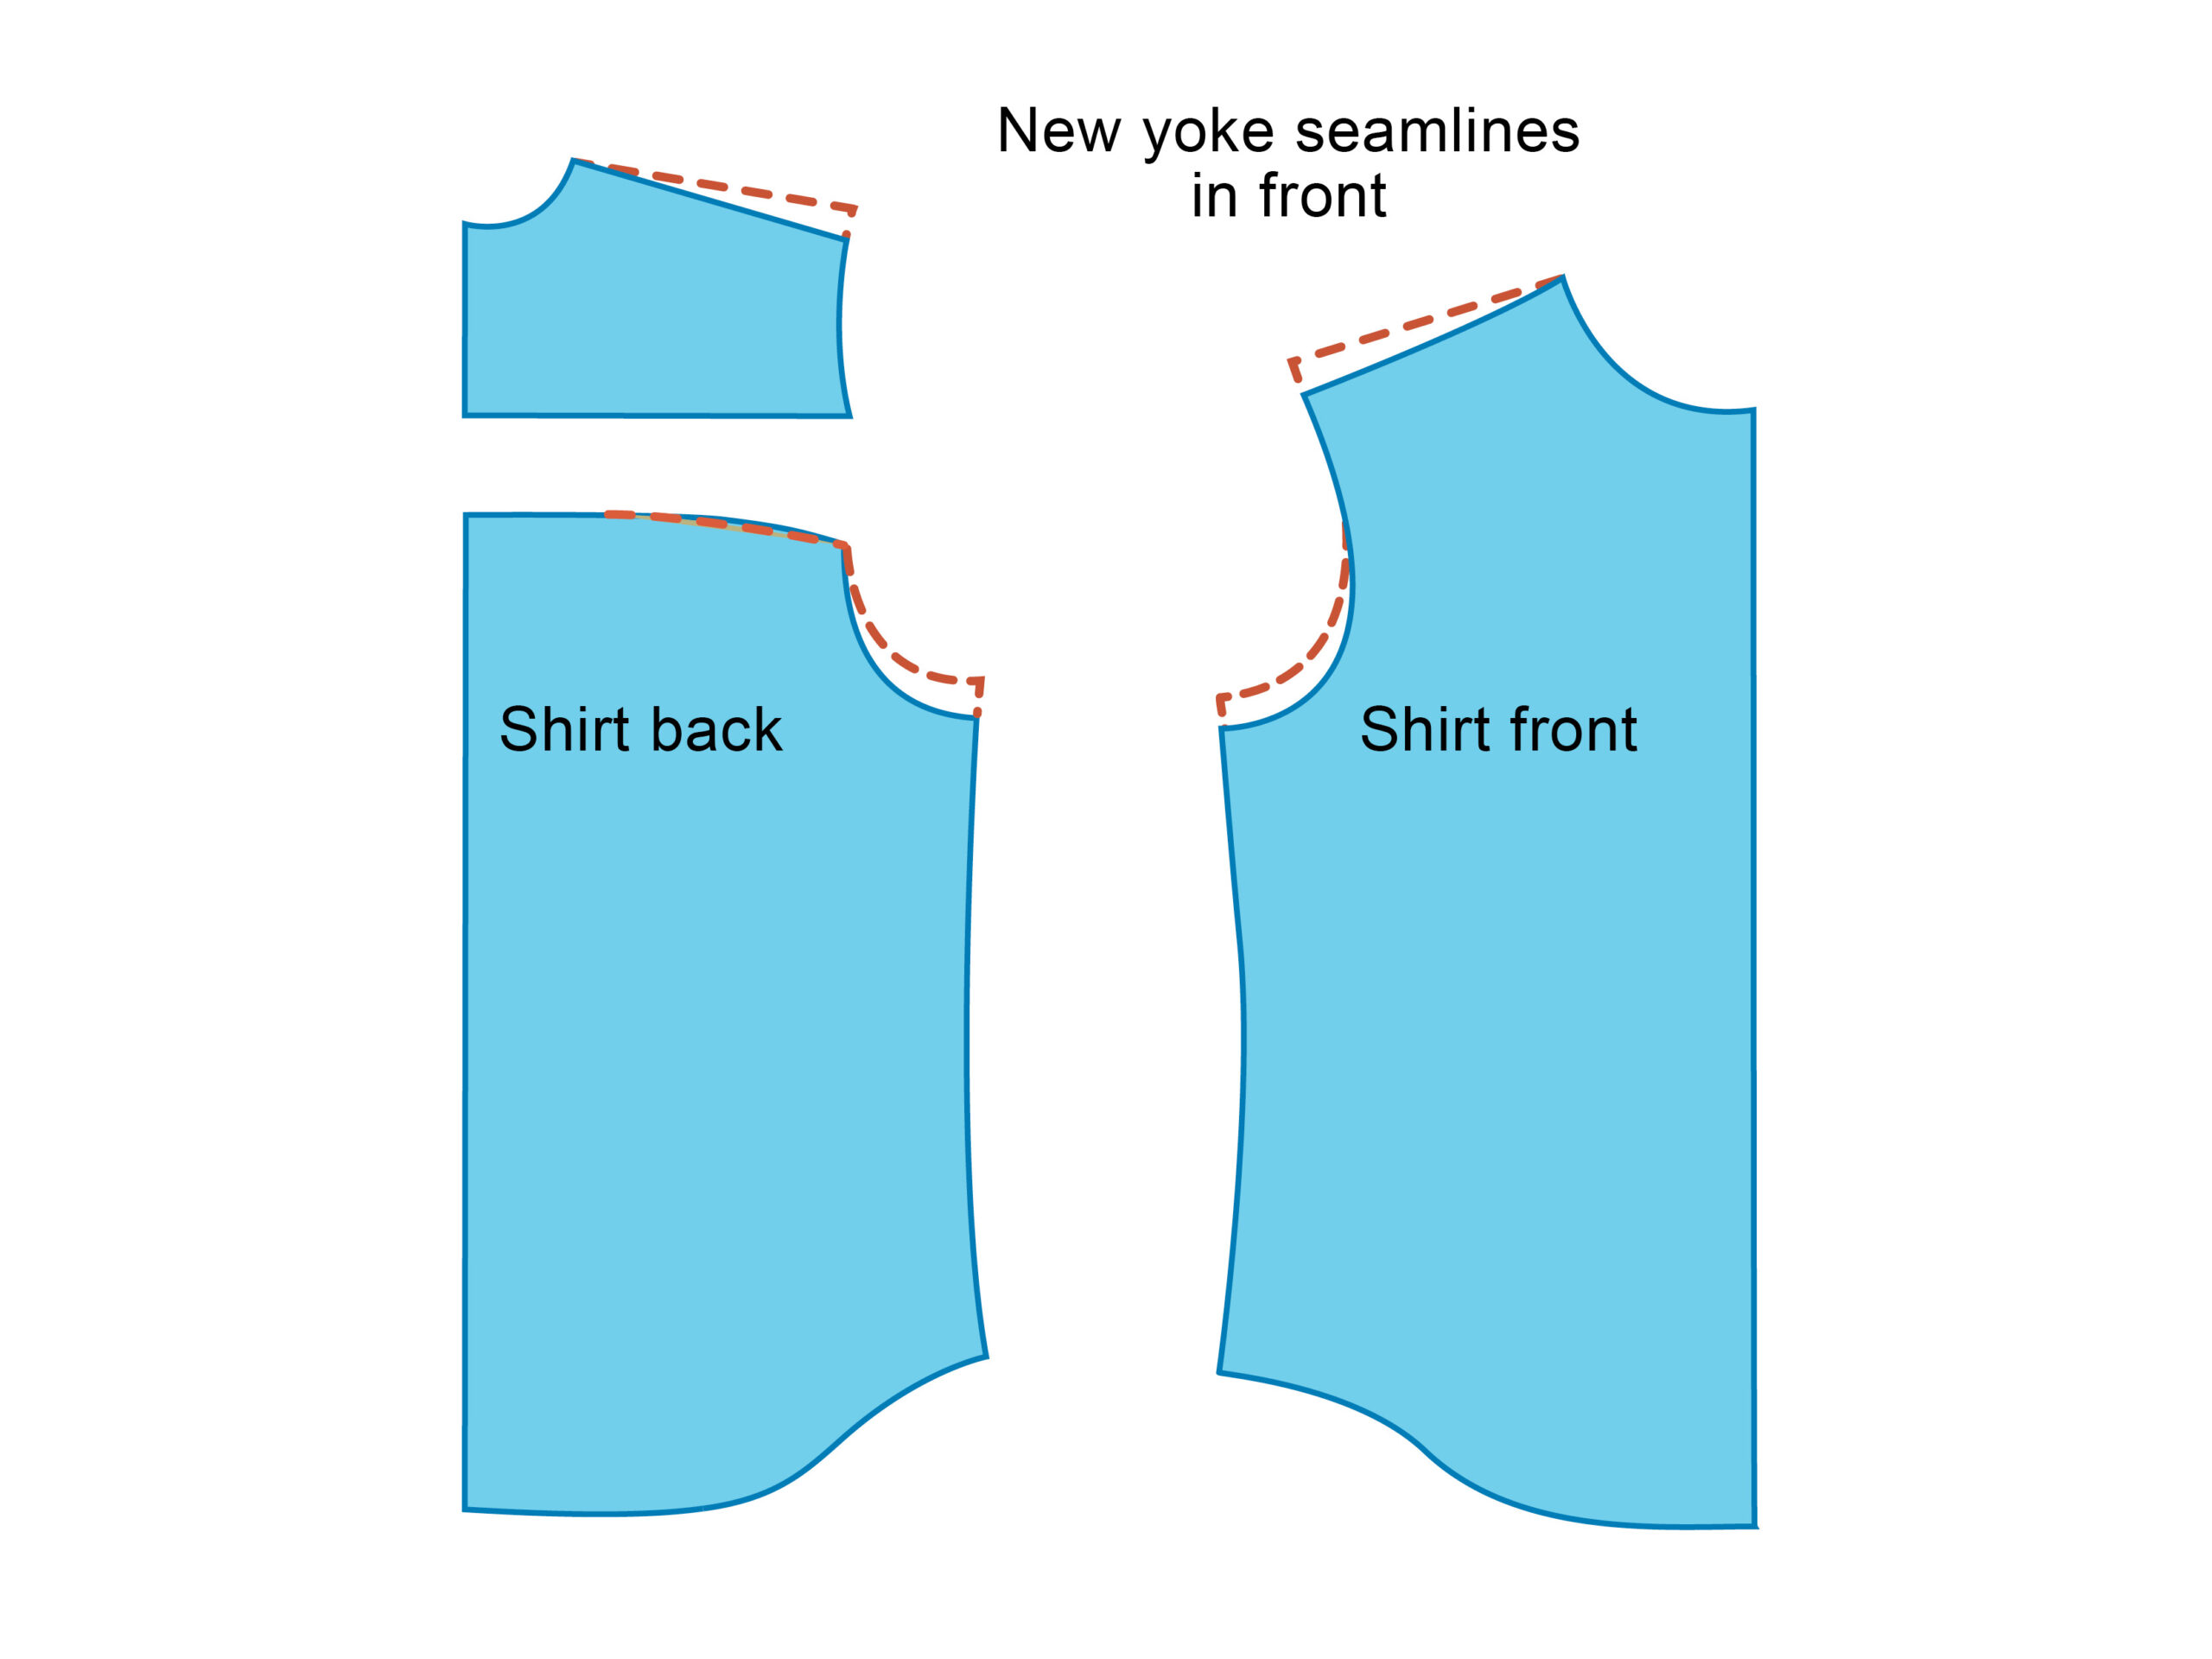
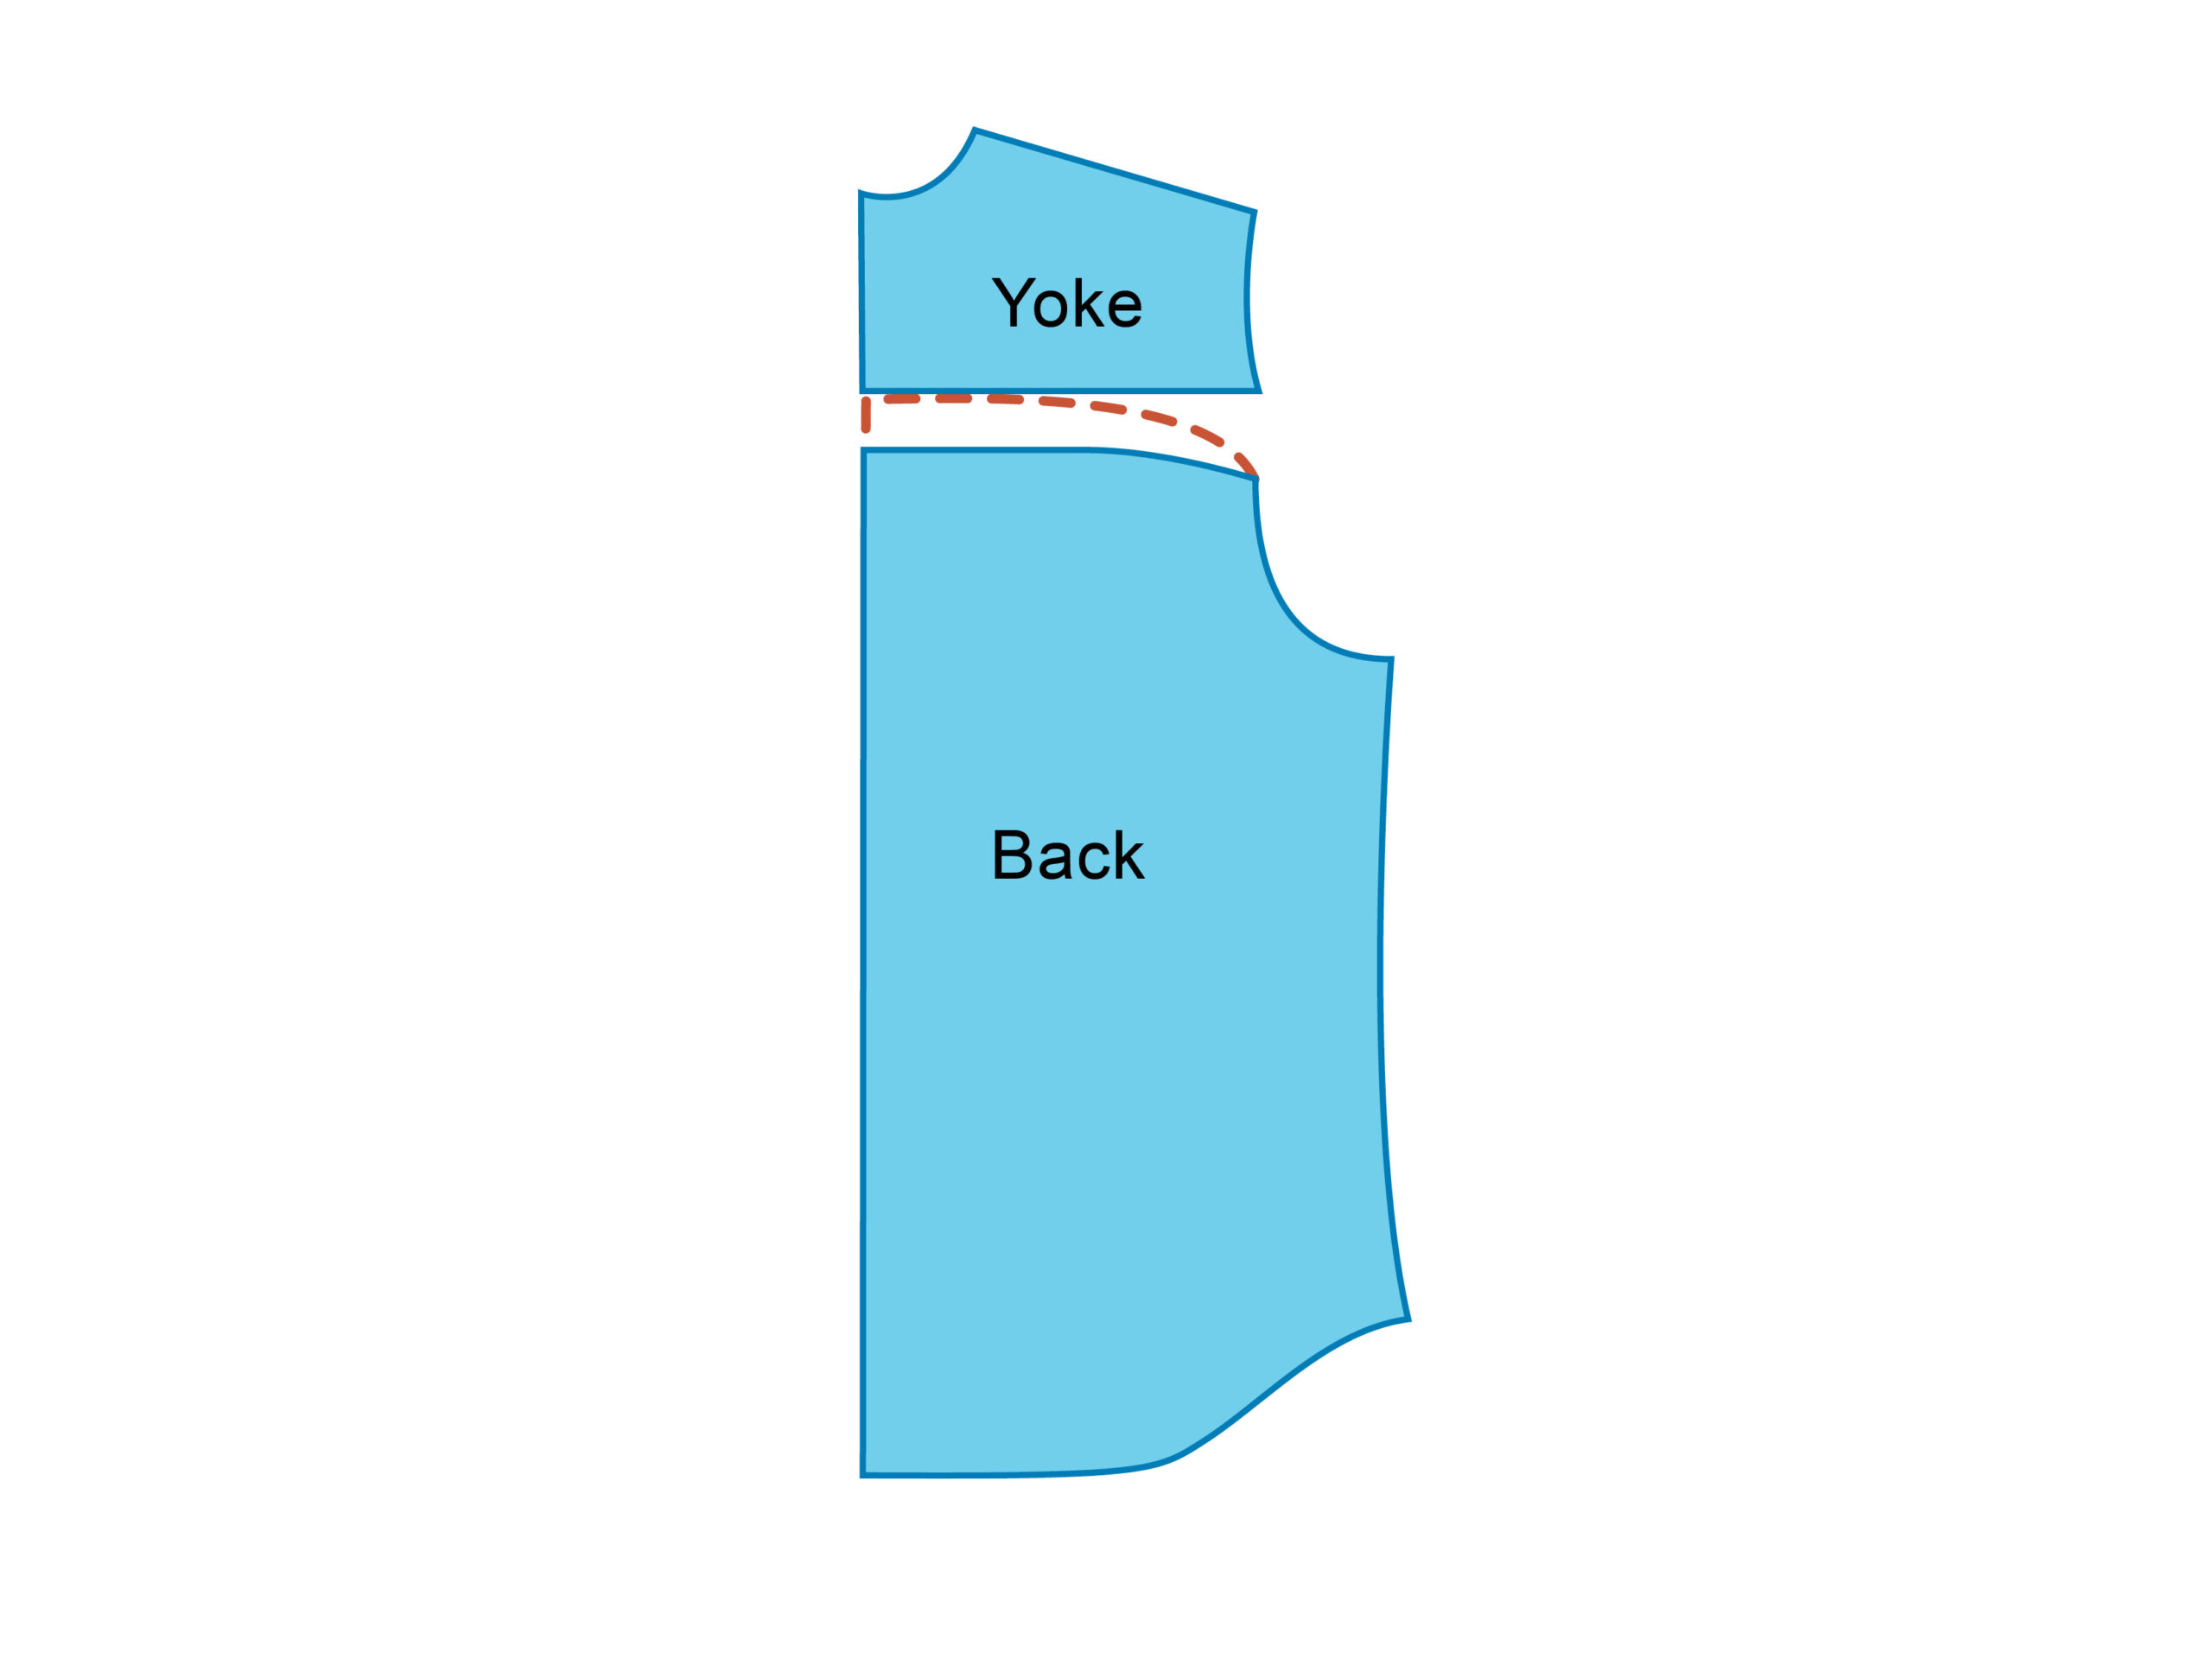
We’ll deal first with your square shoulders, then alter for the back curve. I’ll also show how you can accommodate a narrower shoulder width in front than in back, since this is common with a rounded back. But first, take a look at the illustrations below, which show how the dart on a fitted but yokeless shirt or blouse back is converted to a curved yoke seam on the back piece when a fitted yoked pattern is designed. On loose-fitting or unfitted garments, you may find a yoke that is simply a style feature, with straight seamlines on the back and the yoke. On garments like this, the yoke seamlines can be placed anywhere on the back pattern (by the designer), and may be many inches below the neckline, nowhere near the curved area of the back. But if the back/yoke seamline is curved to provide shaping, the yoke seamlines will typically fall near the neck and most curved portion of the back. To best solve your problem, begin with a pattern that has a curved seamline on the top of the back.
How shaped yoke seams are developed
|
|
|
|
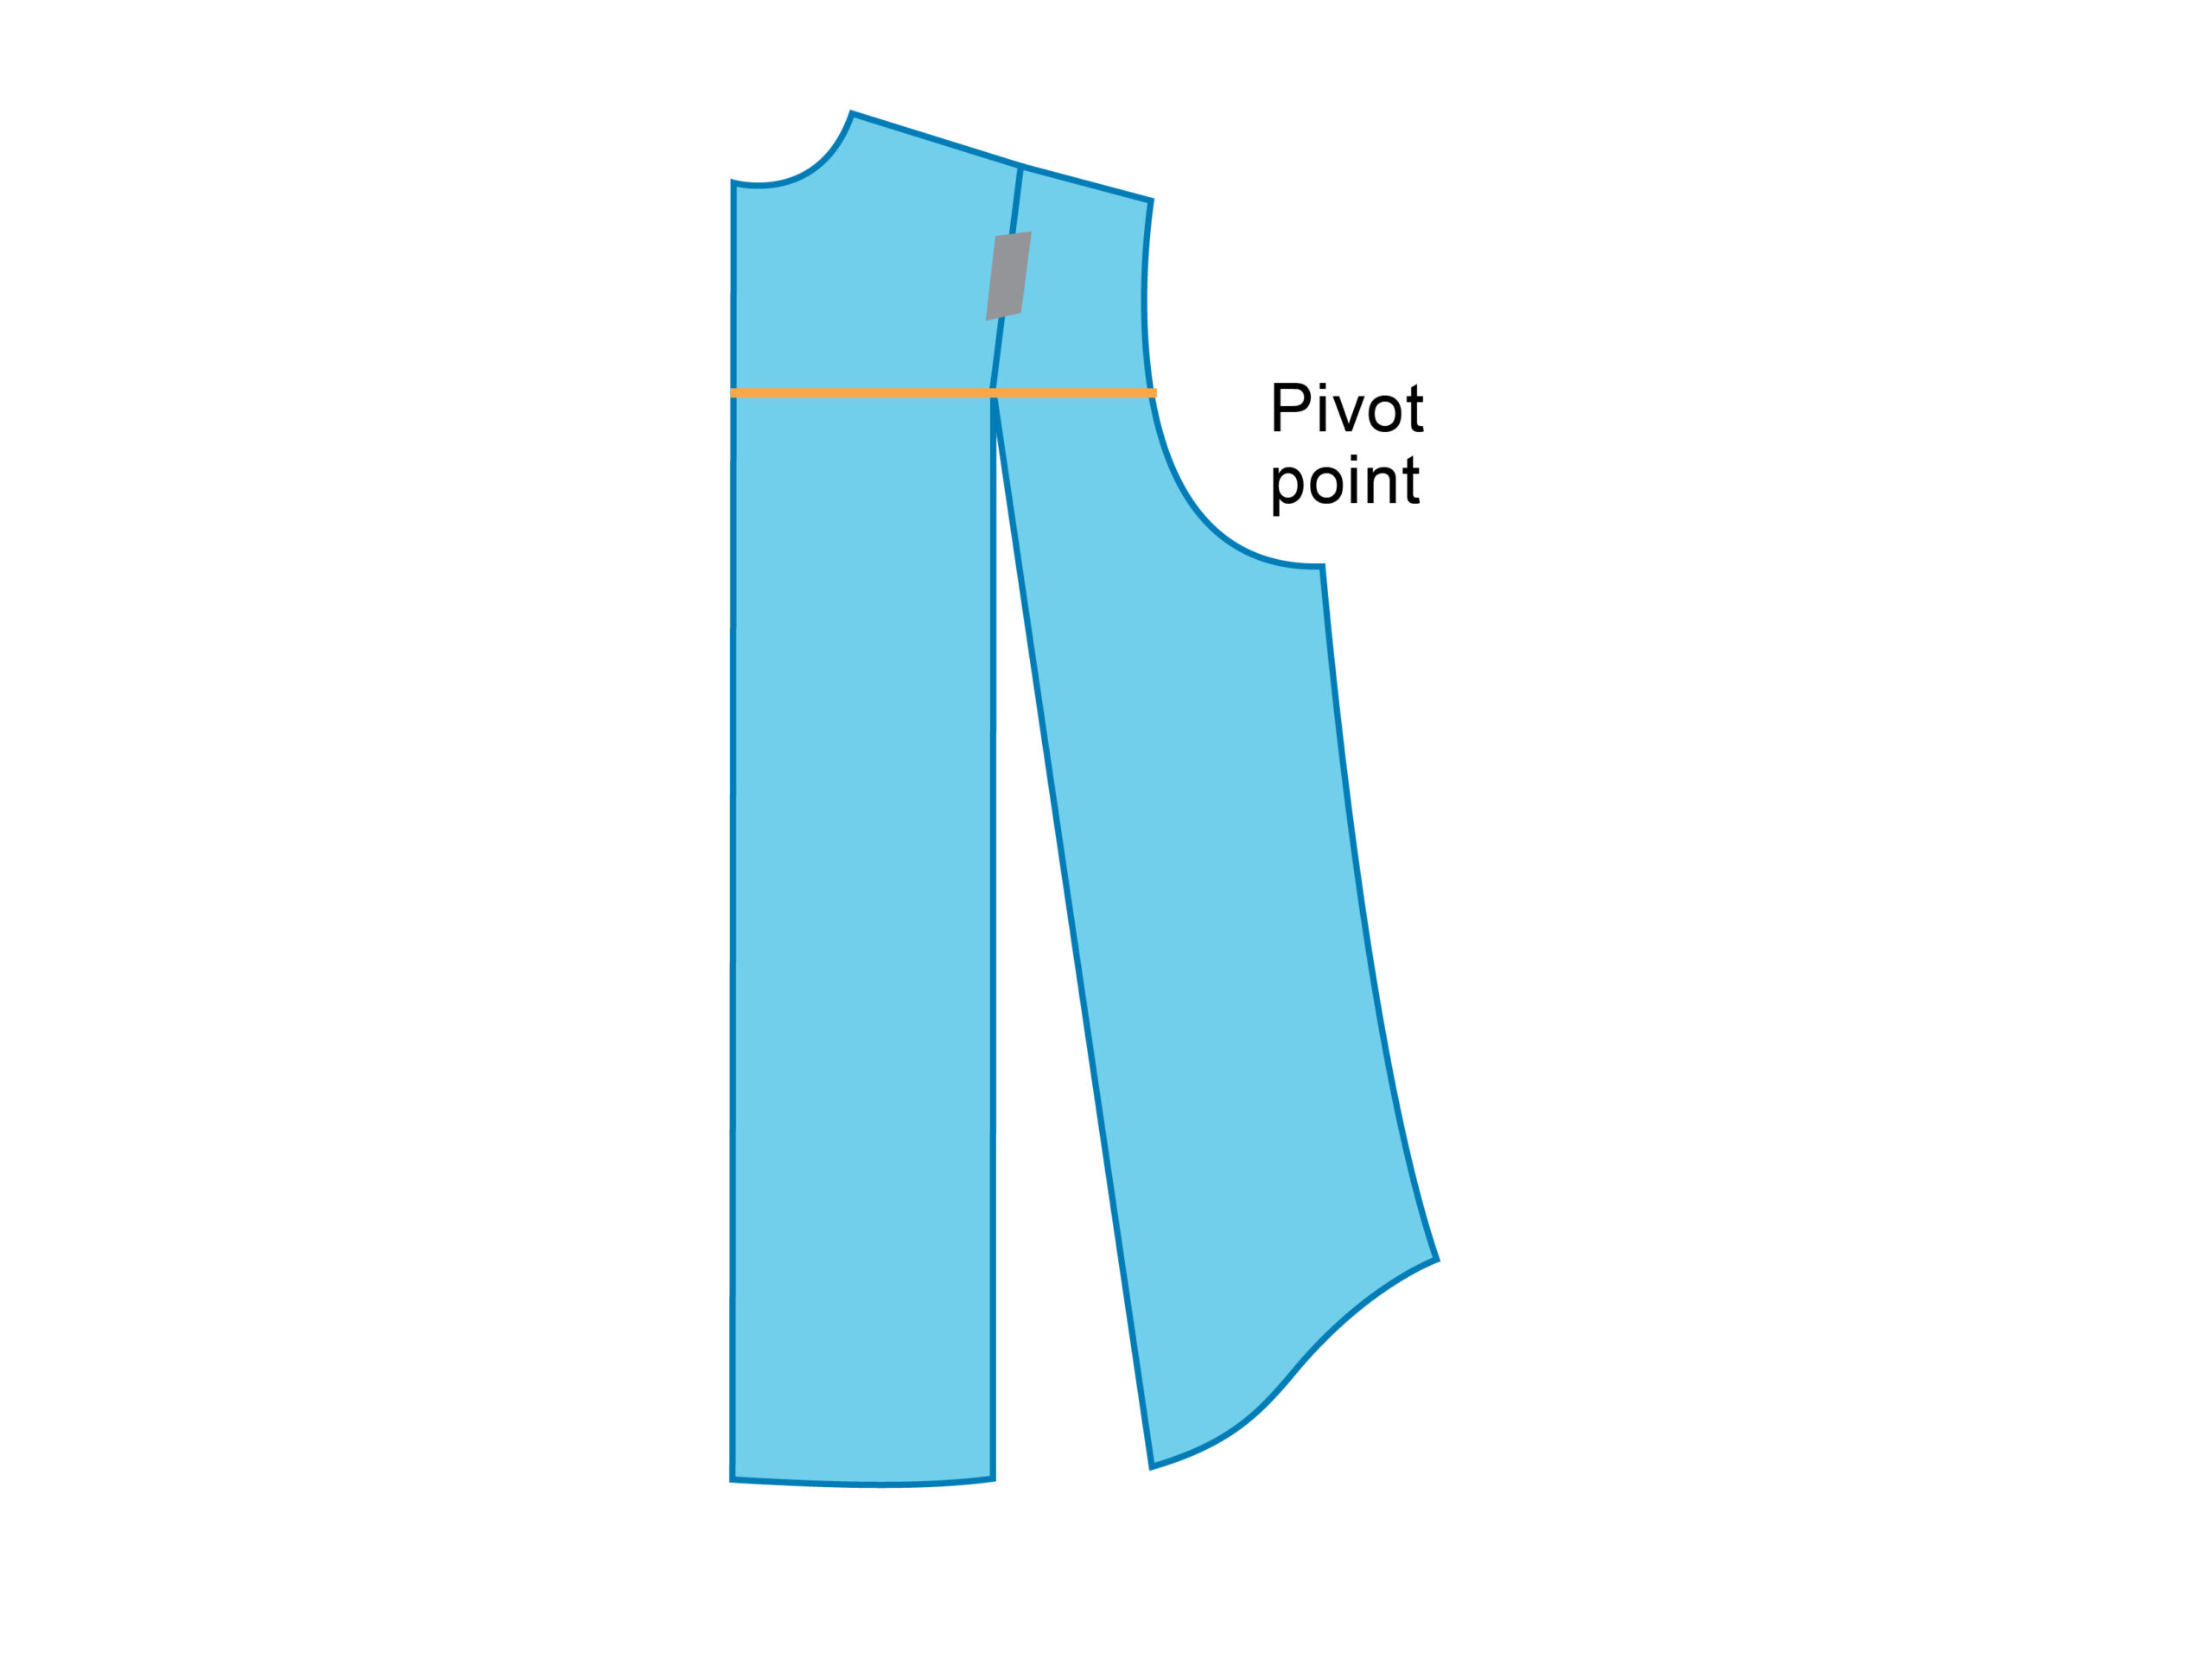

Most square shoulders can be accommodated with a simple change to the angles of the front/yoke seamlines. Probably the easiest way to determine the angles you need is by pin-fitting a muslin shirt front to a muslin yoke. Cut both with extrawide seam allowances at the yoke seamlines, then (wearing a T-shirt so you’ll have something to pin the pieces to) arrange the front smoothly in place with its center front centered and vertical, and place the yoke on your shoulders. With the yoke piece over the front, fold and pin the yoke’s front seam allowance at an angle that looks good to you (using its existing position on the neckline), then trace this edge onto the muslin below to create its seamline. Compare the new seamlines with the original pattern (adjust so the difference is equally divided), and then raise the front and back armhole seamlines at the side seam by this adjusted amount to make up for the changes, as shown in the illustrations below.
Correct for square shoulders
2. Raise the armhole by the same amount as changed at the yoke seamlines.
To alter the yoke seamline in back to accommodate a rounded back, first measure your waist-to-neckline distance at the center back and compare this to your pattern; you’ll be longer, due to the increased curvature. Add the difference as shown in the illustration below, which will increase the amount of dart control provided by the yoke seamline on the back piece.
Correct for back curve
2. Draw new yoke seamline.
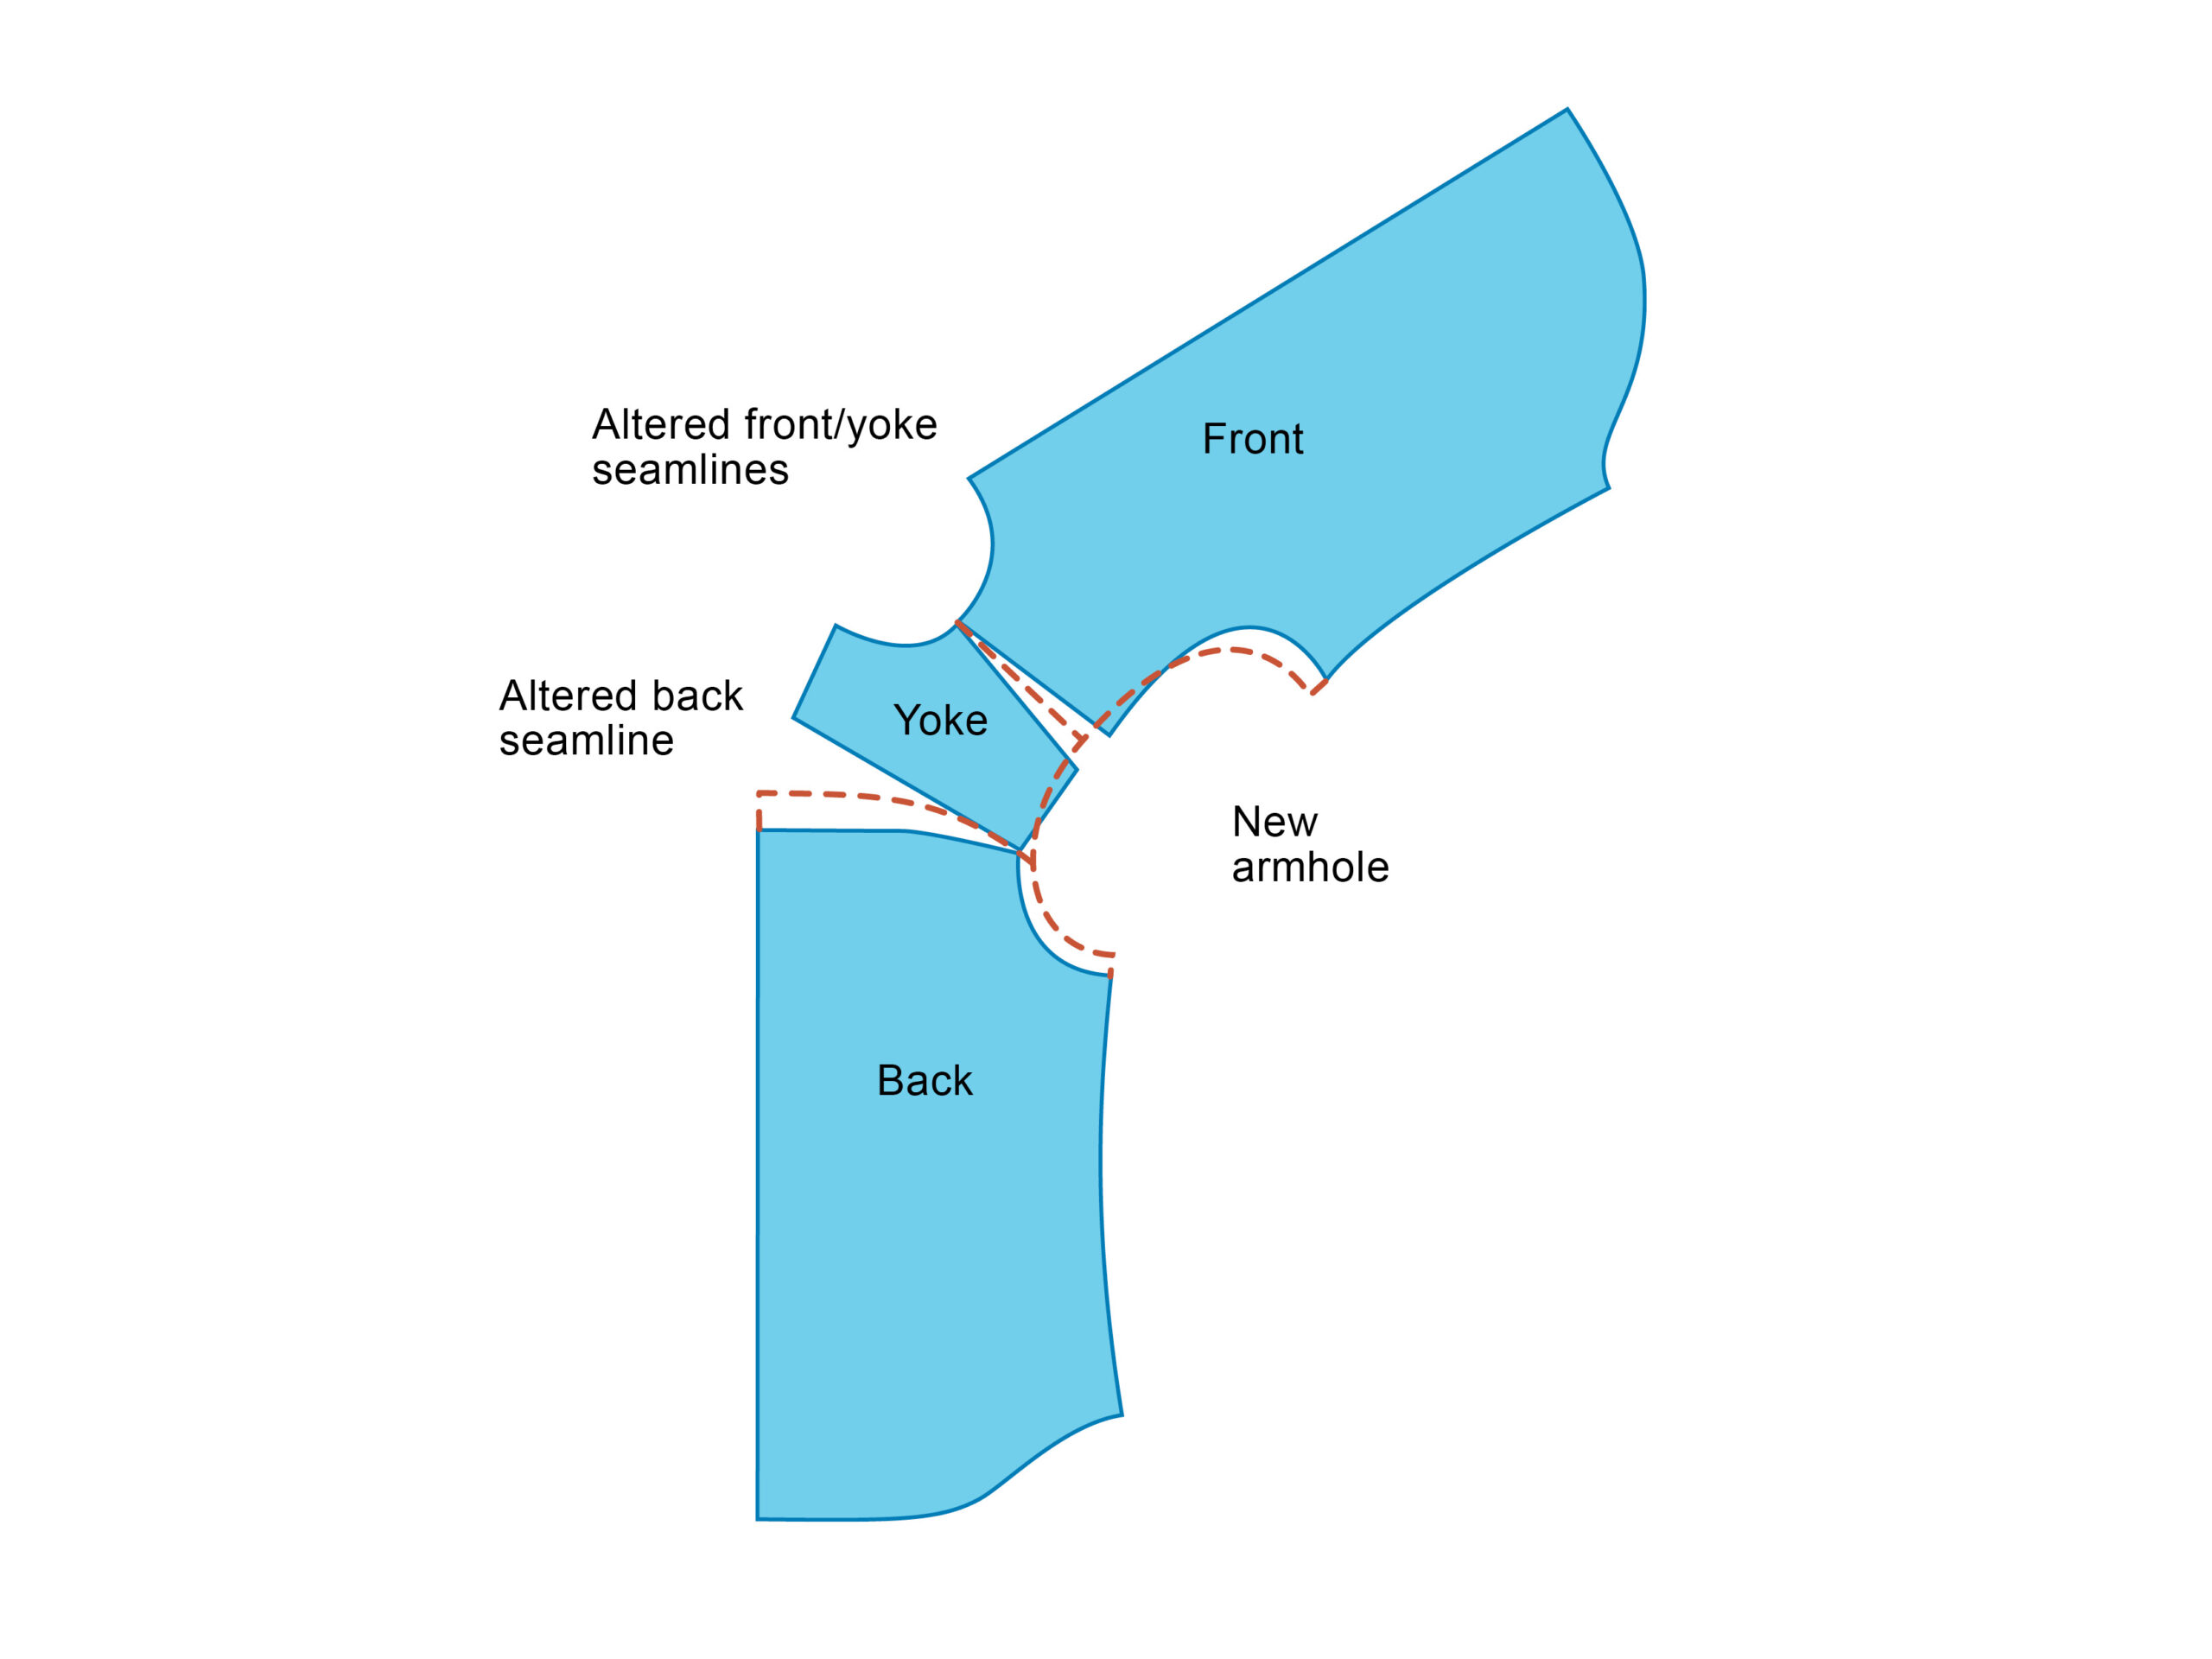
To put all these adjustments together, see the illustration below. You’ll be able to adjust the relative widths of the front and back at the shoulders by altering the position of your new armhole, using your own width measurements in these areas. A flexible ruler (available from art and drafting stores), is a handy tool for adjusting and drawing armhole curves without changing the overall seam length.
Align pieces and draw new armhole
This article by Karen Howland of Chillicothe, Illinois, was published in Threads #109.
Illustrations: Linda Boston.


Log in or create an account to post a comment.
Sign up Log in