

Make a Top from Two Scarves
Sew a gorgeous top made from a scarf

It’s fun to sew with scarves because the fabrics, colors, and patterns are gorgeous.
Another advantage—scarves are already finished at the edges! Here’s a fast way to turn two chiffon scarves into a sleeveless top with a bubble-look hem.
This top is a forgiving one-size-fits-most. The suggested scarf size yields a top that’s about 20 inches from neck to waist and 83 inches in circumference. It’s more or less sheer, depending on the selected scarves, but you can wear it over a shell or other shirt.
The finished top is two layers and reversible (inside and out as well as front to back). The neckline ruffled effect is formed by a drawstring, so you can adjust the neck diameter for different looks.
Supplies
- Two 42-inch square silk chiffon scarves
- 1 yard 1⁄8-inch heavyweight rattail or satin cord
- 70/10 sewing machine needle for lightweight woven fabrics
- Bodkin or small safety pin
- Scissors
- Sewing machine
- Silk pins
- Thread
Connect the scarves
The two scarves are joined with short side seams. When the sewn-together scarves are folded in half, parallel edges meet at the neckline and the fold becomes a hem.
1 Press the scarves. Select and mark neckline edges on each scarf. Place one scarf over the other, with right sides together and neckline edges aligned. Pin around the edges.
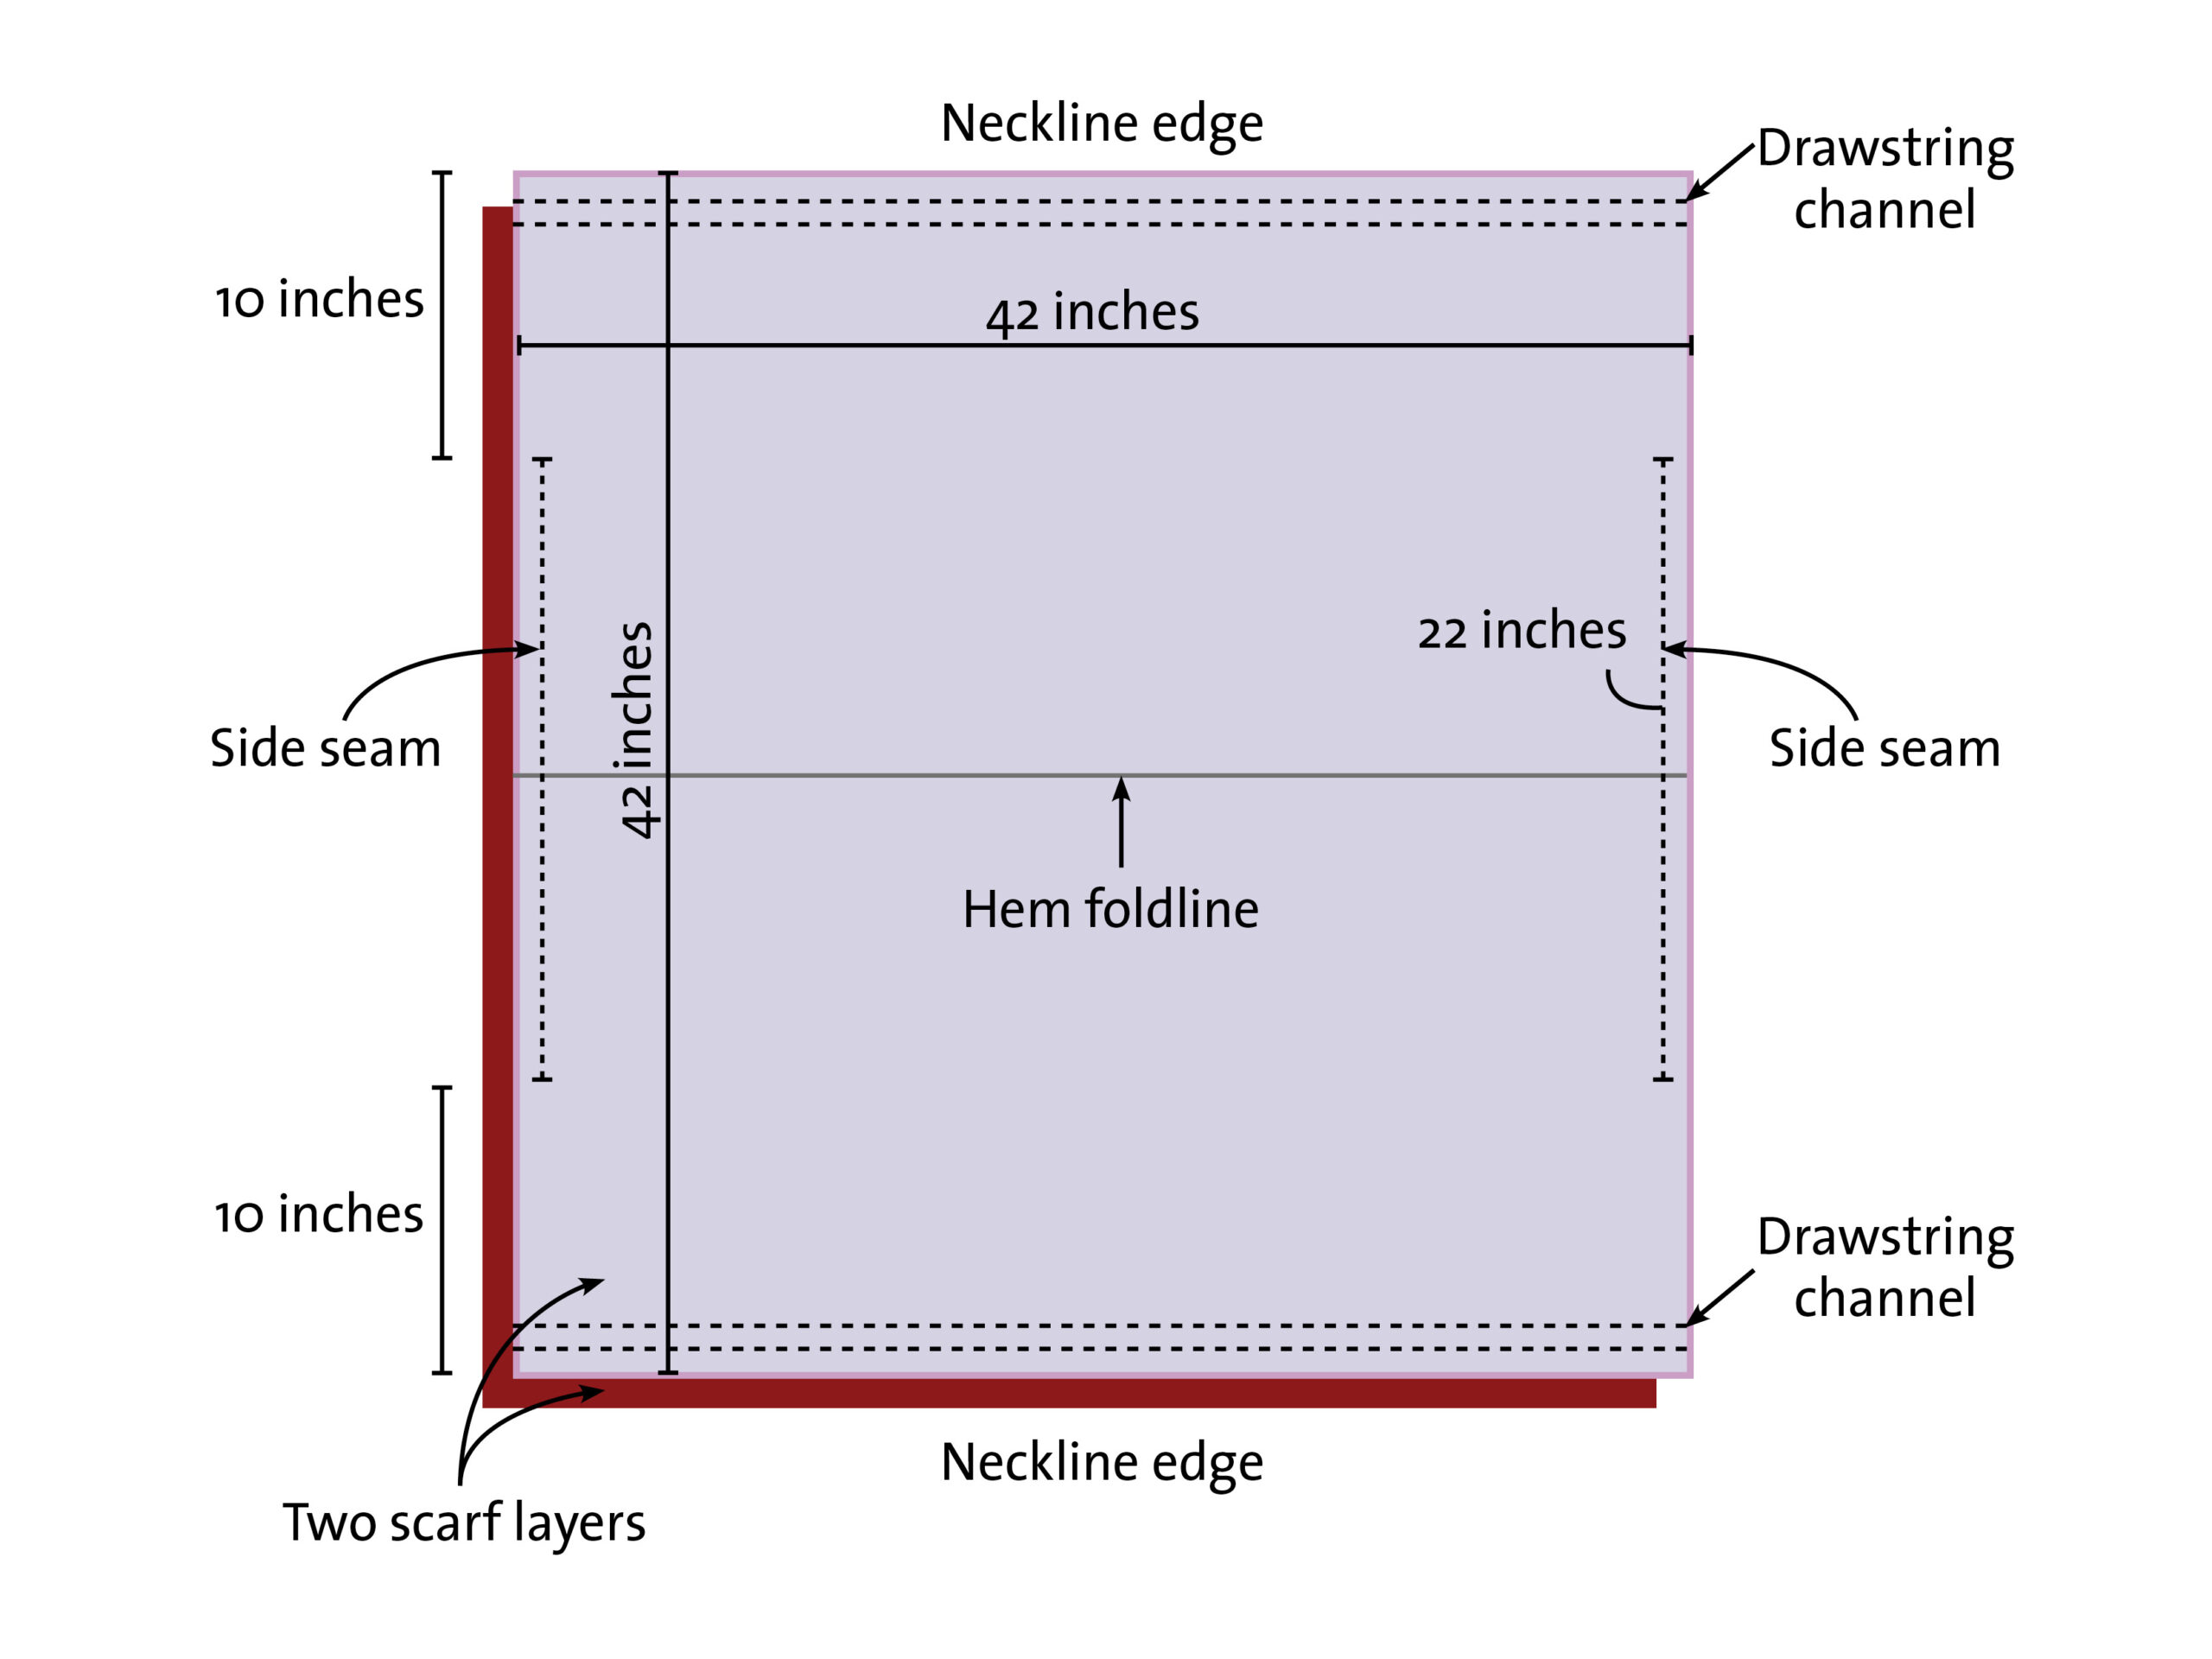
2 Mark the side seams’ length. On the edges perpendicular to the neckline edges, make a mark 10 inches from each corner. The side seams are sewn between the marks.

3 Sew a side seam. Starting at a mark, back-tack perpendicular to and through the scarves’ rolled edges. With the needle down and 1⁄4 inch from the scarves’ edges, pivot the work and sew to the seam’s end mark. Pivot at the mark, and back-tack…
Start your 14-day FREE trial to access this story.
Start your FREE trial today and get instant access to this article plus access to all Threads Insider content.
Start Your Free TrialAlready an Insider? Log in


Log in or become a member to post a comment.
Sign up Log in