

The Magic Yoke: Constructing a Fast Finished Yoke
The yoke on a typical shirt or blouse isn’t challenging to construct. After joining the yoke and facing to the back, and the yoke facing to the front with a standard seam, you can simply fold under the front edge of the yoke to cover the front/facing seam and edge-stitch it to the garment front.
But what to do when you’re using a fabric that you don’t want to edgestitch or topstitch, and when finishing the yoke by hand seems too slow or too homemade? And what if you’re making a reversible yoked garment that needs to look equally finished on both sides?
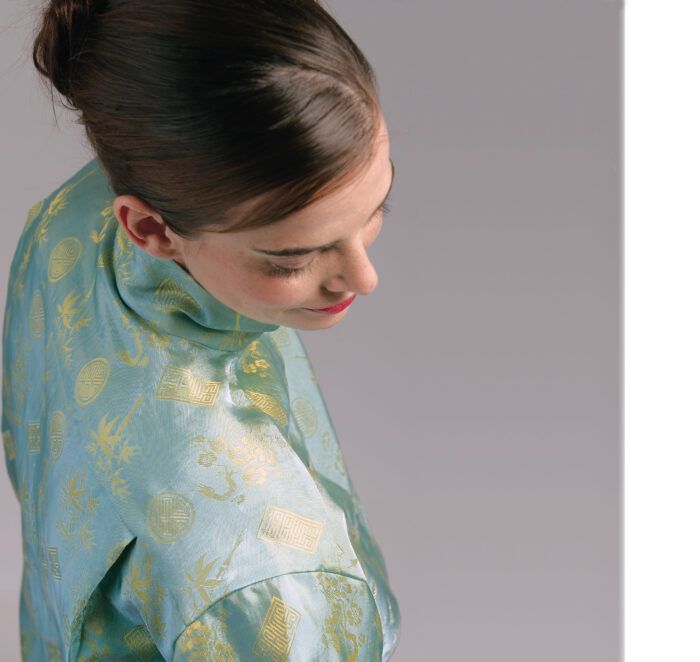
The answer to all of these questions: Try the magic yoke. It makes quick work of machine-sewing a traditional shirt yoke while completely concealing the stitches it’s constructed with, as you can see in the photos. The trick is to roll up the garment fronts and back between the yoke pieces while you sew the front yoke seams, as shown in the photos below. When you’re done, you simply pull the fronts and back out through an armhole end or the neckline opening—turning the yoke right side out as you do this—to admire and press your yoke with its perfect
finish, both inside and out. Give it a whirl!
Four easy steps
This technique works with any yoke and yoke facing, so long as the distance between the front and back seams on the yoke is large enough to allow you to roll up both the garment fronts and back inside it during the final stitching. With most fabrics, any yoke over 3 inches from the front edge to the back at the shoulders will be big enough. Be sure you cut the yoke and yoke facing exactly…
Start your 14-day FREE trial to access this story.
Start your FREE trial today and get instant access to this article plus access to all Threads Insider content.
Start Your Free TrialAlready an Insider? Log in


Log in or become a member to post a comment.
Sign up Log in