
Copy a Beloved Garment
Deconstruct it for a pattern that duplicates the fit and details
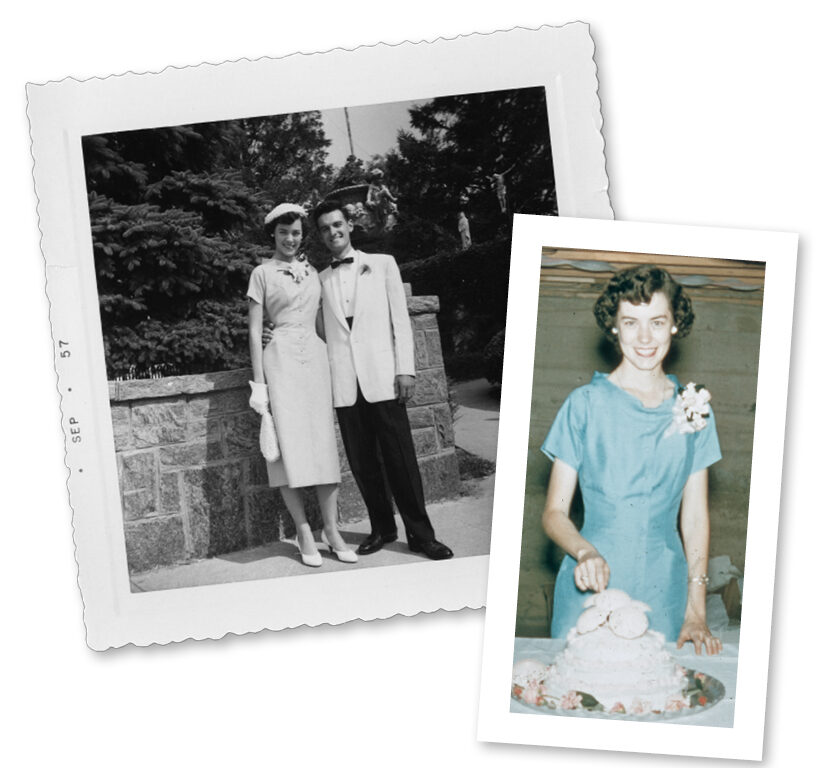
Every sewer has a go-to outfit in the closet that fits beautifully and always looks great. When your favorite garment shows too much wear, don’t send it to the thrift store. Turn it into a perfectly fitting pattern. I have a smart method for accurately copying a garment. This minimizes the need to alter patterns to achieve an ideal fit.
The sample I’m using is a vintage dress, but the process can be used for almost any garment. It is a fabulous way to re-create favorite pants that are almost threadbare. You don’t need special talents. Just take good photographs, make thorough marks, and record careful notes before deconstructing the cherished garment to make a pattern. Follow my method, and you’ll have a new favorite pattern and the directions to sew it together.
Analyze and mark the garment
This method involves deconstructing the garment to copy a pattern, but before opening any seams, record as much preliminary information from the garment as you can. Take lots of photographs from every angle. Make notes of what you are photographing, and label each photo in a chronological sequence.
1. Mark all the seamlines. Use a soft-lead pencil or a felt-tip marker that doesn’t bleed. Measure and mark the seam lengths, especially if they are on the bias.
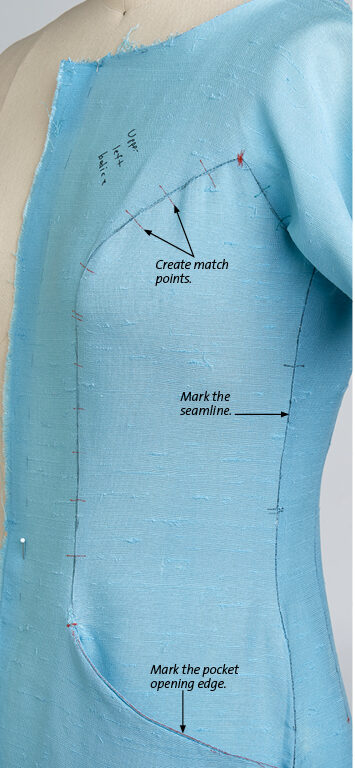
2. Create match points. Make several notch-like hash marks on curved seams, princess seams, or sleeve caps. Any seams that typically incorporate ease must be marked on both adjacent pieces, to restore the exact ease distribution in the original manner later. Mark folds, tucks, hemlines, pocket edges, and other details, to be thread-traced later.
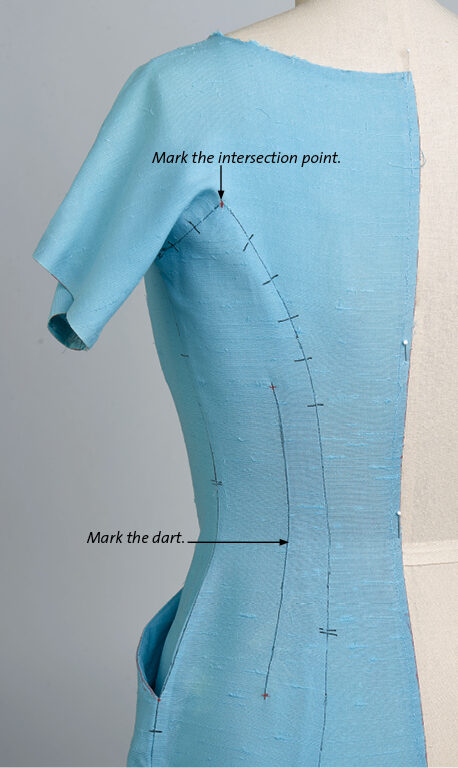
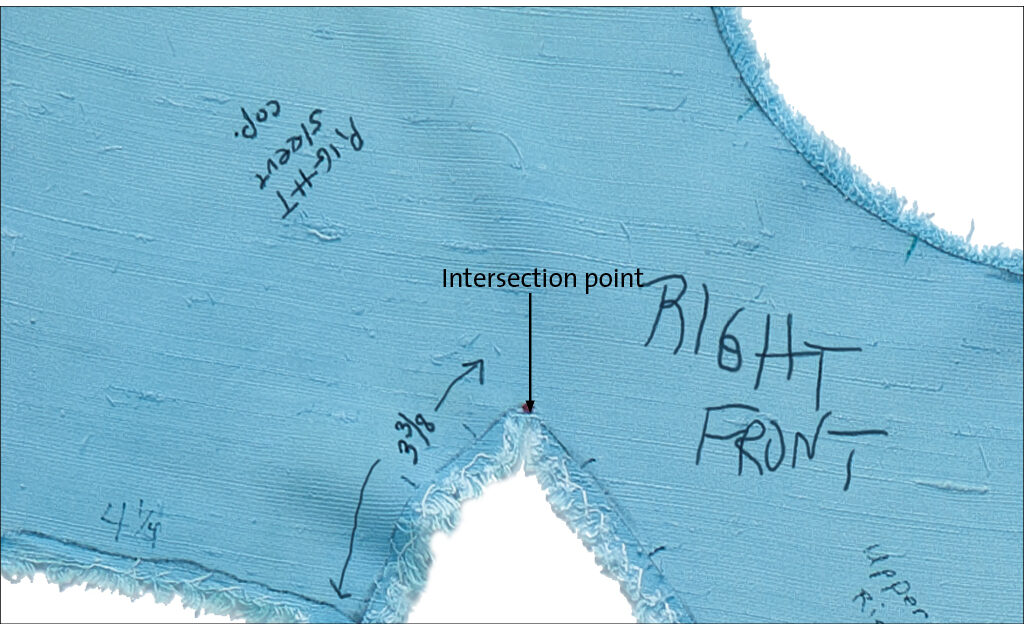
3. Mark intersection points. Add dots with colored pencils or fine-line colored markers. Mark pockets, button locations, and shoulder seam and neckline intersections. Put the garment on. Mark the bust apex and where the waistline falls.
4. Make notations on every garment section. Include specific details like near hip, neck edge, top, bottom left, or bottom right.
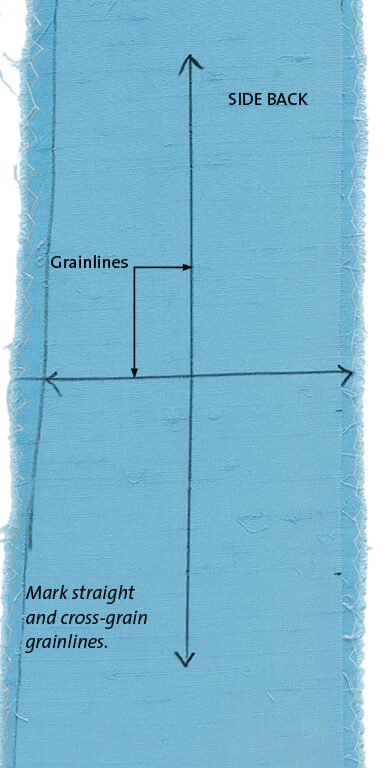
5. Mark the grainlines. You can usually draw a line on the crosswise grain and lengthwise grain. On most fabrics, the cross-grain has more stretch than the lengthwise grain.
Separate the pieces
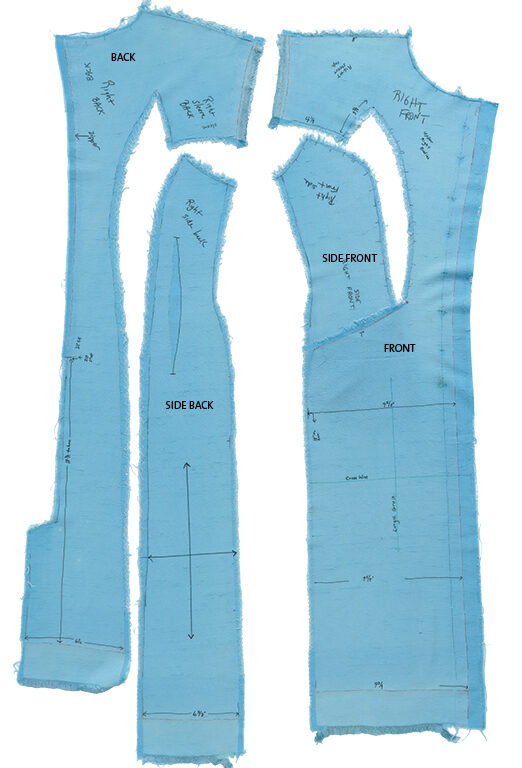
Careful deconstruction is the key to successful reconstruction. If the garment has a symmetrical design, you can disassemble one half and use the intact half as a reference to double-check measurements and construction techniques. Gently use a seam ripper or snips to open all the seamlines. Avoid ripping the seams open by hand because that could distort or tear the fabric.
Document the process. Take a photo each time you detach a component.
Take notes. While disassembling the garment, write down every aspect of the garment construction you observe, in the chronological sequence. This is critical for reconstruction.
Mark any stitching lines that you have missed with a pen or pencil. These seamlines are essential for creating each pattern piece.
Label each garment section by writing on that specific component, such as upper right bodice.
Don’t copy the original seam allowances. Typically, they have been graded, trimmed, or clipped to different widths throughout the garment. You will work from the stitching lines.
Press each garment section to obtain a smooth, flat pattern piece. Sometimes the steaming process shrinks or removes needle holes from the original stitches. Therefore, it is important to mark seamlines before this step.
Create a final pattern
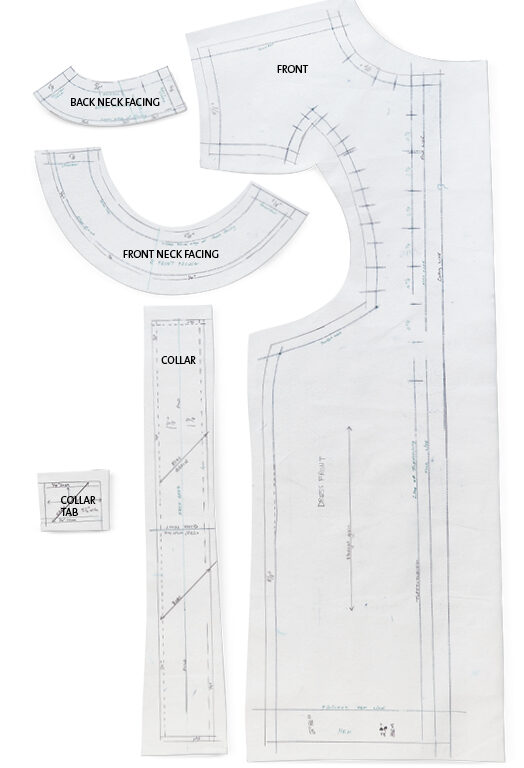
After you have dismantled the garment, use the individual pieces to create the final pattern.
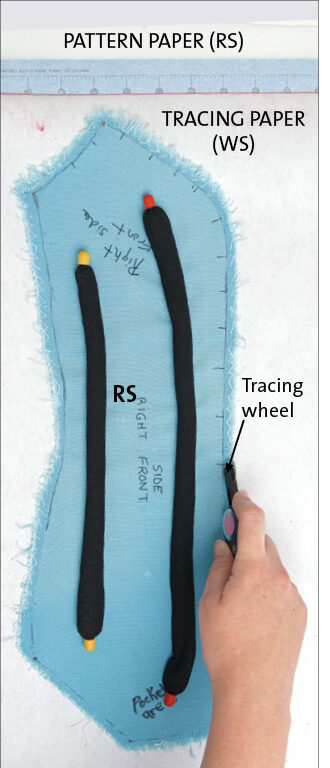
 1. Prepare pattern material. To make the pattern, use a nonwoven tracing material that is wide enough, easy to see through, durable, and effortless to write on (Pattern-Ease from Fabric.com).
2. Use extralarge sheets of tracing paper. Place the tracing paper (26-inch by 39-inch sheets from RichardtheThread.com) wax side down atop the tracing material to get an exact copy and not a mirror image of your garment piece.
3. Position the original garment sections. Lay them right side up atop the tracing paper. Use pattern weights instead of pins to prevent any shifting or grain movement.
4. Trace every seamline from the original garment. Be sure to transfer any notch or hash marks you made along curved edges like princess seams or sleeves.
5. Add seam allowances. The seam allowance width is a personal choice. Most American patterns use a 5⁄8-inch-wide seam allowance. I prefer a 1-inch-wide seam allowance in the zipper seam. The extra width makes a smoother transition over the spine and zipper teeth. A wider seam allowance also enables you to make fitting changes more easily.
6. Choose the right fabric. If you expect the new garment to drape and fit precisely like the original garment, you must select a similar fiber and weave. Be mindful that spandex-blend fabrics hang and fit differently from non-spandex blends.
7. Mark the fabric. Use removable chalk-style tracing paper (NancysNotions.com) to transfer notches, darts, foldlines, and other details to mark your new fabric. Immediately use contrasting double thread to trace all the notch lines, foldlines, and other details before the chalk can brush off. Mark dots with chalk or tailor’s tacks.
 Copy the construction
The photos and notes you’ve made during the deconstruction process make easy-to-follow instructions for sewing your new garment. Besides duplicating a much-loved garment exactly, you can also personalize it and make structural or fit improvements to the original design.
Reimagine the style
Consider changing the level of formality by using a different fabric. A sundress design may be used to sew a cocktail dress. Lengthen a dress or skirt or shorten it, as we did, to reflect current fashion trends.
Improve garment support
Consider adding interfacing, underlining, or lining where there was none in the original garment. Alternatively, replace a heavy structural element with a lighter one to reduce bulk. For this dress, I would recommend using Ambiance rayon to line the pockets rather than self-fabric.
Customize the details
Replace an old-style metal zipper with a nylon one, either in a centered or invisible application. Update button closures to frogs, or use hook-and-loop tape for those with limited hand mobility. Add or eliminate topstitching, or change it to decorative embroidery. Incorporate piping or other creative embellishments.
Plan the construction order
For all garments, this is straightforward. Remember, you still have a garment half to refer to. Looking back at your notes, list the steps in the order you plan to do them. You can also refer to a general sewing manual for further guidance, if desired.
Use standard sewing practices and sequences for the most successful garment: Staystitch curved areas first and reinforce unstable areas. Serge the seam allowances if you plan to press the seam allowances open. Sew the darts in all pieces. Insert the zipper. Sew the seams, matching all the notches to maintain the original ease distribution. Understitch faced edges. Hem as desired.


Log in or create an account to post a comment.
Sign up Log in