
Runway Sewn Your Way Technique: Becky Fulgoni’s Delicate Stitching Method
An lace alternative lends openness to a tailored garment
When I chose Isabel Marant for my designer inspiration, I was positive there would be gobs of lace in my future. The images of her runway shows were literally dripping in lace. I collected yards of different laces and combed through my stash to find all the lace edging I could get my hands on. But the more I tried, the more I realized that it just wasn’t me. I wanted the open, transparent idea of lace but not the lace.
A lace conundrum
My pondering was temporarily interrupted because this challenge happened at the same time that I was moving and selling the home that I had lived in for the past 25 years. To say I was distracted would be an understatement. I packed up my piles of lace and rayon challis with the rest of my sewing room and literally put it on the shelf for several months. When I finally unpacked it, I was still scratching my head about how to incorporate the lacy look I saw in the inspiration photos, without going overboard with lace.
The solution: delicate stitching
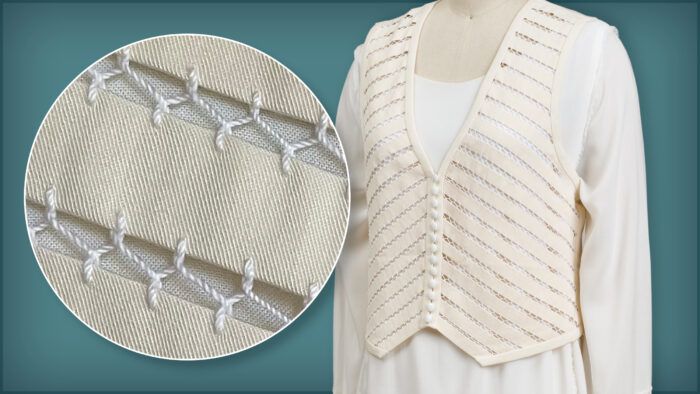
There is a really lovely stitching technique handed down from the Victorian era called fagoting (also spelled faggoting or fagotting). Its name comes from sticks bundled together called “fagots.” The technique is, in fact, a delicate way of joining pieces of fabric and was once extensively used for ladies’ lingerie. This delicate stitching was just what I was looking for, as it gives an open, lacy look without being lace.
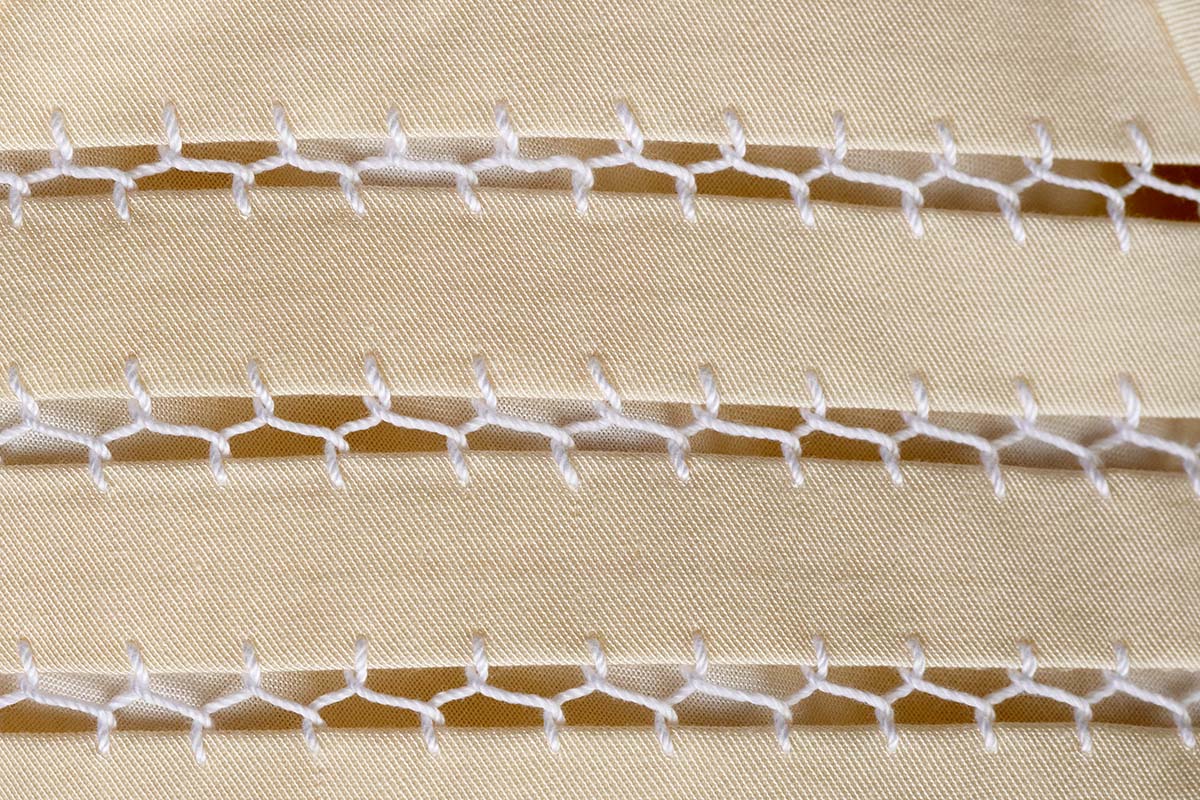
It had been years since I had made fagoting stitches, and it took some experimenting and practice to get the look I wanted. I ended up using a pearl cotton crochet thread that gave my stitching a heft to stand up to the rayon twill I was using for the foundation of my vest. I made “tubes” of the rayon twill to form the fabric foundation strips that I then stitched together with fagoting.

First attempts failed
My first attempts were pathetic. My stitching was randomly spaced, and the spaces between my foundation strips were just as random. I needed a way to keep the spaces even between my stitches and my strips. I tried using a tear-away stabilizer that you might use for machine embroidery, but when I tore it away, it distorted the stitches. Hmmmm, not great. Stitching free-hand and by eye-balling were even more disastrous.
Finding success
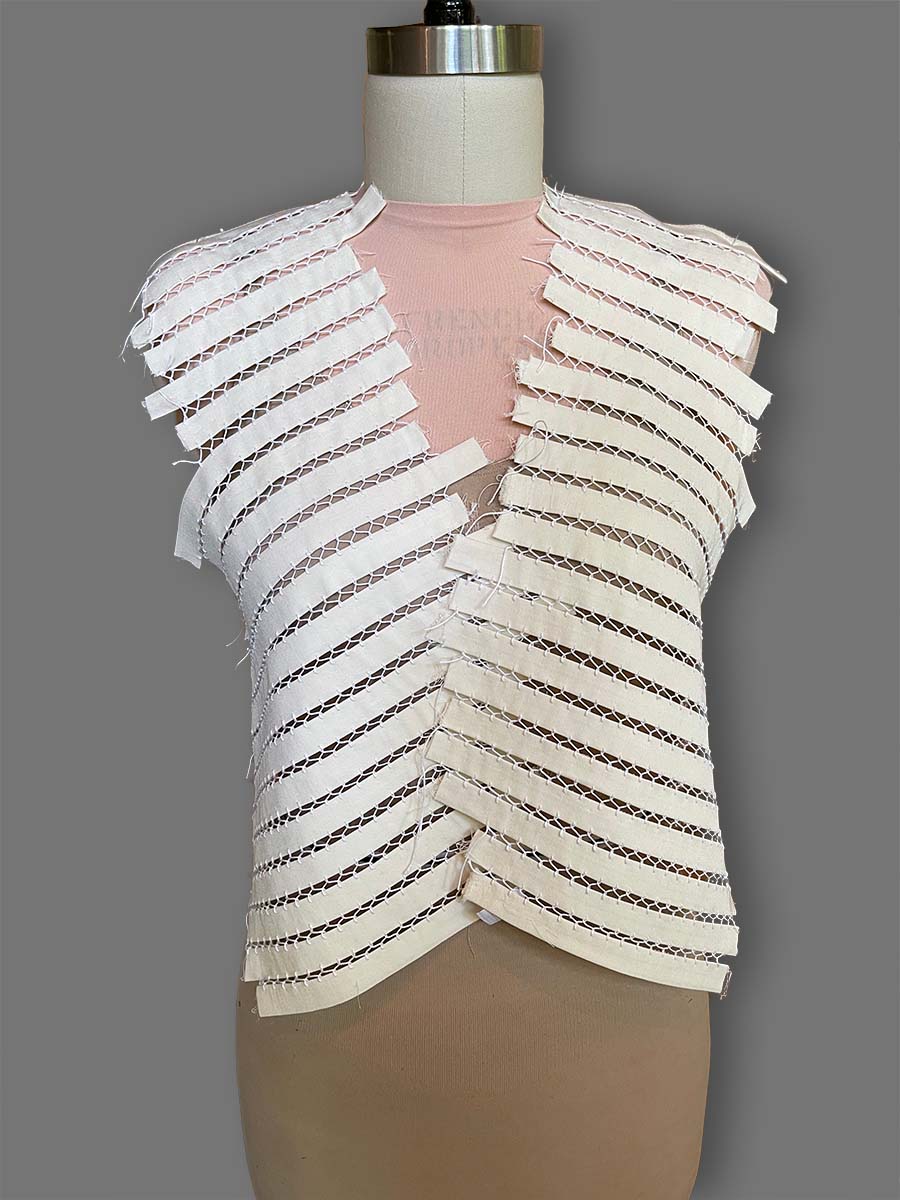
I finally ended up basting the foundation strips to 1/4-inch graph paper. I could line up the fabric strips with the vertical lines and use the horizontal lines as guides for spacing my stitches.
As my British husband says, “Bob’s your uncle!” (It’s an expression used when something is simple, straightforward, and perfectly obvious.) I could then remove the basting without distorting the fagoting stitches and have straight, evenly spaced fabric strips held together with neat, evenly spaced stitches.
Video demo
I made a short video to demonstrate the process, which I hope is clearer than trying to describe it in words.
Handy guide
I used the front pattern piece of my vest as a guide as I added fabric strips.
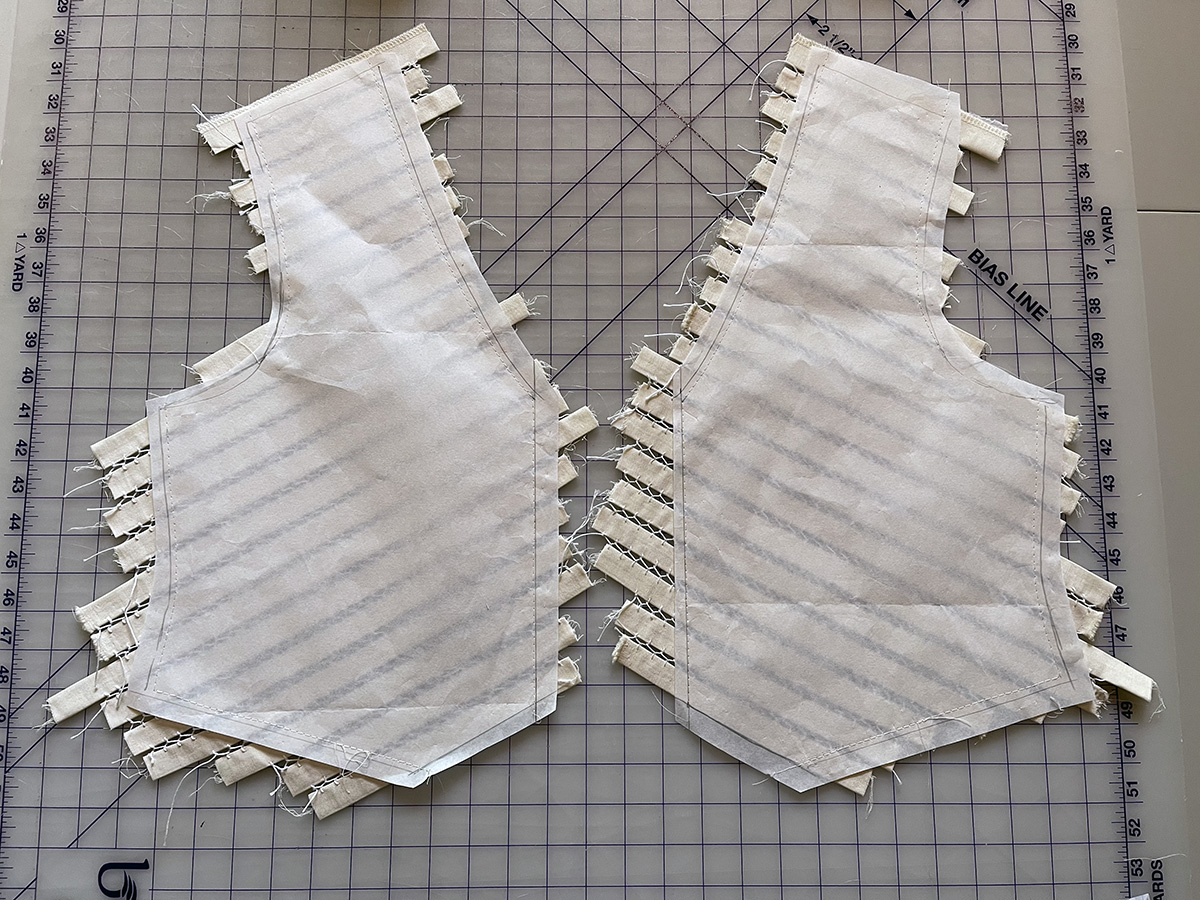
It gave me the basic shape I was looking for, and it meant I didn’t do a lot of extra fagoting that would get cut away later.
To hold the shape of my vest fronts, I basted them to the tear-away stabilizer that I didn’t use for the fagoting, which worked great. Plus, it tore away cleanly once I had the edge bindings in place.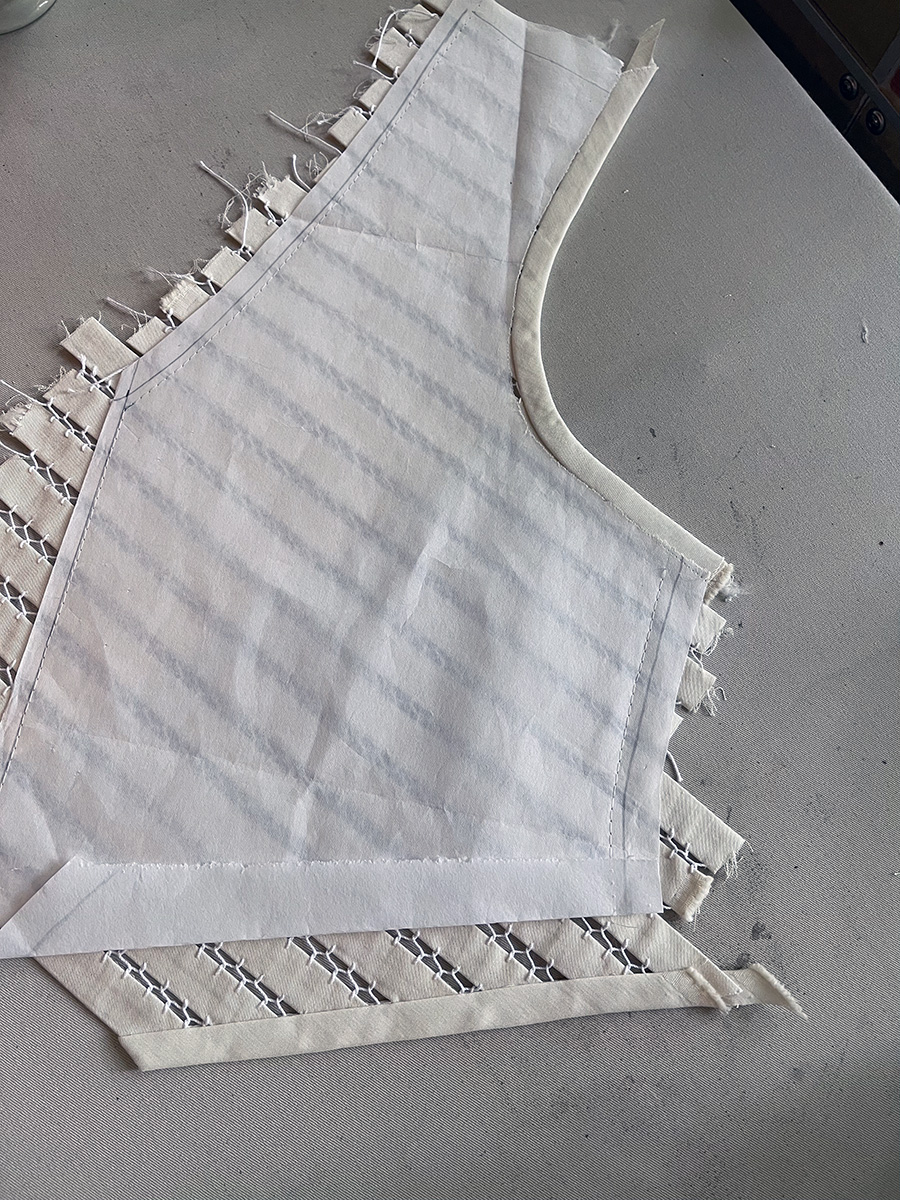
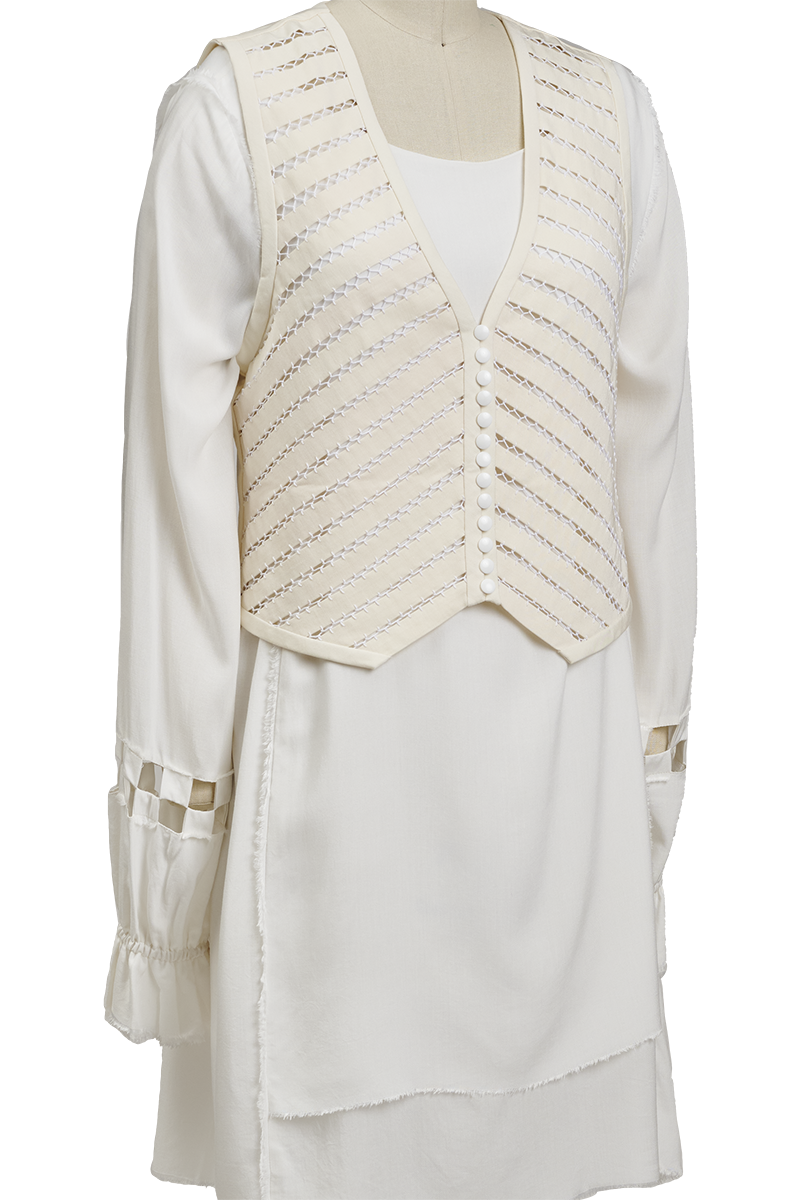
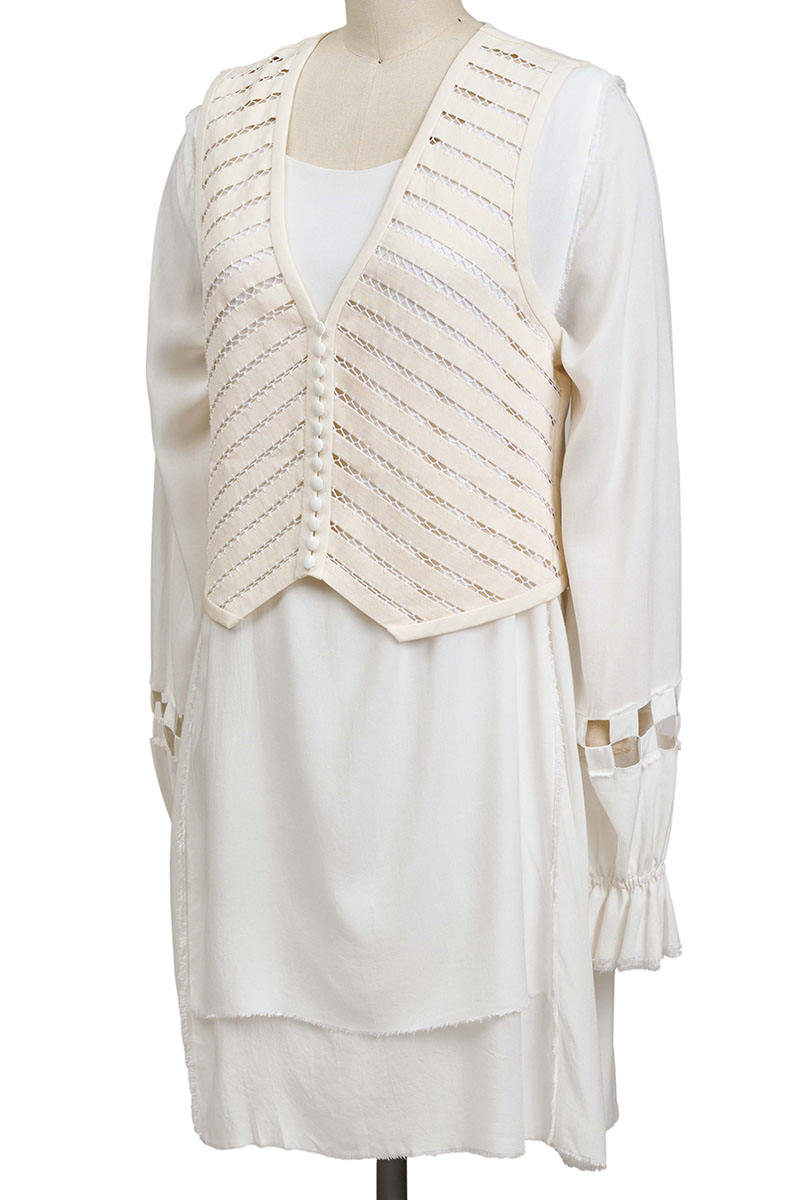
Completing the vest
I finished the vest fronts and then “bagged them” with the back and back lining to finish the garment. This is a method of creating a professional finish.
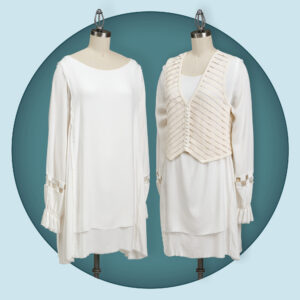
I really like the way the fagoting creates open space and gives the idea of lace, but in a more tailored way. Plus, it echoes the openwork on the sleeves of the tunic. It was the perfect choice for my lace-but-not-lace vest.
If you would like to give the delicate stitching a try, you don’t have to commit to a whole garment. Try it as the hem on a sleeve, or as the edge of a collar. It just requires two finished edges and a decorative thread and “Bob’s your uncle!”


I utterly love this, and your problem-solving is genius. I have one question: how did you get your twill strips to be ridge-free? If I did this, the seam allowances would be obvious from the right side.
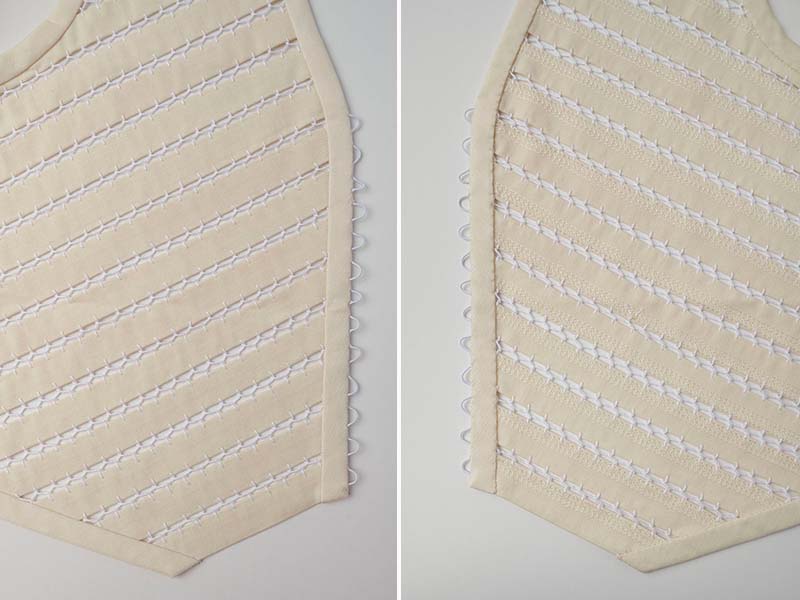
You are VERY observant! And YES, my first few tries did have that issue. I tried making the seam allowance the same as the finished width of the strip, pressing it to one side, putting them on the bias. Finally, I serged one edge, and folded the strip into thirds with the serged edge all the way at the folded edge of the strip. The "unserged" edge helped pad the front so the serged edge did not show through. I used a double-sided, iron-on web to hold the edge in place and then caught the serged edged in the hand stitching. Since I'm not going to machine-wash and dry this piece it didn't need to be "bulletproof." You can see the back side of the strips in the pictures above. And I'm attaching some "in progress" photos that might help. Thanks for noticing! I love knowing that folks get down into the details.
This is genius too. I'm thinking of ways to apply it to spaghetti straps and other small, thin tubes. Maybe deploying fusible and washaway to create a better knit strap.
Again, thank you!
MerryJo
I'm wondering how you handled the front closure. Hidden snaps? Hooks and eyes under the buttons?
On the "buttonhole" side of the vest I used a large needle threaded with round elastic cord. I ran it along the on the inside of the front fold to where I wanted a buttonhole, poked it out of the fold and back into the fold about 1/2" farther along. The elastic loops stretch enough to get the buttons through and bring the front edges together without and overlapped edge. You can see the loops in the photos above. It was a bit tricky to sew the buttons right on the folded edge ;)
Perfection!
Thank you so much! It was a fun challenge.
Very elegant. Thank you for clear instructions/