
Runway Sewn Your Way Technique: Gilbert Muniz’s Batik Circles
The Versace-inspired project required soy wax, dyes, paints, and artistry
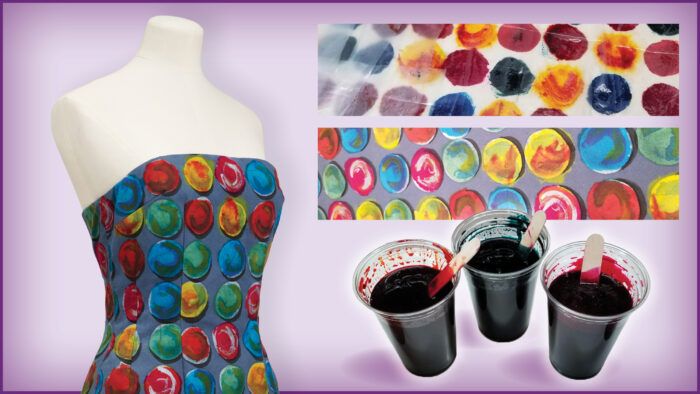
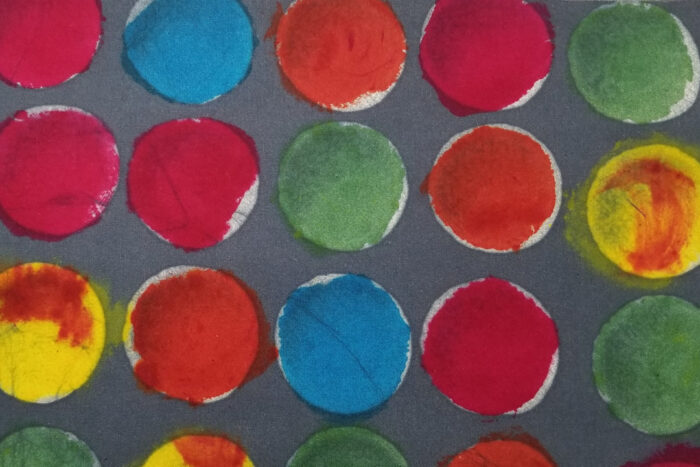
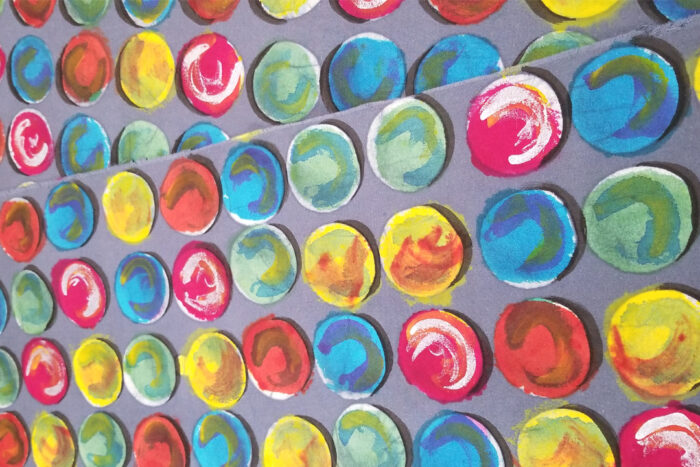
When I decided to work with Versace’s Pre-Fall 2019 Collection for the Runway Sewn Your Way Challenge, I immediately homed in on the Jim Dine heart print. The challenge was to make it my way, so rather than duplicate the print directly, I went with a more familiar motif—a circle. I kept the painterly effect of brushstrokes and the spatial separation of the motifs so the rhythm of the print was preserved. Instead of a solid black background, I went with a dark gray. This gave me an opportunity to play with dimension by adding shadows to the bottoms of the circles. I feel these details give the print an edge while retaining the original design’s spirit.

Inspired by Versace
The Versace design is printed on a variety of fabrics including stretch satin and georgette. I printed my design on a medium-weight cotton muslin. This was to make it more manageable to paint and more stable for the garment’s cut and shape. To achieve the original print, you would use silk screening as Versace did.
This video from The Look, a documentary about the fashion industry, shows how the design house prints their fabric. The printing section begins at about 20:50.
Batik instead of silk screening
For my design, I used soy wax batik. This process allows me to gradually build up layers without having to burn multiple screens and register prints. Below is a general overview of how I produce a simple batik print. Once the basic dye paint layers were set, I painted details using fabric paint. By combining these processes, I was able to create an artistic interpretation of the original print. I then used the fabric to make a strapless dress that highlights the print.
Batik how-to
Fabric prep
I first scoured the fabric in hot water with the dye-specific detergent Synthrapol and soda ash, a dye fixative. This process removes any oils or finishes on the face of the fabric. The fabric was then lightly pressed on the wrong side to help stabilize the fabric for printing.
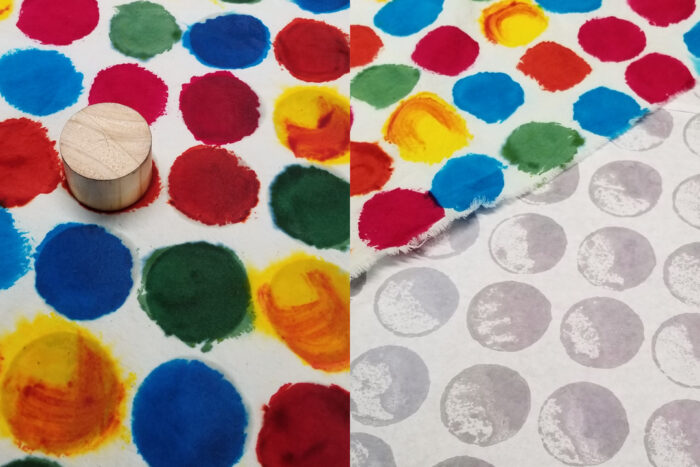
Template
I then made a template of the batik stamp (a thick wooden dowel) I was going to use on oak tag and traced the motif onto the fabric with a children’s washable marker.
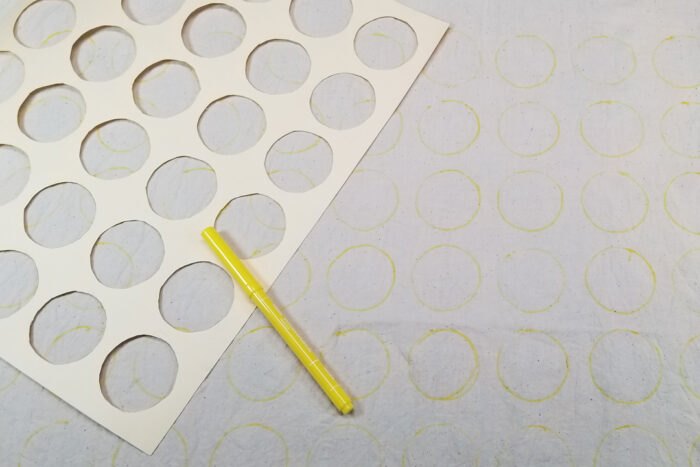
Using a washable marker allows me to see exactly where I need to paint, but since it’s water soluble, it doesn’t leave an obvious outline after the fabric is rinsed.
Dye paint
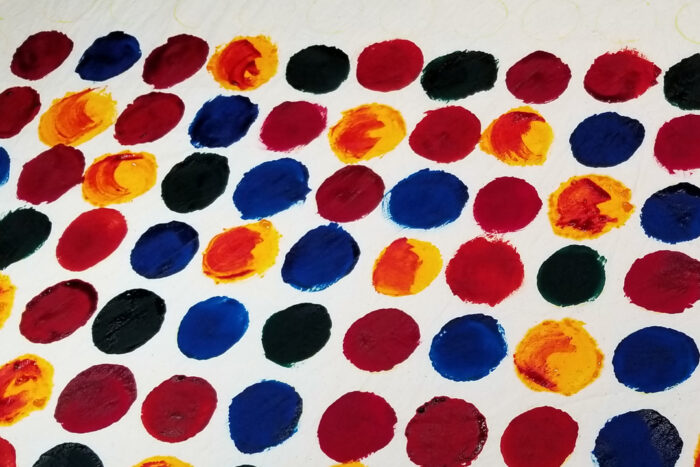
To prepare the dye for painting, I mixed a print paste consisting of sodium alginate and urea water. The alginate thickens the water, and the urea is a humectant that keeps the dye wetter longer. The dye powder is added to a small amount of water then mixed into the thickened paste. This yields a controllable dye paint that can be applied to the fabric with a brush.

The individual circles were painted using five colors (fuchsia, orange, turquoise, yellow, and green) to create the pattern. I tried to randomize the colors across the print as much as possible. I made sure to not paint exactly in every circle because it looks more painterly if there is a free-flowing effect to the color spread.
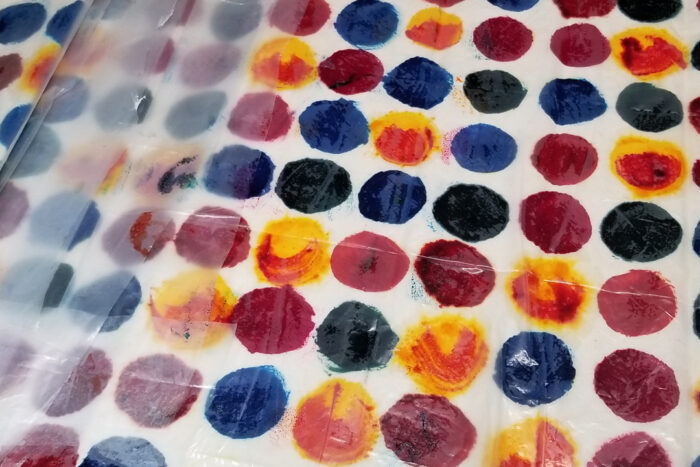
Once painted, the dye is batch set by wrapping in plastic and left to cure for several hours.
Once batch set, the fabric is rinsed and dried. It is now ready to be waxed.
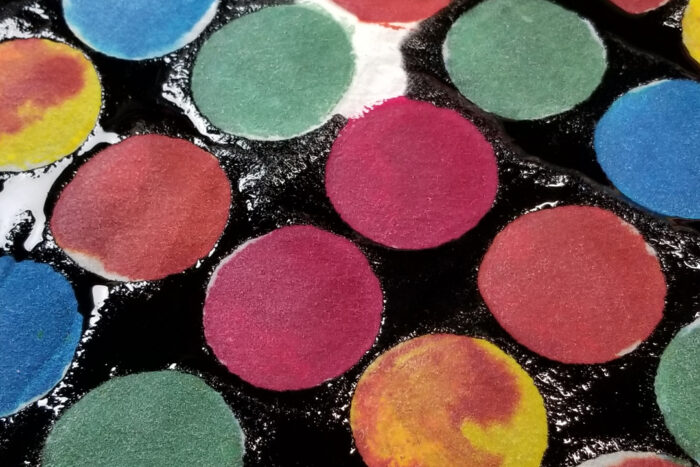
Applying the soy wax
I use 444 soy wax. It’s relatively inexpensive and available online. It is melted in a simple electric frying pan. I dip the wooden dowel I’m using as a stamp into the wax and apply it to the painted circles. The wax penetrates the fabric and forms a barrier that prevents liquid dye from passing through. The wax dries quickly, and if you are prepping several fabric cuts, they can be stacked on top of each other before the next step.
Dyeing the fabric
Using a large plastic tub, I mixed a few gallons of water with black dye powder. Most black dyes require an amount of heat to yield a dark color, but because of the wax, I was limited to cold water. This is perfect, as I didn’t want a solid black background anyway, and I know that using black dye in cold water always results in a smokey charcoal color. The waxed fabric is then submerged in the black dye bath for a few minutes, then soda ash water is added to the bath and the fabric is slightly agitated to make sure the dye covers all of the unwaxed surface. The fabric soaks in the dye bath for two to three hours. Soda ash can dissolve soy wax, so leaving it in for longer is not that advisable.
Removing the wax
Once the dye is set, I run it through a boiled water bath to remove the bulk of the wax. It then all goes in the washing machine for a few hot washes with more Synthrapol. It’s then dried, starched, and pressed on the wrong side to prep it for the painting process. The starching helps keep the fabric stiff and stable, so you’re not fighting wrinkles.
The fabric paint and the dyes are from Pro Chemical & Dye. The company’s fabric paints can be thinned with water, which will give you a flowable effect.
Painting
I first painted the shadows. I made sure to keep them relatively consistent, but still with a hand-painted feeling.
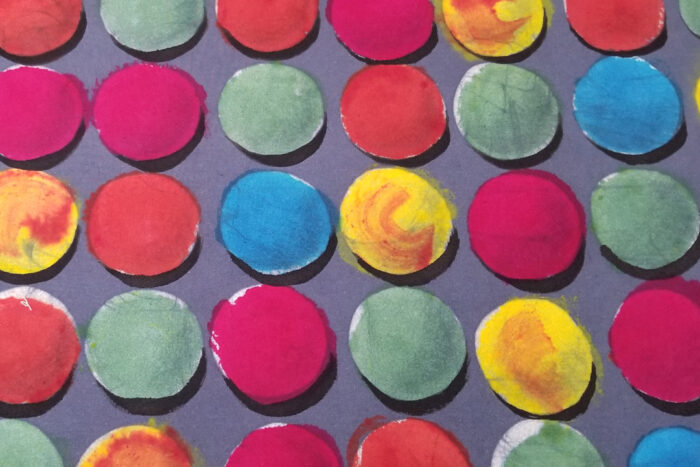
Once the shadows dried, I swirled various colors of paint over the dyed circles. Some circles were highlighted with a metallic glitter paint for variety. The finished effect reminds me of the inside of paint can lids.

Once dry, the paint is set in the dryer on the highest heat for about an hour. The one drawback to using these fabric paints is that they can’t be washed for 10 days. This allows the paint to properly set into the fiber. This project is never going into a washing machine, so this is not an issue for me. Once the fabric was heat-set and pressed, it was ready to be cut into a garment.
Try soy wax batik
It might seem like an involved process, but I did all of this over a weekend. Surface design is my happy place, so I’m probably biased here. There is a Zen rhythm to creating the look of your own fabric. This process could easily translate to silk or any other plant fiber. The key is the wax penetration. There are other techniques that allow for surface painting of the background fabric once the wax is applied, but that involves steaming and more equipment; however, for thicker fabrics, you wouldn’t need a deep wax penetration. Working with soy wax is a great introduction to wax resists and the only wax process I enjoy working with.
Photos: dress on form, Mike Yamin; all others, Gilbert Muniz.


It's cute, who is going to wear it,though?maybe your 14-yr. old daughter at Halloween ?Its not really something i could wear to the grocery store. heh.