
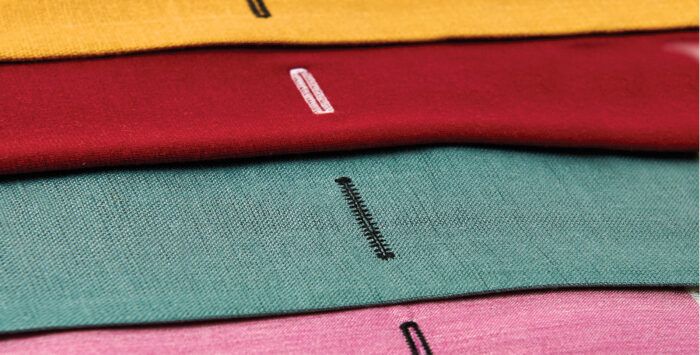
A good machine-sewn buttonhole has a two-part goal: It should emulate fine ready-to-wear, and it ought to stand up over time without raveling or gaping. It’s also possible to choose buttonhole options that become integrated into a garment’s overall look, or stand out as a design feature.
I’ll share my favorite buttonhole tips and techniques. We’ll look at stitching, cutting, and even how to rip out the stitching of an uncut buttonhole that just isn’t going to work. For most projects, the buttonholes are the last detail, a scary prospect if you’re nervous about making a mistake at the end. We’ll explore how to confidently sew them as a project’s finishing touch.
Test before you sew
It is essential to make test buttonholes before committing to a type on your finished garment. In a test, simulate the exact project conditions (see the checklist below). Most home sewing machines are programmed to automatically stitch fairly solid bead lines, and they tend to be too dense and stiff. To produce buttonholes that look more like those on high-end garments, adjust the stitch-width and -length settings.
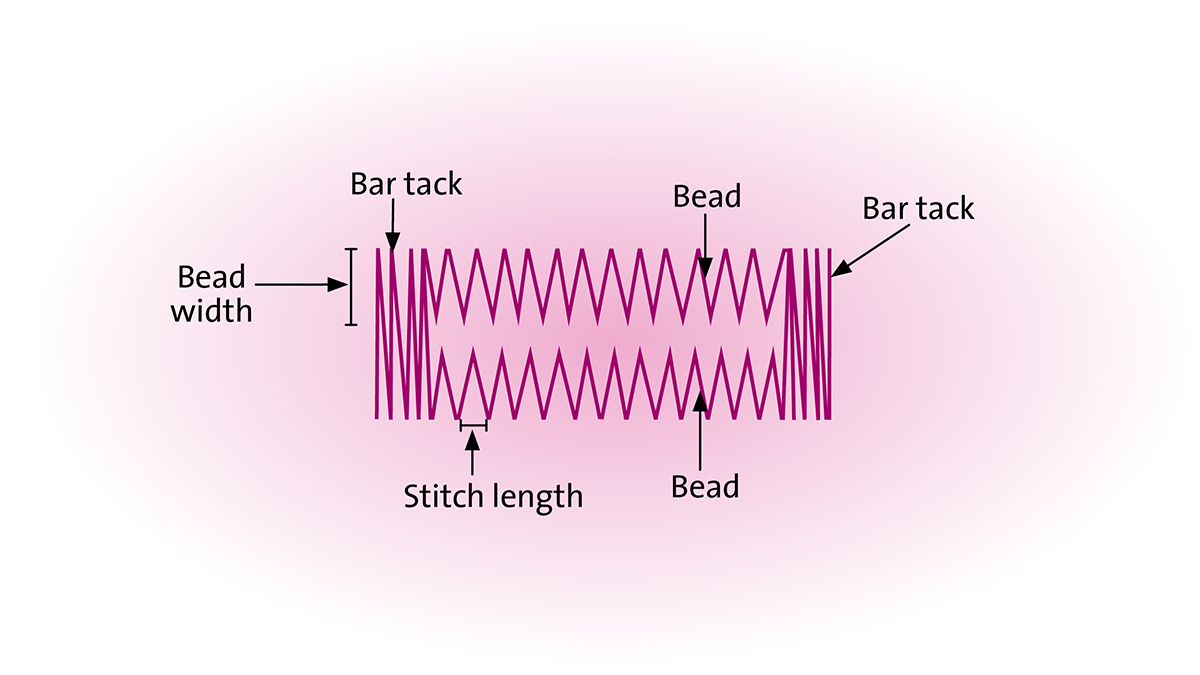
Machine buttonhole anatomy
In case the terms aren’t familiar, here’s a standard machine buttonhole with the parts labeled. The terms “columns” and “beads” refer to the long sides of the buttonhole.
Stitch adjustments
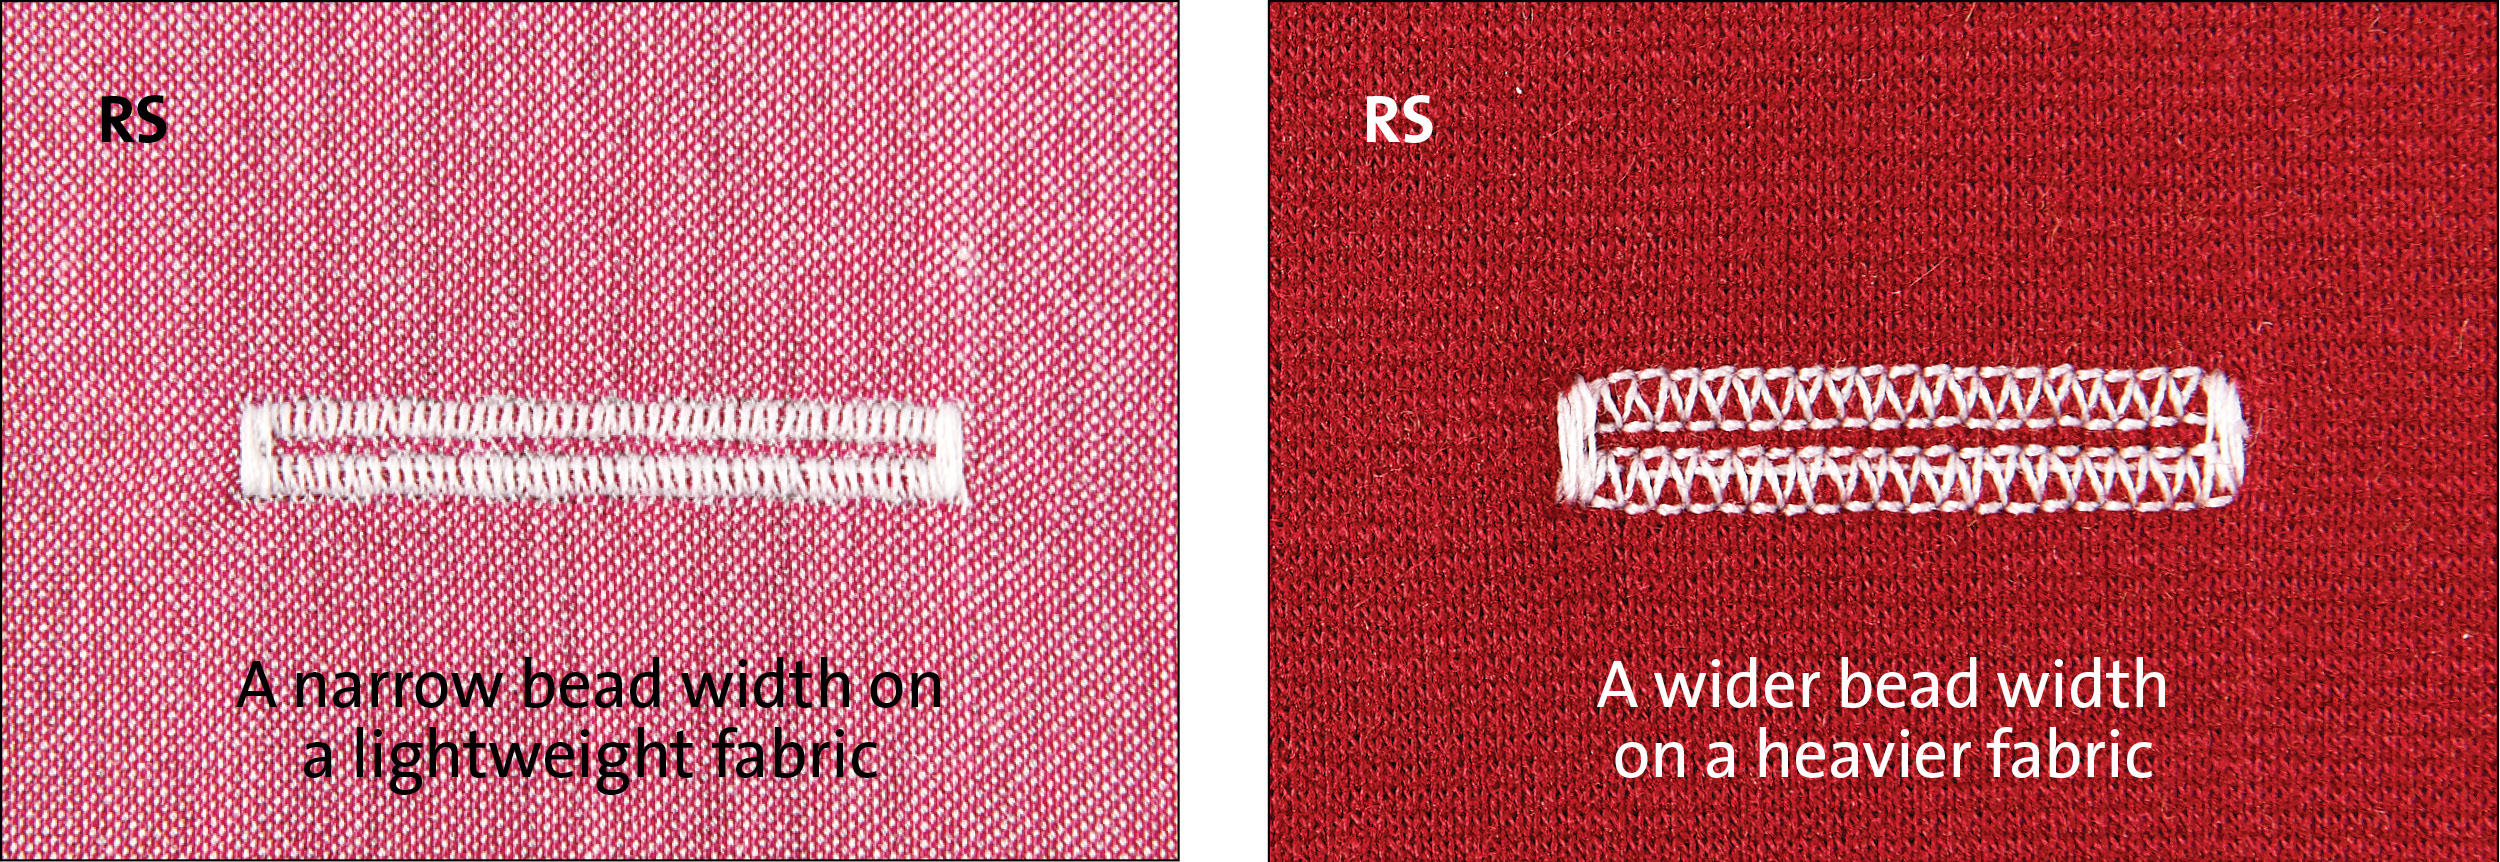
Bead width: To adjust the bead width, simply adjust the stitch width in the same manner as any stitch width on your machine. Make the stitch width narrower for fine fabrics, wider for bulky fabrics.
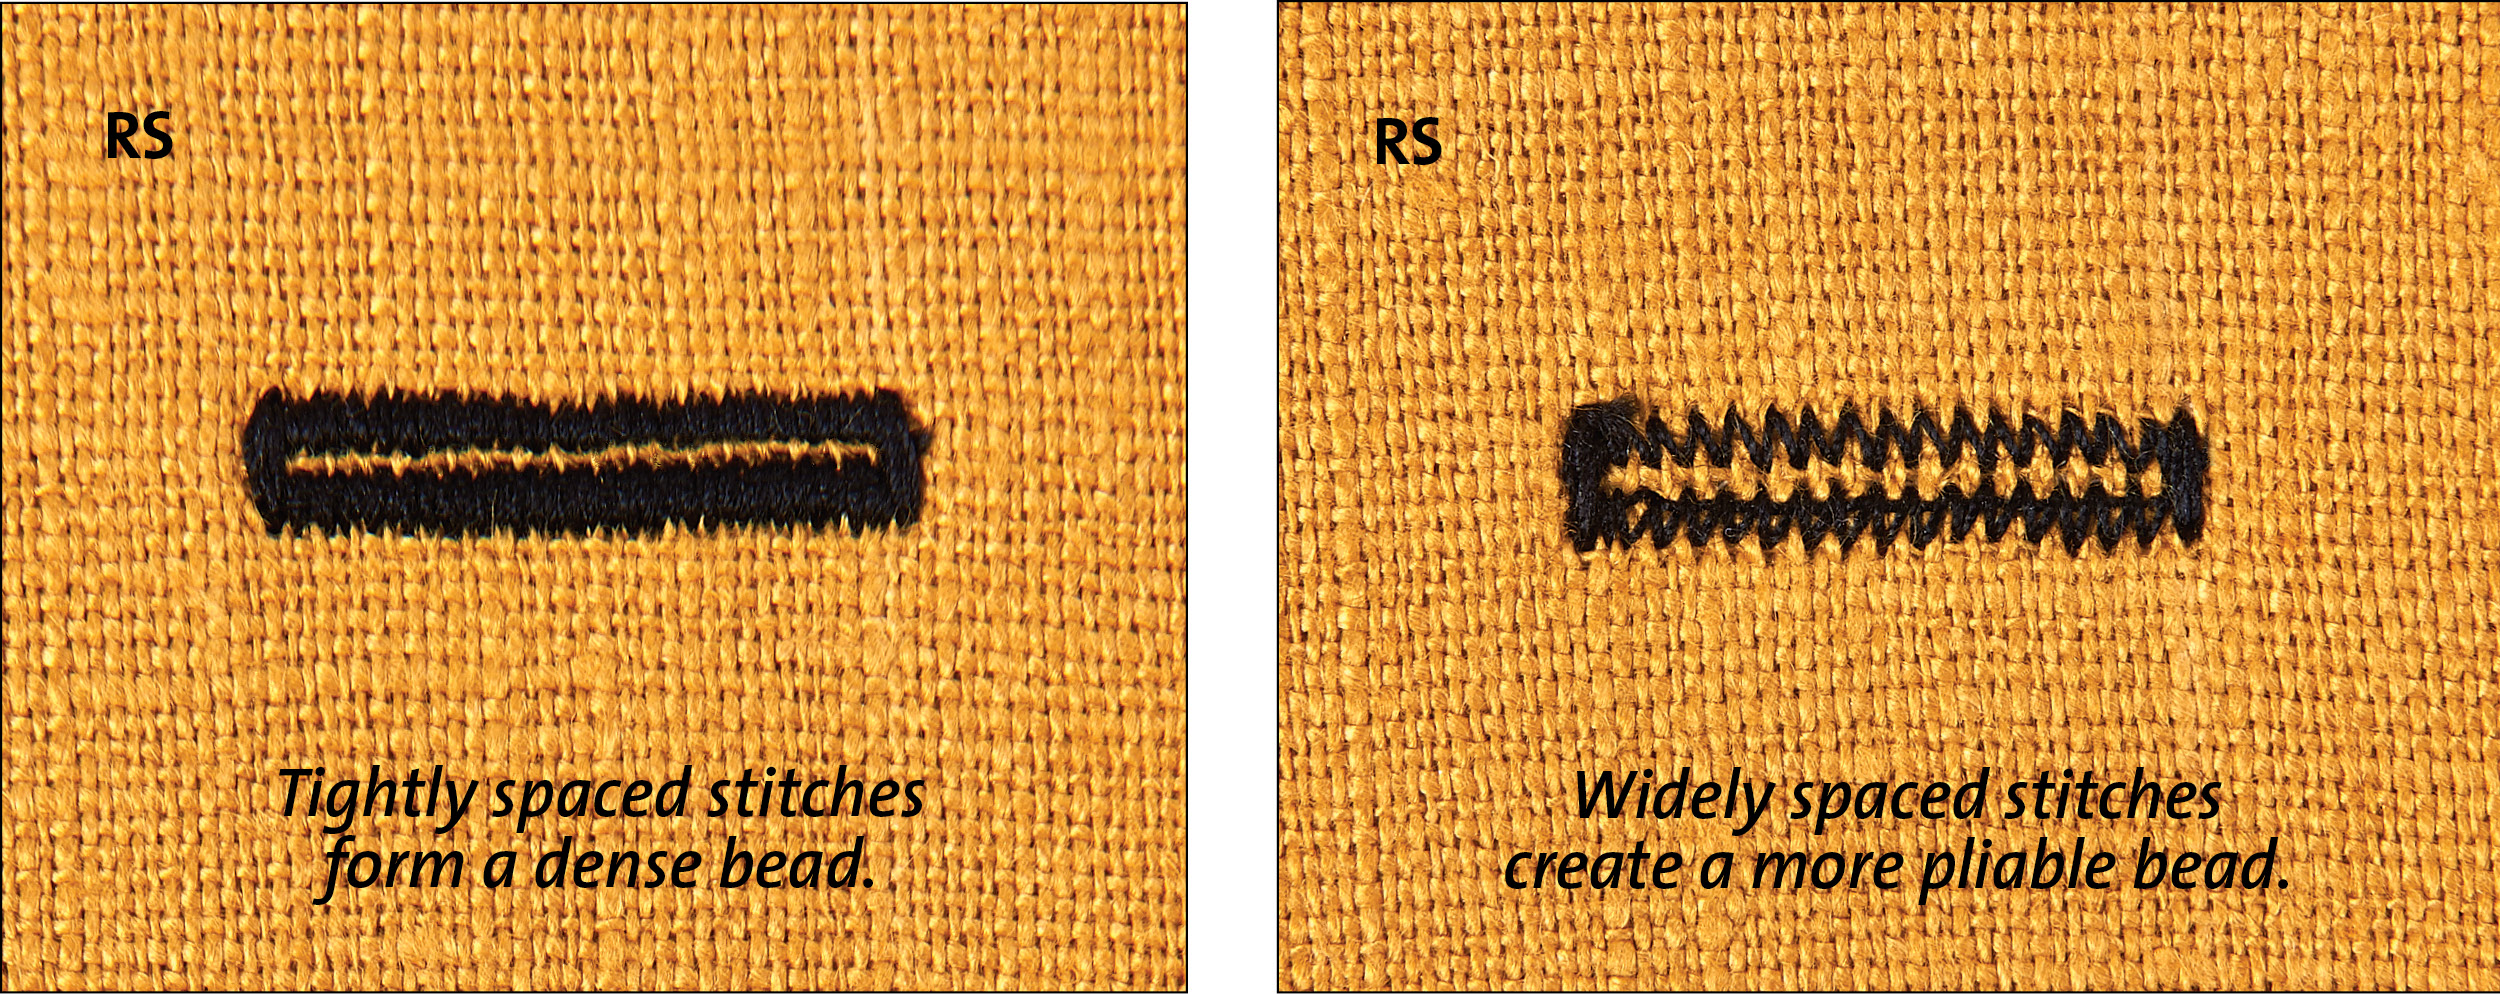
Stitch length: This affects the spacing between the stitches. Spreading the stitches makes the buttonhole more pliable and definitely looks more like ready-to-wear. Determining the right spacing takes some experimenting on your fabric.
Buttonhole-testing checklist
• Use the same fabrics and interfacings as your project.
• Sew through the same layers and in the same relation to the grain as the final buttonholes.
• Make more than one sample to ensure things work correctly.
• If you are making a buttonhole in a tricky place, such as at a collar stand’s end, experiment by starting one near a sewn seam or a bulky edge to make sure the sewing starts smoothly.
• Double-check that the buttonhole is the correct length. Cut open a sample buttonhole and insert the button. Adjust if necessary.
When all is perfect, check the top and bobbin threads in your machine. Make sure there is enough to complete all buttonholes for your project.
Plan for better results
Every sewing machine has its own personality when it comes to making buttonholes. The process and the mechanics vary between brands, but there are ways to improve the appearance and longevity of buttonholes sewn in any fabric.
Choose thread
For most buttonholes on woven fabrics, use a good-quality, 100 percent cotton thread. Cotton thread is slightly “fluffier” and fills in the buttonhole stitches for better overall coverage.
Use polyester thread when sewing buttonholes in knits and wovens with spandex. Polyester thread has a slight stretch that allows buttonholes to “give” as the fabrics move.
Compensate for fabric thickness
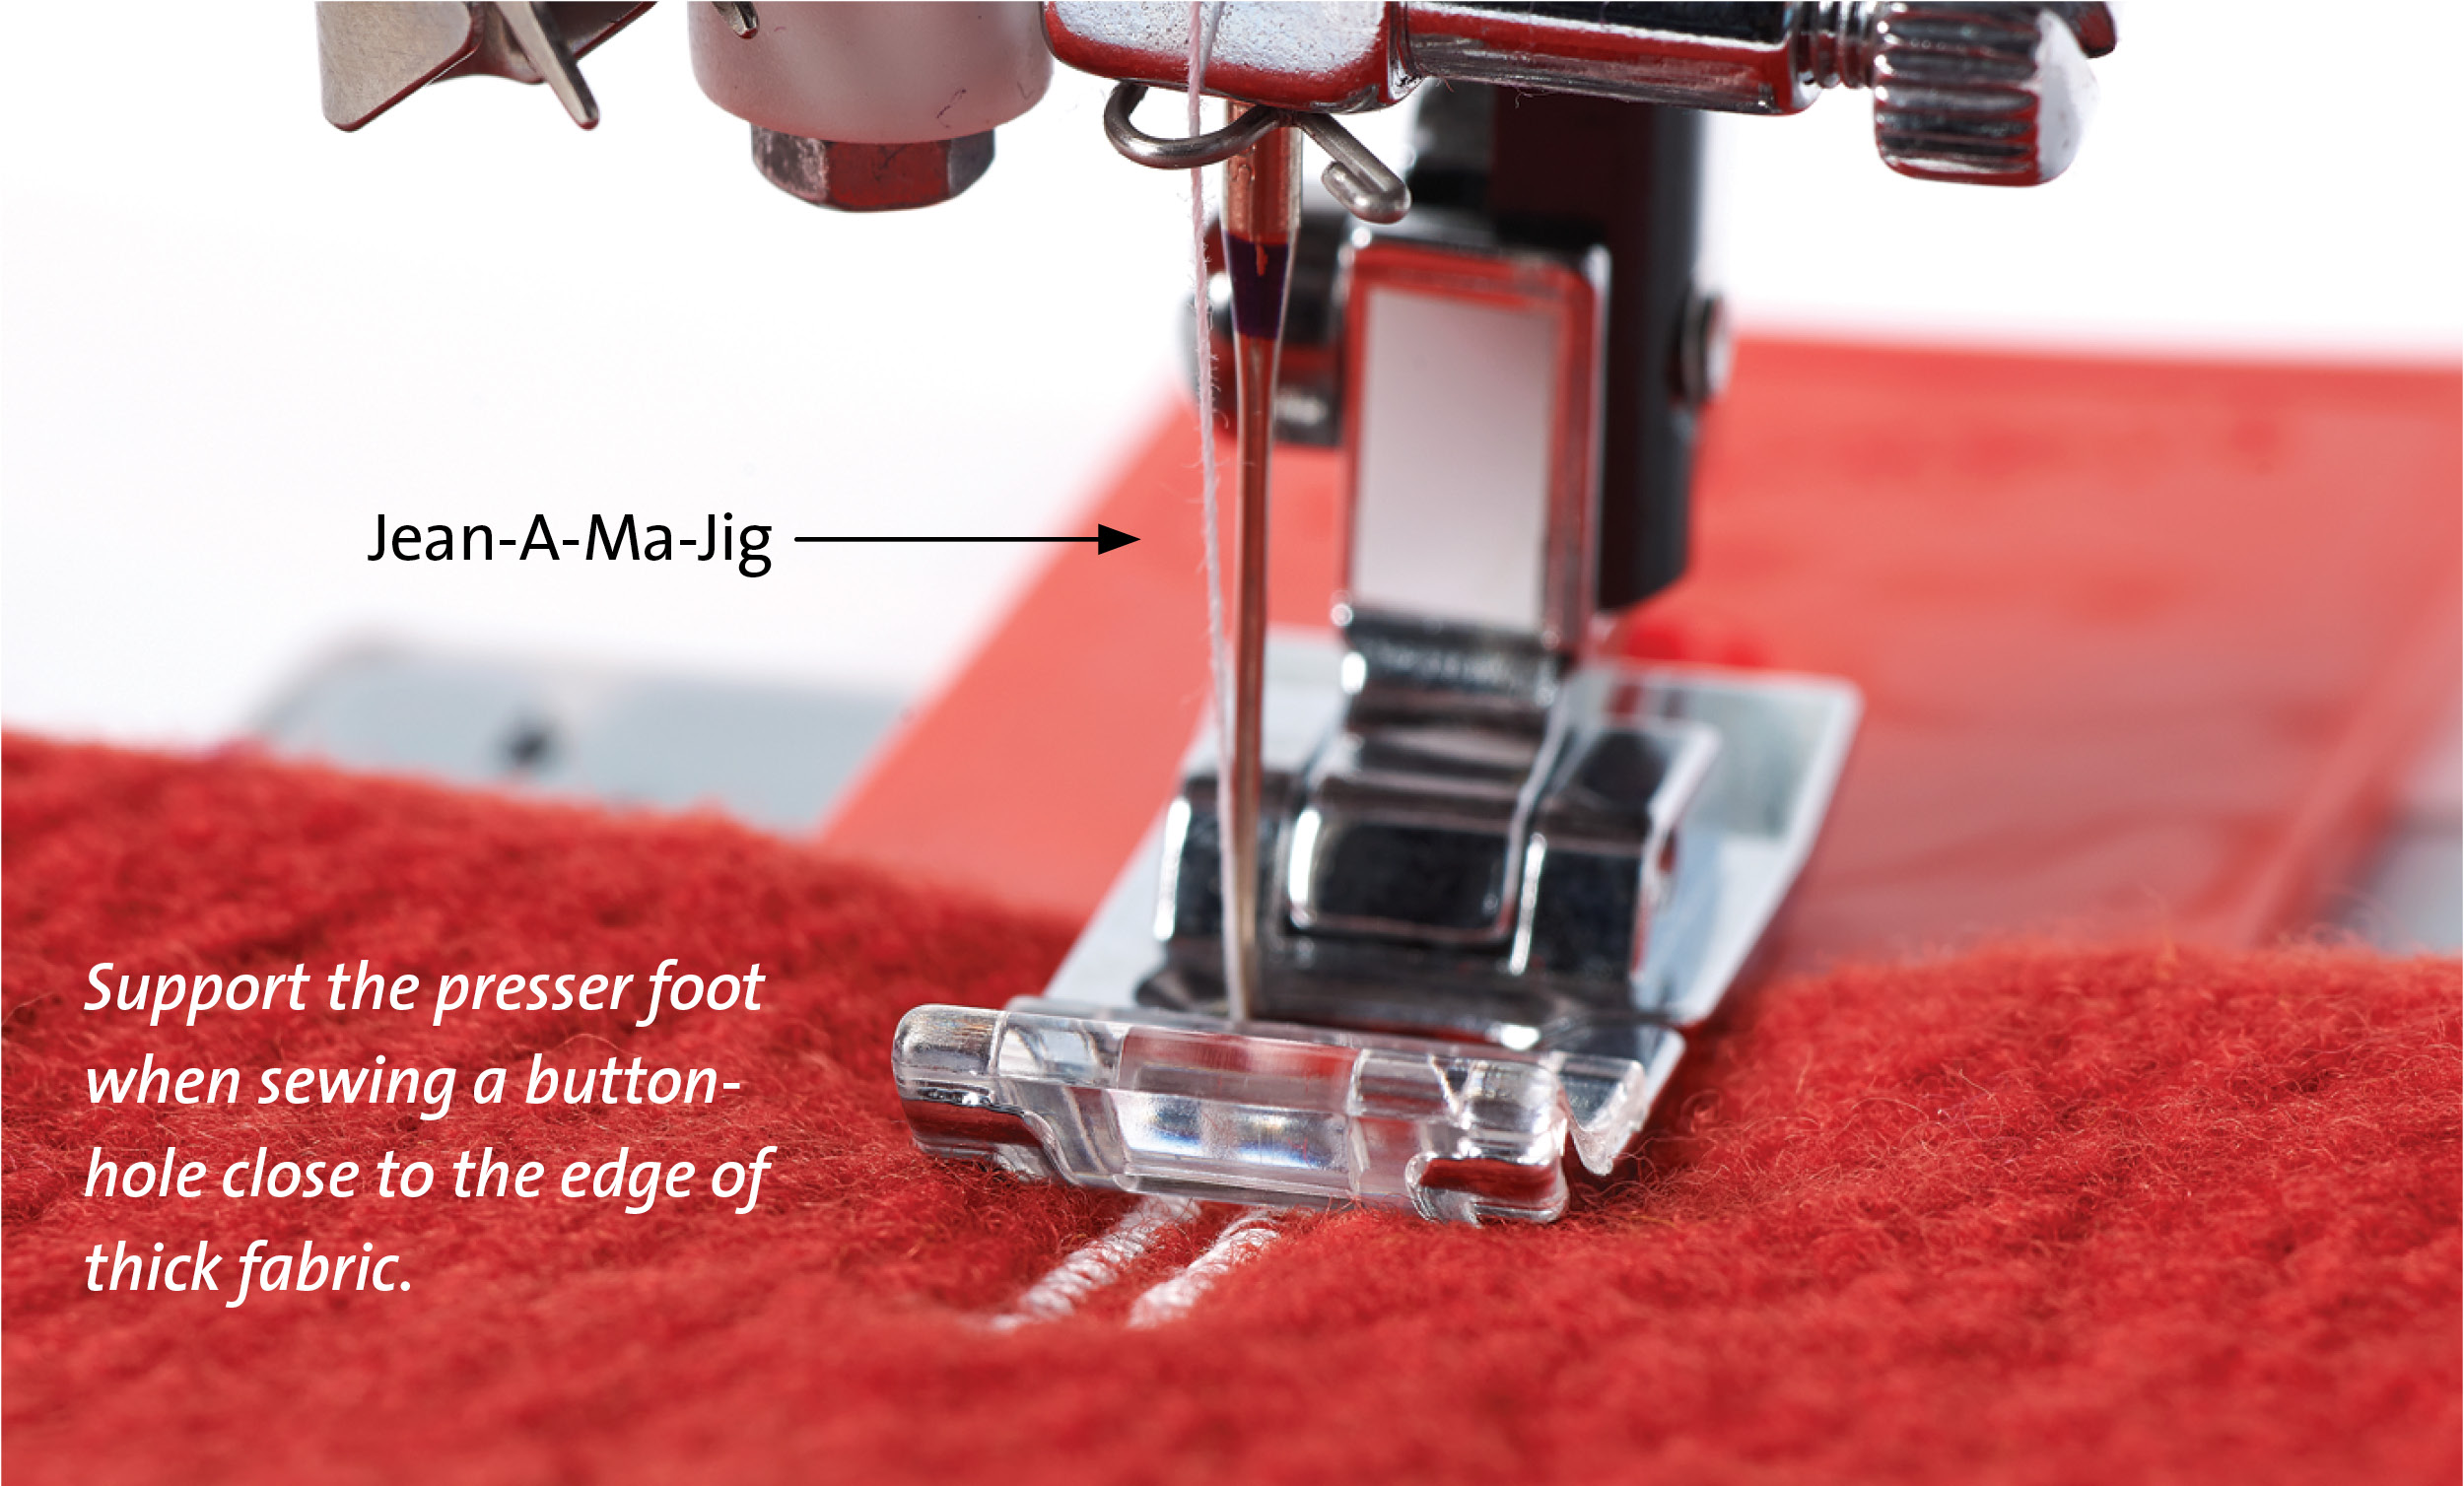
When a buttonhole is sewn at right angles to a seam or edge, particularly in a tight spot, use a height-compensating plate. Place it under the presser foot’s heel to level the foot for even starting and feeding as you sew. A folded piece of paper stacked to the height of your fabric works well, too. Alternatively, the Hump Jumper, Jean-A-Ma-Jig, and The Buttonhole Buster devices are available for any machine from independent retailers. You can use an all-purpose foot, as shown, but a buttonhole foot has a groove beneath to fit over the stitching.
Consider seam sealants
If the width between the beads is correct, no sealant should be needed. Occasionally, if a fabric ravels significantly or the cutting tool has not made a clean cut, you may need to seal the cut edge.
Seam sealants behave differently on different fabrics, so test first; look for transparency, care requirements that match those of the garment, and a supple hand. Two products to try are Fray Check by Dritz and June Tailor Fray Block.
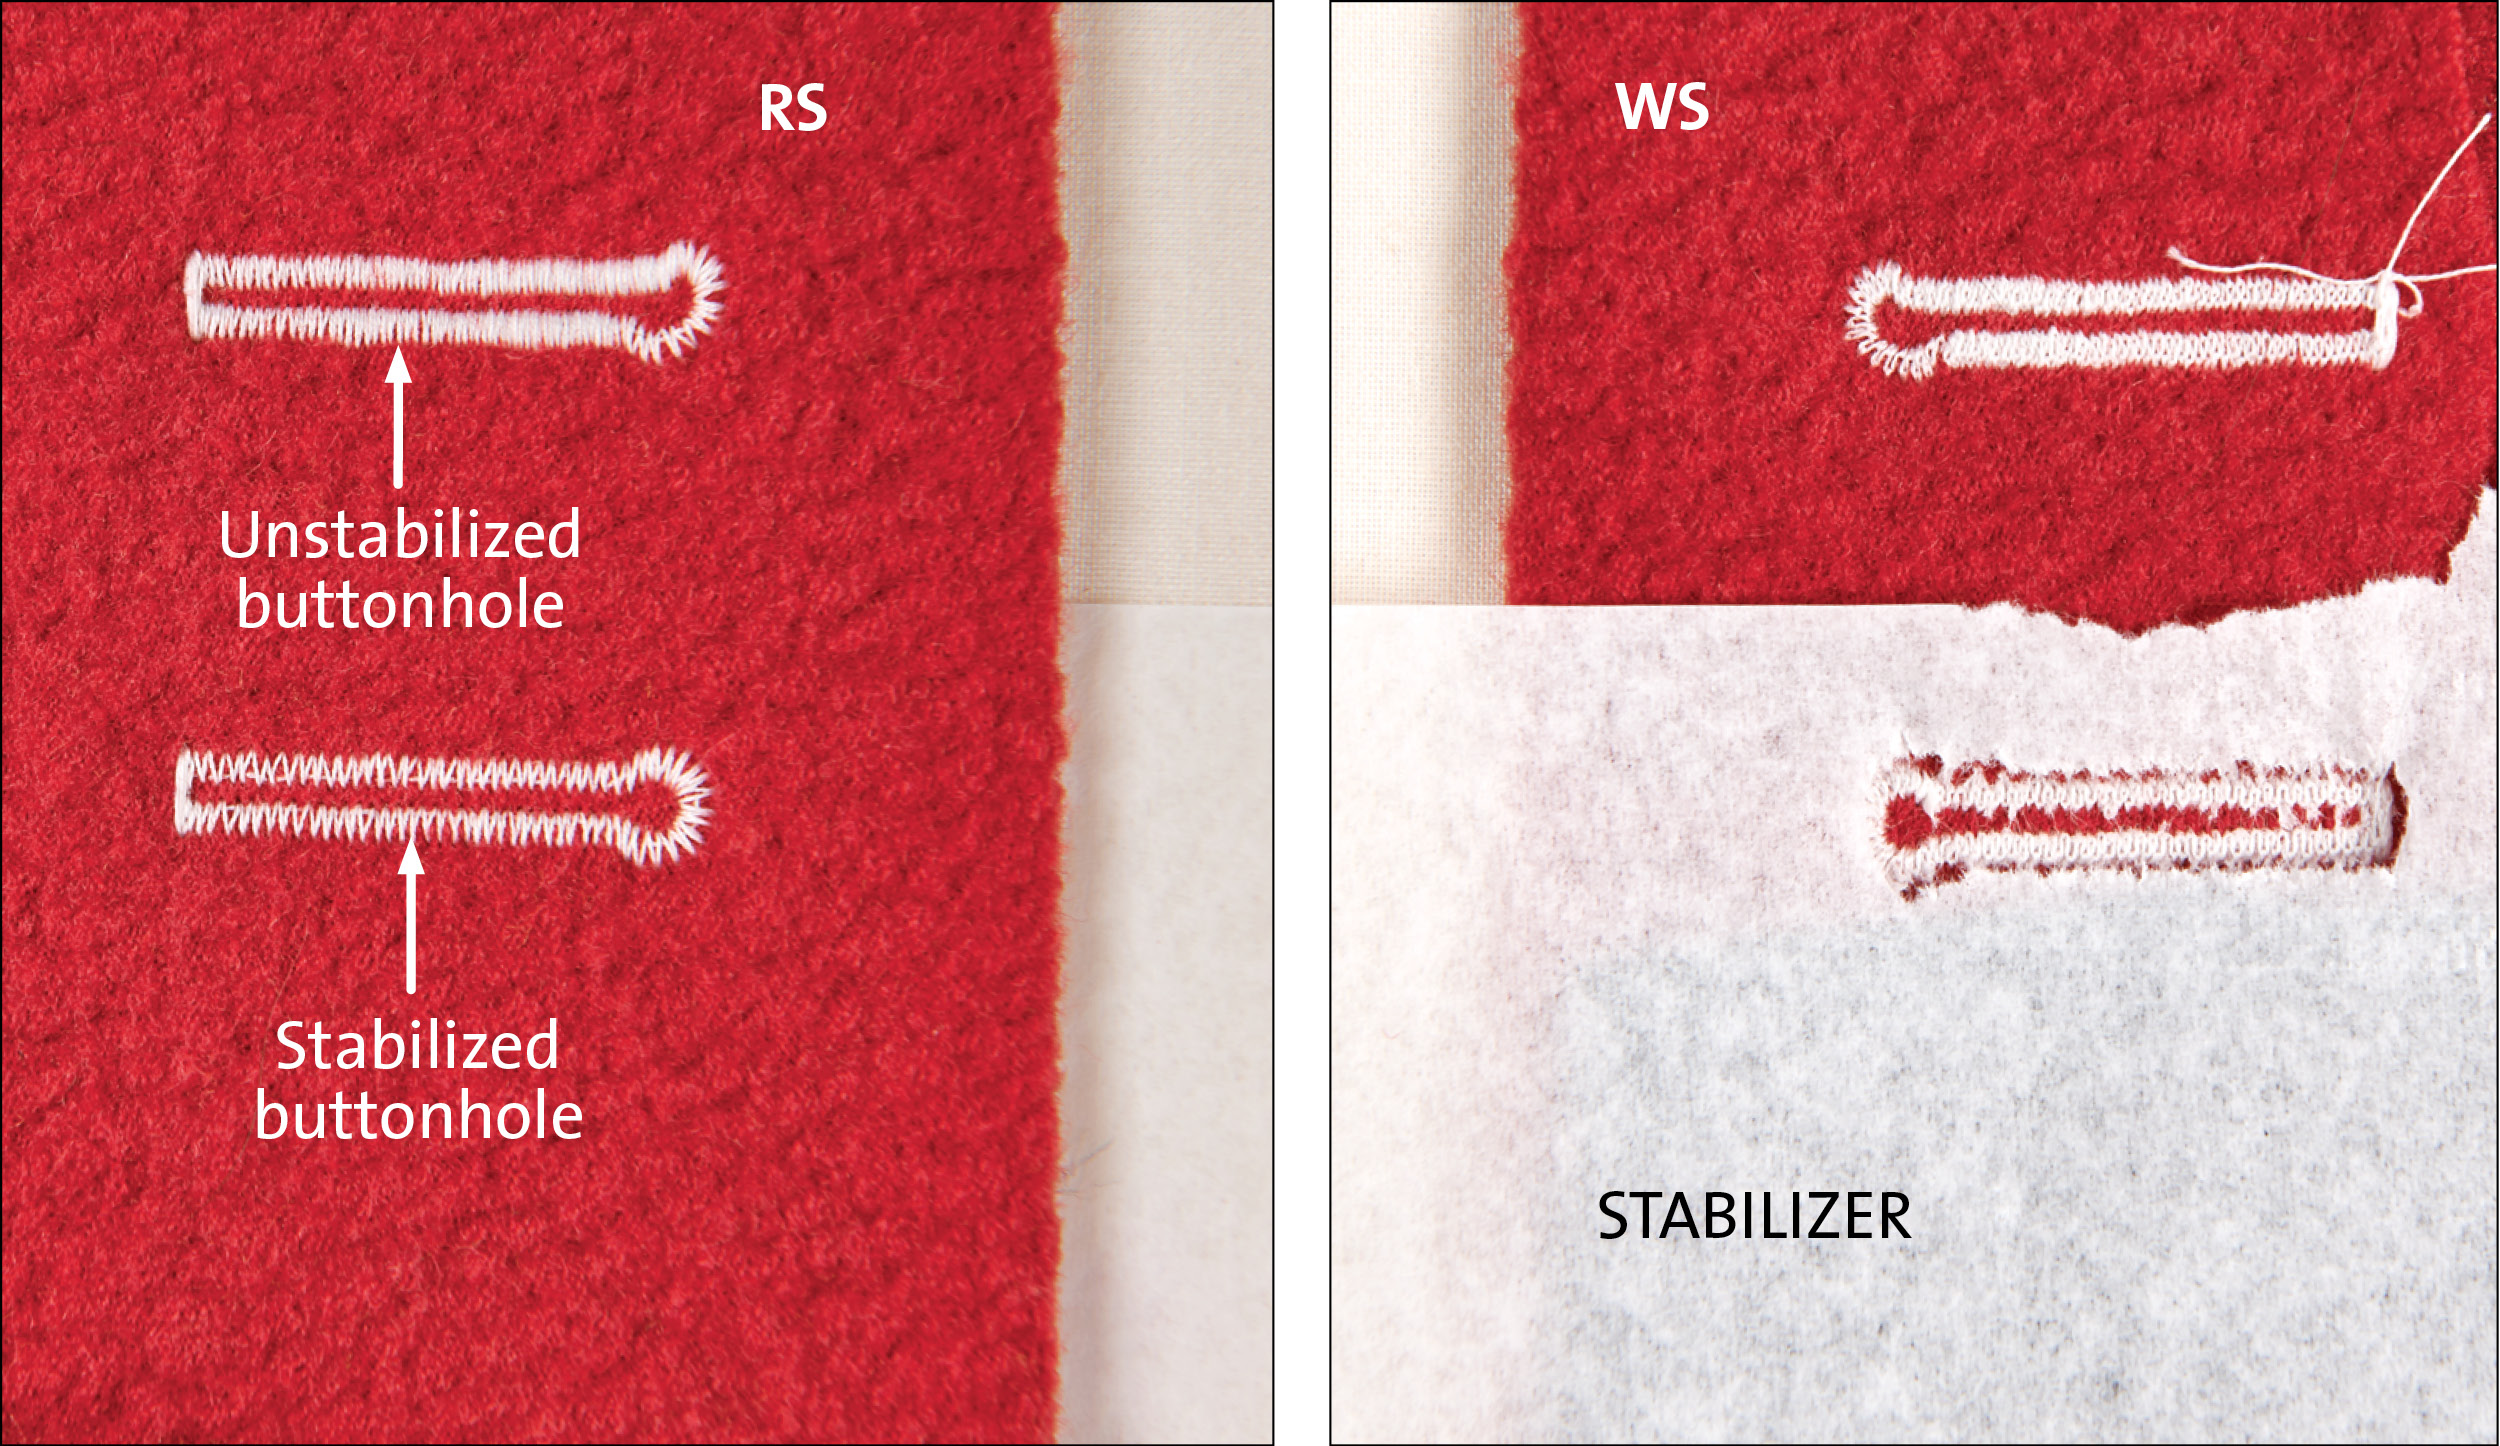
Pick a stabilizer
For best results, always sew buttonholes in an area that is interfaced with the appropriate material for your fabric. In addition, other stabilizer layers may be needed. This is determined in the testing process. In most cases, using paper or a tearaway stabilizer underneath is enough to keep the buttonhole from tunneling under the bar tacks. For thick and fluffy fabrics, try using various weights of embroidery stabilizers. On fine fabrics, such as silks and sheers, use a see-through stabilizer and paper on the bottom. Experiment to find the best combination for your fabric.
Program buttonholes
One of the most delightful features of computerized embroidery sewing machines is that buttonhole size and placement can be programmed. You can program the machine’s embroidery software to sew all buttonholes in one large hoop, in a single sequence. This ensures perfect placement for every buttonhole (assuming you start at the correct spot). This feature is especially useful if you plan to make the same garment multiple times.
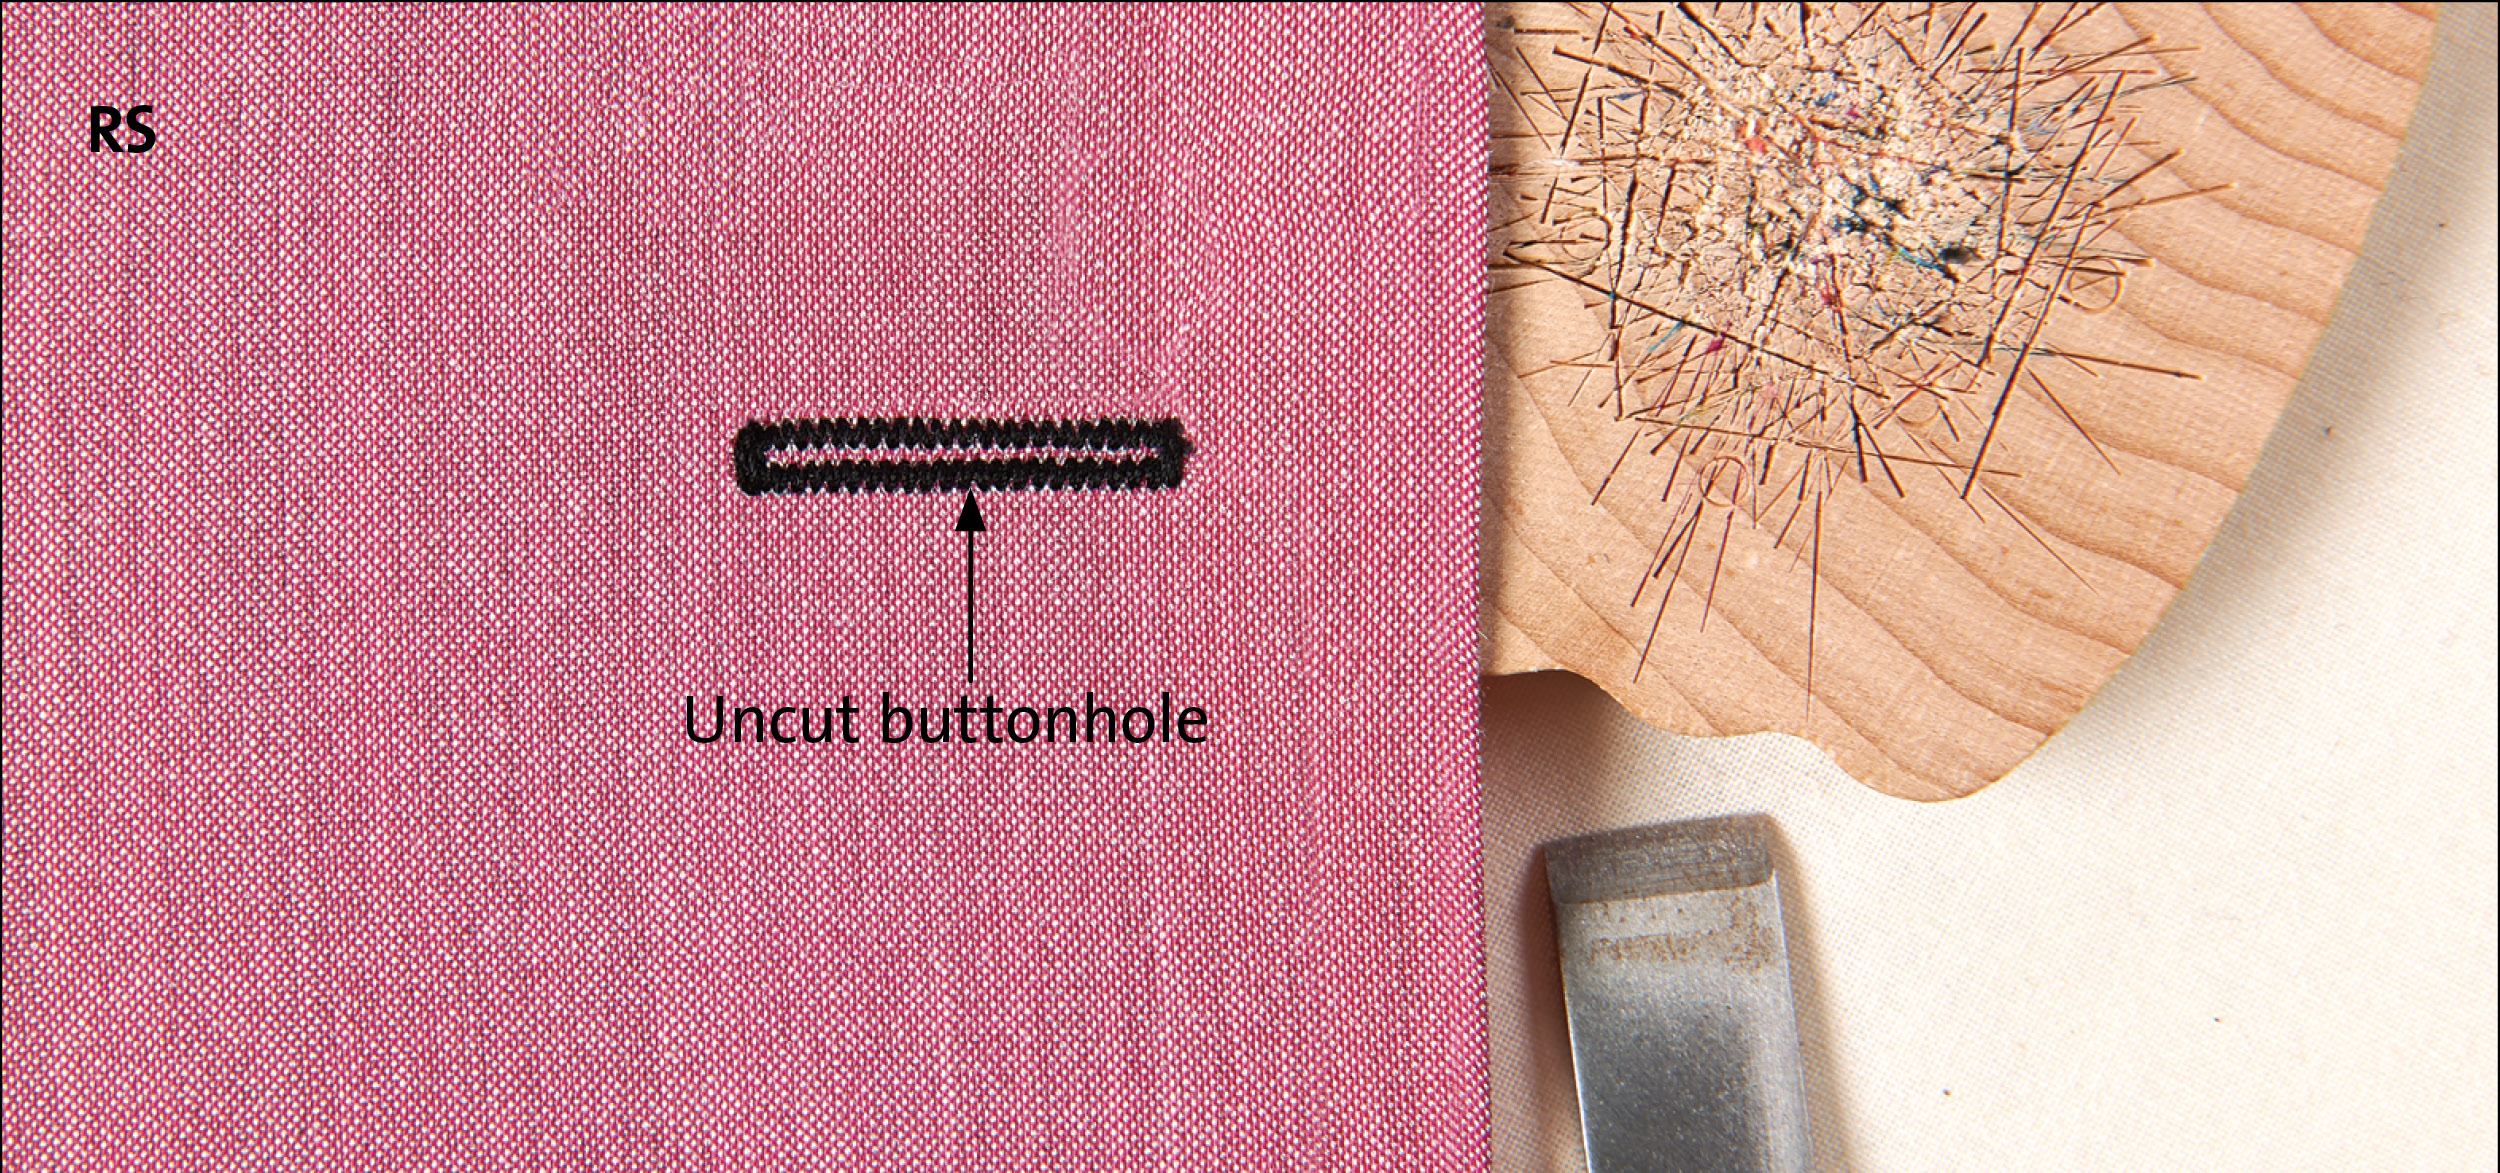
Cut open a buttonhole
Cutting is the most intimidating step in the buttonhole-making process. You can use a seam ripper or a buttonhole cutter and wood block.
Seam ripper
1. Place a pin perpendicular to the beads and just within each bar tack. The pins act as “fences” to prevent the seam ripper from cutting through the bar tack and the fabric beyond the buttonhole.
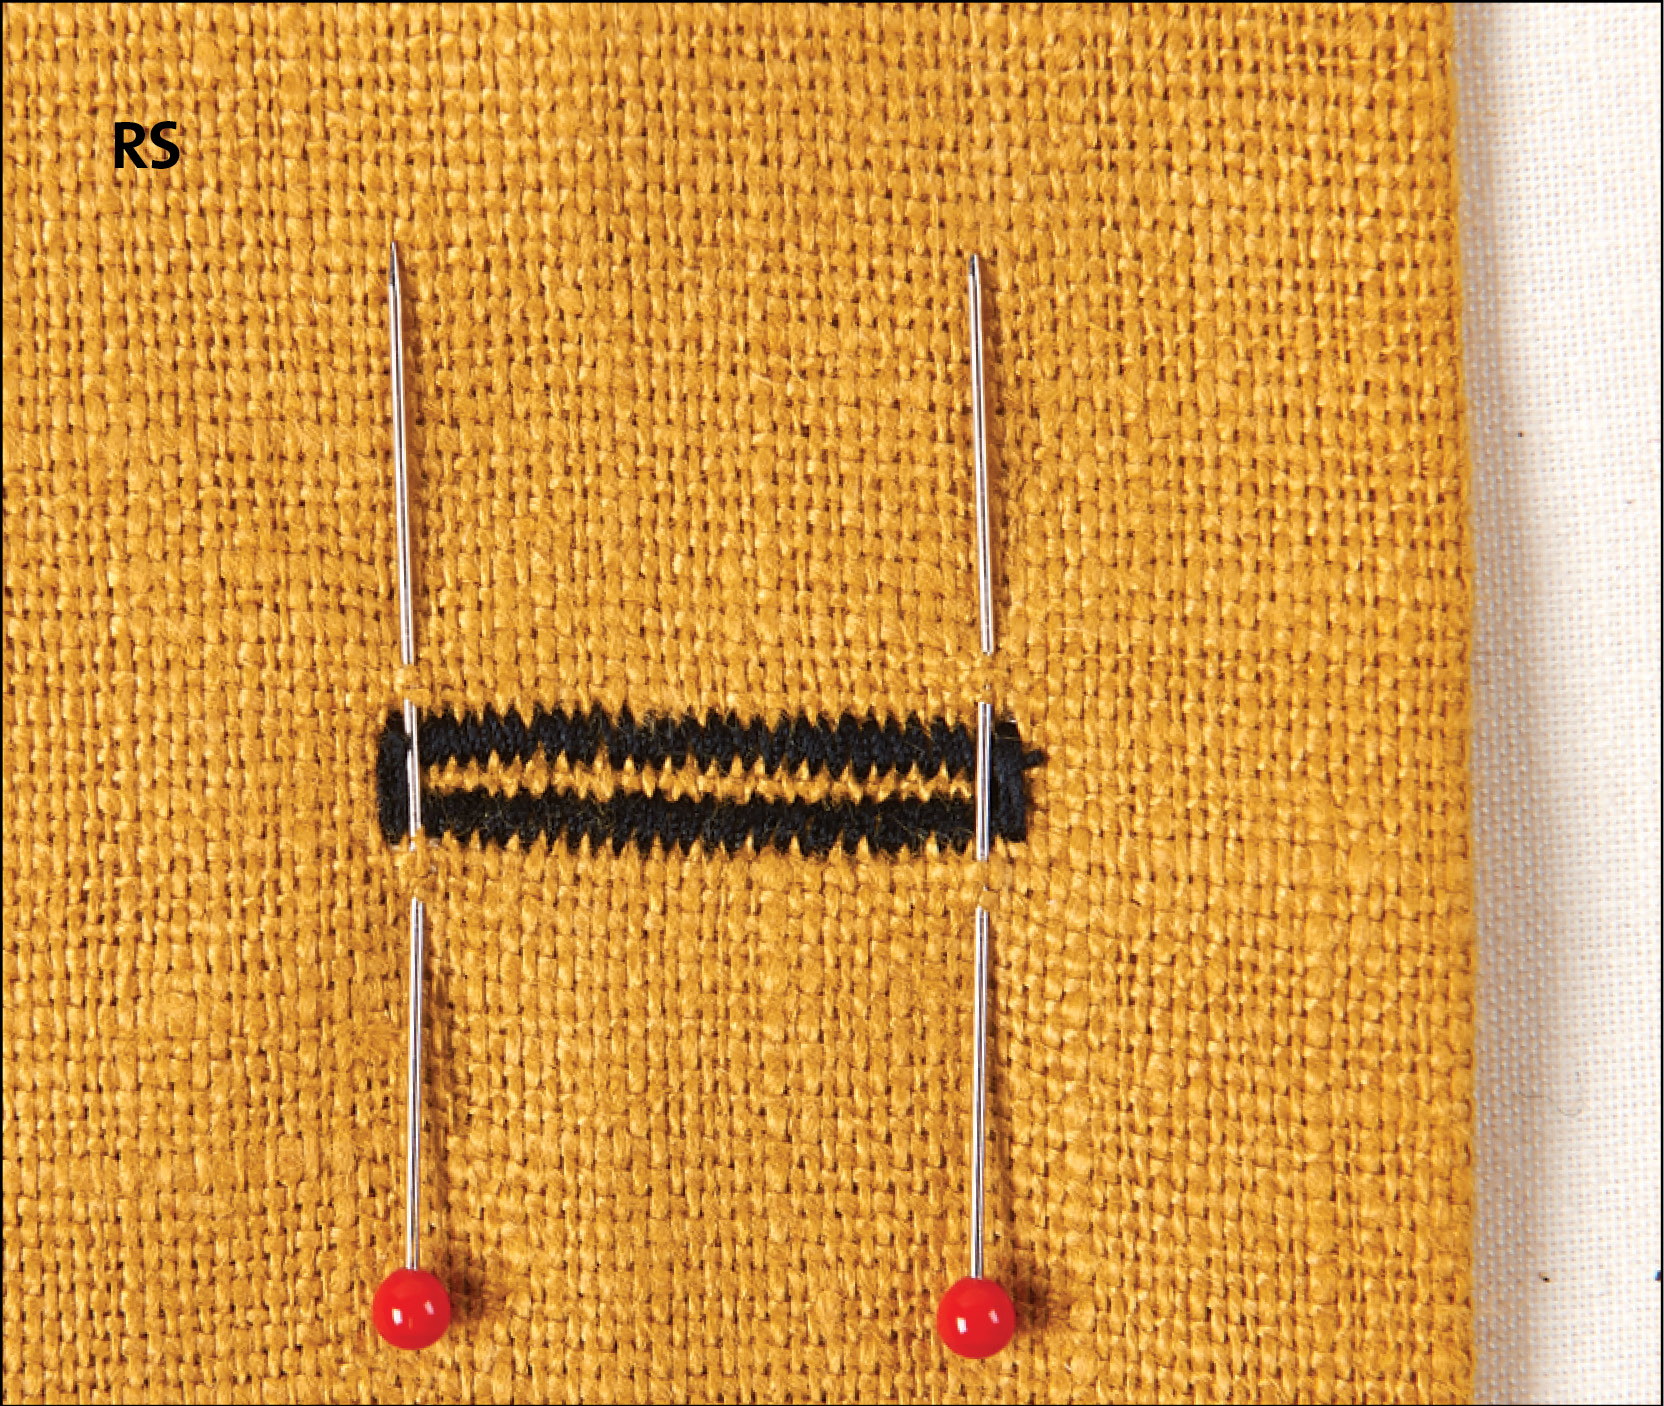
2. Start at one end and cut between the beads toward the other end of the buttonhole. The pin prevents you from cutting through the bar tack.
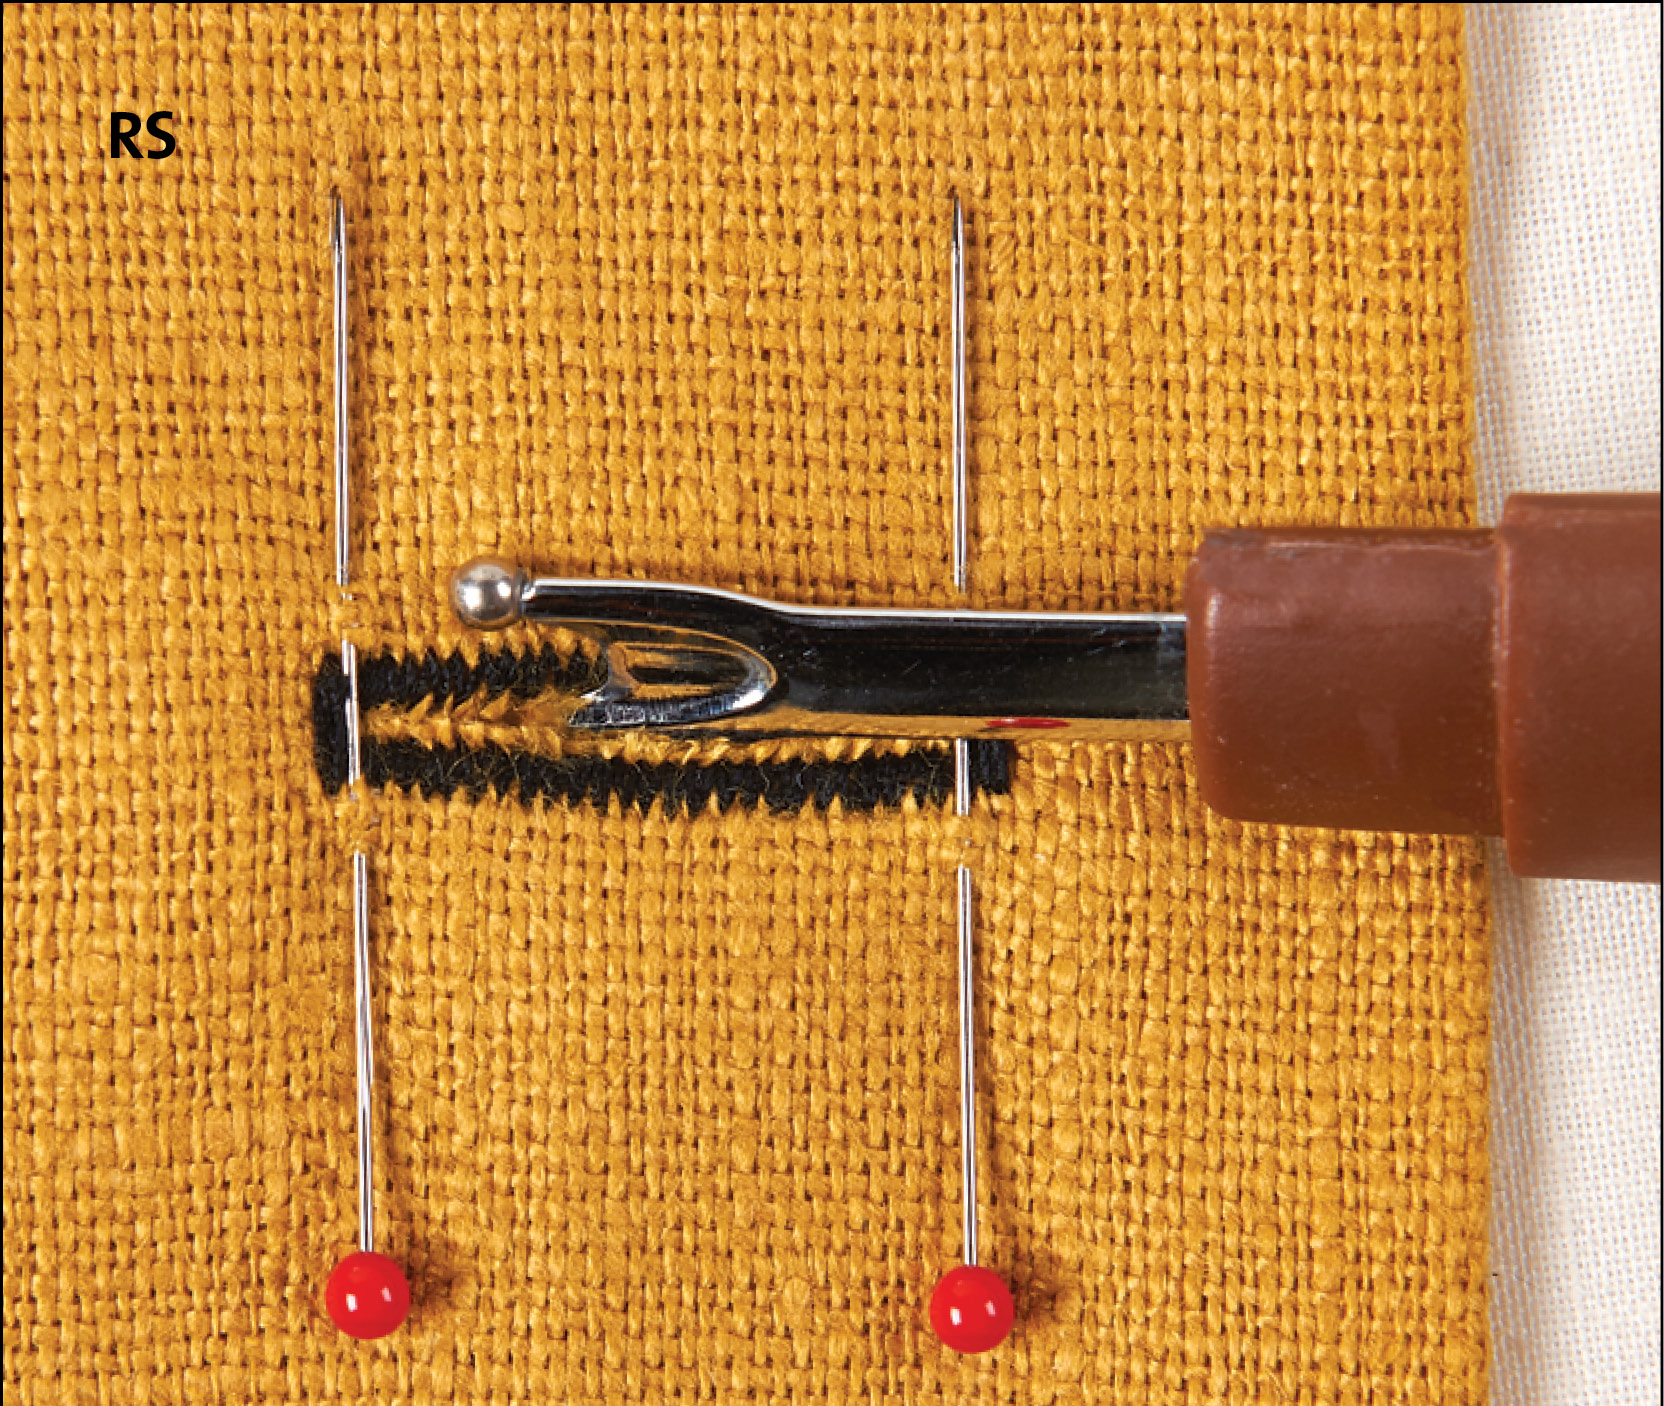
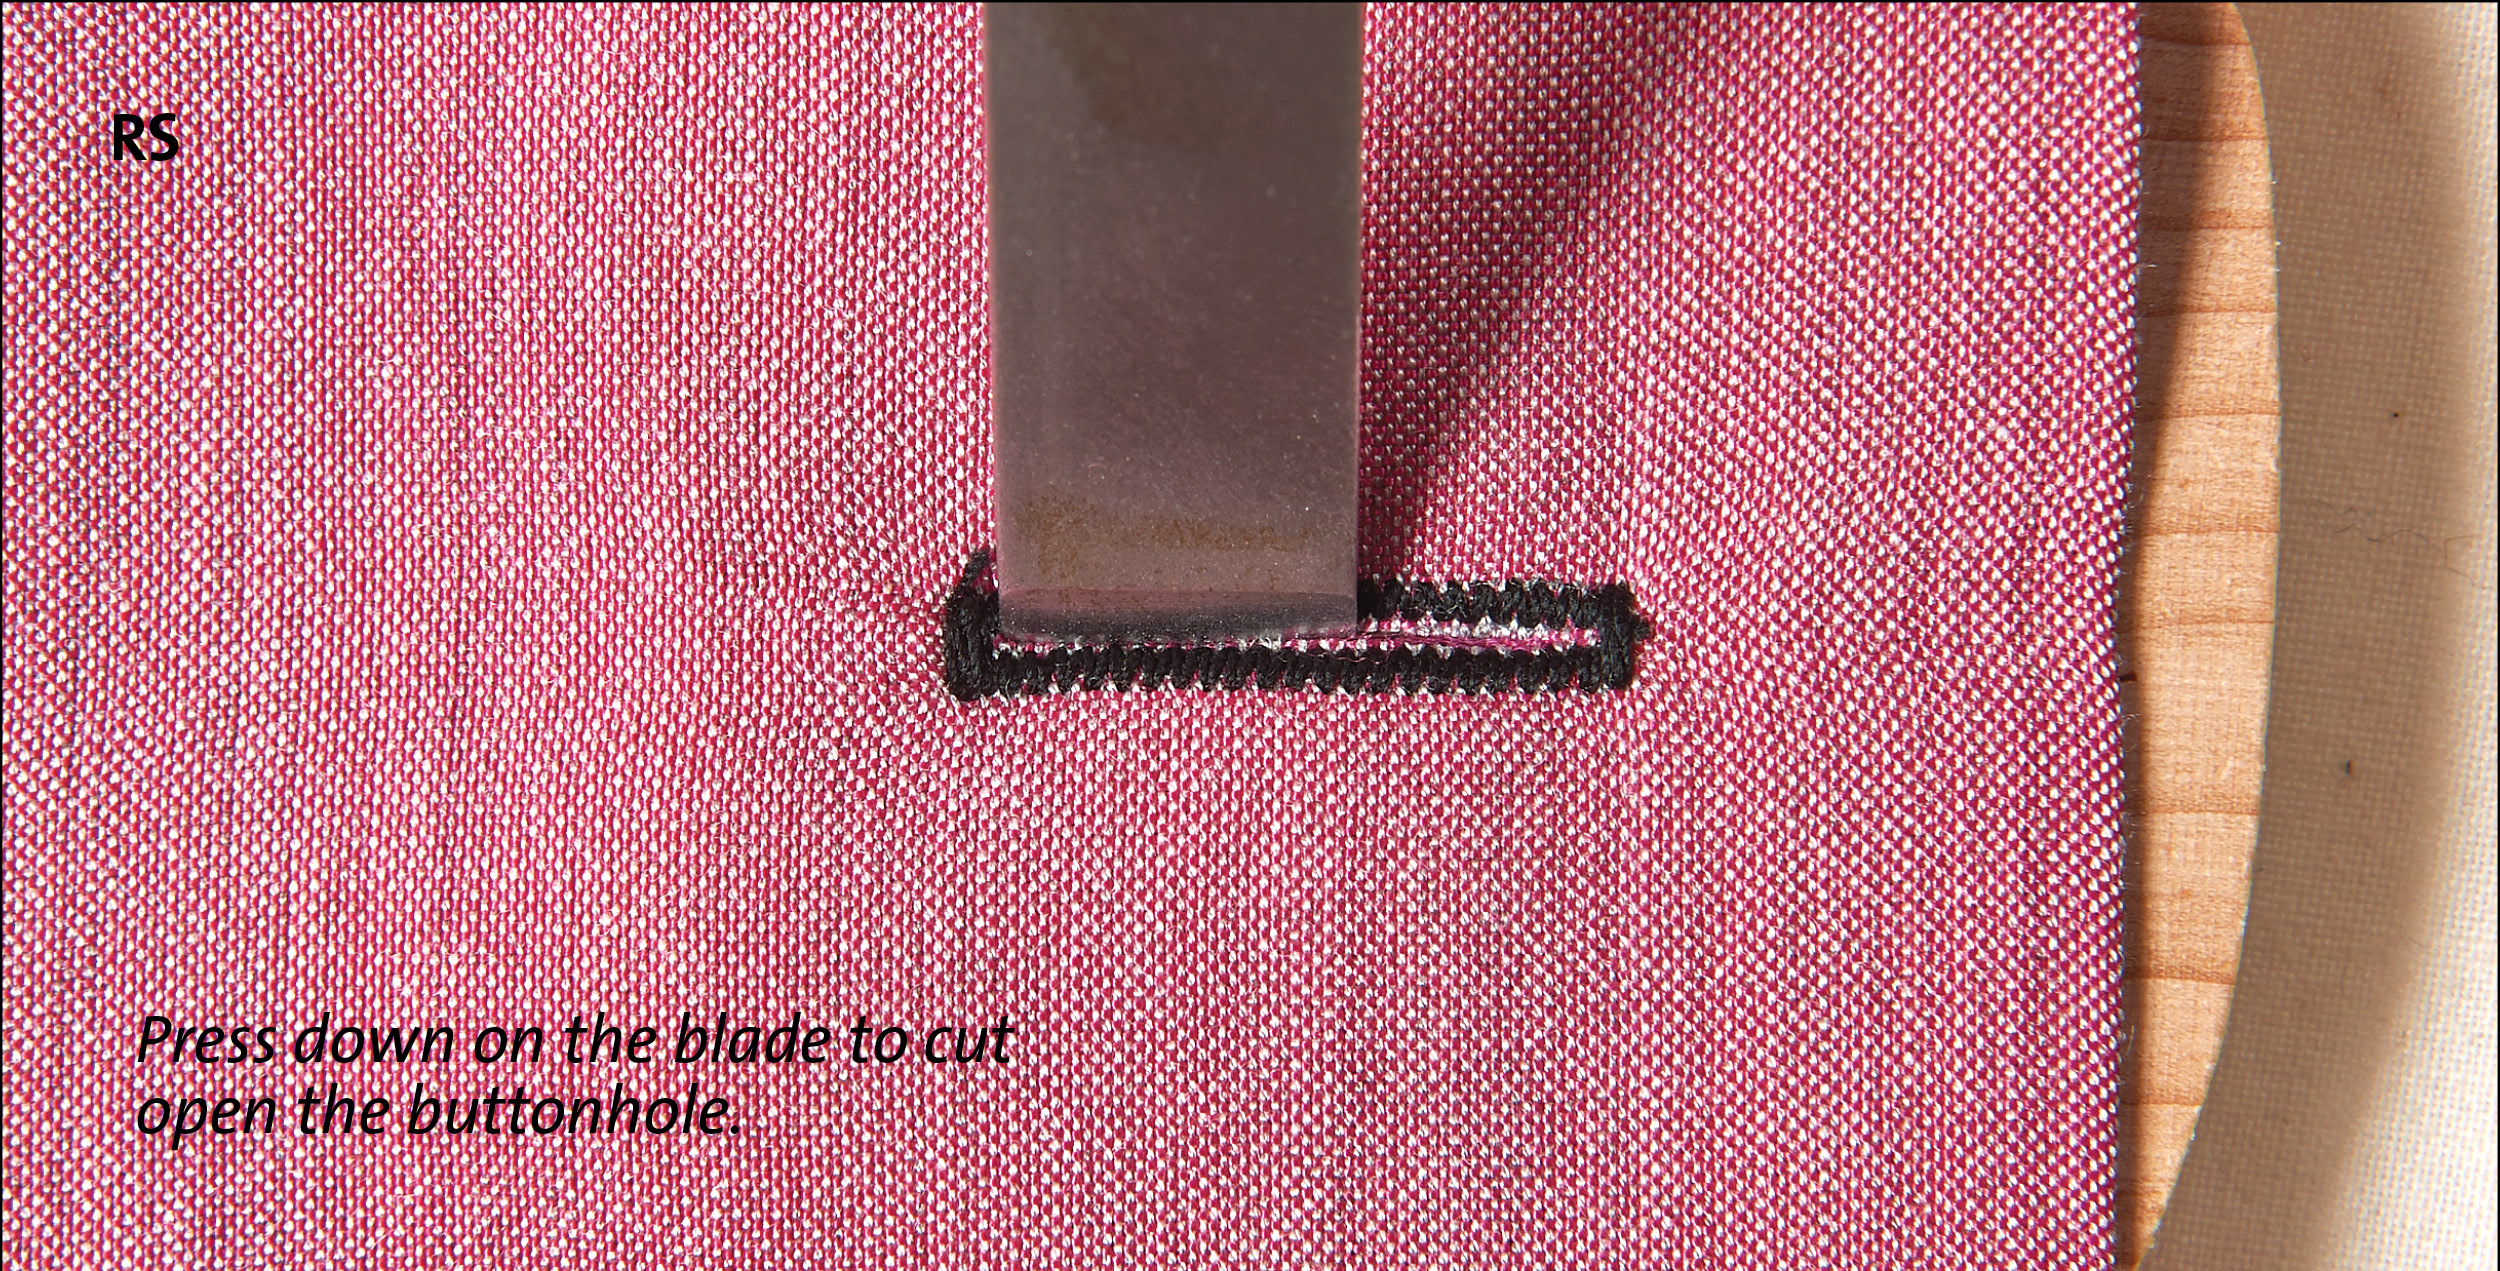
Cutter and wood block
1. Place the uncut buttonhole on the wood block. The cutter is a chisel-like blade, wedge-shaped to cut precisely between the beads. The wood block protects your work surface from the cutter.
2. Place the cutter blade parallel to and between the beads. Press down firmly, slicing the fabric cleanly with the cutter. Be sure to use a sharp cutter, and place it carefully.
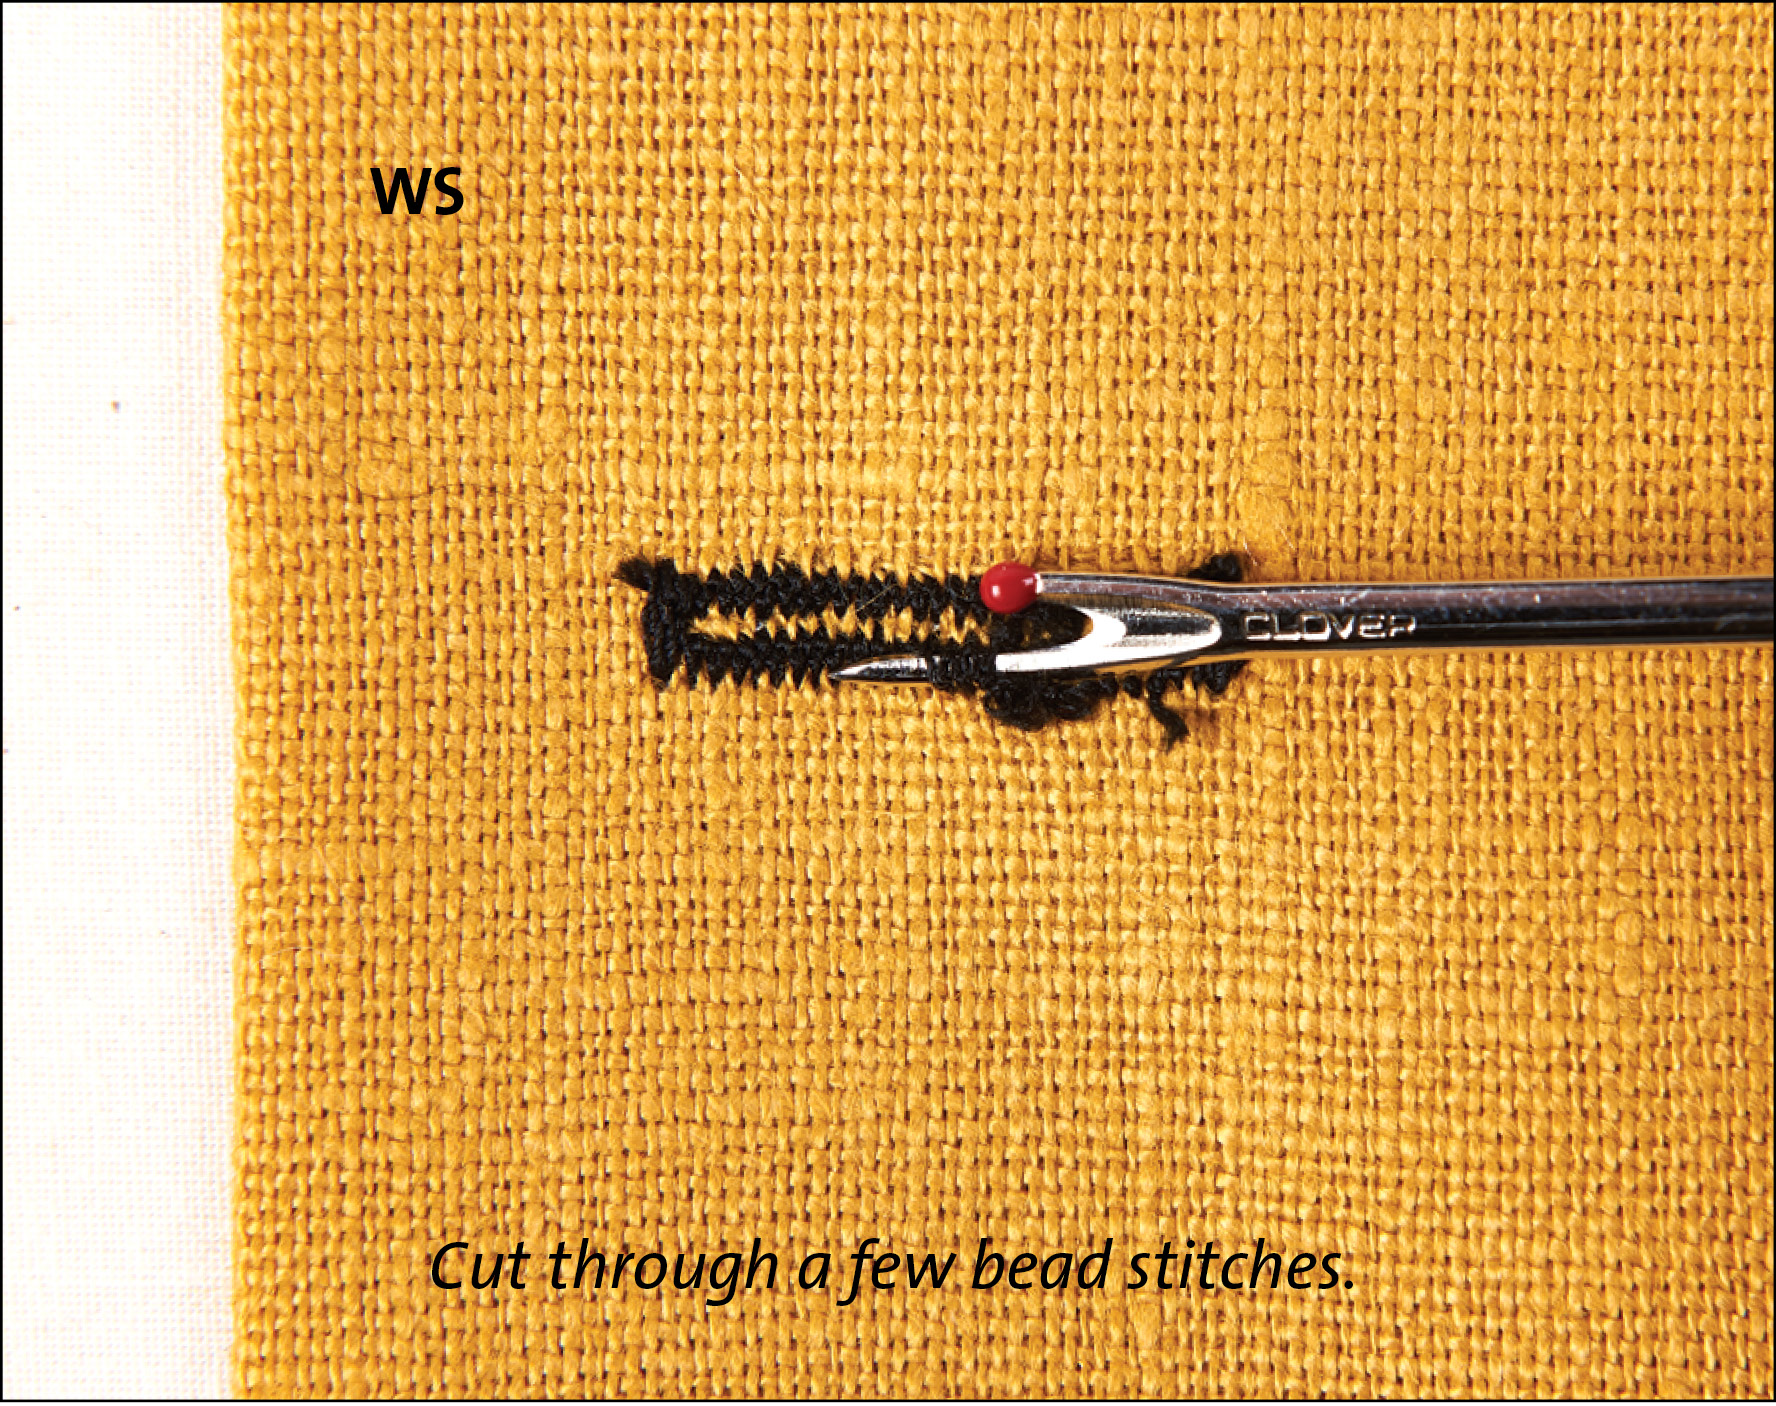
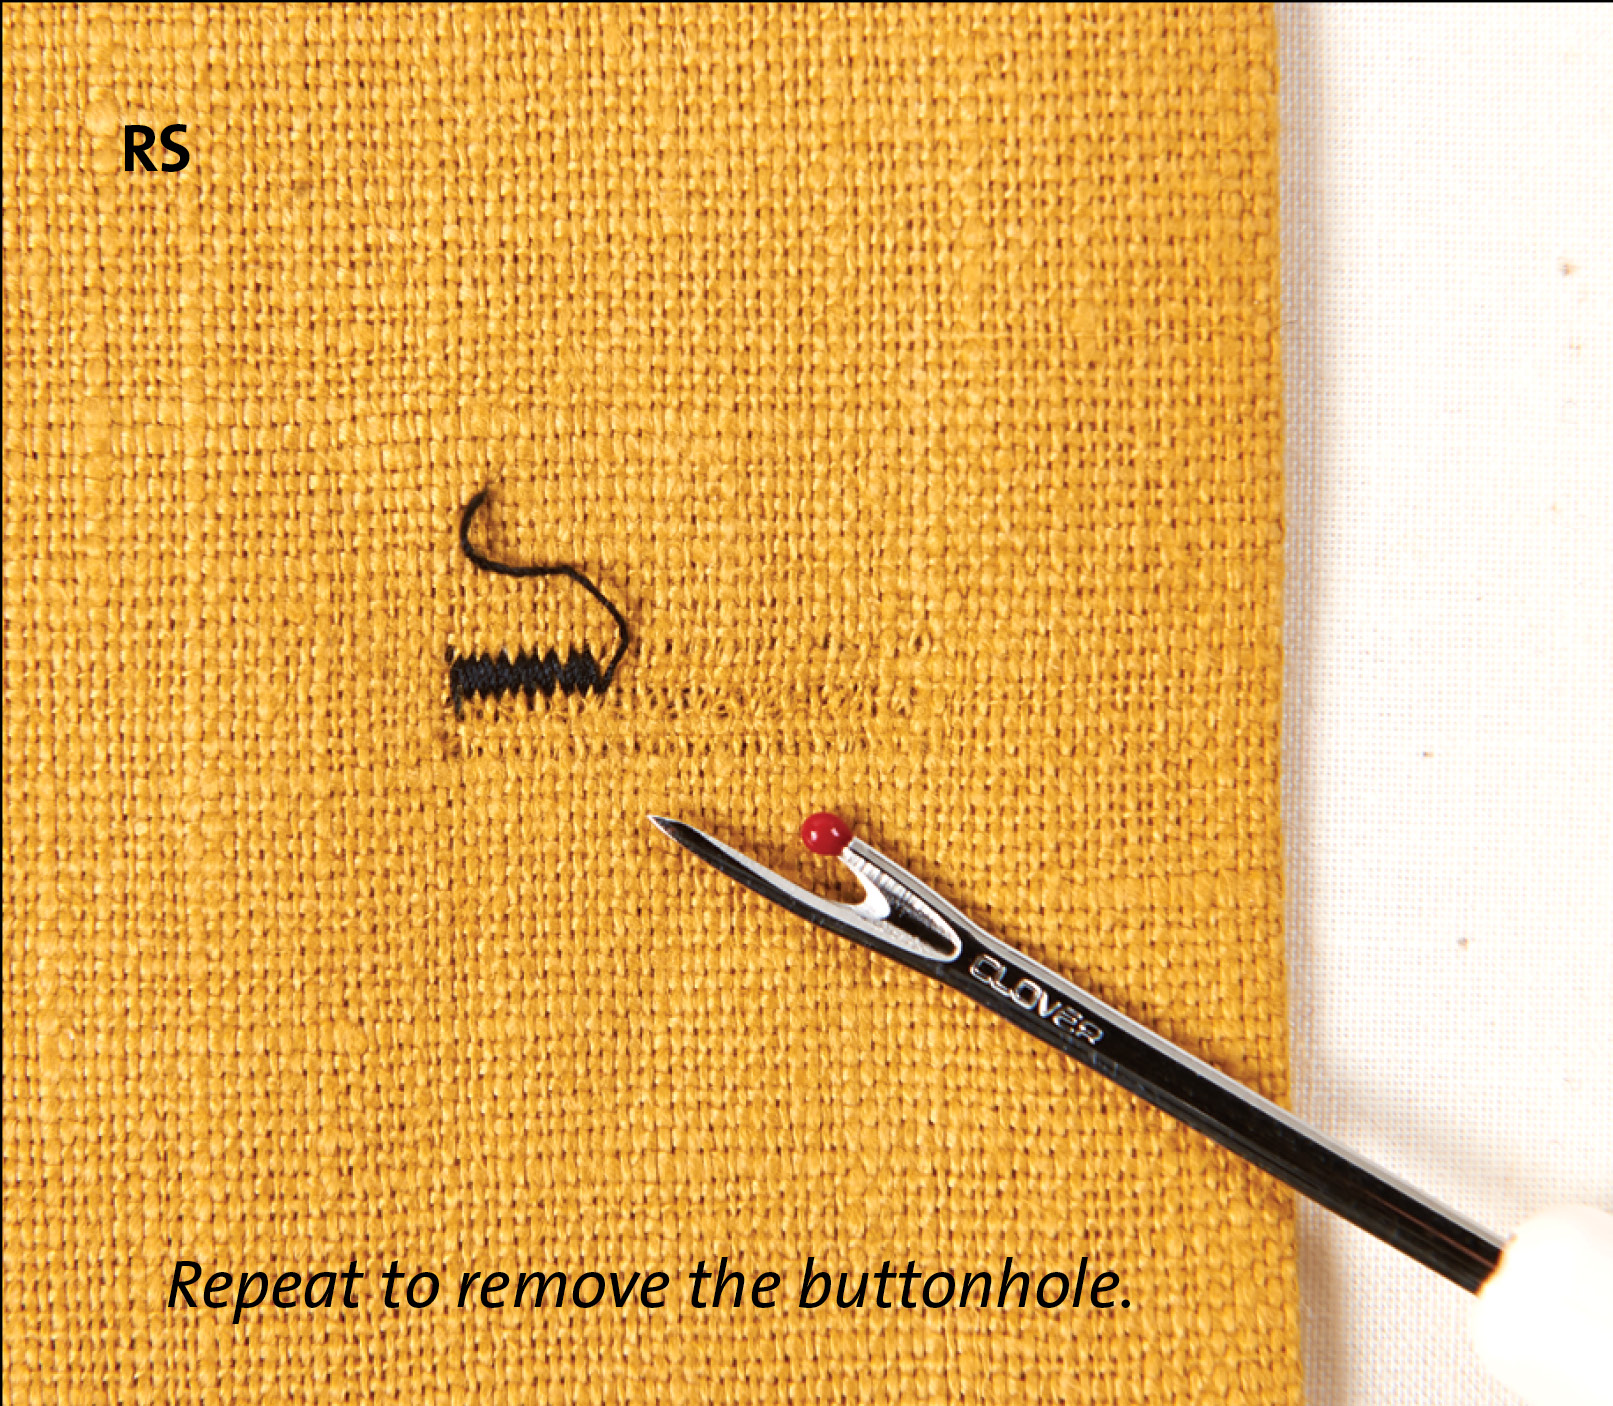
Rip out buttonhole stitching
Many sewers dread making buttonholes because they don’t know what to do if one turns out badly. The trick to removing the stitching of an unsatisfactory buttonhole is to use caution and a fine, sharp seam ripper. Try a 482/W seam ripper by Clover.
1. Start on the garment’s wrong side. Slip the ripper’s point under a few stitches, cutting them along one bead.
2. Use the ripper’s point to pull the cut stitches loose from the right side.
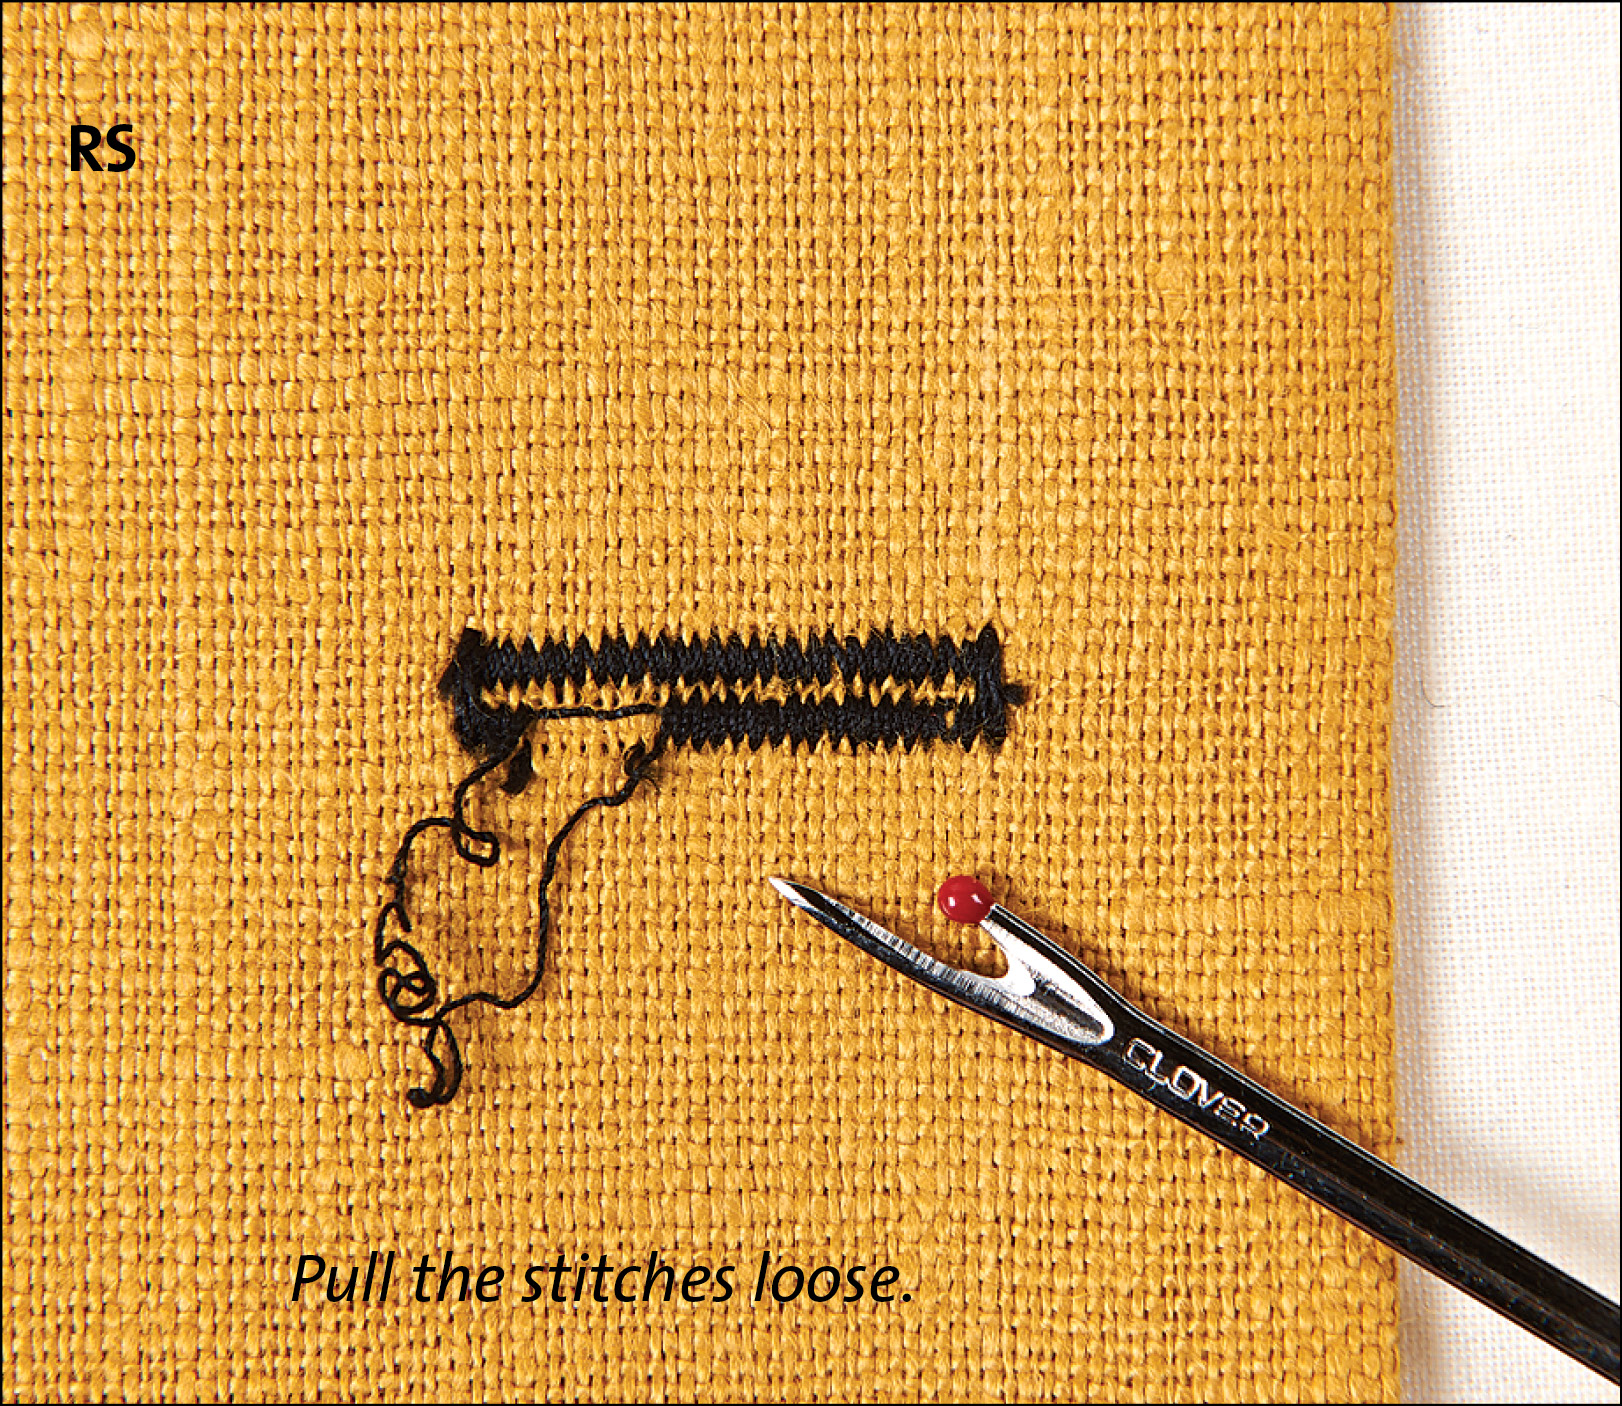
3. Repeat steps 1 and 2. Remove a few stitches at a time until all are removed.
Sources
You can find the products mentioned in this story online.
Jean-A-Ma-Jig, Hump Jumper, or Buttonhole Buster: JoAnn.com, SSNDesigns.com, SewForLess.com
Fray Check by Dritz: Dritz.com, JoAnn.com, KMart.com
June Tailor’s Fray Block: JuneTailor.com, Amazon.com
Clover 482/W seam ripper: Clover-USA.com, Sewing
MachinesPlus.com
This article by Linda Lee was published in Threads #168, Aug./Sept. 2013. Linda teaches sewing techniques across the country and designs the Sewing Workshop pattern collection. Find out more at SewingWorkshop.com.
Photos: Sloan Howard. Illustration: Gloria Melfi.


Putting a thin bead of fray check along the cut line before cutting helps with fraying later, especially after laundering.