
Create Precise Edges on Collars and Lapels
An improved process keeps seamlines out of sight

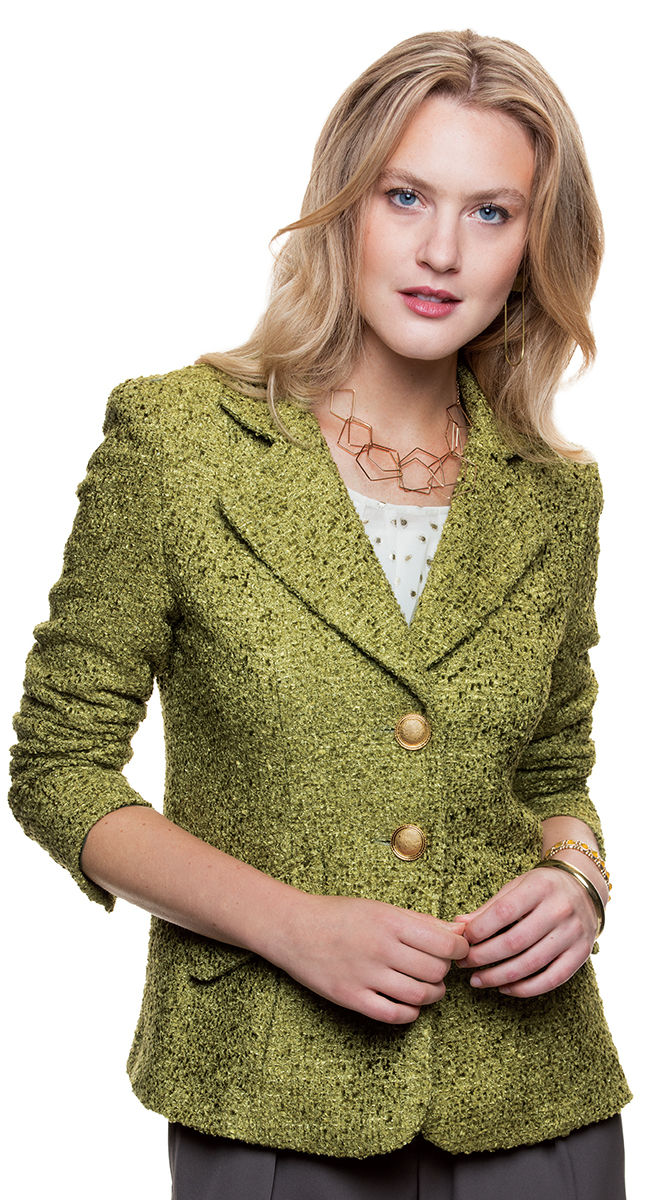
A high-quality collar and lapel can make any jacket appear to be a designer garment. Precise edges of these details enhance a jacket’s overall appearance.
When using traditional sewing methods, it is difficult to ensure that the seamlines roll out of sight, while
defining a sharp contour around the collar and along the lapel above and below the roll line.
I’ll show you a wrapping technique that produces impeccably shaped lapels and nicely set collars. The wrapped corner technique ensures that all points match and you don’t have to fuss to get the seams to roll to the underside. This approach also eliminates hand basting.
Read on to learn the seaming, grading, and pressing sequence that simplifies jacket construction and results in a beautiful finished garment. Once you have this approach in your repertoire, you will save time and get reliable results when sewing any garment with a collar and front facing. This wrapping technique can be applied in a tailored jacket as well as in dresses, blouses, cuffs, and unstructured jackets.
Change the collar sewing sequence for precise edges
Begin by interfacing the upper and undercollar pieces. Then sew and press for a clean, crisp result. For collars, try a fusible weft-insertion interfacing in polyester or poly/rayon, such as PerfectFuse Sheer by Palmer/Pletsch. For lapels, use PerfectFuse Light, Medium, or Tailor. Be sure to test-fuse a sample.
1. Stitch the collar’s outer seam. Grade the seam allowances: Trim the undercollar allowance to 1⁄4 inch wide, and the upper collar allowance to 3⁄8 inch wide. Finger-press the seam allowances toward the undercollar.

2. Understitch the seam allowances. Working from the collar’s right side, understitch the seam allowances to the undercollar with a three-step zigzag stitch, 3.0 mm to 4.0 mm wide by 2.0 mm to 2.5 mm long. (Contrasting thread was used for visibility on the examples shown.) The understitching keeps the seam allowances in position, creates a crisp edge, and prevents the undercollar from rolling out at the collar edge.

3. Sew the collar ends. With right sides together, fold the collar along the outer seamline. The seamline automatically rolls toward the undercollar. Stitch each end from the fold toward the neckline. Grade the seam allowances as described in step 1, and clip the corners.

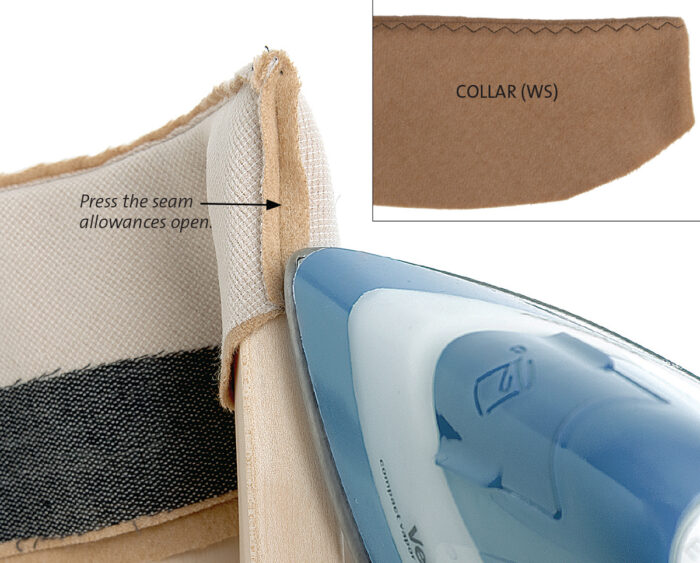
4. Press the seam allowances open. Work over a point presser to reach all the way into the corners. Turn the corners with a point turner. Lay the piece on the ironing board with the undercollar up. The seamline rolls slightly toward the undercollar side. Steam and lightly press the collar. Turn the piece over and steam generously. Use the flat bottom of the point presser/clapper tool to pound the piece, then press down with the tool, holding it in place for a few seconds.
Prepare the jacket and lining for precise edges
Assemble the jacket and facing/lining unit, and baste the collar to the jacket. Follow the pattern’s instructions for darts, pockets, and other details.
1. Assemble the jacket. Construct the outer jacket. (Sleeves are not shown in the examples on the pages that follow.) Staystitch the entire neckline edge. Mark the collar end points on the neckline, then clip the neck seam allowance so you can straighten it.
2. Assemble the lining/facing unit. Construct the lining, attaching the front facings and the back-neck facing, if present, and set in the sleeves. Staystitch the entire neckline edge. Clip the neck edge so you can straighten it.
3. Baste the collar. With the undercollar against the jacket’s right side, pin the collar to the jacket, matching center-back points, the collar end points, shoulder seam dots, and any other markings. Baste the seam, using a 1⁄2-inch-wide seam allowance. Check that the collar is symmetrical. If there are mistakes, fix them now.
TIP: Support the lapel. If your fabric has an open weave or soft hand, apply light interfacing to the entire jacket front for greater stability.
Understitch, wrap, and grade for a clean finish
The final steps in this process attach the lining/facing unit with the wrapping technique, so the lapel edges are as sharp as the collar. The principle guiding this method is that the seamline always rolls toward the seam allowance that has been trimmed closer to the stitching.
1. Attach the lining/facing at the neckline. With right sides together, pin the lining to the jacket along the entire neckline edge. The collar is sandwiched between the layers. Stitch from one lapel point to the other with a 5⁄8-inch-wide seam allowance. Trim the collar seam allowances to 1⁄4 Inch wide and the jacket/lining allowances slightly wider. Understitch all the allowances to the lining along the back neckline between the shoulder seams, using a three-step zigzag stitch. Press lightly.
2. Sew the front opening edges. With right sides together, align the jacket front edges with the lining/facing unit. At the upper front corners, wrap the neckline seam allowance to the jacket side, as when constructing the collar. The seamline will roll to the lapel’s underside in the finished jacket. Stitch the entire front seam. This stitching secures the seam allowances in the folded position.

3. Grade the seam allowances. From the neckline edge to the lapel roll line, trim the garment seam allowance to 1⁄4 inch wide, and the facing seam allowance to
3⁄8 inch wide. From the roll line to the hem, trim the facing seam allowance to 1⁄4 inch wide, and the garment seam allowance to 3⁄8 inch wide. Press the front edges using a clapper and lots of steam. Turn the lining/facing to the wrong side.

4. Set the lapel. Roll a small towel tightly. Place it along the roll line and bend the lapel around it. Steam well, but do not press. Cup your hands over the roll to trap the steam. Leave the roll in place until the lapel is cool and dry.

TIP: Press professionally. When your jacket is done, take it to a trusted dry cleaner and have it pressed.

SOURCESInterfacing: SewkeysE stay tape: Point presser/clappers and bamboo point turners: |
Designer and instructor Pamela Leggett owns a sewing studio in Vernon, Connecticut. PamelasPatterns.com


Log in or create an account to post a comment.
Sign up Log in