
Alterations for a Boiled Wool Jacket

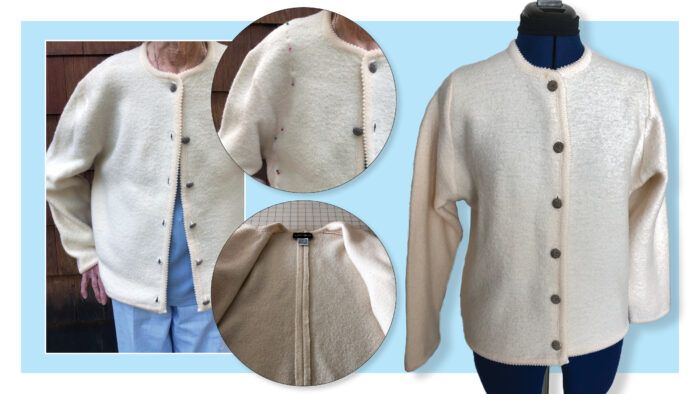
The techniques I used to alter an unlined boiled wool jacket can be applied to just about any garment with a set-in sleeve. The original jacket was too large for the client, as shown in the top left photo. It required more than just taking in the side seams to balance the jacket’s look. The shoulders were too wide, as was the entire upper torso. My solution was to remove fabric from the center-back seam and to reset the sleeves. I’ve done alterations like this many times and know the sleeves will easily fit back into the original armholes.
Note the look of the sleeves before alterations, and how the jacket center-back seam was pinned to get rid of the unwanted fabric there.
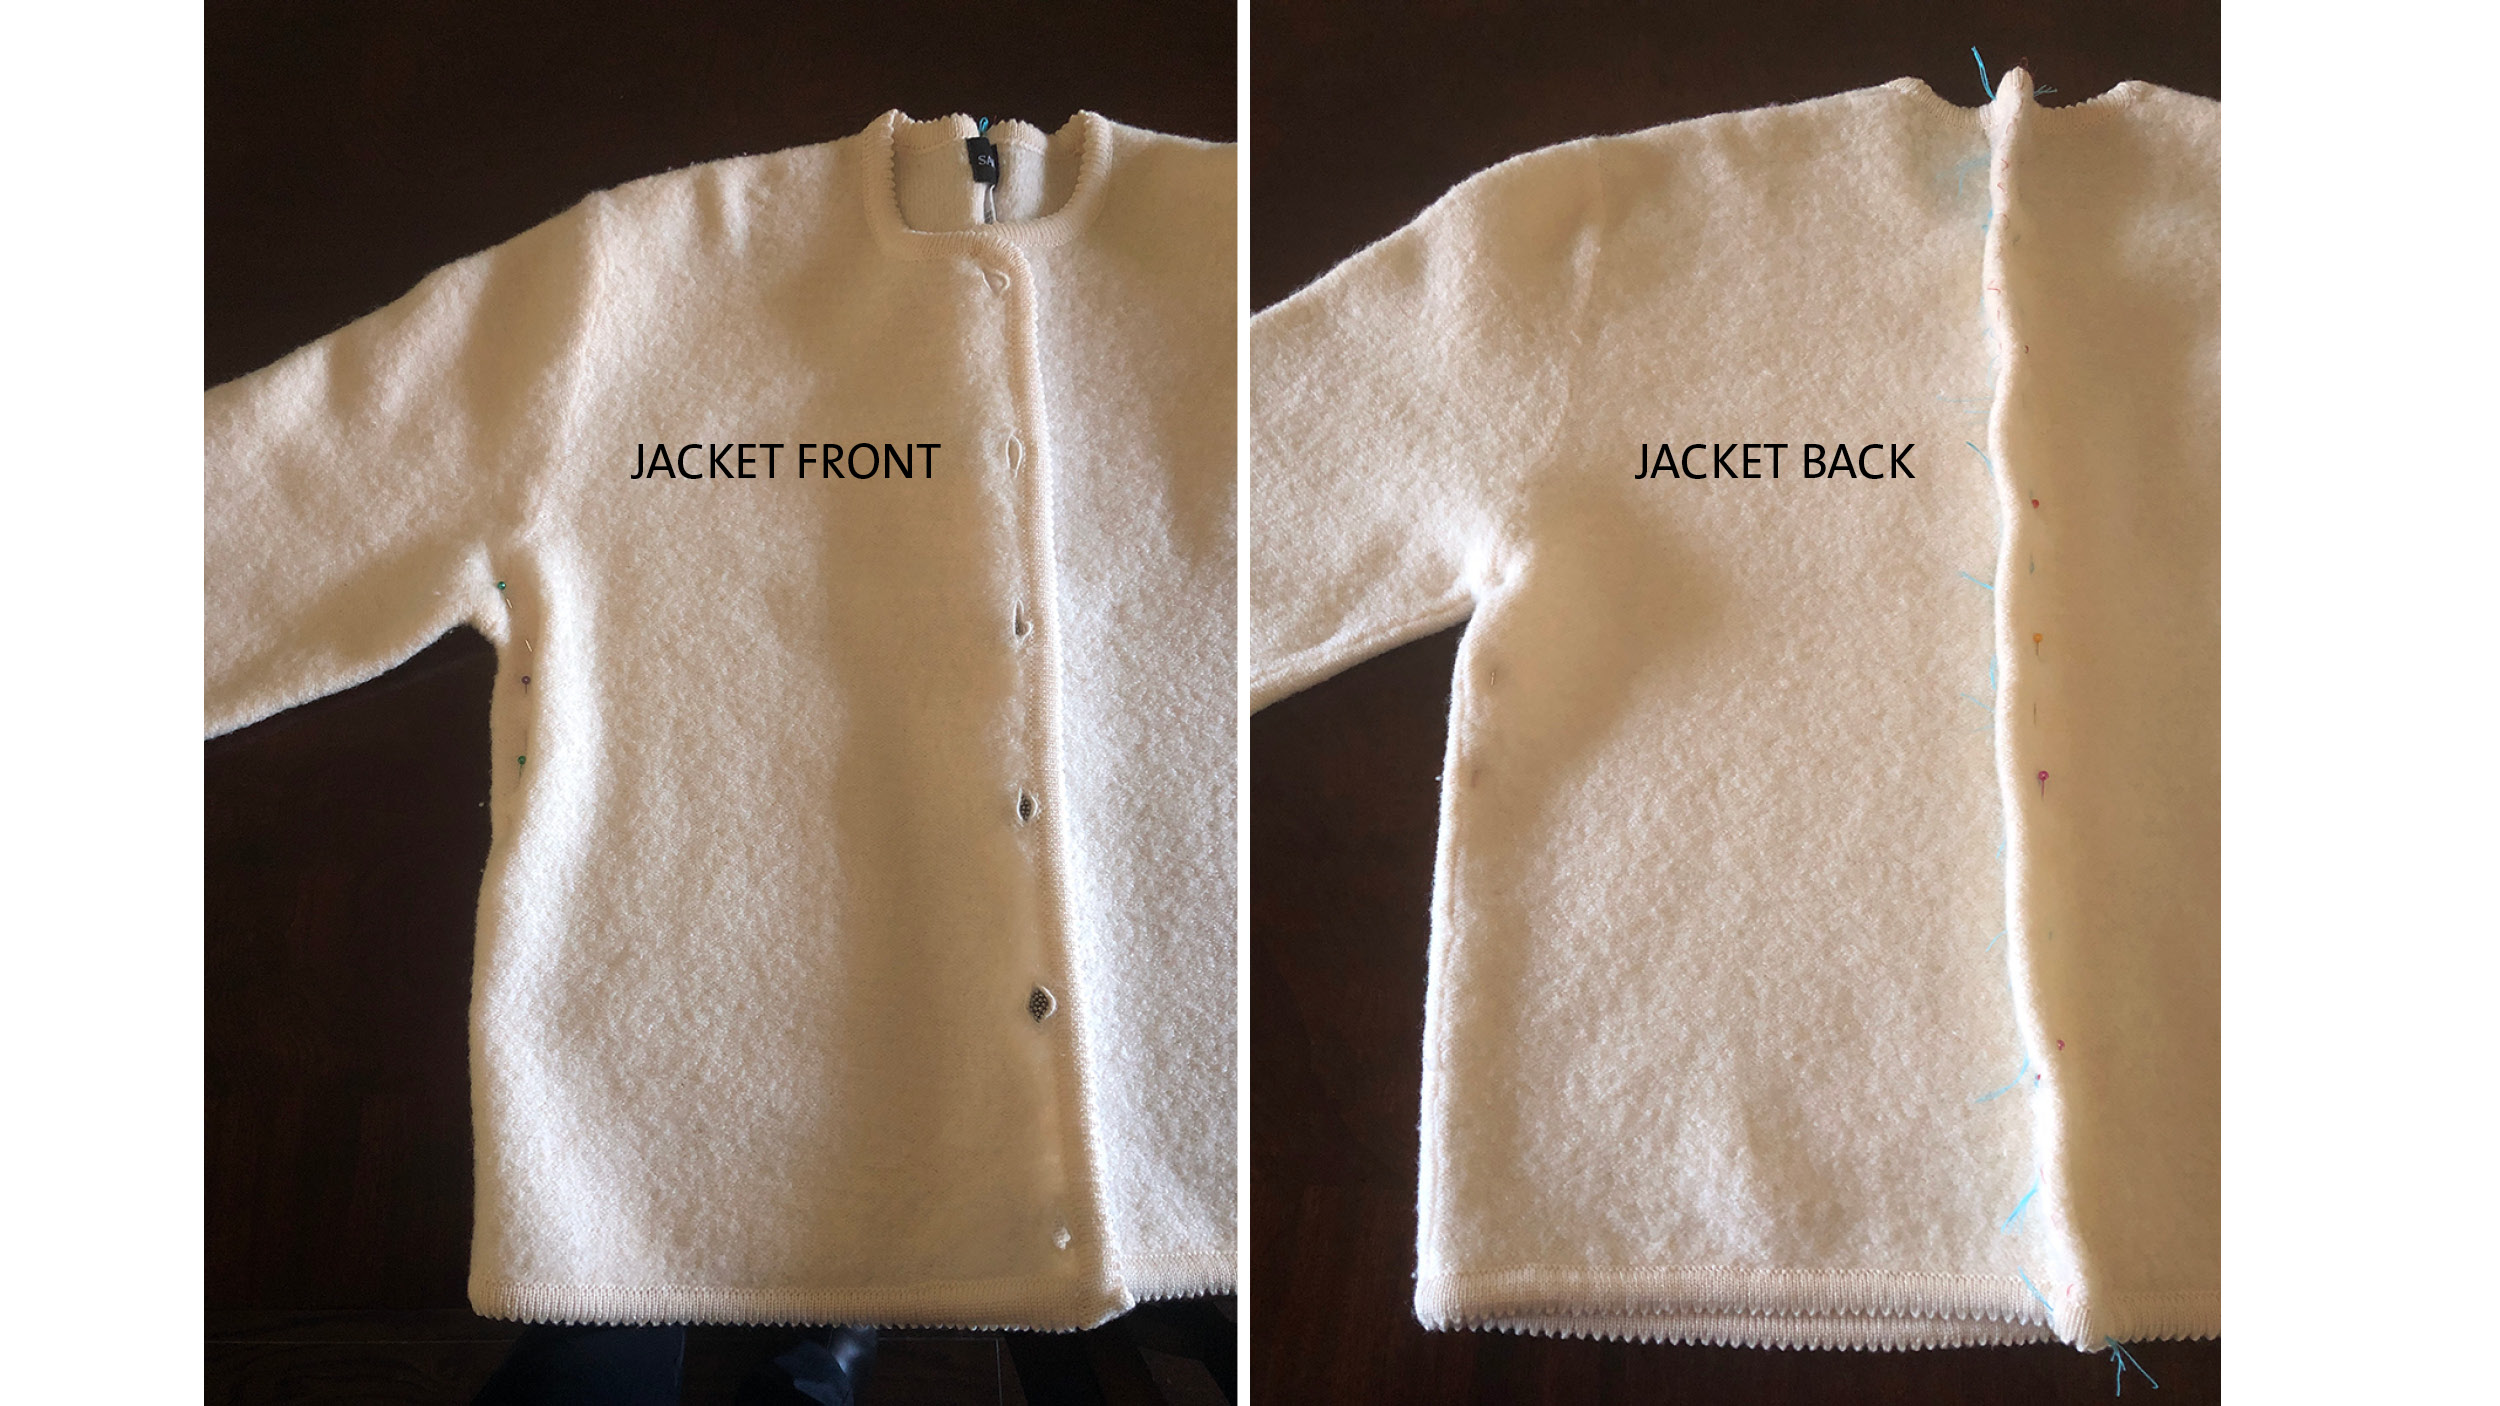
By removing some of the center-back fabric, I could move the sleeve caps closer to the desired location. Additional fabric needed to be taken away by resetting the sleeves. More excess was removed at the side seams, too.
Here’s the process I used and which you may want to follow, as well, for a similar project.
Mark with pins and basting
1. First, determine where the sleeve caps should sit and pin-mark the new location.
2. Lay the jacket flat on a worksurface and pin the jacket together around the sleeve armscye to keep it as smooth as possible. Using a contrast color thread, hand-baste the new sleeve-cap location; the pins serve as your basting guide for the new armhole seamline. Do this on the jacket front and back, and for both sleeves.
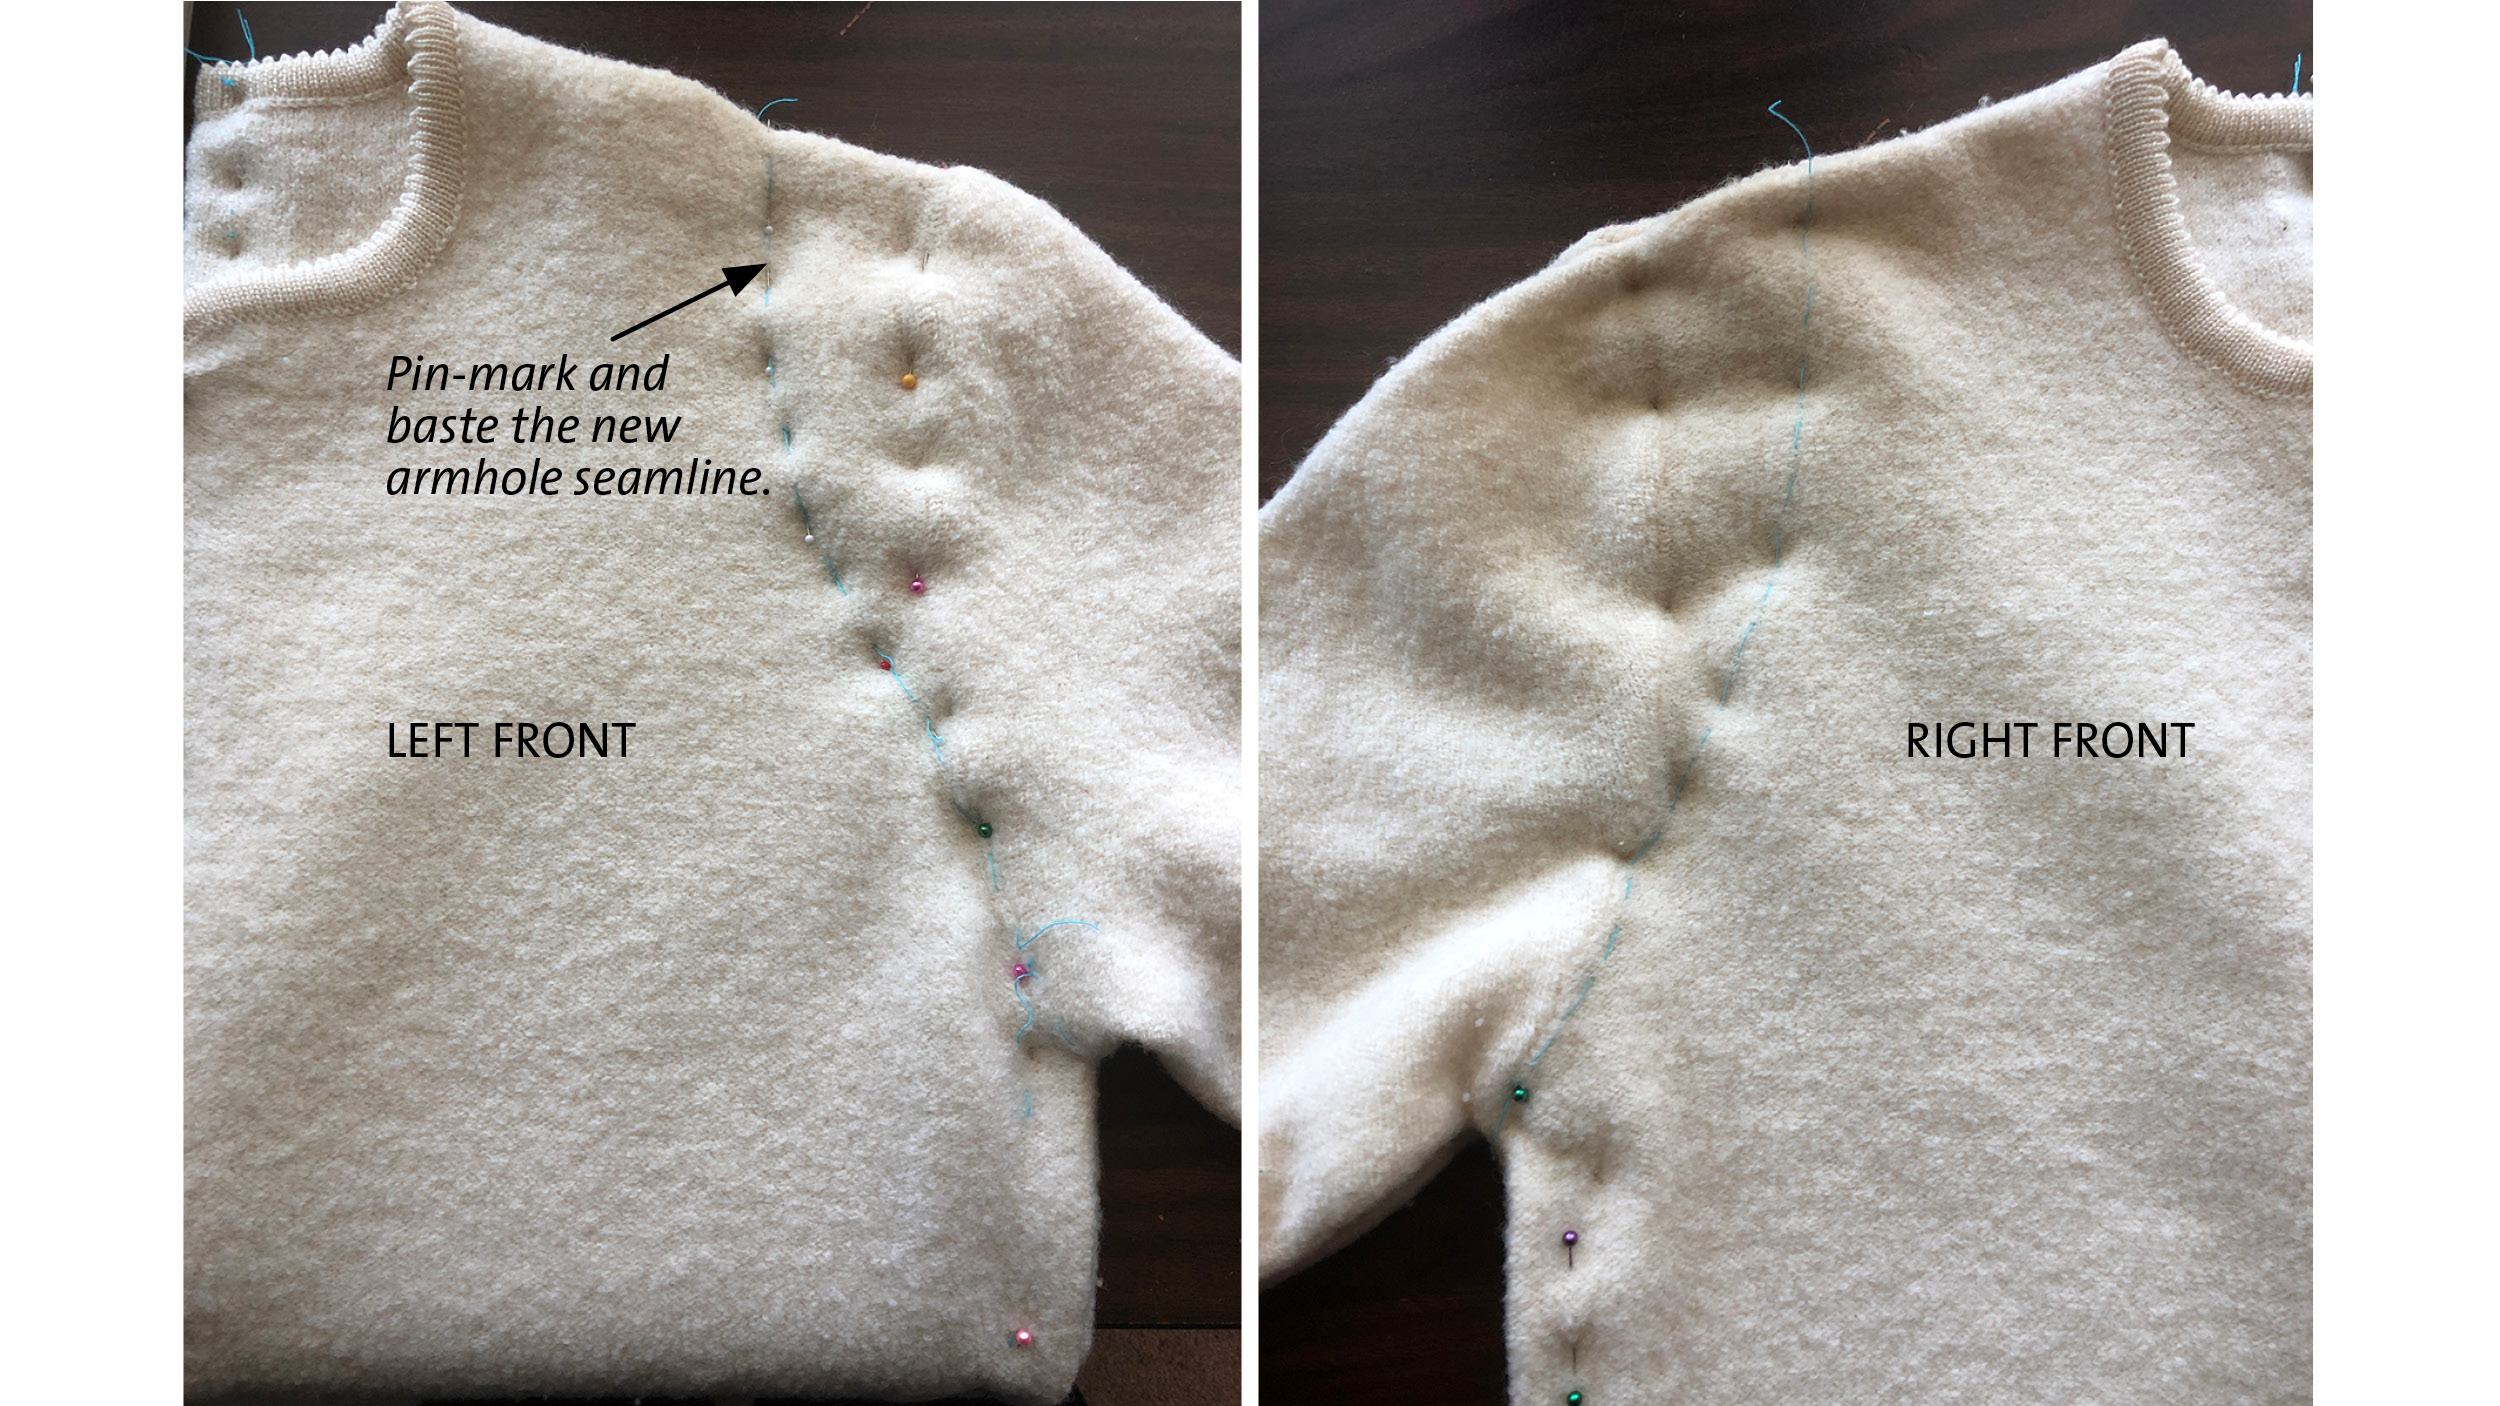
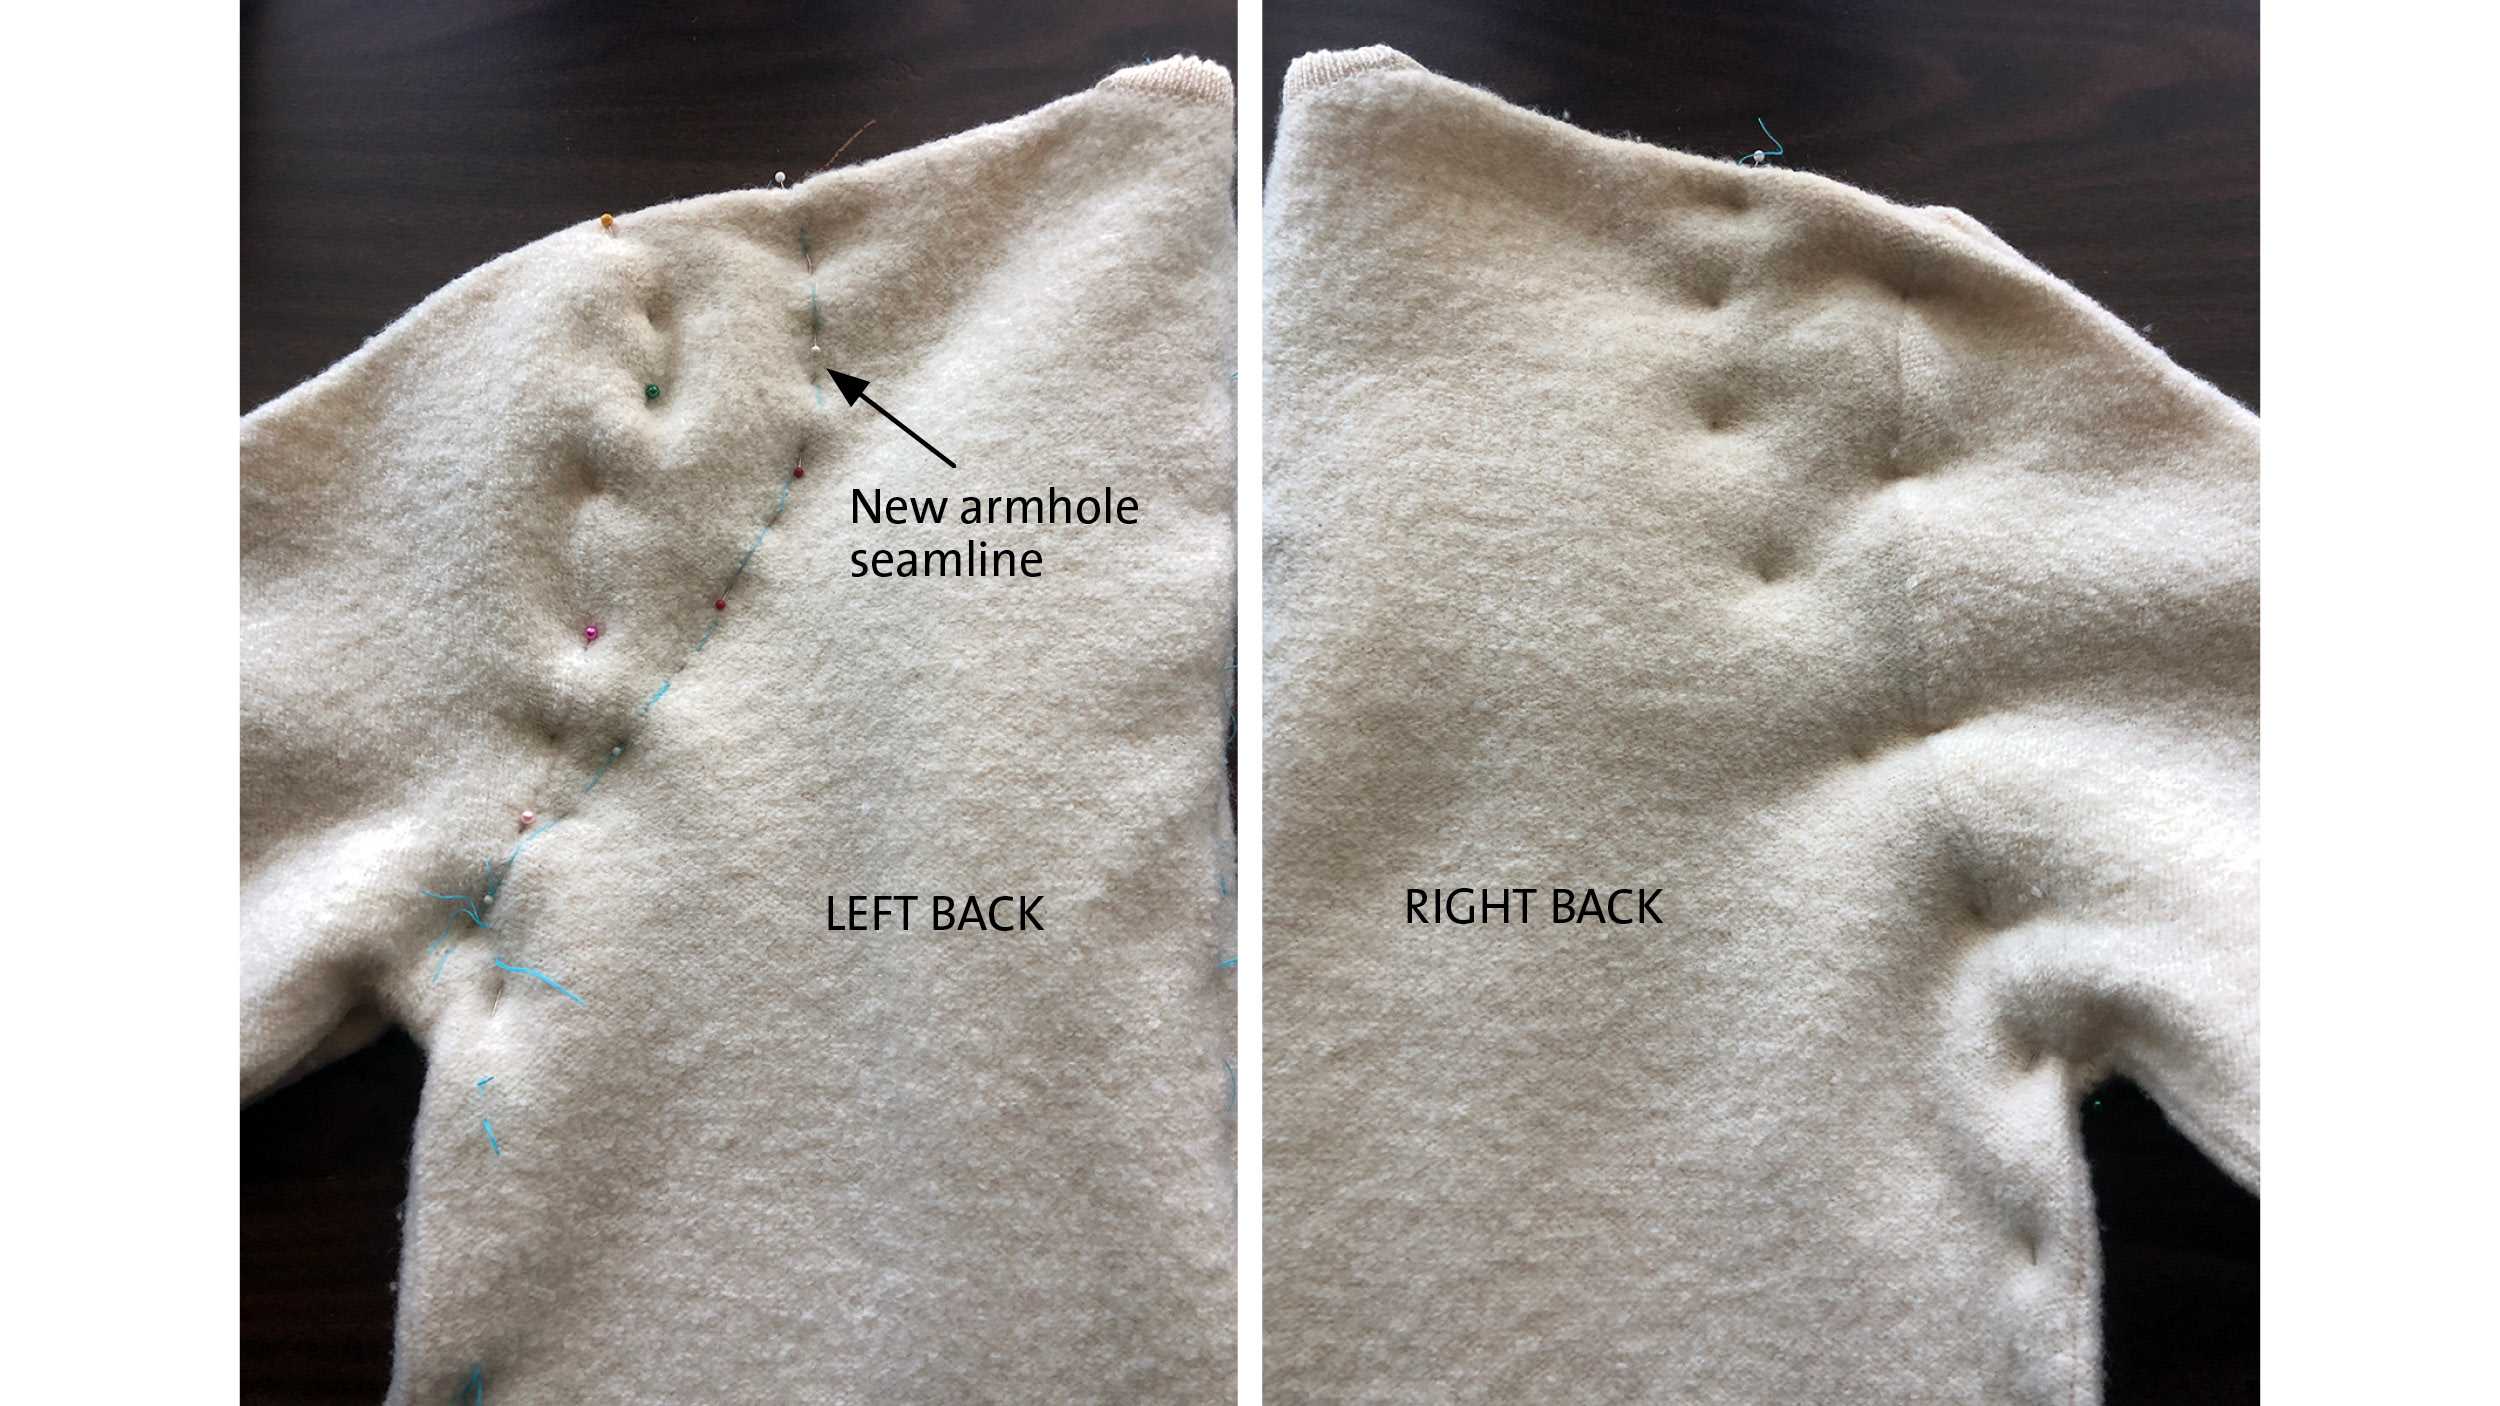
3. Align the jacket’s original armhole seams to the new, basted armhole seamlines and pin the sleeve caps in place.
4. Once the sleeves caps are pinned, do any additional hand basting with contrast thread as needed, to refine the new…
Start your 14-day FREE trial to access this story.
Start your FREE trial today and get instant access to this article plus access to all Threads Insider content.
Start Your Free TrialAlready an Insider? Log in


You cannot take in the center back seam without creating a corresponding jutting out of the center front. I'd be curious to know how you managed this alteration without the front neckline jutting out. Thank you.