

Those of us familiar with standard garment sewing patterns know what a bodice pattern “should” look like. Therefore, when we make fit adjustments to accommodate our body shapes, we may think the resulting patterns look incorrect. If you’re comparing your personalized pattern to a standard one, you may lose confidence in your fitting skills. Take a look at these postural fitting adjustments to get a sense of how a custom pattern should look.
Fitting expert Sarah Veblen understands your conundrum. In her article “Fit for Your Posture,” Threads #217 (Spring 2022), she demonstrates three common fitting solutions. These produce patterns with curved seams or sections that look unbalanced—but which are actually correct for the body. She wants you to trust your patternwork, even if it doesn’t seem right at first glance. Remember that a custom fit, by definition, changes the pattern to work for your unique figure. Unless your body is shaped like a dress form, any standard pattern won’t fit perfectly.
Compare Sarah’s before-and-after patterns to see how adjustments change the shape. She focuses on posture issues: a curved lower back, an upper back curve, and a forward shoulder. Each of these can be fixed by shaping or moving seamlines to reflect the body’s contours.
Lower back curve
This fit issue is sometimes referred to as “sway back.” The pronounced inward curve at the lower back creates horizontal folds or crumples in a garment, where excess fabric collects. To solve this, you need to shorten the bodice back. There are two options for this: In one case, you may also need to increase the bust dart intake for better shaping in front, and then shorten the back. In the other case, you’ll just shorten and shape the center back.
Lower back and bust
Before:

During:
Mark the desired bust dart increase. Then, draw parallel horizontal lines across the back pattern at about the same level. This marks the back length decrease. These changes are marked in red below.

After:
Start by increasing the bust dart intake as needed (see the red line on the front pattern piece at right, below). Then create an even tuck (or overlap) across the back, with a depth that equals the dart increase. The bust now has better shaping, the back is shorter to remove excess length, and the side seams are still the same length. 
Lower back only
Before:

During:
After pinning the fitting muslin to determine how much length to remove from the back, mark a wedge across the back pattern piece (see the red lines below).

After:
If you don’t need to change the bust fit, then only adjust the back. Add a center-back seam if there is none on the pattern. Then create a horizontal “wedge” adjustment. This removes excess length at the center back, tapering to no change at the side seam. The back seam now has a curve that accommodates the body’s inward back curve.
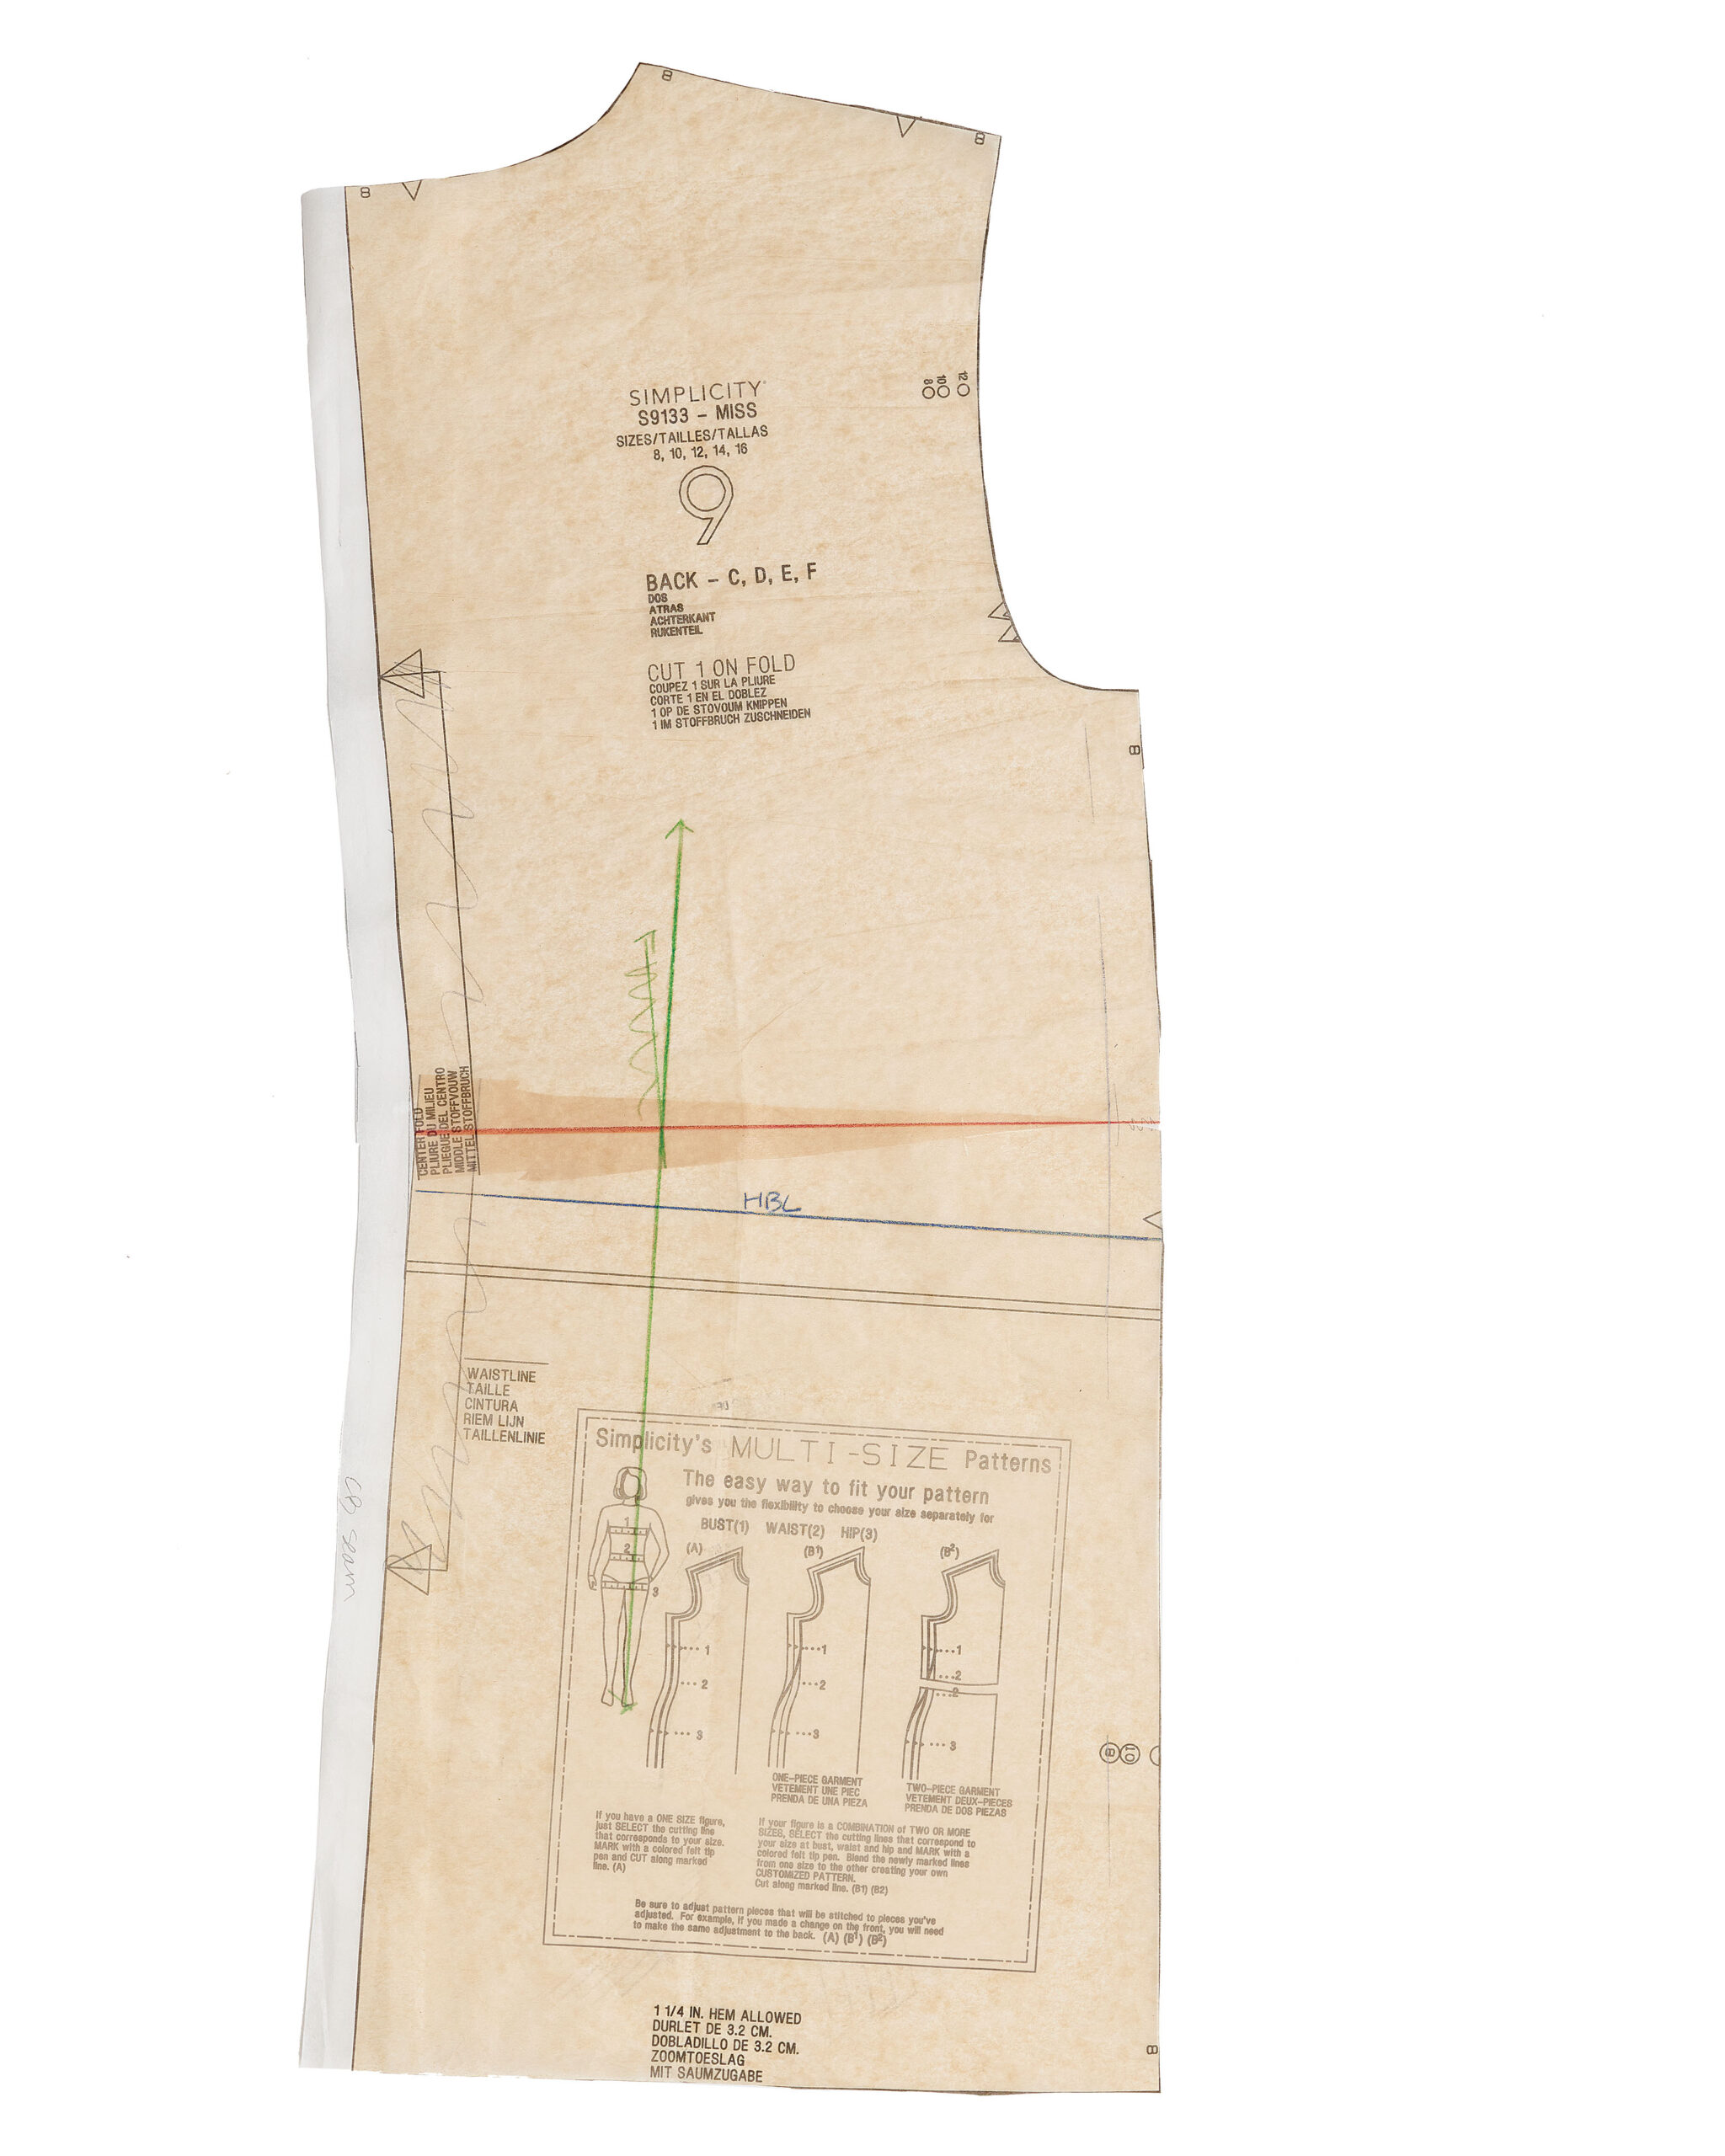
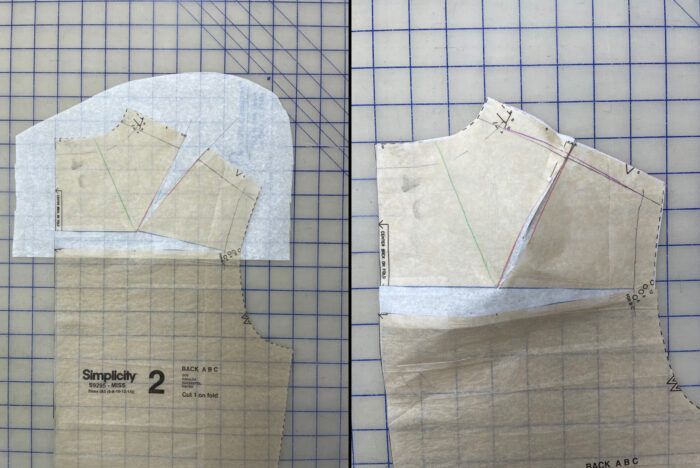
Rounded upper back
This body type needs shaping from the back shoulders up to the neck; more importantly, it usually needs extra length, too. If you have a curve at the upper back, you may notice that garments seem to slide back at the neck. The back neck is actually sitting too low on your body. A side effect may be that the front neckline feels snug.
Before:
During:
The fit adjustment was made by cutting and spreading the back bodice, creating the needed back length and a back shoulder dart. Pin the shoulder dart closed, then trim the tissue along the shoulder seam cutting line. This trues the dart end. With the dart pinned, you can see how the newly fitted pattern provides shaping for a curved upper back.

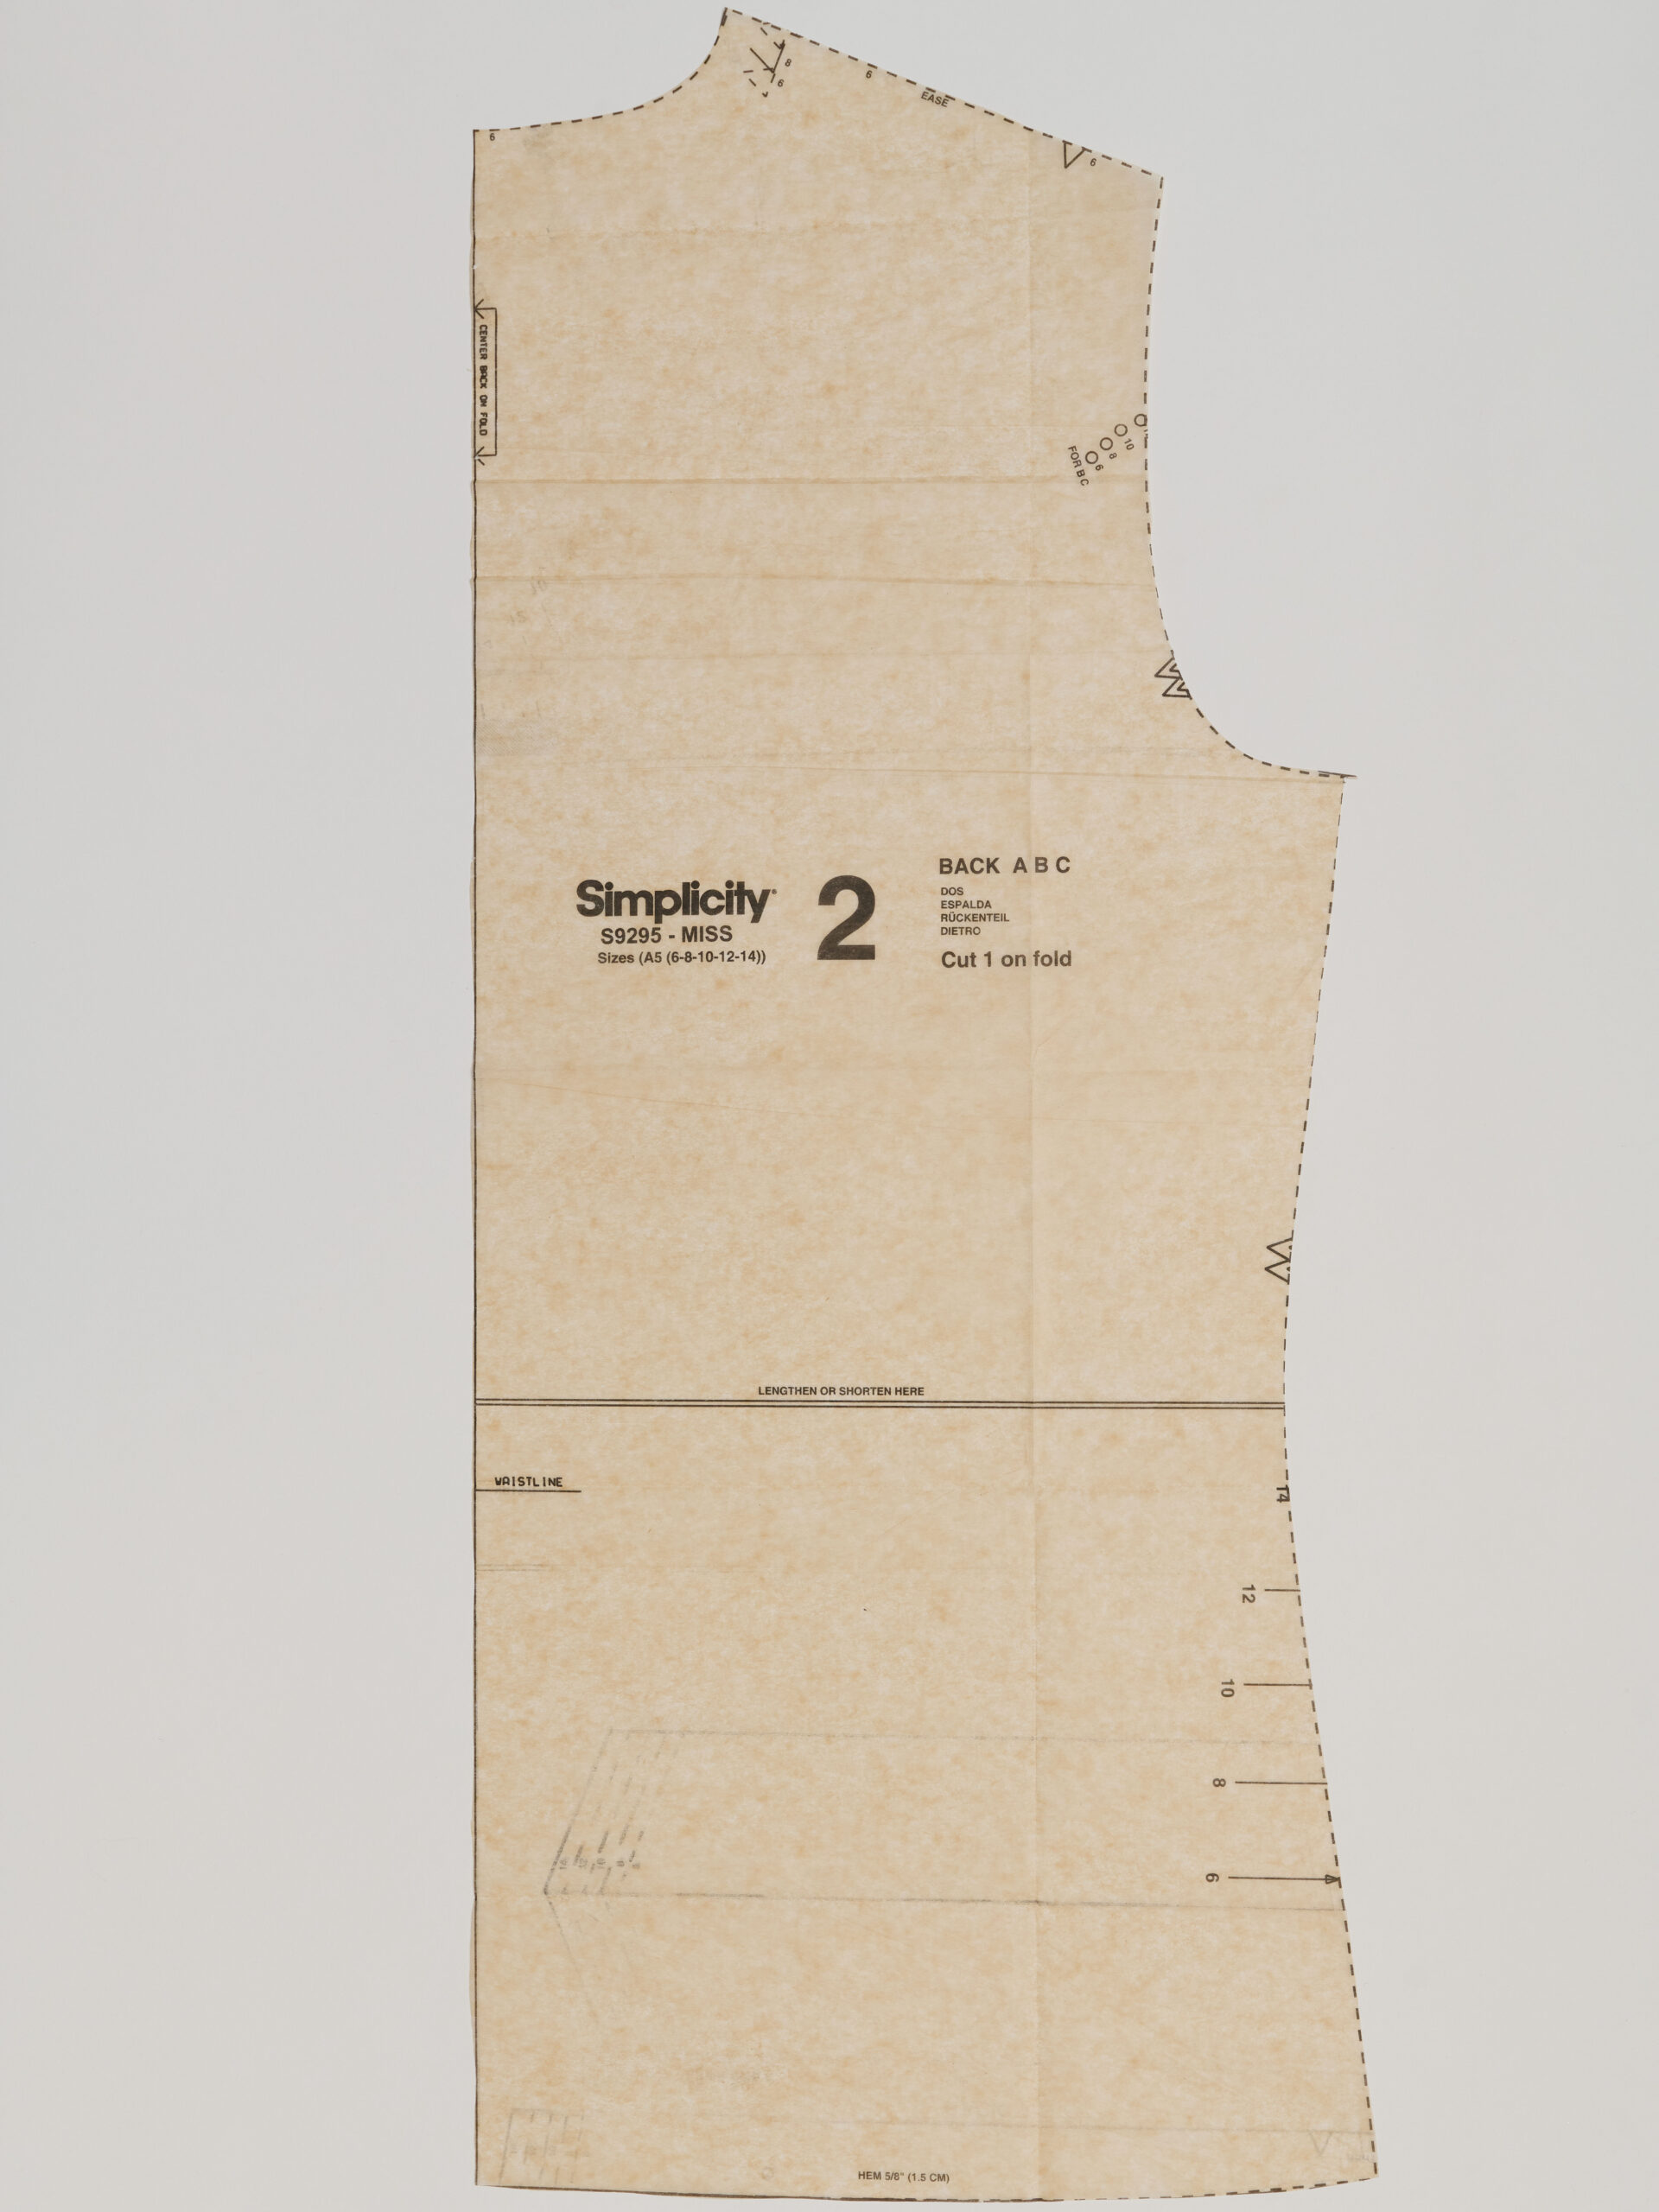
After:
The center-back seam has been spread vertically to provide needed length. This enables the upper bodice to extend up to the neck, over the rounder back area. In addition, this adjustment creates a back-shoulder or back-neck dart. The small dart creates additional shaping over the curved upper back, so the garment hangs more smoothly.

Forward shoulders
Many of us, of any age, have developed forward shoulders—use of computers and other technology is a common cause. You may find that shoulder seams fall toward the back of the body, and the ball of the shoulder seems to push against the front sleeve cap. This can be uncomfortable, and garments look unbalanced with the shoulder seam not resting on the top of the shoulder. To improve the fit, you’ll shift the shoulder seam forward and angle it as desired for visual balance. Finally, adjust the sleeve cap to add space for the shoulder.
Before:

During:
Pin the front and back patterns together at the shoulder seam. Draw in the desired new shoulder seamline; it’s shown in red below. It is forward of the original seamline.

After moving the front shoulder seamline down, add tissue to extend the back shoulder. Fold under the back shoulder seam allowance and pin the patterns together, matching the new shoulder seamlines.

After trimming the tissue, the back shoulder dart is trued and the new shoulder seam lengths match.

After:
The shoulder seam has been moved forward by trimming the front shoulder and adding to the back shoulder. The front sleeve cap is increased, so the curve more closely reflects the forward ball of the shoulder.


Photos: (“Before” and “After” images) Mike Yamin; (“During” images) Sarah Veblen


Thank you so much for this article - it is really coming at a time when I need to make new correct fitting tops/blouses. Recently I went through cancer surgeries, with following treatments. Due to bad posture, my shoulders have been slightly forward previously, but the right is now more pronounced - at least 1/2" - due to removal of some shoulder muscle. Obviously, the right sleeve on all my patterns will need to be adjusted, and your article will hopefully help me to accomplish this! I'm presuming this "fix" should also help with knits for T-shirts, hopefully!