
Redesigning Sleeves, Part 3: Shaping

Puff sleeves are on trend right now. Why? I have no idea, but as someone who appreciates all patternmaking, I accept fashion’s quirks—even the ones I’m not particularly fond of. Now, I want to work with this traditional design in a nontraditional way. For this sleeve variation, I’ll show how to add the dimension and shape of a puff sleeve without gathering the cap.
Let’s face it, the shape of a puff sleeve doesn’t work for every design. By cleaning up the volume, though, you can get the shape without having to gather the fullness into the armhole seam. Also, once you understand the basic technique described below, you can create whatever shape you want to stand away from the body.
Once again, I am demonstrating the drafting in half-scale because it’s easier to photograph. However, I’ll give you full-scale measurements in the instructions to minimize confusion. If you haven’t checked out my first two sleeve design articles, circle back to them before you follow the instructions in this post. Most of the basic terms and techniques I discuss are covered in Redesigning Sleeves, parts 1 and 2.
Shaping starts with a sleeve sloper
To begin, trace your sleeve sloper. Trace exactly on the edge to keep the true fit. Be sure to include all notches. Even though not all notches are used, it’s nice to have references points. I have labeled the major horizontal lines on my draft.
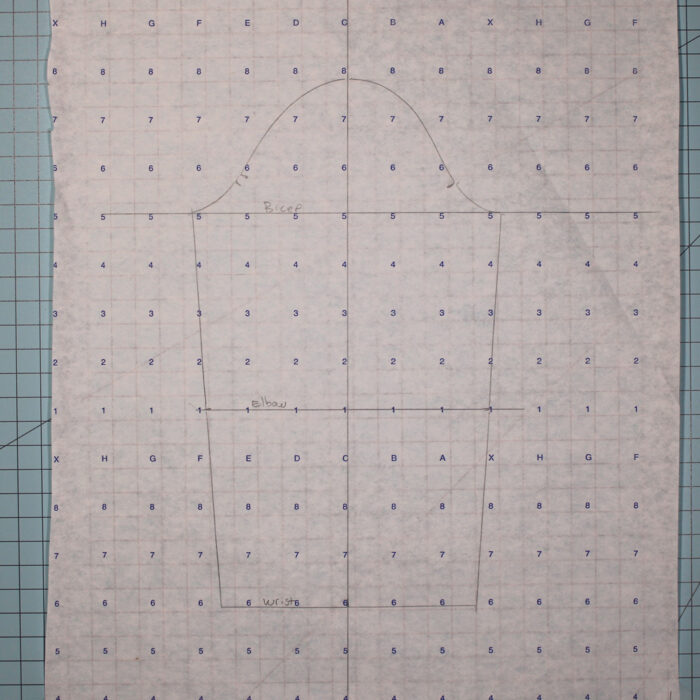
Draw and label essential lines
1. Draw a parallel line below the biceps line. This is the sleeve hemline, or sewing line. I usually measure the sleeve length to create this line starting at the underseam. I made a short sleeve, but you can take this design all the way to the wrist.…
Start your 14-day FREE trial to access this story.
Start your FREE trial today and get instant access to this article plus access to all Threads Insider content.
Start Your Free TrialAlready an Insider? Log in


I didn't know you could do French seams on a tight curve like that! Did you have to clip the first seam allowance a lot?